14
Time Lapse Video Cassette Recorder
13
Time Lapse Video Cassette Recorder
Normal Recording
Normal Recording
1
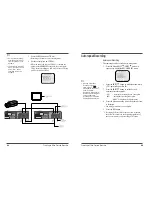
Turn the power on to all devices used.
2
Load a cassette tape with erasure prevention tab in
place.
3
Press the REC/PLAY SPEED
(or
) button to set
the recording speed.
• The recording speed is displayed on-screen and on the
display panel.
• If you don’t want to record the recording speed,
counter, title, time, date etc, press the DISPLAY button,
then start recording.
4
Press the REC button.
• The “REC” indicator is displayed on the display panel
and recording starts.
5
To stop recording, press the STOP button.
<Recording Speed>
✔
• If the Repeat Rec Set is set
to “NO” in the REC
MODE SET menu ,
recording will continue to
the end of the tape, then
stop and the tape will be
ejected.
✔
• A tape recorded on this
VCR cannot be played
back on another make of
time lapse VCR.
• If you press on the REC
button and the loaded
cassette has no erasure-
prevention tab, the VCR
will eject the cassette.
• During recording, the
Menu button will not
function (the menu cannot
be accessed).
2(SP)
2.67
1/60 Sec
60
YES
Continuous
6(EP)
8
1/60 Sec
60
YES
Continuous
18(EP)
24
3/60 Sec
20
YES
Continuous
24(SP)
32
12/60 Sec
5
NO
Intermittent
36(SP)
48
18/60 Sec
3.3
NO
Intermittent
Recording
Speeds &
Duration T-
120
Recording
Duration T-
160
Recording
Intervals
Rec.
Fields
/ Sec.
Audio
Record-
ing
Tape Motion
Record Pause
Recording can be interrupted temporarily.
1
Press the PAUSE/STILL button during recording.
• The “REC” and “
” indicators are displayed on the
display panel.
2
To resume recording, press the REC button, or press
the PAUSE/STILL button again.
✎
(SP) means to be recorded by SP heads.
(EP) means to be recorded by EP heads.
✔
• During pause, the image
appears on-screen but it is
not recorded.
• If a recording pause
continues for 5 minutes or
more, the VCR will go into
stop mode to avoid
damage to the tape.
✔
• If you playback the
recorded part where
recording check was
performed, noise may
appear.
• If you change the
recording speed during
recording, noise or
missing signal may result.
6
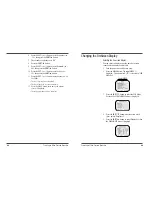
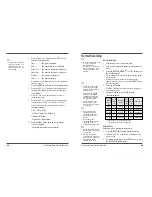
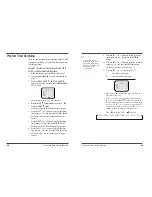
Press the SET - (or +) button to set “YES” for the
functions described below.
Time................The time is displayed.
Date ................The Month-Day-Year is displayed.
Frame Cnt .......The number of frames is displayed.
Alarm Cnt ........The number of alarms is displayed.
Counter ...........The counter is displayed.
Title.................The title is displayed.
• A maximum of 20 characters can be used. (alphabet,
numbers, space)
7
Press the SHIFT
button to set the display position.
8
Press the SET - (or +) button to set the position of
the time, date, frame cnt. alarm cnt. to “L-Bottom
(or R-Bottom).
• If one of 4 items is set, the position of 4 items is
changed identically.
9
Press the SET - (or +) button to set the position of
counter, title to “C-Top” (or “R-Top” or “L-Top”)
If one of 2 items is set, the position of 2 items is
changed identically.
L-Top / C-Top / R-Top
: Left Top / Center Top / Right Top
L-Bottom / R-Bottom
: Left Bottom / Right Bottom
10 Press the MENU button three times, the normal
screen is displayed.
The setting procedure is now complete.
✔
• The items for which “YES”
is set are recorded. The
items for which “NO” is
set at step 6 above are
not recorded.


