background image


Menu Operations 


Use the included VGA cable to connect this Monitor with your PC and power on both of 

them. Then press the MENU button to enter the menu setting page. 


Press + / - button to select SCREEN/PICTURE/SOUND/TIME/OPTION submenus 

indicated by the icons on the top of the monitor's display. Press UP/DOWN button to 
highlight desired option. 

 Press the SOURCE button to select the highlighted option. Press UP/DOWN button to 

highlight desired option; press + / - button to adjust the value. Then press SOURCE button 
again to confirm selection. 

 Press MENU button to return to previous menu page. 


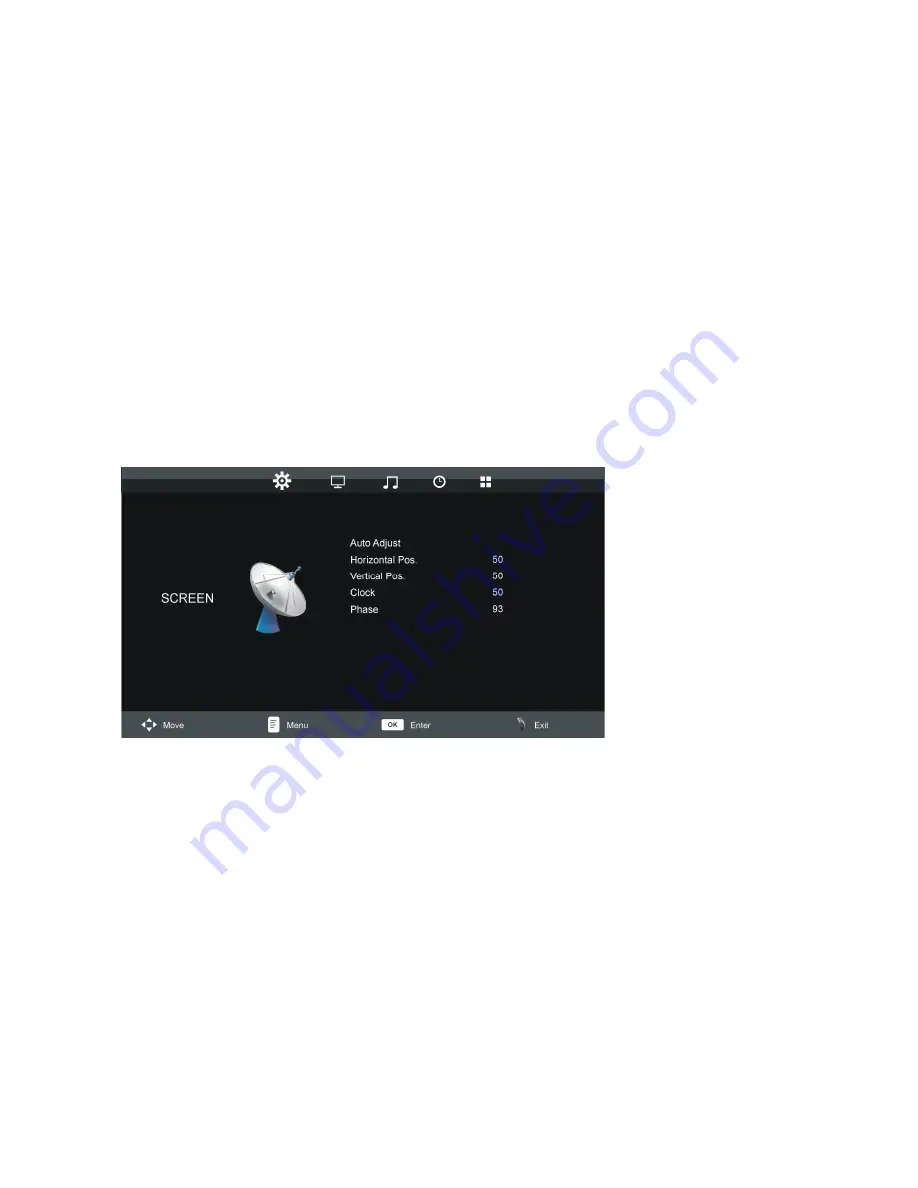
1. SCREEN 

NOTE: This submenu is available only when correctly connected to a PC. 


1.1 Auto Adjust 
Adjust the value of screen automatically. 
1.2 Horizontal Pos. 
Adjust the value of horizontal position from 0-100. 
1.3 Vertical Pos. 
Adjust the value of vertical position from 0-100. 
1.4 Clock 
Adjust the value of clock from 0-100. 
1.5 Phase 
Adjust the value of phase from 0-100. 
NOTE: The picture will shake with unsuitable phase setting. 
 

Содержание L24LE11B

Страница 1: ...24 Wide Screen LED Monitor with HDMI USER MANUAL Please read this manual carefully before using and keep it for future reference L24LE11B_MANUAL_EN_R1...

Страница 2: ...CONTENTS GETTING STARTED Monitor Stand Assembly 1 Basic Connection 2 3 Wall Mounting 3 OPERATIONS General Parts and Operations 4 Menu Operations 5 8 FOR REFERENCE Maintenance 9 Specifications 9 Acces...

Страница 3: ...pillingonthemonitor Where the MAINS plugor an appliance coupler is used as the disconnectdevice the disconnect devicewill remainreadilyoperable Do notoperate this productunderthefollowingconditions Wh...

Страница 4: ...n soft surface 2 Align the openings on the monitor stand with the screw holes on the base of the monitor NOTE The monitor stand only connects to the monitor base one way Do not force the monitor stand...

Страница 5: ...source PC Connection To power input AC adaptor To power outlet Built in speakers Audio cable optional VGA cable included Back of DVR NVR or PC Use the included VGA cable to connect the monitor to your...

Страница 6: ...mount the monitor on your own Do not wall mount the monitor while monitor is turned on It may cause personal injury due to electric shock Use standard M4 10mm screws 4 pieces to mount this monitor He...

Страница 7: ...g an input source 3 button Press this button to decrease the volume level to adjust the value in menu setting page 4 UP button In menu setting page press this button to move UP LEFT 5 DOWN button In m...

Страница 8: ...P DOWN button to highlight desired option press button to adjust the value Then press SOURCE button again to confirm selection Press MENU button to return to previous menu page 1 SCREEN NOTE This subm...

Страница 9: ...ightness The value of brightness can be adjusted from 0 100 2 4 Color The value of color saturation can be adjusted from 0 100 2 5 Tint It may be not adjustable for this monitor 2 6 Sharpness The valu...

Страница 10: ...is adjustable only when Sound Mode is User 3 2 Treble Adjust the level of higher pitched sounds from 0 100 3 3 Bass Adjust the level of lower pitched sounds from 0 100 3 4 Balance Adjust the audio ou...

Страница 11: ...reen Available options 5S 10S 15S 20S 25S 30S 5 OPTION 5 1 OSD Language Select the desired On Screen Display language 5 2 TT Language Select desired TT language 5 3 Aspect Ratio Available options 4 3...

Страница 12: ...to remove dust When attaching or removing the monitor base lay the monitor face down on a soft area to prevent it from getting scratched defaced or broken Specifications 1 Display Device 24 inch TFT...

Отзывы: