

www.lorexcctv.com
L164-81
Page 2 Rev. 3
BUSINESS & HOME SECURITY
STEP 2
RECORDING AND REVIEWING SAVED IMAGES
* For advanced features in recording, playback options and search functions, refer to the DVR’s owner’s manual.
Information in this document is subject to change without notice. As our products are subject to continuous improvement, Lorex Technology and our subsidiaries reserve the right to modify product design, specifications and prices, without notice and without incurring any obligation. E&OE © 2006 LOREX. All rights reserved.
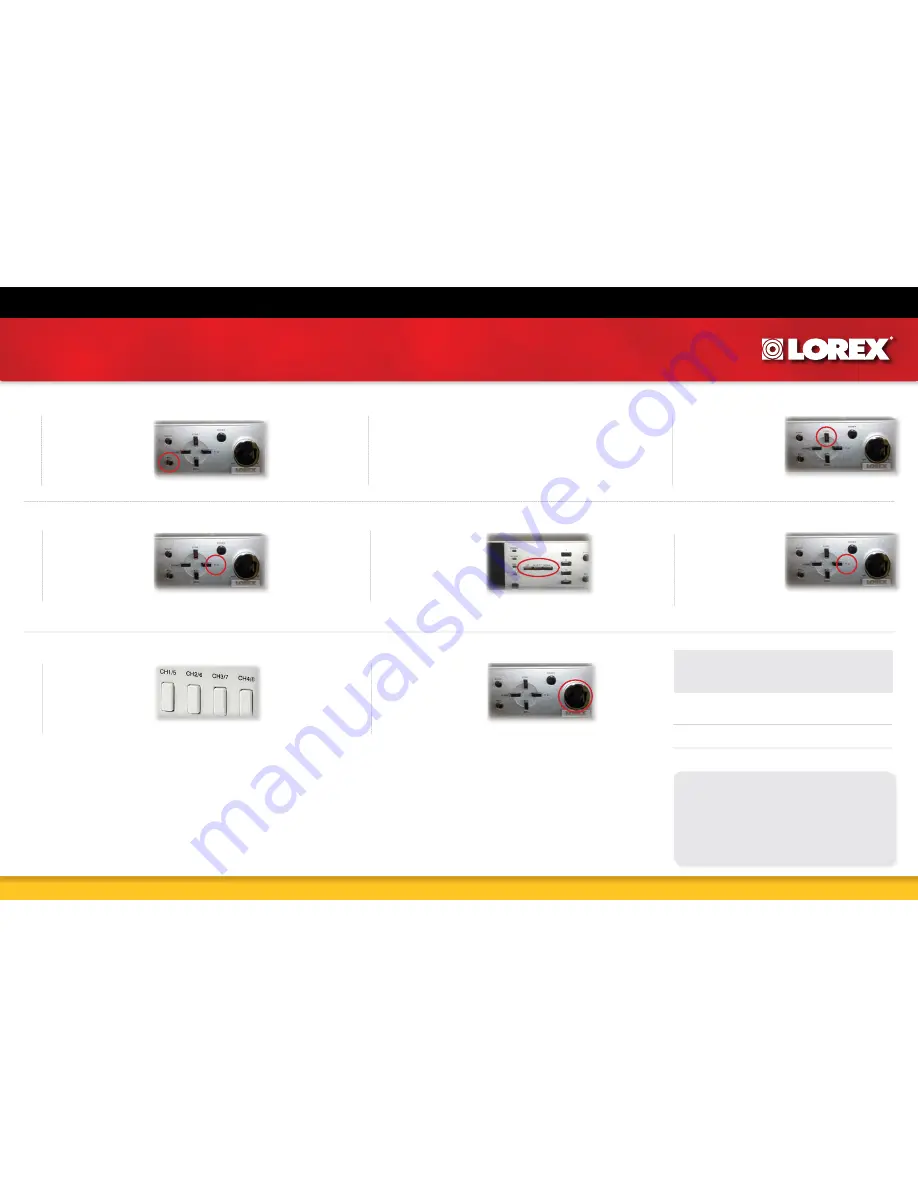
1
Press the record
button on the
DVR
FRONT OF THE DVR
3
Press the Stop
button on the
DVR
FRONT OF THE DVR
5
Using the UP/Down
button, move the
pointer to manual
REC Event, next
press the select
button
FRONT OF THE DVR
7
Select the
camera button
on the monitor to
display the images
in full screen
FRONT OF THE LOREX MONITOR
2
Record the image
for 1-2 minutes
(ideally someone
should be moving in
front of the camera)
4
Press the Play
button to enter
the ‘Search’ menu
FRONT OF THE DVR
6
Press the
Play button
to view the
recorded
image
FRONT OF THE DVR
8
Turn the DVR’s
Shuttle button
Left/Right to
Rewind/Pause/
Fast Forward the
recorded event
FRONT OF THE DVR
It’s all on the web
Product Information
User Manuals
Quick Start Guides
Specification Sheets
Software Updates
Firmware Upgrades
FOR ADDITIONAL INFORMATION OR TROUBLESHOOTING HELP, REFER
TO YOUR OWNERS MANUAL FOR ASSISTANCE. YOU CAN ALSO CALL OR
EMAIL FOR FURTHER SUPPORT.
TOLL FREE TECHNICAL SUPPORT: 1-888-42 LOREX (1-888-425-6739)
EMAIL SUPPORT: [email protected]
WEBSITE: WWW.LOREXCCTV.COM