background image

14

Installation Guide

Mounting Kits 

(hidden by DVD unit)

1

2

3

4

5

6

7

8

9

0

10+

REPEAT

TITLE

SUBTITLE

AUDIO

MUTE

SOURCE

STEP

DISPLAY

MENU

VOL+

VOL-

SLOW

ZOOM

1

2

3

4

5

6

7

8

9

0

10+

REPEAT

TITLE

SUBTITLE

AUDIO

MUTE

SOURCE

STEP

DISPLAY

MENU

VOL+

VOL-

SLOW

ZOOM

VOL-

ENTER

VOL+

SOURCE

VOL-

ENTER

VOL+

SOURCE

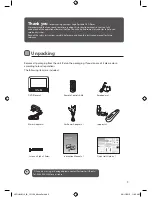
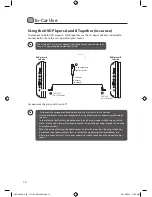
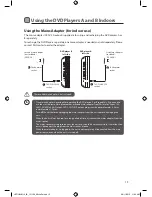
DVD Player B

DVD Player A

Car Power 

Adapter

Remote Control B

Remote Control A

•  This unit should never be used by the vehicle’s driver or left unsecured in the vehicle while 

driving.

•  If this unit is being used in your vehicle, be sure that it is securely fixed to the headrests’ leg 

supports or held safely, and does not obstruct any safety device, including air bags or seat belts, 

or it may cause injury in case of accidents. Ensure all rear passengers are correctly restrained 

when this product is in use in the car.

•  All passengers should always wear seat belts when using this unit in a moving vehicle.
•  If in doubt, please contact your vehicle manufacturer for further advice.

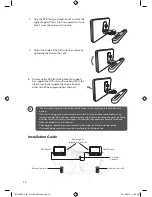
6.  To remove the DVD from the horizontal support 

bar, support the DVD unit with one hand. With the 

other hand, firmly squeeze the release buttons 

either side of the angled support and pull.

4.  Grip the DVD firmly with both hands and slot the 

angled support firmly into the support bar. It will 

click. Ensure the entire unit is secure.

5.  Adjust the angle of the DVD unit, then secure by 

tightening the bolt on the right.

L9DUALM12_IB_121109_Michelle.indd   14

09/11/2012   11:05 AM

Содержание L9DUALM12

Страница 1: ...9 Dual Portable DVD Player Instruction Manual L9DUALM12 L9DUALM12_IB_121109_Michelle indd 1 09 11 2012 11 05 AM...

Страница 2: ...L9DUALM12_IB_121109_Michelle indd 2 09 11 2012 11 05 AM...

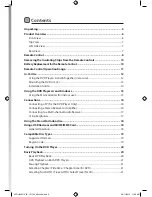
Страница 3: ...r for indoor use 15 Connections 16 Connecting a TV for the DVD Player Only 16 Connecting a Stereo Receiver or Amplifier 16 Connecting to a Multi channel Audio Receiver 17 Using Earphones 17 Using The...

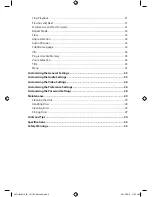
Страница 4: ...3 Title 23 Menu 23 Customising the General Settings 23 Customising the Audio Settings 25 Customising the Video Settings 26 Customising the Preference Settings 26 Customising the Password Settings 28 M...

Страница 5: ...ly understand all the operational features it offers You will also find some hints and tips to help you resolve any issues Read all the safety instructions carefully before use and keep this instructi...

Страница 6: ...Skips forwards to the next track Allows fast forwarding of the current track Navigates down on a menu screen and adjust certain settings VOL ENTER VOL SOURCE 1 4 3 6 7 5 8 2 2 Battery Indicator Indic...

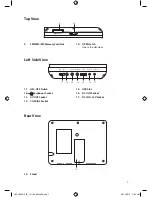
Страница 7: ...N 9 12V 18 Rear View 11 12 13 14 15 16 17 Left Side View Top View 10 OPEN Latch Opens the disc door 11 ON OFF Switch 12 Earphones Socket 13 AV OUT Socket 14 COAXIAL Socket 15 USB Slot 16 DC OUT Socket...

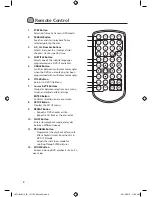
Страница 8: ...n the DVD you are playing has been programmed with multiple camera angles 6 TITLE Button Returns to DVD Title Menu 7 Cursor Buttons Navigates between selections on a menu screen and adjust certain set...

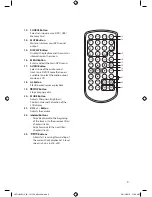
Страница 9: ...tracks on a DVD if more than one is available or select the audio output mode on a CD 18 Button Starts pauses resumes playback 19 STOP Button Stops playing a disc 20 MODE Button Adjusts Sharpness Brig...

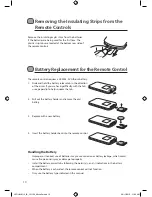
Страница 10: ...ect use of batteries may cause corrosion or battery leakage which could cause fire personal injury or damage to property Install the battery correctly by following the polarity and indications in the...

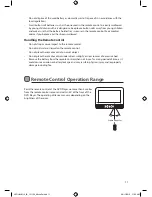
Страница 11: ...in the remote control Seek medical advice if you believe a cell has been swallowed Handling the Remote Control Do not drop or cause impact to the remote control Do not spill water or liquid on the rem...

Страница 12: ...only Using other car power adapters could damage the unit In the interest of traffic safety do not operate this unit or view videos while driving a vehicle Make sure the unit is securely fastened to p...

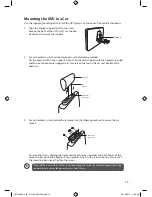
Страница 13: ...securely on the top of the car seat Reattach the headrest Headrest Support Leg support Horizontal support bar Horizontal support bar 3 For car headrests which cannot be removed use the following metho...

Страница 14: ...ruct any safety device including air bags or seat belts or it may cause injury in case of accidents Ensure all rear passengers are correctly restrained when this product is in use in the car All passe...

Страница 15: ...ains adapter is plugged in the unit is not completely disconnected from the main power source even when the unit is turned off ON OFF AV OUT COAXIAL USB DC OUT DC IN 9 12V ON OFF AV OUT COAXIAL USB DC...

Страница 16: ...y and follow the instructions included with it to connect the unit to your TV Connections Connecting a TV for the DVD Player Only If your TV has Audio Video inputs you can connect the DVD player to yo...

Страница 17: ...g copy will be unclear with poor sound quality This is NOT caused by a defective DVD system Connecting to a Multi channel Audio Receiver For better sound quality you may want to play the DVD audio thr...

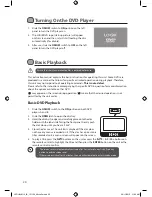
Страница 18: ...ayer left side view DVD player Top view 2 Press the SOURCE button to access the data in the drive 3 Use the buttons to select Media 4 Press the button and then press the buttons to highlight USB SD MS...

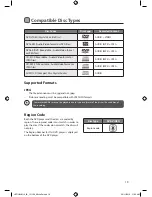
Страница 19: ...c Digital Audio AUDIO Supported Formats JPEG The file extension must be jpg and not jpeg Pictures encoding must be compatible with JPEG ISO formats Region Code Both the DVD player and the discs are co...

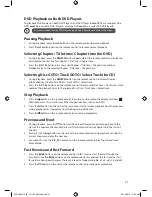
Страница 20: ...ts playback if the disc does not have any menus recorded on it If the disc has one or more titles recorded on it a menu screen will appear on the screen 5 To play a title press the buttons on the unit...

Страница 21: ...ck skips to the selected Disc time Track time Select track Stop Playback 1 Press the button on the remote control to go to pre stop mode the display will show With some discs the unit can recall the s...

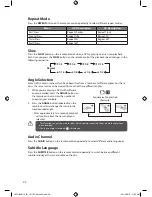
Страница 22: ...of these different angles 1 While you are playing a DVD with different angles recorded press the ANGLE button on the remote control to view the number of current angles available 2 Press the ANGLE but...

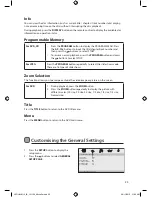
Страница 23: ...eatedly to select the slide show mode There are 16 types of slide shows Zoom Selection This function allows you to enlarge or shrink the video image or picture on the screen For DVD 1 During playback...

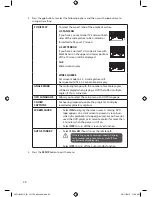
Страница 24: ...that offers multiple angles if this is turned on OSD LANGUAGE Allows you to select the setup menu and OSD language CLOSED CAPTIONS For hearing impaired people the program can display recorded explana...

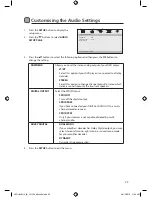
Страница 25: ...n if your DVD player is connected to a Dolby decoder STEREO Select this option to change channel output to stereo which delivers sound from only the two front speakers DIGITAL OUTPUT Select the SPDIF...

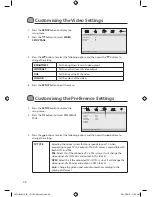
Страница 26: ...llowing options and then press the buttons to change the setting BRIGHTNESS Set the brightness level of video output CONTRAST Set the contrast level of video output HUE Set the hue value of the video...

Страница 27: ...t to the following ratings 1 Kid Safe 2 G 3 PG 4 PG13 5 PGR 6 R 7 NC17 8 Adult Unlock the disc by entering the 4 digit password you have set in PASSWORD setup at the PASSWORD SETUP PAGE If you change...

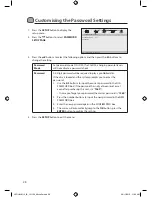
Страница 28: ...e required to play a prohibited disc If the disc is locked and the system prompts you to enter the password 1 Use the 0 9 buttons to input the current password in the OLD PASSWORD box If the password...

Страница 29: ...places subjected to direct sunlight or near heat sources Do not store discs in places subjected to moisture and dust such as a bathroom or near a humidifier Storing discs vertically in a case stackin...

Страница 30: ...reverse mode Press the button Make sure the AUDIO VIDEO input output connections are correct A DTS DVD cannot be decoded to allow audio speaker output Press the AUDIO button repeatedly to switch to an...

Страница 31: ...D R RW in all cases due to the type of disc or condition of the recording If you are having trouble playing a certain disc remove the disc and try a different one Improperly formatted discs will not p...

Страница 32: ...AV OUT Socket x 1 Digital Coaxial Output Socket x 1 Headphones Socket x 1 SD MS MMC Card Reader x 1 USB Port x 1 Car Power Adapter Mains Adapter 12V Car Cigarette Lighter Adapter AC 100 240V 50 60Hz...

Страница 33: ...mmediately Withdraw the mains adapter and consult your dealer Ventilation Safety Warnings To prevent the risk of electric shock or fire hazard due to overheating ensure that curtains and other materia...

Страница 34: ...verely damaging the disc and the unit Do not stack devices heat from other devices may affect the performance of the unit CLASS 1 LASER PRODUCT CAUTION RISK OF ELECTRIC SHOCK DO NOT OPEN The lightning...

Страница 35: ...This item incorporates copy protection technology that is protected by U S patents and other intellectual property rights of Rovi Corporation Reverse engineering and disassembly are prohibited Restri...

Страница 36: ...L9DUALM12_IB_121109_Michelle indd 36 09 11 2012 11 05 AM...

Страница 37: ...L9DUALM12_IB_121109_Michelle indd 37 09 11 2012 11 05 AM...

Страница 38: ...L9DUALM12_IB_121109_Michelle indd 38 09 11 2012 11 05 AM...

Страница 39: ...L9DUALM12_IB_121109_Michelle indd 39 09 11 2012 11 05 AM...

Страница 40: ...L9DUALM12_IB_121109_Michelle indd 40 09 11 2012 11 05 AM...

Отзывы: