background image

25

GB

U

sing the F

ea

tur

es

2.  Press the 

 buttons to select the following picture options and then 

press the OK button.

3.  Press the 

 buttons to select the options. Press the OK button and then press the     buttons to adjust each option’s 

setting.

Picture Mode

Cycles among picture mode: Standard / Mild / User / Dynamic.

Alternative

You may press the P.MODE button to select the picture mode directly.

Contrast

Adjusts the difference between light and dark levels 
in the picture. (for User mode)

Picture Mode           Standard

Contrast 82

Brightness 50

Colour 50

Sharpness 50

Tint 50

BACK

MENU

EXIT

Brightness

Increases or decreases the amount of white in the 
picture. (for User mode)

Colour

Controls the colour intensity. (for User mode)

Sharpness

Adjusts the level of crispness in the edges between 
light and dark areas of the picture. (for User mode)

Tint (For NTSC 
format)

Adjusts the balance between red and green levels.
(Tint is only available for NTSC signal reception.)

Colour 

Temperature

Cycles among colour temperature: Medium / Cool / User / Warm.
Adjusts the colour components independently to achieve a warm or cool. 
(for User mode)
•  Red

Increases red tint

•  Green

Increases green tint

•  Blue

Increases blue tint

Colour Temperature Medium

Red 40

Green 31

Blue 50

BACK

MENU

EXIT

 Customising the Picture Setting

Allows you to set your preferred picture mode.

1.  Press the MENU button and then press the 

 buttons to select the 

PICTURE menu and then press the OK button.
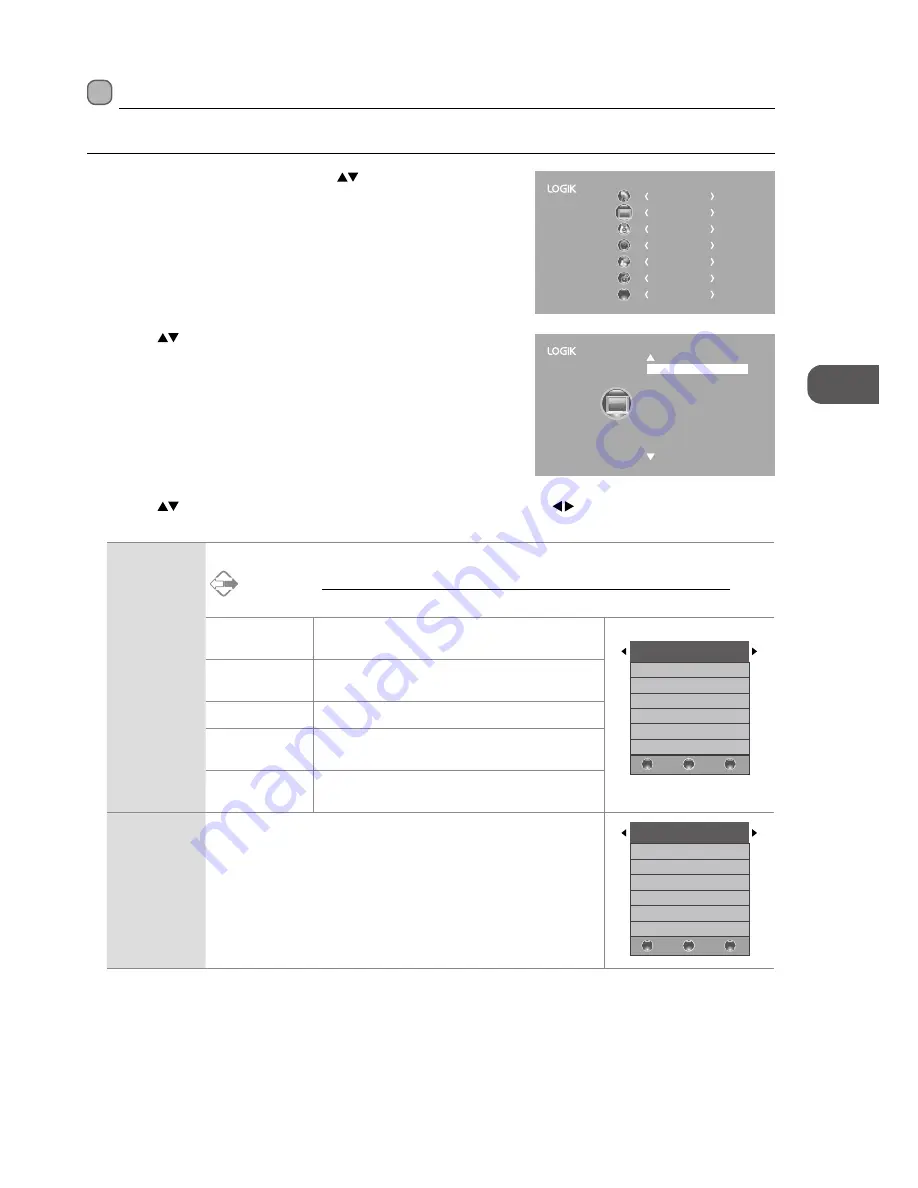
CHANNEL


PICTURE

SOUND

TIME

OPTION

LOCK

EXIT

EXIT

Picture Mode Standard

Colour Temperature
Aspect Ratio
Noise Reduction
Screen

Содержание L19LDVB11

Страница 1: ...19 HD Ready Digital LED TV with DVD Player Instruction Manual L19LDVB11 L19LDVP11 L19LDVN11...

Страница 2: ......

Страница 3: ...lection 18 Display Channel Information 18 Volume Adjustment 18 Using the Features 19 Customising the Channel Setting TV DTV or Radio Mode 19 Auto Tuning 19 DTV Manual Tuning 20 ATV Manual Tuning 20 Ch...

Страница 4: ...ode 48 Basic DVD Playback Functions 49 Playing the DVD 49 Menu Playback for DVD 49 Stopping Playback 49 Previous Next for DVD CD Multimedia discs 49 Forward Backward for DVD CD Multimedia discs 49 Pau...

Страница 5: ...commend that you spend some time reading this instruction manual in order that you fully understand these features You will also find some hints and tips to help you resolve any issues Read all the sa...

Страница 6: ...and align the screw hole and then secure the base stand by hand or using a screw driver with the provided 1 screw or screw screw unscrew Installing Removing the Base Stand Screws x 3 P N xxxxxxxxxxx 1...

Страница 7: ...sc DVD mode 4 Press to start playback or pause DVD mode 5 Disc Slot Insert the disc with the label side facing backwards to you 12 cm discs only Don t insert 8 cm discs 6 INPUT Press to select among d...

Страница 8: ...age 23 for details 5 USB Allows the insertion of a USB storage device to play video audio photo and text files DMP mode and record DTV programmes on to a USB storage device 6 HDMI1 HDMI2 To connect to...

Страница 9: ...roperty Only use the battery type indicated in this manual When the batteries are exhausted the remote will not function Replace both batteries at the same time with new ones Do not install new batter...

Страница 10: ...ode 10 S MODE Select sound mode Standard Music Movie Sports User 11 ASPECT Allows you to watch the screens in various formats Auto 4 3 16 9 Zoom Subtitle Smart Zoom 12 GUIDE Displays the EPG electroni...

Страница 11: ...DVD menu DVD mode 24 S Subtitle Displays subtitles which are broadcast with the programme DTV mode Displays subtitles on the DVD DVD mode 25 REC Record the current programme DTV mode ZOOM Zoom in on...

Страница 12: ...ack rapidly SUBPAGE Displays the subpage on the teletext screen ATV mode 34 To advance playback rapidly INDEX To select the page number of the index from teletext ATV mode 35 Coloured buttons Access t...

Страница 13: ...or the INPUT button on the remote control to display the Source List Use the buttons to select HDMI1 HDMI2 and then press the OK button to confirm Making Video and Audio Connections Not all AV device...

Страница 14: ...nnect the TV s PC AUDIO input socket to the computer s audio output socket 2 Plug the connected devices into the mains socket before switching on the TV 3 Press the button on the right side panel of t...

Страница 15: ...ut sockets VIDEO yellow Audio Left white and Audio Right red 2 Plug the connected devices into the mains socket before switching on the TV 3 Press the button on the right side panel of the TV or on th...

Страница 16: ...hard disk is used make sure its mains adapter is connected to the mains supply If a USB hub is used make sure its mains adapter is connected to the mains supply as the total current consumption may e...

Страница 17: ...France Greece UK Australia Austria Czech Denmark Finland Country OK Belgium Bulgaria Croatia Hungary Italy Luxembourg Germany Turning the TV On for the First Time 1 Connect the mains adapter to the m...

Страница 18: ...to highlight and select the channel Press the OK button to view the selected channel If a blocked channel is selected the password screen will be displayed Press the 0 9 buttons to enter the password...

Страница 19: ...ct ATV DTV DTV ATV Press the button and then press the buttons to select the country where you will operate the TV Press the OK button to confirm 2 Press the buttons to select Auto Tuning and then pre...

Страница 20: ...ts of the channel under DTV mode 1 Press the MENU button and then press the buttons to select the CHANNEL menu and then press the OK button CHANNEL PICTURE SOUND TIME OPTION LOCK EXIT EXIT CHANNEL PIC...

Страница 21: ...s the buttons to make manual fine tuning adjustments Frequency Displays the current tuned frequency 4 After finishing the manual tuning adjustment of a channel press the RED button to save your channe...

Страница 22: ...ain menu 5 Press the EXIT button to exit the menu 3 Press the BACK button to return to the previous menu or press the MENU button to return back to the main menu 4 Press the EXIT button to exit the me...

Страница 23: ...MENU button and then press the buttons to select the CHANNEL menu and then press the OK button 2 Press the buttons to select CI Information and then press the OK button CI Common Interface DTV Mode T...

Страница 24: ...03 Yes to upgrade No to ignore this upgrade EXIT Download 20 Software Update OAD 71 6 If you select Yes the over air download will start Press the EXIT button if you want to stop the download and exi...

Страница 25: ...colour intensity for User mode Sharpness Adjusts the level of crispness in the edges between light and dark areas of the picture for User mode Tint For NTSC format Adjusts the balance between red and...

Страница 26: ...his selection will allow you to zoom in the picture without any alternation while filling the entire screen with subtitles shown at the bottom of the screen This selection will allow you to zoom in th...

Страница 27: ...tualisation technology developed by SRS Labs that provides an enhanced listening experience unlike any other technology that has been offered for a two speaker playback environment TruSurround HD buil...

Страница 28: ...On Screen Display Mono Stereo Dual MONO NICAM MONO MONO NICAM STEREO MONO NICAM DUAL I NICAM DUAL II NICAM DUAL I II Mono sound selection If the stereo signal is weak in stereo reception you can switc...

Страница 29: ...180 240 min The timer begins to count down from the number of minutes selected Alternative 1 You may press the SLEEP button repeatedly to select the number of minutes OFF 10 20 180 240 min directly 2...

Страница 30: ...the buttons to select the Primary Secondary Audio Language Press the button and then press the buttons to select your desired audio language Press the OK button to confirm 4 Press the BACK button to...

Страница 31: ...ect Hearing Impaired and then press the OK button to select On Off 3 Press the BACK button to return to the previous menu or press the MENU button to return back to the main menu 4 Press the EXIT butt...

Страница 32: ...ton to start formatting Warning All data will be lost Start Exit Format disk Format disk File System Size PVR File System Type PVR File System Size Duration 104 Mins FAT32 All MENU Do not unplug USB d...

Страница 33: ...DMI CEC functions 1 Press the MENU button and then press the buttons to select the OPTION menu and then press the OK button OSD Language Audio Language Hearing Impaired Country PVR File System CEC Off...

Страница 34: ...K EXIT EXIT Lock System Set Password Block Channel Parental Guidance Off 4 Press the buttons to select Lock System and then the OK buttons to select On Off If the Lock System is set to On a valid pass...

Страница 35: ...EXIT 2 Press the buttons to select Lock System and then press the OK button 5 Use the 0 9 buttons to input the old password and then input the new 4 digit password Re enter new password for confirmat...

Страница 36: ...control to block or unblock the programme Press the GREEN button again to unblock 6 Press the MENU button once to return to the previous menu Press the MENU button again to return back to the main me...

Страница 37: ...not operate This allows you to set up blocking schemes to block specific channels and ratings This TV is programmed to remember which option it was last set to even if you switch the TV off When a pr...

Страница 38: ...ton The text will be superimposed over the TV programme Press the MIX button again to return to the text page Double height text If you have difficulty reading the text on the TV you can double the he...

Страница 39: ...as an Electronic Programme Guide EPG to help you navigate through all the possible viewing options The EPG supplies information such as programme listings start and end times for all available service...

Страница 40: ...next day Press the YELLOW button again to return to the EPG BLUE Remind Press the BLUE button while on the selected programme the Reminder setting menu will be displayed Press the buttons to adjust t...

Страница 41: ...3 Press the buttons to select your storage device and then press the OK button My Music 1 Press the button on the right side panel of the TV or the INPUT button on the remote control then press the bu...

Страница 42: ...side panel of the TV or the INPUT button on the remote control then press the buttons to select the DMP mode and then press the OK button 2 Press the buttons to select MOVIE and then press the OK but...

Страница 43: ...ct the function Prev page Next page Prev Next Stop Music Playlist Info 6 Press the EXIT button to return back to the previous menu 3 Press the buttons to select your storage device and then press the...

Страница 44: ...e Shift Progress Bar 1 Indicates the status of the currently displayed video 2 Indicates the time lagging behind the live broadcast DVR reviewing 3 Indicates the available recording time on your USB s...

Страница 45: ...2 Press the REC button again the recording progress bar will disappear 3 Press the Stop button to stop recording Recording will stop automatically when the disk is full If you want to turn off your T...

Страница 46: ...Date and then press the buttons to adjust the end time Mode Press the buttons to select the Auto Once Every Day Weekly 3 After finishing all the recorder adjustments press the OK button to confirm yo...

Страница 47: ...ss the buttons to select your storage device and then press the OK button 4 Press the buttons to select the MY PVR folder and then press the OK button Press the buttons to navigate in the MY PVR folde...

Страница 48: ...DVD Recordable Audio Video format or JPEG files DVD R AUDIO VIDEO JPEG CD R CD Recordable Audio Video format or JPEG files AUDIO VIDEO JPEG CD RW CD Rewritable Audio Video format or JPEG files AUDIO...

Страница 49: ...first one pressing the button will restart the disc at the beginning The sound will be off during Forward or Backward For DVD discs the above functions may very due to different DVD disc s structure...

Страница 50: ...to repeat certain content Press the A B button on the start point A and the end point B to select the repeat part Press the A B button a third time to cancel the A B button function and return to nor...

Страница 51: ...ontrol to highlight the Edit mode To leave the Edit mode press the OK button on the remote control again to cancel the highlight 3 Press the button on the remote control to skip to the left screen Pre...

Страница 52: ...hange from Browser view to Program view 2 Press the buttons on the remote control to select Edit mode then press the OK button on the remote control to leave the Edit mode Picture CD Playback When you...

Страница 53: ...ltiple OSD Languages Not all DVD discs support multiple Subtitle Languages Not all DVD discs support multiple Audio Languages Not all DVD discs support multiple DVD Menu The image display ratio is rel...

Страница 54: ...tton on the remote control Press the buttons to select the Misc menu and then press the button to enter the sub menu Press the buttons to select the menu options Press the SETUP button to exit the men...

Страница 55: ...dust such as a bathroom or near a humidifier Storing discs vertically in a case stacking discs or placing objects on discs outside of their cases may cause warping Be sure to switch off the button on...

Страница 56: ...tre if the picture has not appeared after five minutes No or poor colour or poor picture Adjust the settings in the PICTURE menu Try another channel The problem may be caused by the broadcaster Check...

Страница 57: ...aerial installer Why do I get blocking on my digital picture In most cases blocking is caused by a reception problem either the signal is too weak or there is some kind of interference Talk to your r...

Страница 58: ...3 480P 720 x 480 576I 720 x 576 50 576P 720 x 576 720P 1280 x 720 50 60 1080I 1920 x 1080 50 60 1080P 1920 x 1080 50 60 PC Mode Please check the display settings of your computer before connecting to...

Страница 59: ...measured diagonally Approx 47 cm 18 5 inch Power Consumption In HOME STANDBY mode 23 W Average Annual Energy Consumption 33 kWh Standby Power Consumption 0 4 W Operating Temperature 0 C 40 C Operating...

Страница 60: ...E IJA IA 2010 1062 2011 33 kWh annum 23 Watt 47 0 cm 18 5 inch L19LDVB11 B A B C D E F G ENERG Y IE IJA IA 2010 1062 2011 33 kWh annum 23 Watt 47 0 cm 18 5 inch L19LDVP11 B A B C D E F G ENERG Y IE IJ...

Страница 61: ...nnect the unit from the mains supply before connecting disconnecting other devices or moving the unit Unplug the unit from the mains socket during a lightning storm Mains Adapter Cable Make sure the u...

Страница 62: ...adjustments or performance of procedures other than those specified herein may result in hazardous radiation exposure Before moving the unit ensure the disc tray is empty Always remove the disc when t...

Страница 63: ...protected by trademarks HDMI the HDMI logo and High Definition Multimedia Interface are trademarks or registered trademarks of HDMI Licensing LLC The FREEVIEW word and logo are trademarks of DTV servi...

Страница 64: ......

Страница 65: ......

Страница 66: ......

Страница 67: ......

Страница 68: ......

Отзывы: