Assembly Instructions
10
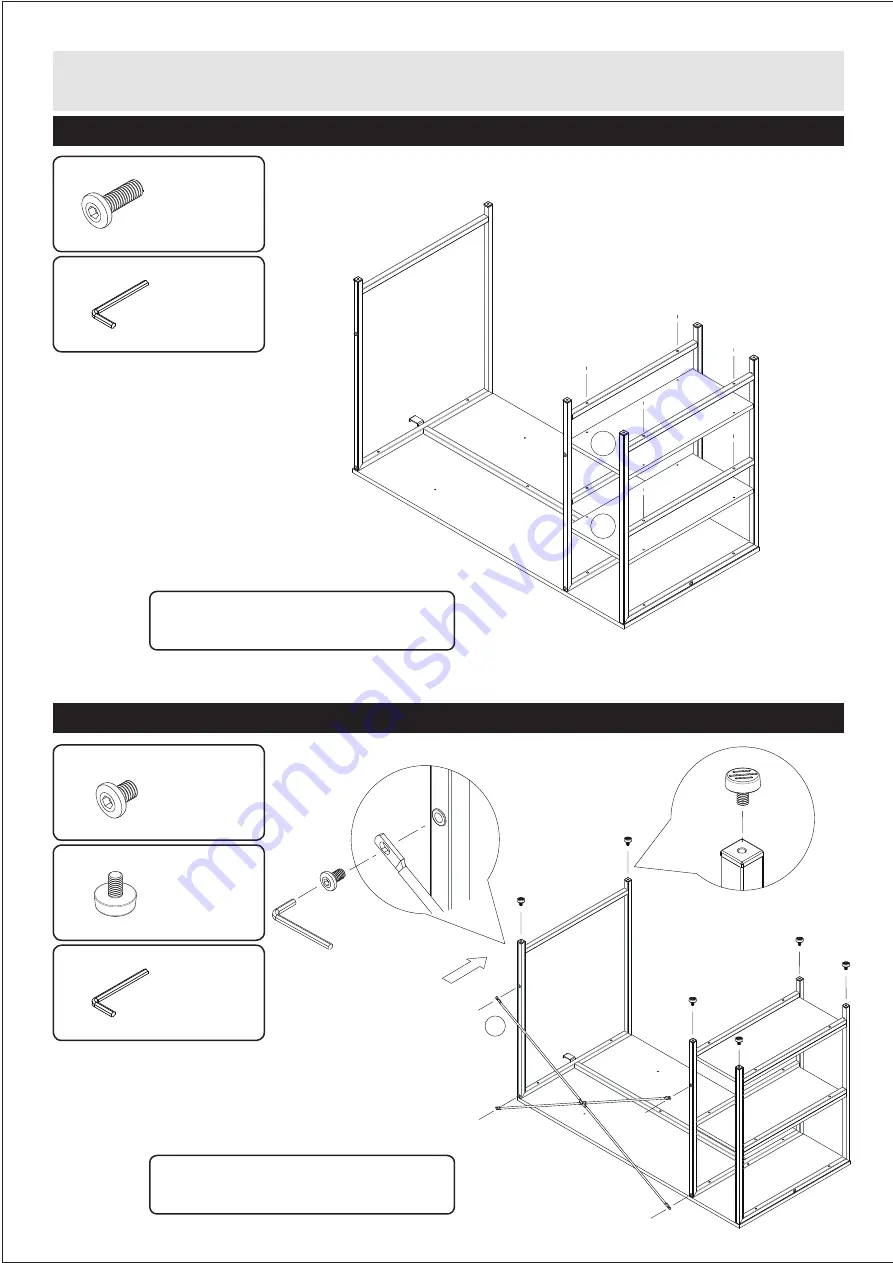
Step 4
Step 5
D x 1 pc
B x 8 pcs
D
x 1 pc
A
x 4 pcs
C
x 6 pcs
C
Don’t screw tightly before all the screws
are put into the corresponding holes
Don’t screw tightly before all the screws
are put into the corresponding holes
B
B
B
B
B
B
B
B
8
8
A
C
C
C
C
C
C
5
A
A
A


