

Quick Installation Guide Applicable model: LDV-212ASK
Rev. 1.3 Copyright© All rights reserved
Easy Operation
There are three methods to control your KVM Switch for PC and
Audio/Mic channel selection: using (1) the face-panel push
buttons, (2) the hotkey sequences, or (3) the KVM Switcher
Software.
Face-panel buttons
The face-panel button allows you a direct control over KVM
switching operation. Simply press the button to switch to the
corresponding PC port (and audio/mic channel, if binding is
enabled). By default, PC port switching and audio/mic port
switching are bound together, unless you specify the audio to be
fixed a specific port.
You can use the face-panel button to switch to an empty port that is
not connected with any computer. Normally, if you use keyboard hotkeys
or the KVM Switcher software, you will not be able to switch to an empty
port.
Keyboard hotkeys
User-definable hotkeys for PC selection:
Hotkey sequence = Ctrl - Alt - [command key]*
* Please refer to next section for keys that are qualified to be used as a
command key
Note that these 3 keys should be pressed and held together. And it
is upon the release of all three keys, the switching action will be executed.
Universal hotkey for switching to next port:
Universal Hotkey sequence = ScrLk + ScrLk
* For other operating systems on PC such as Linux, you can still use this
special hotkey to facilitate PC switching. This special hotkey is not available
for Mac.
Both the universal hotkey, ScrLk + ScrLk and the user-definable
hotkey, Ctrl - Alt - [command key]
WILL NOT
allow you to switch to an
empty port that is not connected with any computer. To force your KVM
to switch to an empty port, just press the face-panel button to switch.
Each keystroke within a hotkey sequence should be pressed within
2 seconds. Otherwise, the hotkey sequence will not be validated.
After port switching, you have to wait till the KVM Switcher icon
shows forth the target port before you can perform next switching again.
All the hotkeys are only functional after your PCs are booting into
the OS. If you want to switch PC in the BIOS/preboot stage, press the
face-panel button to switch.
KVM Switcher Software
In addition to PC switching, the KVM Switcher Software also
allows you more advanced functions such as described in the
next section….
KVM Switcher Operation Reference
Switch to PC x by Operation Menu
Right-click the KVM Switcher icon to evoke the operation menu,
then select whichever PC that is available for switching. Once
you select a PC channel, it will immediately switch to that PC.
Note that the unconnected port(s) or the active port will be
grayed-out and hence non-selectable.
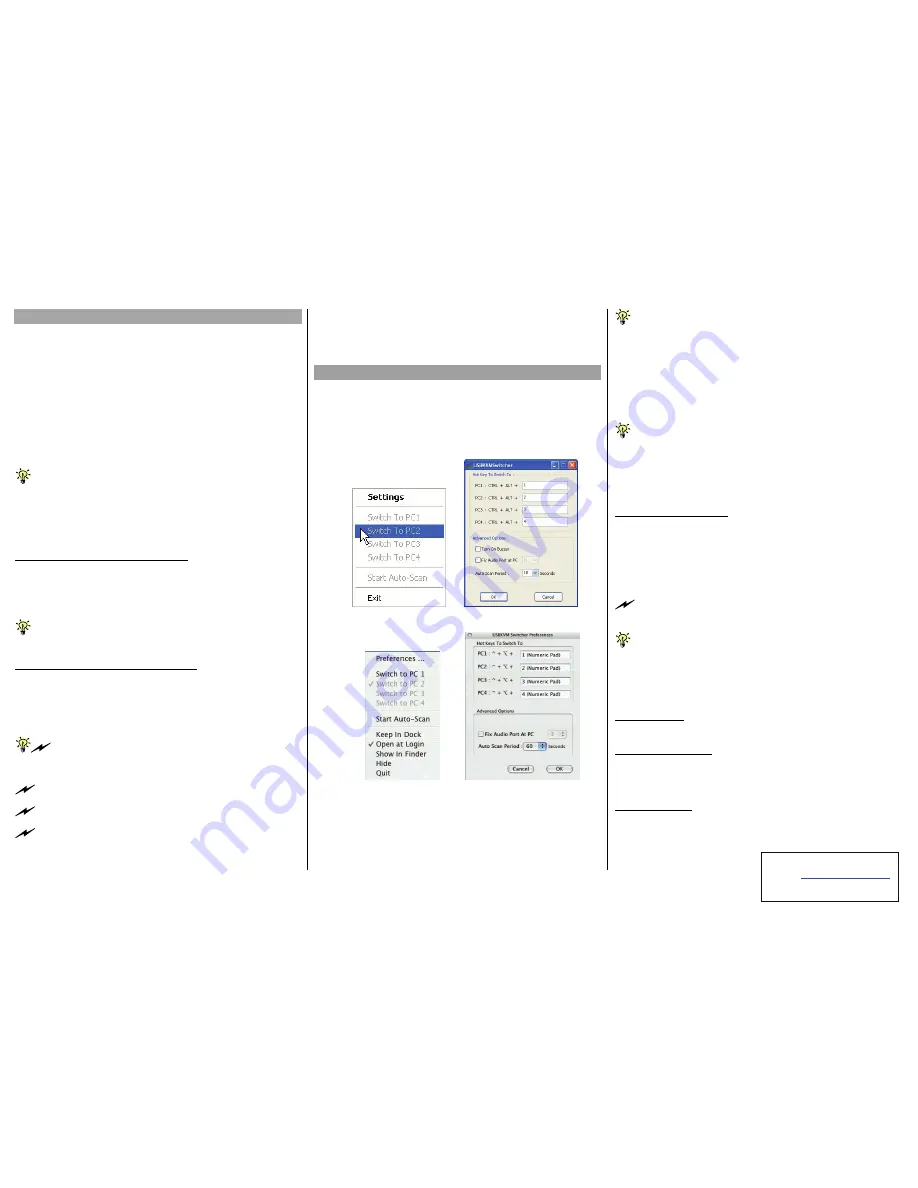
Windows
: Operation Menu Configuration Dialog Box
Mac OS: Operation Menu Configuration Dialog Box
Switch to PC x by Keyboard Hotkeys
Hit the hotkey according to your current hotkey definition:
Hotkey sequence = Ctrl - Alt - [command key]*
* The factory default hotkey setting is Ctrl + Alt + 1/2/3/4 for PC 1/2/3/4. You
can also use ScrLk + ScrLk to switch PC.
Note that these 3 keys should be pressed and held together. And it
is upon the release of all three keys, the switching action will be executed.
Start Auto-scan
Right-click the KVM Switcher icon to evoke the operation menu,
then select
Start Auto-Scan
to activate autoscanning.
Stop Auto-scan
(While autoscanning) Press any key on keyboard, or press any
button on the front-panel will stop autoscan.
While autoscanning, the mouse will be locked and hence not
possible to stop autoscan by the menu option.
KVM Switcher configuration
Right-click the KVM Switcher icon and select
Settings
or double-
click the icon to bring up the configuration dialog box.
Define Hotkey commands
You can specify the command key as you like by typing it in. For
example, you can specify the hotkey for switching to PC 1 as
CTRL - ALT - A by typing an A (not case-sensitive) in the editable
field.
Hotkey Sequence = CTRL - ALT - [command key]*
* The command key is user-definable via the configuration dialog box
Please note that if you intend to modify the command key, you have
to modify them on each and every of the connected computers, since the
hotkey setting is stored within each connected computer.
Except those control keys such as Alt, Ctrl, Shift, CAPS, Tab, Esc
and those functions keys and edit keys, all other keys on the keyboard,
including those number keys on the number pad, are all other keys
qualified to be used as hotkey command keys. In addition to the software
KVM Switching by the operation menu and the user-defined hotkeys, you
can always use the universal hotkey for PC switching – ScrLk + ScrLk
Turn On Buzzer
Check this option to turn on the buzzer sound.
Fix Audio Port at PC
x
Check this option and then select the PC to fix the audio/mic
channel to the selected PC. Once this option is checked, the
audio/mic channel will be fixed and become non-switchable.
Auto Scan Period
Select the Autoscan period from 10 ~ 60 seconds with an
increment of 5 seconds. The Autoscan period is the time your
KVM Switch will wait before switching to next PC.
Technical Support
E-mail:
Website: www.linkskey.com


