background image

2

Chapter One

Installation Notes

For your safety and equipment security, please be sure reading the safety

instructions carefully before using the machine.

If you have doubts in the use, please read this manual first. Described in

detail in the body of the device operation. If you still have questions, please

contact us, we will give you a satisfactory answer as soon as possible.

Specifications subject to release to change without notice, please understand.

When installing, please note the following

1,Power supply:

Please use with protection to single-phase three-wire AC 220V power supply,

and ensure that the entire engineering system using the same protected. You can
not use unprotected power, the power cord ground pin can not be destroyed.

2, Power off:

When you need to move equipment or other work must outage, to shut off all

power, including the power switch, unplug the power plug, so as to ensure the
safety of your equipment.

3, Cable:

Items can not put pressure

on the power supply lines, signal lines,

communication lines, cable should keep from trample or extrusion, to prevent
the risk of leakage or short circuit.

4, Connecting the signal line:

Inserting or pulling the signal line to the device, the device needs outage,

so as not to damage the device. Hot plug caused damage not covered under
warranty.

5, Vents:

The outer surface of the device may have openings for heat dissipation, do

not block these openings, in order to avoid heat build-up, the risk of damage
to the equipment or cause fire.

6, Equipment placement:

Should a reasonable settlement for devices such as standard rack mount,

chassis, cabinets, or placed on a stable flat work surface to prevent the unit
from dropping.

7, Surroundings:

Equipment working environment should pay attention to dust, moisture, in

particular, to prevent the liquid from soaking and splashing into the interior
of the device.

8, Service:

All repairs should be done by qualified service personnel , untrained Never

attempt to repair equipment. To prevent the risk of electric shock, do not open
the cabinet.

9, Safety Precautions:

1, the internal high-voltage equipment, non-professional maintenance personnel
shall not open the case, to avoid danger;

2, non-dripping or splashing, prohibited place any container with liquid items
on the device;

3, for the prevention of fire,forbiding a device near the fire;

Содержание LM-SH61

Страница 1: ...HD Video Multiplexers LM SH61 User Manual...

Страница 2: ...1 Catalog 1 Installation Notes 2 2 Product Introduction 4 3 Machine installation 7 4 Remote Control Description 8 5 Key Instructions 10 6 Software Control 11...

Страница 3: ...usion to prevent the risk of leakage or short circuit 4 Connecting the signal line Inserting or pulling the signal line to the device the device needs outage so as not to damage the device Hot plug ca...

Страница 4: ...es 10 properly organize the power cord to prevent breakage 11 the following conditions should unplug the device power cord handled by qualified service personnel 1 The power cord is damaged or frayed...

Страница 5: ...multaneously display multiple HD signals 2 The main function support a single display unit simultaneously display multiple high definition or analog signals N composite video N channel VGA N way HDMI...

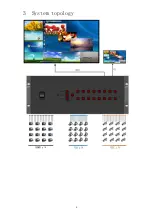
Страница 6: ...5 3 System topology...

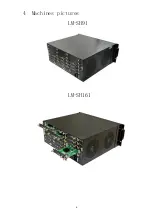
Страница 7: ...6 4 Machines pictures LM SH91 LM SH161...

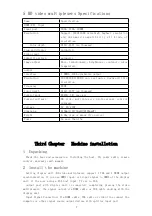
Страница 8: ...ional control sofeware voltage AC 90 260V dimension 440mm L 177mm H 403mm W Weight 8 2kg plus or minus five percent Power No more than 15w Third Chapter Machine installation 1 Unpacking Check the host...

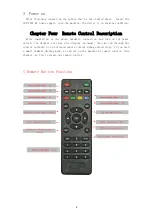
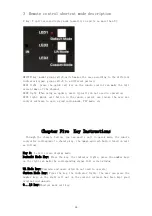
Страница 9: ...trol Description After completion of the above hardware connection and turn on the power switch the display unit may also display no image then we can through the control software or an infrared remot...

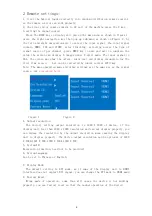
Страница 10: ...irst time access but can be corrected by remote control AUTO key Note The menu operation mode and other settings are the same way as the signal source not reproduced here figure 1 figure 2 4 Output re...

Страница 11: ...er use control software to save a good custom mode PIP mode etc Chapter Five Key Instructions Through the chassis button you can easily call in quick mode the remote controller corresponds to chassis...

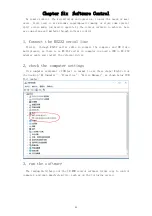
Страница 12: ...irstly through RS232 serial cable to connect the computer and HD video multiplexers as there is no RS 232 serial in computer you need a USB to RS 232 adapter cable and install the relevant driver 2 ch...

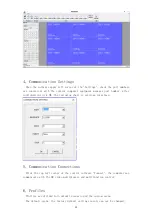
Страница 13: ...onfirmation click OK the following chart is settings interface 5 Communication Connections Click the top left corner of the control software Connect the computer can communicate with the HD video mult...

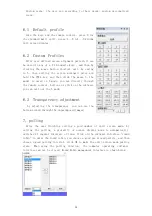
Страница 14: ...gh the remote control buttons or click on the software you can call out the 5 mode 6 3 Transparency adjustment by adjusting the transparency you can see the bottom screen through the superimposed imag...

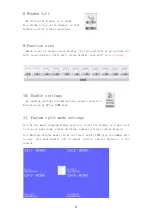
Страница 15: ...r split screen display 10 Enable settings By enabling setting video multiplexers output resolution And selection of DVI or HDMI mode 11 Custom split mode settings 11 1 by the mouse dragging Window pos...

Страница 16: ...y pinpoint the exact location and the window screen to adjust the screen size as shown 11 4 You can set picture mode for example By controlling the software can be set to various split mode such as PI...

Отзывы: