


7
dc2269aaf
DEMO MANUAL DC2269A-A
LtpowerpLay Quick start proceDure
The following procedure describes how to use LTpowerPlay
to monitor and change the settings of LTM4676.
1. Download and install the LTPowerPlay GUI:
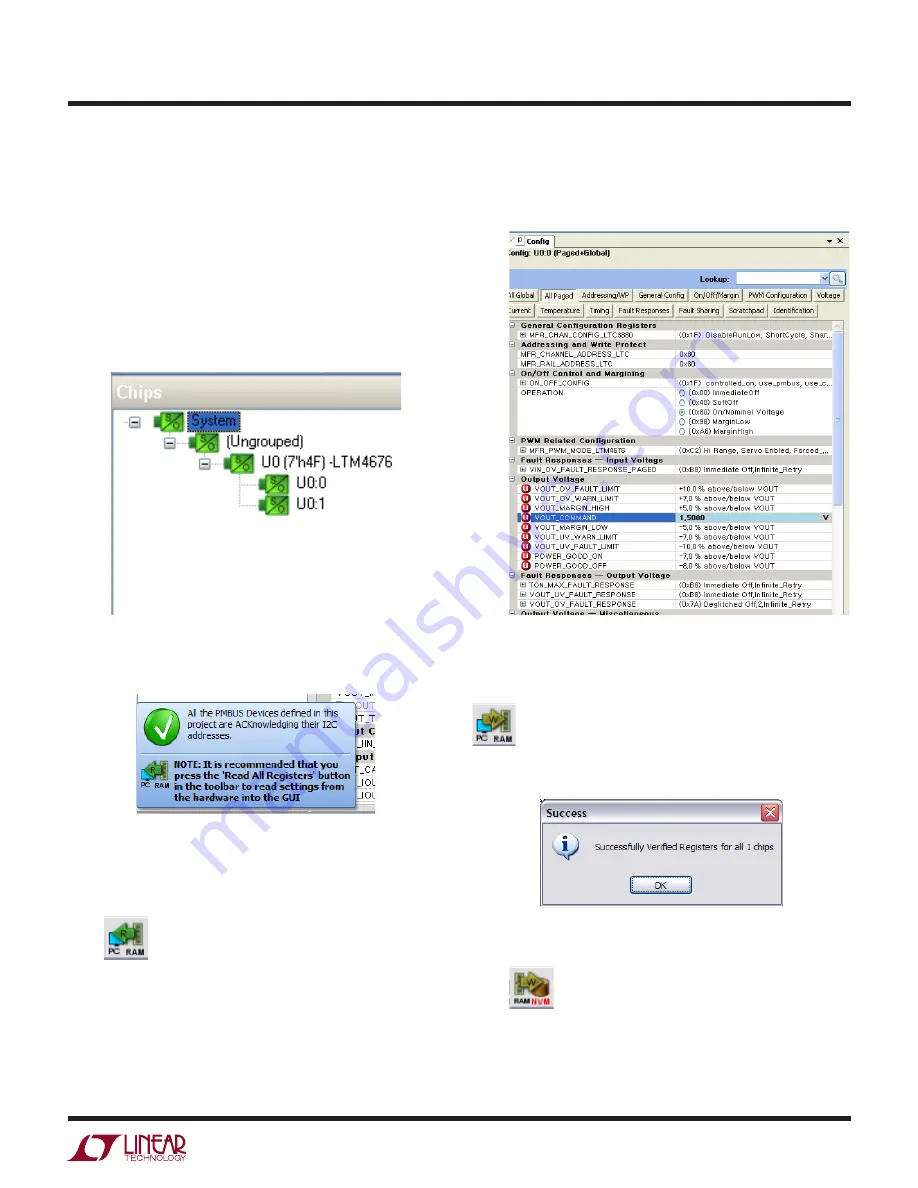
2. Launch the LTpowerPlay GUI.
a. The GUI should automatically identify the DC2269A-A.
The system tree on the left hand side should look
like this:
b. A green message box shows for a few seconds in
the lower left hand corner, confirming that LTM4676
is communicating:
c. In the Toolbar, click the “R” (RAM to PC) icon to
read the RAM from the TM4676. This reads the
configuration from the RAM of LTM4676 and loads
it into the GUI.
d. If you want to change the output voltage to a different
value, like 1.5V. In the Config tab, type in 1.5 in the
VOUT_COMMAND box, like this:
Then, click the “W” (PC to RAM) icon to write these register
values to the LTM4676. After finishing this step, you will
see the output voltage will change to 1.5V.
If the write is successful, you will see the following message:
e. You can save the changes into the NVM. In the tool
bar, click “RAM to NVM” button, as following:
f. Save the demo board configuration to a (*.proj) file.
Click the Save icon and save the file. Name it whatever
you want.


