User Manual
English
- 3 -
Installation
1. Before connecting your new KVM Switch Lite, insert the CD-ROM into your computers CD-
ROM drive. If the Autorun screen does not pop up automatically please start the program
named Autorun.exe from the CD-ROM.
2. Click “Software Installation for Window/Mac” to start the installation. (If the Mac version
software does not start, you should copy the files from the CD to your local Hard disk on the
Mac and install from that location).
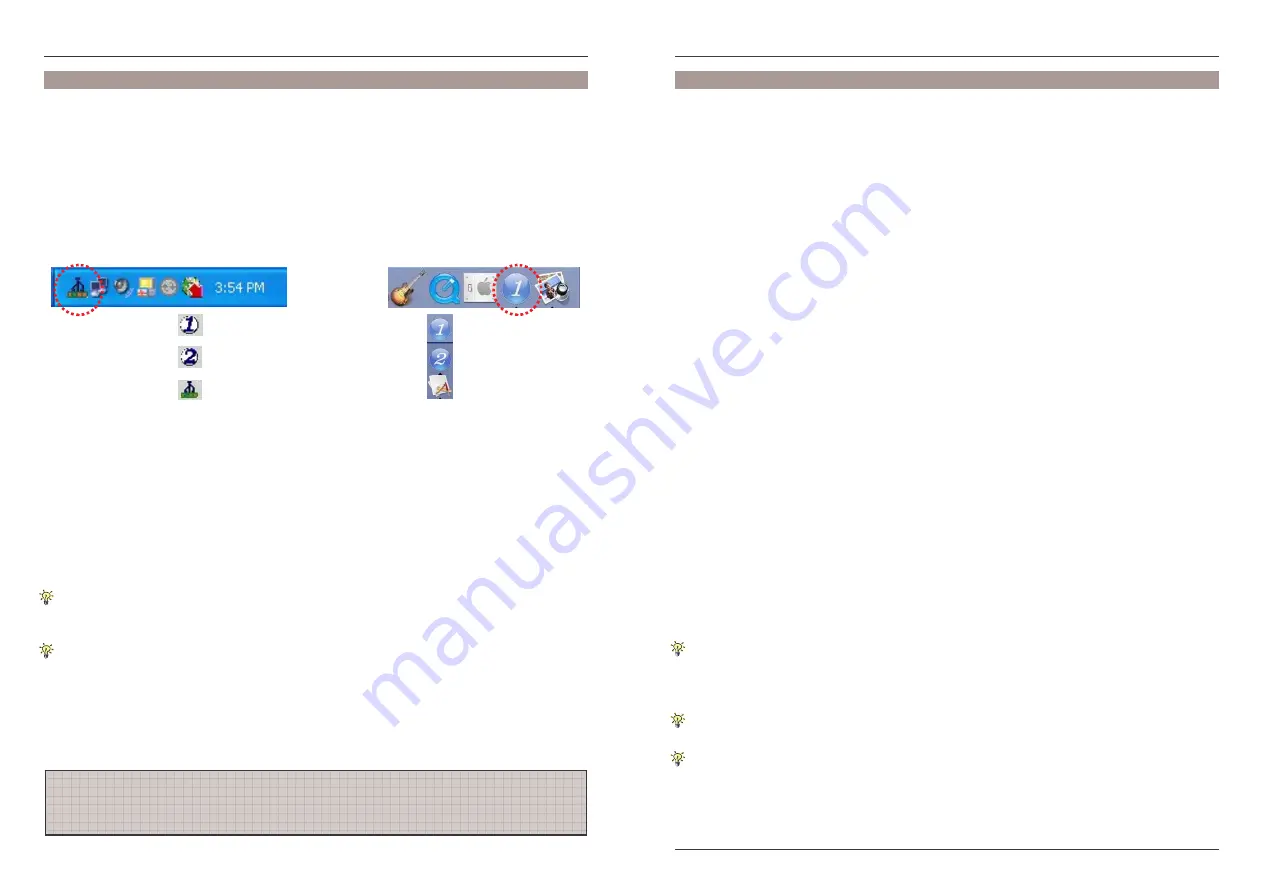
3. Once the installation has completed you will find a KVM Switcher icon on the system tray of
your desktop. Right-click the icon to open the operation menu and double-click the icon to
open the configuration box.
The KVM Switcher Software supports both Windows (98SE or later) and Mac OS 10.4 (Tiger or
later) operating systems. For other OS platforms, such as Linux, you can still use the keyboard
hotkey –
Scroll Lock + Scroll Lock
– to switch between computers. Please note hotkey switching
is not available on Mac OS.
4. Connect the shared USB keyboard, mouse and monitor to the corresponding ports on the
KVM Switch. If you want to connect more than 2 USB devices then simply connect an
additional USB hub and power supply.
5. Connect each KVM PC port to a computer using the supplied cables. Connect the supplied
power supply to the mains and to the KVM switch. After you have connected the KVM and
computers properly, you can start using the KVM Switch immediately.
Some older computers with USB ports may require you to manually enable the USB (Legacy)
support option in the BIOS settings before you can use any USB devices. If your USB
interface does not work, please check the USB options in your computers BIOS.
If you use Windows 98SE or Mac OS and have not yet installed a USB mouse on your
computer, there might be an error message. It is suggested that you install your USB mouse
on your computer before connecting it to the KVM Switch.
Sharing High-speed USB Devices
The two USB 2.0 ports on the front-panel are normally used for keyboard and mouse
connections. However, they can also be used to connect any USB devices that you wish to
share between the two connected computers, such as a printer or scanner etc.
Windows OS
Mac OS
Computer channel is active on port 1
Computer channel is active on port 2
No live connection detected
Please Note: If you share USB Storage devices please be aware that you will interrupt any
active data transfer when switching to the other computer. Ensure all data transfers are
completed before switching.
User Manual
English
- 4 -
Switching Operation
There are four methods for controlling your KVM Switch for Computer channel selection:
••••
The supplied remote control
••••
The front panel button
••••
Hot-Key sequence (
Scroll-Lock + Scroll Lock
)
••••
KVM switcher software
During the switching process the computer will enumerate each of the connected USB devices.
This detection will introduce a small delay whilst the operating system detects the connected
devices. The LED indicator on the front panel will blink during this process and will show a
steady light when complete. Allow this process to complete before attempting to switch again.
Front-panel button
The front-panel button gives you direct control over KVM switching operation. Simply press the
button to switch to the corresponding port. It switches HDMI and USB signals. When the
switching process has completed and USB drivers are loaded from the connected computer the
switch button LED indicator is illuminated constantly.
Universal Hotkey Sequence
If you are using the KVM Switch in combination with computers running Windows or Linux OS
you can use the universal hotkey sequence to switch between ports. This feature is not
available to Mac OS users.
Universal Hotkey sequence = Scroll Lock + Scroll Lock
Each keystroke within a hotkey sequence should be pressed within 2 seconds.
User Hotkey Sequence
Using the supplied KVM Switcher software it is possible to define your own Hotkey to switch
between computers. The default Hotkey sequences are:
Hotkey sequence Computer 1 = Ctrl - Alt - 1
Hotkey sequence Computer 2 = Ctrl - Alt - 2
Please note that all 3 keys should be pressed and held together. Upon the release of all three
keys the switching action will be executed. Information on how to configure the keys is provided
in the KVM Switcher Software section of this guide.
Neither the universal hotkey,
Scroll Lock + Scroll Lock
or the user hotkey, Ctrl - Alt -
[command key], will allow you to switch to an empty port that is not connected with any
computer. To force your KVM to switch to an empty port, just press the front-panel button to
switch.
After switching ports, you have to wait until the KVM Switcher icon shows the target port
before you can perform next switching action.
The hotkey switching (universal/user) is only functional after your computers have booted into
the OS. If you want to switch in the BIOS stage, press the front-panel button to switch.


