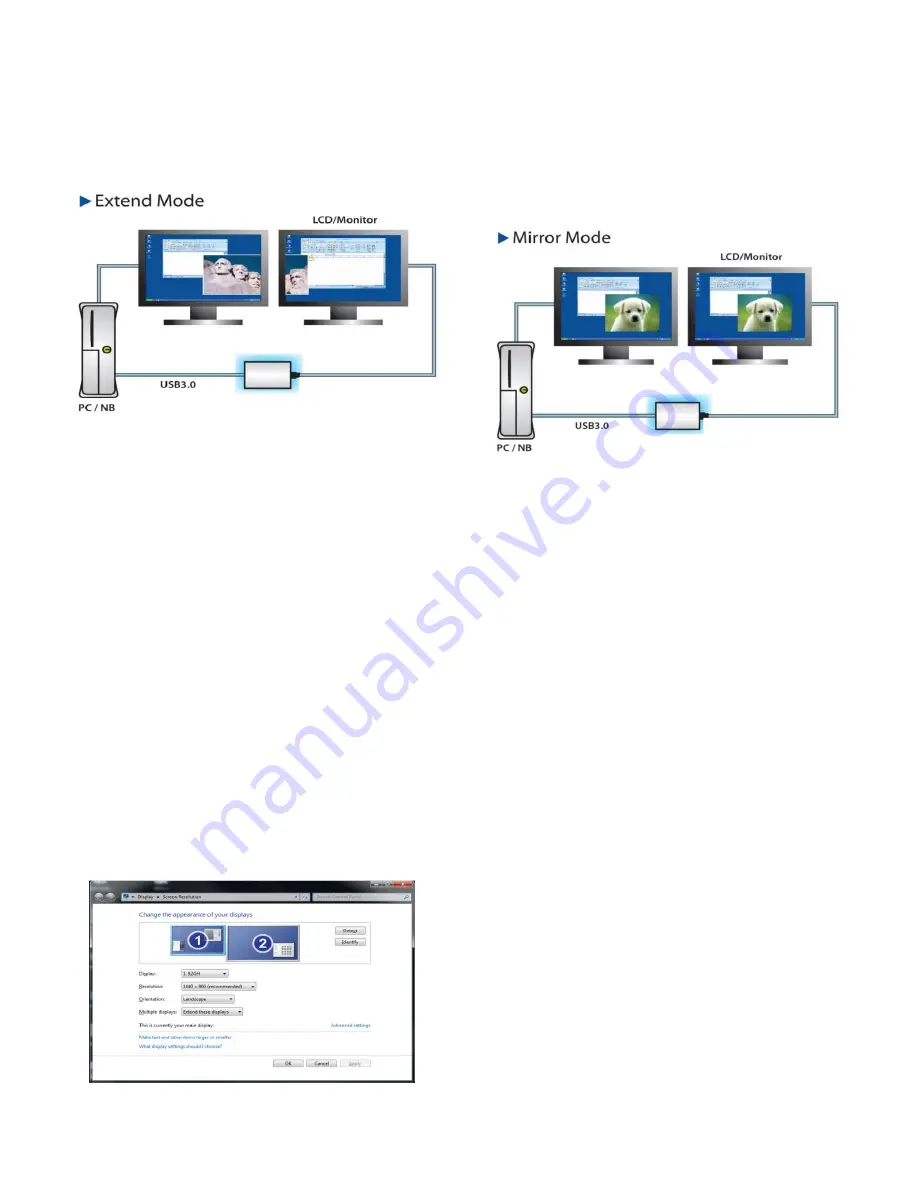
Setting the Display into Extend Mode
In extend mode, the monitor attached to the USB 3.0 DisplayPort Adapter
forms part of the extended Windows desktop. The extra desktop area is a
great productivity aid, allowing more applications or documents to be
visible at a time.
The device is now extended in the direction it was the last time the display
was in this mode. For more control, use the Extend To submenu and
select one of the options. This puts the device into extend mode and
places it to the Left/Right/Above/Below the main (primary) monitor.
Setting the Display into Mirror Mode
In mirror mode, the monitor attached to the USB 3.0 DisplayPort Adapter
will duplicate what is on the primary display.
The resolution, colour depth and refresh rate of the primary screen are
replicated on the monitor connected to the USB 3.0 DisplayPort Adapter.
If the monitor connected to the USB 3.0 DisplayPort Adapter supports a
lower resolution than the primary then the primary graphics device will
have its resolution changed automatically to ensure the whole picture fits
the external screen. When the monitor connected to the USB 3.0 Display-
Port Adapter is of a larger size than primary screen the image will be letter-
boxed to keep the aspect ratio correct.
LINDY Art. 43171
LINDY Art. 43171
DisplayPort
DisplayPort
(2) Use Windows Display Properties
You can also configure the USB 3.0 DisplayPort Adapter from the Win-
dows Display Properties dialog box.
To open the Windows Display Properties on Windows 7
a. Right-click on the Desktop.
b. Click Screen Resolution.
To open the Windows Display Properties on Windows Vista
a. Right-click on the Desktop.
b. Click Personalize.
c. Click Display Settings.
To open the Windows Display Properties on Windows XP
a. Right-click on the Desktop.
b. Select Properties.
c. The Display Properties dialog opens, select the Settings tab.
The Display Settings window will then open.
To set the display to Extend Mode using Windows Display properties
a. Select Extend the desktop onto this monitor checkbox.
b. Set the screen resolution using the Resolution slide bar (drop-down
box on Windows 7).
c. Select the colour quality from the Colors drop-down list. (Advanced
Settings >> Monitor on Windows 7)
d. Arrange its position with respect to the other monitors on the extended
desktop in using the drag area.
e. Click Apply then OK to save your changes.
For more detailed mode setting, including the refresh rate, click Advanced
Settings, then the Adapter tab, then on the List all modes button.
To set the display into Mirror Mode
a. Uncheck the Extend the desktop onto this monitor checkbox or select
duplicate these displays from the drop down box (Windows 7)
b. Click Apply.
To make the USB 3.0 DisplayPort Adapter the Primary Display
a. Select the ‘This is my main monitor checkbox’.
b. Click Apply.
Note: On some PCs and laptops it is necessary to disable the main dis-
play (clear the Extend the desktop onto this monitor checkbox for the
main display) as part of the same settings change. The reason for
this is that many primary graphics card drivers tend to make the lap-
top screen primary if it is enabled. The only workaround for this is to
disable the laptop screen to allow another screen to be primary.
To do this:
a. Select the ‘This is my main monitor checkbox’ of the USB 3.0 Display-
Port Adapter
b. Select the primary display.
c. Uncheck the Extend the desktop onto this monitor checkbox.
d. Click Apply.


