Manual
English
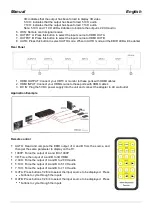
3D: indicates that the output has been forced to display 3D video
5.1CH: indicates that the output has been forced 5.1CH audio
7.1CH: indicates that the output has been forced 7.1CH audio
Note: 5.1CH and 7.1CH LED will darken to indicate the output is 2.0CH audio
5. IR IN: Remote control signal receive
6. OUTPUT A: Press this button to select the input source to HDMI OUT A
7. OUTPUT B: Press this button to select the input source to HDMI OUT B
8. AUTO: Press this button to select AUTO mode. When in AUTO mode, all the EDID LED will be darker
Rear Panel
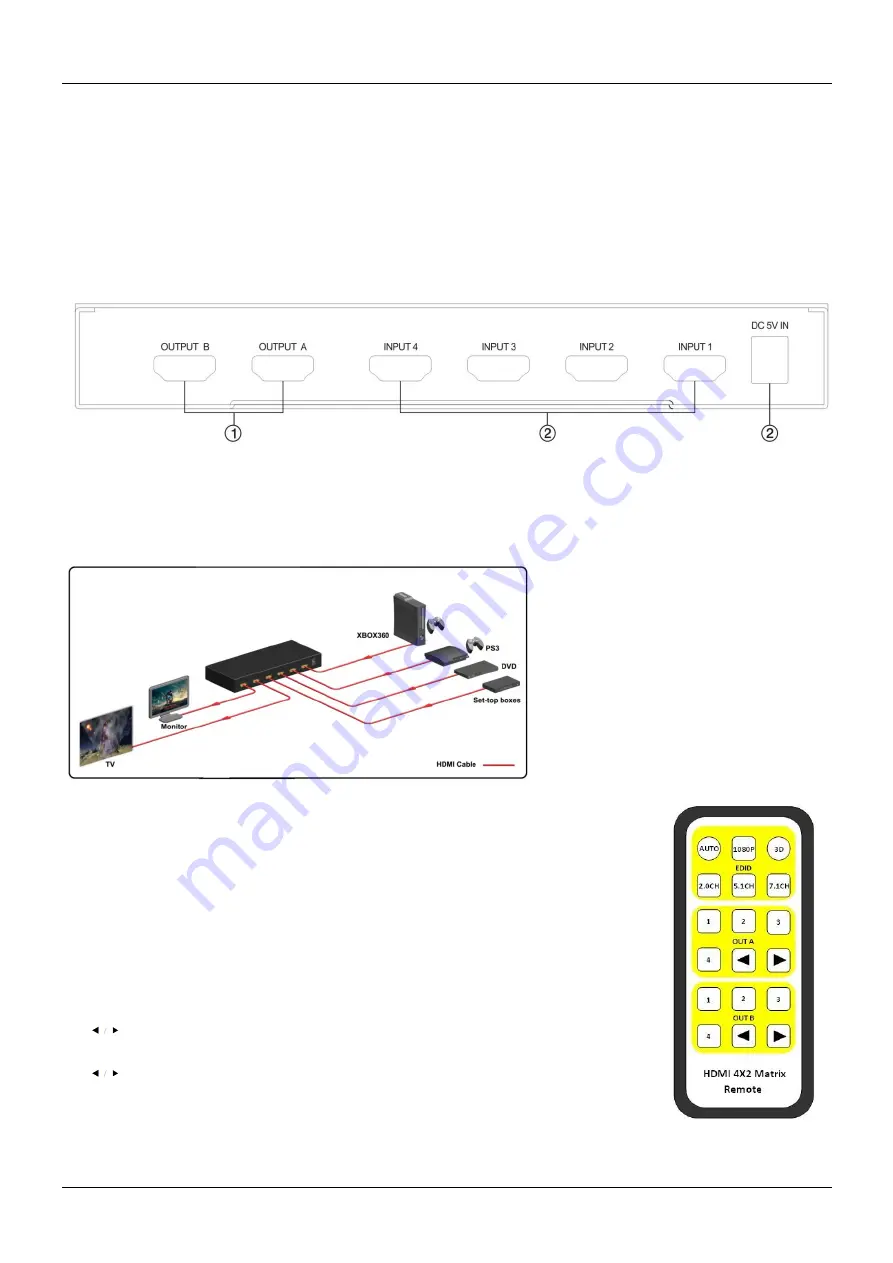
1. HDMI OUTPUT: Connect your HDTV or monitor to these ports with HDMI cables
2. HDMI INPUT: Connect your HDMI source to these ports with HDMI cables
3. DC IN: Plug the 5V DC power supply into the unit and connect the adapter to AC wall outlet
Application Example
Remote control
AUTO: Read and compare the EDID output of A and B from the source, and
then get the same parameter to display on the TV.
1080P: Force the output of A and B to 1080P
3D: Force the output of A and B to 3D HDMI
2.0CH: Force the output of A and B to 2.0CH audio
5.1CH: Force the output of A and B to 5.1CH audio
7.1CH: Force the output of A and B to 7.1CH audio
OUTA: Press buttons 1\2\3\4 to select the input source to be displayed. Press
buttons to cycle through the inputs
OUTB: Press buttons 1\2\3\4 to select the input source to be displayed. Press
buttons to cycle through the inputs
Содержание 38050
Страница 2: ......


