background image

3

/23


†

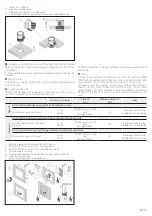
Belimo motorized version

1.  Manual closing switch

2.  Manual opening lever

3.  Position indicator

4.  Blade locking lever

Blade closing mode

Automatic closing with thermal fuse.

The WH25VPB/DPB control mechanism has a thermosensitive ele-

ment that automatically closes the blade when the temperature in 

the duct or in the room exceeds 72°C (or 95°C for the 95°C version).

To close the damper when the motor is connected, press the switch 

on the temperature sensor or cut off the power supply.

Blade opening mode

The damper must be opened when the ventilation system if 

switched off.

To open the damper with the electric motor driven actuator, provide 

power supply to the motor. Refer to the section Electrical connec-

tions  for further information.

To manually open the damper, use the handle supplied and carefully 

rotate clockwise to the 90° indicator. To hold the damper in open 

position operate on the lever indicated in figure.

During the manual opening of the damper, power must not be sup-

plied to the motor.

Position indication microswitches

The motorized versions are supplied with two microswitches to 

show the blade's position (open or closed). Refer to the section Elec-

trical connections  for further information.

Closing by remote control

If power to the motor is cut off, the blade will close.

Temperature calibration of thermosensitive element for auto-

matic damper closing

72 °C±7 °C (Standard)

95 °C±9 °C (On request).


†

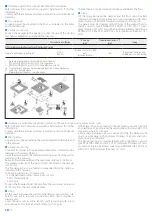
Siemens motorized version

1.  Manual closing switch

2.  Manual opening lever

3.  Screwdriver

4.  Position indicator

Blade closing mode

Automatic closing with thermal fuse.

The control mechanism has a thermosensitive element that auto-

matically closes the blade when the temperature in the duct or in 

the room exceeds 72°C (or 95°C for the 95°C version).

To close the damper when the motor is connected, press the switch 

on the temperature sensor or cut off the power supply.

Blade opening mode

The damper must be opened when the ventilation system if 

switched off.

To open the damper with the electric motor driven actuator, provide 

power supply to the motor. Refer to the section Electrical connec-

tions  for further information.

To manually open the damper, use the handle supplied and carefully 

rotate counterclockwise to the 90 °C indicator. To hold the damp-

er in open position, rotate the screw anticlockwise as shown in the 

picture.

During the manual opening of the damper, power must not be sup-

plied to the motor.

Position indication microswitches

The motorized versions are supplied with two microswitches to 

show the blade's position (open or closed). Refer to the section Elec-

trical connections  for further information.

Closing by remote control

If power to the motor is cut off, the blade will close.

Temperature calibration of thermosensitive element for auto-

matic damper closing

72 °C±7 °C (Standard)

95 °C±9 °C (On request).

Содержание WH25

Страница 1: ...esthetic or dimensional features the technical data the equipment and acces sories indicated could be subject to variations Cert N 1812 CPR 1023 EN 15650 This is a 23 page installation booklet www mp3...

Страница 2: ...opening lever 2 Manual closing button 3 Lever position when the blade is open 4 Lever position when the blade is closed Blade closing mode Automatic closing with thermal fuse The control mechanism has...

Страница 3: ...tion of thermosensitive element for auto matic damper closing 72 C 7 C Standard 95 C 9 C On request Siemens motorized version 1 Manual closing switch 2 Manual opening lever 3 Screwdriver 4 Position in...

Страница 4: ...al light wall plasterboard Wall minimum thickness 100 mm Wall rock wool density up to 80 kg m optional Mortar or plaster putty sealing ve i o W min 100 max 315 min 100 max 315 min 100 max 315 min 100...

Страница 5: ...y 140 kg m and endothermic varnish sealing ve i o W min 100 max 315 min 100 max 315 min 100 max 315 min 100 max 315 Minimum distance allowed between 2 dampers 200 mm 50 mm 50 mm 50 mm EI 120 S Install...

Страница 6: ...from the vertical light wall gypsum blocks wall Wall minimum thickness 100 mm Wall minimum density 995 kg m Mortar or plaster putty sealing ve i o W min 100 max 315 min 100 max 315 min 100 max 315 min...

Страница 7: ...microswitches included 1 Microswitch contacts for blade position 2 Magnet power supply contacts 24V DC or 48V DC Keep to the polarity for input magnet MAG Magnet power supply FCU Closed blade contact...

Страница 8: ...oswitch S6 Normally opened open damper microswitch Electrical specifications Manual and compact manual Manual with magnet Belimo motorized version Siemens motorized version Voltage and power consumpti...

Страница 9: ...command system manually execute an opening and closing test and check the correct movement of the blade and the correct functioning of the microswitches limit switches if present Together with the con...

Страница 10: ...in case of fire It is recommended not to compress flexible connectors in the in stallation phase Flexible connector must be at least 100mm long and in order that possible duct thermal expansions are b...

Страница 11: ...n within vertical rigid wall Plasterboard and rock wool 100 kg m sealing 50 75 Flexible wall EI 120 S Installation within vertical light wall plasterboard Mortar or plaster putty sealing 50 75 EI 90 S...

Страница 12: ...aling Rock wool 140 kg m and endothermic varnish sealing 200 110 Floor EI 120 S Installation remote from the floor Mortar or plaster putty sealing 200 110 EI 90 S Installation remote from the floor Mo...

Страница 13: ...unalinged to avoid alignment between the joints of the layer above and below the front plasterboards layers are fixed using long enough screws to pass through the lower plasterboard and attach to the...

Страница 14: ...ith pre formed slabs with interlocking shaped edges according to the fol lowing characteristics minimum thickness 100 or 150 mm according to the resistance class required minimum density 2200 kg m Ins...

Страница 15: ...en the wall and the damper as indicated in the table and in the drawing Fire resistance classification D hole size mm Wall minimum thickness S mm Sealing EI 60 S Installation within vertical light wal...

Страница 16: ...995 kg m EI 90 S 500 Pa From 25 to 35 circular hole 100 Plaster putty sealing 1 Plaster putty D Hole size see table above S Wall minimum thickness see table above Lp Overlap length between fire dampe...

Страница 17: ...h an internal perimeter sealant type PROMASTOP E PASTE or HILTI CFS S ACR minimum thickness of 1 mm Fire resistance classification D hole size mm Wall minimum thickness S mm Sealing Rigid wall EI 120...

Страница 18: ...rigid wall and the vertical light wall gypsum blocks wall Refer to the section Construction supports characteristics for further information Comply with the minimum distances indicated on section Mini...

Страница 19: ...he table and in the drawing Damper positioning Connect fire damper to the galvanized steel duct as indicated in the drawing with 4 screws 4 2x13 Install the damper with the mechanism facing away from...

Страница 20: ...ck wool sealing 14 Rock wool density up to 80 kg m optional 15 Metal frame Installations remote from the vertical wall with Fire Batt Weichschott sealing Refer to the section Construction supports cha...

Страница 21: ...panel 50 mm thick with 140 kg m density 2 PROMASTOP E PASTE or HILTI CFS S ACR type sealant 3 PROMASTOP E PASTE or HILTI CFS CT endothermic varnish 4 Wall indicated in the table above 5 Self drilling...

Страница 22: ...13 mm 2 PROMASTOP E PASTE or HILTI CFS S ACR type sealant 3 PROMASTOP E PASTE or HILTI CFS CT endothermic varnish 4 Screws M8 x 40 mm 5 Washers 15 x 9 mm 6 Angle connector 105 X 105 X 90 mm 7 Washers...

Страница 23: ...From 50 x 50 To 70 x 70 square hole 90 Mortar or plaster putty with infill plasterboard thickness 20 mm 1 Plasterboard thickness 20 mm 2 Plasterboard arch infill thickness 20 mm 3 Mortar M 10 EN998 2...

Отзывы: