–
23
–
OPERATION
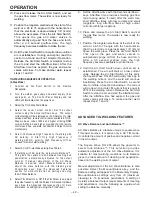
50/60Hz MACHINES - (Codes 10024 thru 10026 & 10134)
Square Wave TIG 255 machines rated for 50/60Hz
operation provide 2 amps of 220 volt AC power at a
continental European (Schuko) type receptacle,
located on the lower case back of the machine. This
circuit is protected from shorts and overloading by a 2
amp circuit breaker, located above the receptacle.
The auxiliary circuit is intended for running water
coolers whose current draw is within the 2 amp rating
of the receptacle. Note that some types of equipment,
especially pumps and motors, have starting currents
which are significantly higher than their running
currents. These higher starting currents may cause
the circuit breaker to open. If this situation occurs, the
user should refrain from using the Square Wave TIG
255 auxiliary for that equipment.
OVERLOAD PROTECTION
This welder has thermostatic protection from
excessive duty cycles, overloads, loss of cooling, and
high ambient temperatures. When the welder is
subjected to an overload or loss of cooling, a
thermostat will open. This condition will be indicated
by the illumination of the yellow Thermostatic
Protection Light on the case front (see Figure 2).
Also, the Display will be blank, and all of the red
Control Panel LEDS will be out. The fan will continue
to run to cool the power source. No welding is
possible until the machine is allowed to cool and the
Thermostatic Protection Light goes out.
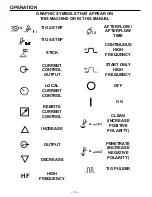
TIG Pulser
The Square Wave TIG 255 contains a unique TIG
Pulser circuit. The TIG Pulser has On/Off selections,
as well as adjustments for Pulses Per Second
Up/Down. When the Pulser is turned On, or when the
Pulses Per Second are adjusted, the pulse frequency is
shown in the Momentary Display. It can be varied
from 0.5 Hz to 10 Hz in 0.5 Hz increments. (One
Hertz {Hz} is equivalent to one pulse per second.)
The background current (the welding current at the
low point of the pulse cycle) is automatically adjusted
from 40% to 60% of the peak current by the Square
Wave TIG 255. The duty cycle (the ratio between that
time spent at the peak current vs, the time spent at
the background current) is fixed at 50%.
STICK WELDING
1.
Remove the amptrol or Arc Start Switch from the
Remote Receptacle.
2.
Turn the welder on. The Control Panel Display
and red LEDS will illuminate when the power is on.
3.
Select Stick Mode and Local Current Control. Set
the output current using the Amps Up/Down keys.
The output current setting will be displayed on the
Ammeter. No other functions or adjustments
operate in the Stick Mode.
4.
Select DC+, AC or DC- electrode polarity.
AUXILIARY POWER
ALL MACHINES
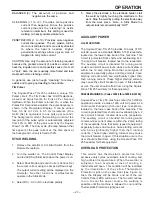
The Square Wave TIG 255 provides 10 amps of 115
volt AC power at a standard NEMA 5-15R receptacle,
located on the lower case back of the machine. This
circuit is protected from shorts and overloading by a
10 amp circuit breaker, located next to the receptacle.
The auxiliary circuit is intended for running water
coolers and small power tools, whose current draw is
within the 10 amp rating. Note that some types of
equipment, especially pumps and large motors, have
starting currents which are significantly higher than
their running current. These higher starting currents
may cause the circuit breaker to open. If this situation
occurs, the user should refrain from using the Square
Wave TIG 255 auxiliary for that equipment.
BALANCED (0): The amounts of positive and
negative are the same.
CLEANING (+1 to +5): Provides more positive
current than negative. Since the positive
current produces the “cleaning” or oxide
removal on aluminum, this setting is used for
welding on heavily oxidized aluminum.
PENETRATION (-1 to -10): Provides more negative
current than positive. The arc plasma will be
more concentrated and more easily directed
to where the heat is needed. Higher
penetration settings allow a given size of
tungsten to carry more current.
CAUTION: Use only the amount of cleaning required
because the greater amount of positive current will
heat the tungsten more and possibly cause it to melt
or “spit”. Also, the arc is usually more flared and less
stable with more cleaning current.
In general, use just enough “cleaning” to remove
oxides and to give good wetting to the puddle.
5.
Clamp the electrode in the electrode holder, start
the weld by lightly touching the electrode to the
work. Stop the weld by pulling the electrode away
from the work piece. Note, in Stick Mode the
output studs remain electrically “HOT”.

