background image

3. Instructions SIM card & TF card 

  The SIM card, memory card and the card connectors on the device are 

precision electronic components.  When  inserting  the  SIM  card  or 

memory card into the card connectors, you much insert after aligning 

to the position accurately in case of damaging the components. When 

removing the SIM card or memory card, please slightly push the upper 

edge of the card to loosen the card, then pull it out.   

  The memory card will get heat after long time working. It is a normal 

phenomenon. 


If you don’t use SIM card correctly, or cutting off the power or pulling 

out the SIM card during the operation, the network will be interrupted 

automatically.   


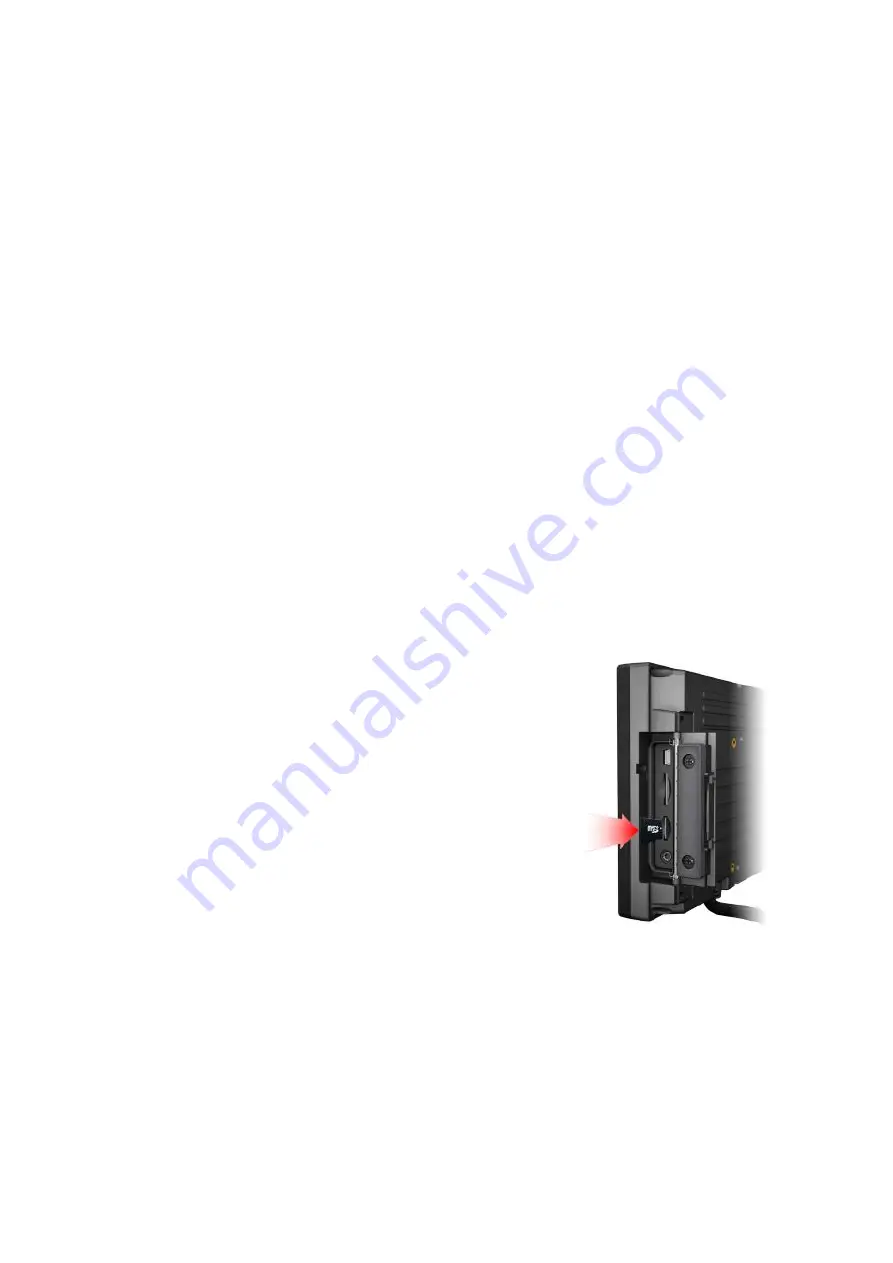
Insert the memory card as shown in below picture 


  Find  the  location  of  the  SIM  card  or  memory 

card slot on the unit, then push the  SIM card 

or  Micro  SD  card  with  the  part  of  the  metal 

contacts  outward  until  it  snaps  into  the 

location.   

  Do not force to Insert the SIM card or memory 

card    to avoid damaging the card. 

  Please do NOT insert micro SD card into SIM 

card slot  improperly,  otherwise, the micro SD 

will be very difficult to be taken out, or may even be damaged.   


Содержание PC-7106PRO

Страница 1: ...Embedded Computer User Manual...

Страница 2: ...creen is very easy to be scratched Do not use any sharp object to touch the screen To clean the outside fuselage please turn off the power unplug the power cord scrub wipe with slightly damp soft clot...

Страница 3: ...TF card 13 4 MENU 14 4 1 Gestures 14 4 2 Delete 14 4 3 Icon bar 15 4 4 Applied 16 4 5 Introduction 17 4 5 1 Power On Off and Dormancy Wake 17 4 5 2 Manage device power supply 17 4 5 3 Device is equip...

Страница 4: ...mply with IP 64 Waterproof Standard Android 9 0 operation system Micro SD TF card storage making the data reading reliable and daily expansion convenient Speaker Microphone 1 2 Optional Functions GPS...

Страница 5: ...264 Sensors Gyroscope accelerometer Compass DISPLAY LCD 7 inch IPS 800x480 resolution 450 nit Touch Capacitive touch screen INTERFACES LAN 1000M GPIO X 8 Software freely define input and output COM R...

Страница 6: ...36V with built in battery Power Consumption 10W Battery optional Built in 2200mAh OTHERS Speaker X1 Dimension 220x132x36 5mm Weight 740g Environment Dust resistance test IP6x Water resistance test IPx...

Страница 7: ...1 4 Structure Function Explanation...

Страница 8: ...optional RS232 or GPS for optional External GPS optional GPS function only 5 COM 3 serial port RS232 RS485 6 USB host port For data transmission 7 LAN port For network connection 8 Power Connect with...

Страница 9: ...g time working It is a normal phenomenon If you don t use SIM card correctly or cutting off the power or pulling out the SIM card during the operation the network will be interrupted automatically Ins...

Страница 10: ...4 MENU 4 1 Gestures Click Double Click and Slide Long press and Drag 4 2 Delete Long press the application icon and drag to the Home screen then drop to the recycle lift up to delete this software...

Страница 11: ...ilent state no notification is displayed and no notification prompt is issued Auto rotation The display is currently rotating automatically power saving mode Power saving mode can be turned on only wh...

Страница 12: ...Calendar In the calendar you can view the date or you can add the schedule Setting It can be set up according to individual requirements Clock Check the time and set the alarm timer and stopwatch Add...

Страница 13: ...d return it back to the factory for repair 4 5 2 Manage device power supply 1 Power on Press the power button start the system after running the LOGO display 2 Power off Long press the power button fo...

Страница 14: ...the following Turn down the display brightness Set a short time to go into sleep mode Turn off the monitor when not in use Not applicable to the application To check the battery usage of each applica...

Страница 15: ...Turn on the switch after enter the system as shown in the figure below...

Страница 16: ...CC Setting Path ACC settings located in ACC Settings under the category of System in the Settings of Android OS Please refer to Figure 2 1 2 2 and 2 3 Clock go to Settings and select ACC Settings as s...

Страница 17: ...controlled by ACC Mark 3 Click to pop up dialog box as shown in Figure 2 6 to edit the screen off delay time after ACC outage Mark 4 The current screen off delay time after ACC outage Mark 5 The switc...

Страница 18: ...IO 4 7 1 GPIO Tail Lines Instruction Regarding the definition diagram of GPIO interface please see the details in Chapter 2 Extended Cable Definition 4 7 2 GPIO Typical Connection The following figure...

Страница 19: ...e You can choose GPIO as the input state or output state As shown in figure 1 Satate HIGH of high level LOW of low level Operation Read whether the current mode is high or low displayed in the status...

Страница 20: ...ndard accessories 1 Extended cable 1piece 2 DC12V adapter 1piece 3 Mini USB cable 1piece 4 User manual 1copy Optional accessories 1 75mm VESA rail slot 1piece 2 Mounting bracket 1piece 3 2200mAh Li io...

Страница 21: ...f power source Screen Problem 1 No picture on screen 2 The application reaction time is too long and cannot be activated when clicked 3 The image appears delay or still when switching Please restart y...

Отзывы: