background image

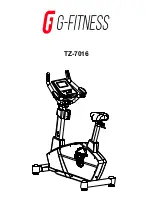
Herzlichen Glückwunsch ...

und willkommen bei 

Die folgende Teileliste und schrittweise Montageanleitung dienen dazu, den Aufbau dieser Heimtrainer so einfach
wie möglich zu machen.

Bitte lesen Sie die nachfolgenden Informationen sorgfältig, bevor Sie einen Standort für den Heimtrainer wählen
und mit der Montage beginnen.

Содержание Classic Series Upright Lifecycle

Страница 1: ...Classic Series Upright Lifecycle Exercise Bike Assembly Instructions...

Страница 2: ...ion Listing and the step by step assembly procedures have been assembled to make the set up of the Exercise Bike as quick and easy as possible Please take special note of the following important point...

Страница 3: ...of return DO read the entire Operation Manual prior to attempting to operate this machine as this is essential for proper use NE PAS placer le v lo d exercice allong Lifecycle l ext rieur pr s d une p...

Страница 4: ...n Head Screw Qty 12 8 18 x 5 8 3 Accessory Tray Qty 1 4 Console Assembly Qty 1 5 Top Cover Qty 1 6 Bottom Cover Qty 1 7 Left Seat Post Shroud Qty 1 8 Right Seat Post Shroud Qty 1 9 Left Pedal Strap Qt...

Страница 5: ...R CABLE and COAXIAL CABLE have been pre installed Please read both the product assembly instructions and Attachable TV System assembly instructions included with the Life Fitness Attachable TV System...

Страница 6: ...nter of the UPPER CONSOLE SUPPORT TUBE A Slide the POLAR RECEIVER SLEEVE 14 over the POLAR RECEIVER covering the entire POLAR RECEIVER 7 Locate the TOP COVER 5 Slide the BOTTOM COVER 6 upward toward t...

Страница 7: ...LEFT SEAT POST COVER and pivot it forward to meet the USER LEFT SEAT POST COVER enclosing the SEAT ADJUSTMENT LEVER Secure the SEAT POST COVERS together using one SCREW 12 12 Locate the RIGHT PEDAL ST...

Страница 8: ...eration Manual before using the Exercise Bike Before attempting to operate your Exercise Bike it is imperative that you familiarize yourself with the contents of the Operation Manual If your Exercise...

Страница 9: ...Classic Series Lifecycle B Bi ic ci ic cl le et ta as s v ve er rt ti ic ca al le es s p pa ar ra a e ej je er rc ci ic ci io os s I N S T R U C C I O N E S D E M O N TA J E...

Страница 10: ...y los procedimientos de instalaci n paso a paso se han organi zado para facilitar y agilizar el montaje de las bicicletas para ejercicios Preste especial atenci n a los siguientes puntos importantes...

Страница 11: ...cia entre centros inferior a 42 in 107 cm para evitar la interferencia diafon a entre los monitores de frecuencia card aca MANTENGA el rea alrededor de la bicicleta para ejercicios libre de obstruccio...

Страница 12: ...8 3 Bandeja para accesorios Cant 1 4 Conjunto de consola Cant 1 5 Cubierta superior Cant 1 6 Cubierta inferior Cant 1 7 Protector izquierdo de columna del asiento Cant 1 Descripci n de las piezas 8 Pr...

Страница 13: ...talado de ante mano un CABLE DE SUMINISTRO y un CABLE COAXIAL Antes de proceder al montaje lea las instrucciones de montaje de este producto y las instrucciones de montaje del sistema de televisi n mo...

Страница 14: ...entro del TUBO SUPERIOR DE SOPORTE DE LA CONSOLA A Deslice la FUNDA DEL RECEPTOR POLAR n 14 sobre el RECEPTOR POLAR cubri ndolo totalmente 7 Encuentre la CUBIERTA SUPERIOR n 5 Deslice la CUBIERTA INFE...

Страница 15: ...delante para que encuentre la CUBIERTA IZQUIERDA DE LA COLUMNA DEL ASIENTO encerrando la PALANCA DE AJUSTE DEL ASIENTO Asegure las CUBIER TAS DE LA COLUMNA DEL ASIENTO uni ndolas con un TORNILLO n 15...

Страница 16: ...54 pulg 137 cm Peso 107 lb 49 kg Lista De Verificaci n Antes Del Funcionamiento Compruebe que los tornillos de soporte de la consola est n bien apretados Compruebe que la bicicleta para ejercicios se...

Страница 17: ...Classic Series Lifecycle Upright Heimtrainer M O N TA G E A N L E I T U N G...

Страница 18: ...ileliste und schrittweise Montageanleitung dienen dazu den Aufbau dieser Heimtrainer so einfach wie m glich zu machen Bitte lesen Sie die nachfolgenden Informationen sorgf ltig bevor Sie einen Standor...

Страница 19: ...enst Den Heimtrainer mit MINDESTENS 30 in 76 cm Abstand zu einem Fernsehger t aufstellen Mehrere Heimtrainer mit MINDESTENS 42 in 107 cm Abstand aufstellen um St rungen berlagerung zwischen Herzfreque...

Страница 20: ...euzschlitz Flachkopfschraube 12 Nr 8 18 x 5 8 in 3 Ablage 1 4 Display Konsole 1 5 Obere Abdeckung 1 6 Untere Abdeckung 1 7 Linke Sitzstangenverkleidung 1 BESCHREIBUNG DER TEILE 8 Rechte Sitzstangenver...

Страница 21: ...riert und bereits mit einem NETZ und KOAXIALKABEL ausgestattet Vor dem Zusammenbau die Montageanleitung des Ger ts und des Verkn pfbares Fernsehapparat System im Lieferumfang des Life Fitness Verkn pf...

Страница 22: ...nbringen Die SCHRAUBEN auf ein Drehmoment von 15 20 ft lbs 20 27 Nm anziehen 6 Den POLAR EMPF NGER 13 in die entsprechende Buchse in der Mitte der OBEREN KONSOLEN ST TZSTANGE A einf hren Die MANSCHETT...

Страница 23: ...ITZSTANGEN VERKLEIDUNG 8 in die entsprechenden Schlitze der LINKEN SITZSTANGENVERKLEIDUNG einrasten und nach vorn schwenken damit sie an der LINKEN SITZS TANGENVERKLEIDUNG die den SITZSTELLHEBEL verde...

Страница 24: ...DBUCH beschriebenen Weise funktioniert wenden Sie sich bitte an das im Benutzerhandbuch angegebene n chste Life Fitness Service Center Ger teabmessungen L nge 48 in 122 cm Breite 24 in 61 cm H he 54 i...

Страница 25: ...Classic Series Lifecycle Cyclette verticali I S T R U Z I O N I D I A S S E M B L A G G I O...

Страница 26: ...mponenti e le procedure dettagliate di assemblaggio sono stati redatti per rendere pi facile e veloce possibile l installazione della cyclette Prima di scegliere il punto in cui sistemare la cyclette...

Страница 27: ...tre cyclette affiancate se non vi sono almeno 42 pollici 107 cm dal punto centrale di una cyclette all alto per evitare eventuali interferenze cross talk tra i dispositivi di monitoraggio della cardio...

Страница 28: ...i pollice 3 Portaccessori Quantit 1 4 Gruppo della console Quantit 1 5 Coperchio superiore Quantit 1 6 Coperchio inferiore Quantit 1 7 Protezione sinistra colonna Quantit 1 di supporto sedile DESCRIZI...

Страница 29: ...CAVO COASSIALE sono stati preinstallati Prima di procedere all assemblaggio leggere sia le istruzioni per l assemblag gio del prodotto che le istruzioni per la predisposizione al sistema attaccabile d...

Страница 30: ...IORE DI SOSTEGNO DELLA CONSOLE A usando quattro BUL LONI DI MONTAGGIO n 1 Serrare le VITI a 15 20 Ft lb 20 27 N m 6 Inserire il RICEVITORE POLAR n 13 nell apposita presa si tuata al centro del TUBO SU...

Страница 31: ...e della PROTEZIONE DESTRA DELLA COLONNA DI SUPPORTO SEDILE n 8 alle cor rispondenti fessure della PROTEZIONE SINISTRA e ruo tarla in avanti fino a farla combaciare con la PRO TEZIONE SINISTRA richiude...

Страница 32: ...iona nel modo descritto nel MANUALE DI FUNZIONAMENTO contattare il centro assistenza Life Fitness pi vicino tra quelli elencati nel manuale stesso Dimensioni fisiche Lunghezza 48 in 122 cm Larghezza 2...

Страница 33: ...Classic Series Lifecycle hometrainers A A N W I J Z I N G E N V O O R M O N TA G E...

Страница 34: ...ijst en de stapsgewijze montageprocedure zijn samengesteld om de montage van deze hometrainers zo snel en eenvoudig mogelijk te laten verlopen Wilt u speciale aandacht aan volgende belangrijke punten...

Страница 35: ...er dan minimaal 42 inches 107 cm van middelpunt tot middelpunt van elkaar om storing in de hartslagmonitors te voorkomen Houd de ruimte rondom de oefenfiets VRIJ van obstakels met inbegrip van muren e...

Страница 36: ...8 3 Accessoirehouder Aantal 1 4 Bedieningspaneel Aantal 1 5 Bovenste afdekkap Aantal 1 6 Onderste afdekkap Aantal 1 7 Linker zadelbuis afdekkap Aantal 1 BESCHRIJVING VAN ONDERDELEN 8 Rechter zadelbuis...

Страница 37: ...sloten Er zijn een VOEDINGSKABEL en een COAXIALE kabel in ge nstalleerd Lees de montage instructies voor het product en die voor de bevestigbaar TVSYSTEEM bij het Life Fitness bevestigbaar TVSYSTEEM g...

Страница 38: ...BUIS A bevindt Schuif de HULS VAN DE POLAR ONTVANGER nr 14 over de POLAR ONTVANGER zodat de gehele POLAR ONTVANGER bedekt is 7 Zoek de BOVENSTE AFDEKKAP nr 5 op Schuif de ONDERSTE AFDEKKAP nr 6 omhoog...

Страница 39: ...KAP en draai hem naar voren zodat hij tegen de LIN KER ZADELBUIS AFDEKKAP aankomt en de ZADEL AFSTELHENDEL bedekt Bevestig de ZADELBUISAF DEKKAPPEN aan elkaar met n SCHROEF nr 15 12 Zoek de RECHTER PE...

Страница 40: ...reageert zoals beschreven in de GEBRUIKERSHANDLEIDING neem dan contact op met het dichtstbijzijnde servicecentrum van Life Fitness waarvan de lijst is opgenomen in de gebruikershandleiding Afmetingen...

Страница 41: ...Classic Series Lifecycle V V l lo os s s st ta at ti io on nn na ai ir re es s v ve er rt ti ic ca au ux x N O T I C E D E M O N TA G E...

Страница 42: ...structions d installation d taill es suivantes sont fournies afin de rendre l installation de ces v los stationnaires aussi facile et rapide que possible Portez une attention particuli re aux points s...

Страница 43: ...s 42 po 107 cm doit tre observ entre les parties centrales de deux appareils afin d viter les interf rences entre les contr leurs de fr quence cardiaque MAINTENEZ la zone autour du v lo d exercice exe...

Страница 44: ...n 8 18 x 5 8 po 3 Plateau d accessoires Qt 1 4 Console Qt 1 5 Capot sup rieur Qt 1 6 Capot inf rieur Qt 1 7 Protection de tige de selle gauche Qt 1 DESCRIPTION DES PI CES 8 Protection de tige de selle...

Страница 45: ...ALIMENTATION et un C BLE COAXIAL ont t pr install s Veuillez lire les instructions de montage du produit et les instructions d installation d t l viseur amovible livr es avec le syst me de t l viseur...

Страница 46: ...n au centre du TUBE SUP RIEUR DE MAIN TIEN DE LA CONSOLE A Faites glisser l ENVELOPPE DU R CEPTEUR POLAR n 14 sur le R CEPTEUR POLAR afin de le recouvrir compl tement 7 Rep rez le CAPOT SUP RIEUR n 5...

Страница 47: ...CLE DE TIGE DE SELLE GAUCHE et faites pivoter vers l avant pour renfermer la MANETTE DE R GLAGE DE LA SELLE Fixez les COUVERCLES DE TIGE DE SELLE ensemble au moyen d une VIS n 15 12 Rep rez la COURROI...

Страница 48: ...on int gralit avant d utiliser le v lo d exercice stationaire Avant d essayer de faire fonctionner le v lo stationnaire il est indispensable de vous familiariser avec le contenu du manuel de l utilisa...

Отзывы: