3
2
*Resusci® Anne™ is a trademark of Laerdal
Medical Corporation.
Attaching the Head to the Manikin:
As explained earlier, NASCO’s Airway
Management Trainer has the ability to
be attached to both
CPARLENE
®
and any
of the Resusci® Anne™* brand mani-
kins. To attach the Airway Management
Trainer head to the above manikins, you
must first remove the lung and stomach
bags if they are attached to the trainer.
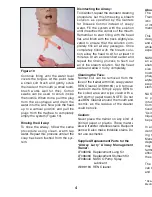
Next, turn the head face down and begin
inserting it at the shoulders. Tip the head
upward slightly until the two keyways on
the back of the neck slide under the ring
and into the top of the torso (Figure 5).
Now match the single keyway on the
neck front up to the slot on the backside
of the torso, and push the head down
until it snaps into place. Rotate the head
back around so that it is facing up and
in the correct position.
Cleaning and Maintenance:
To clean the Airway Management
Trainer you will first need to remove
the head from the stand. Next, take
the trainer to an area with a sink and
open counter space. Using the 3 red
caps supplied, plug off the esophagus
and the bronchi (Figure 9).
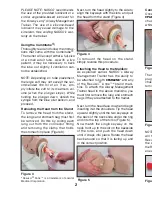
Next, turn the head slightly to the side to
align the keyways with the slots, and pull
the head from the stand (Figure 4).
Figure 9
Figure 8
Figure 7
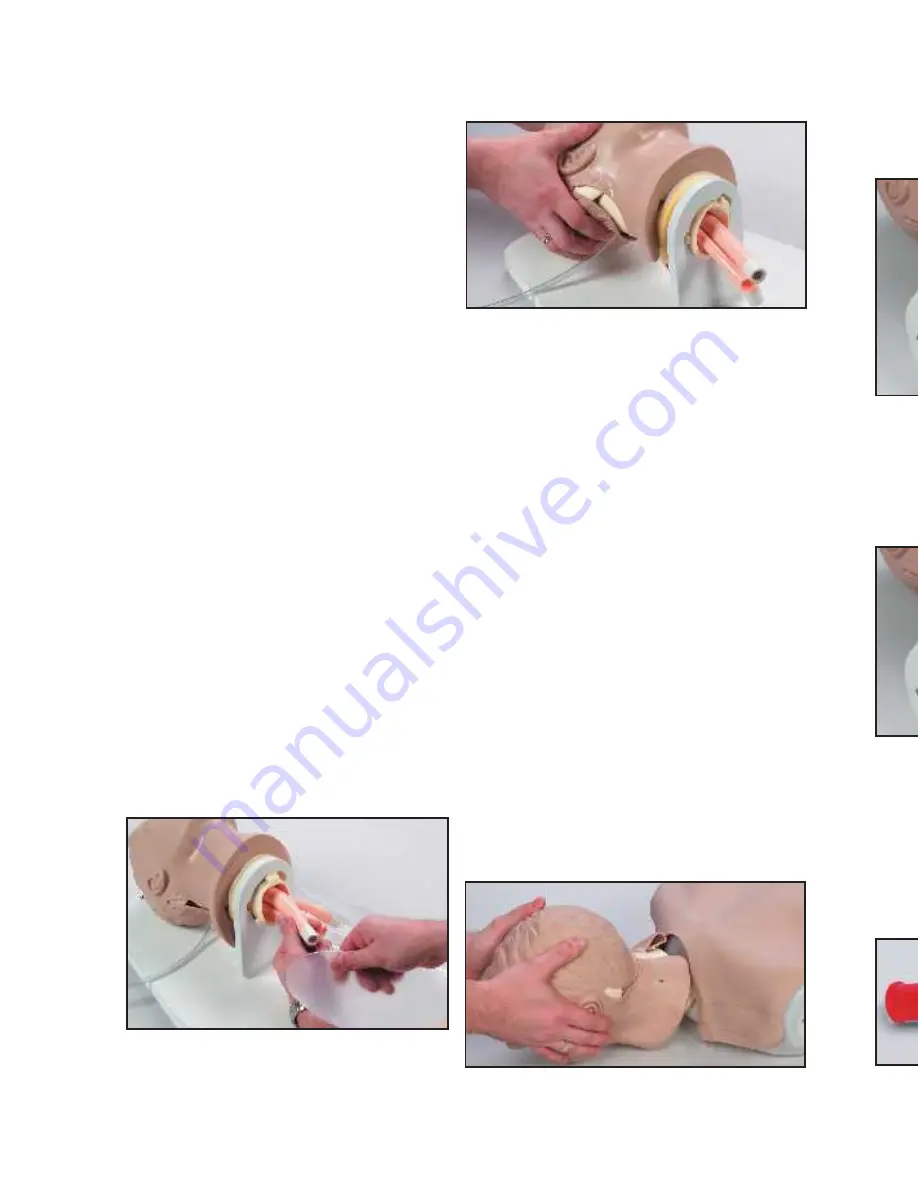
Figure 3
Figure 4
Figure 5
Using the Combitube®:
Thoroughly read and follow the instruc-
tions that come with the Combitube®.
The trainer will accept either a full-size
or a small adult tube. As with a live
patient, it may be necessary to back
the tube out slightly if ventilation can-
not be established.
NOTE: Depending on tube placement,
the large cuff may not accept the rec-
ommended 100 ml of air. If so, sim-
ply inflate the cuff to its maximum vol-
ume (when the plunger stops). While
holding the plunger down, detach the
syringe from the blue pilot balloon, and
proceed.
Removing the Head from the Stand:
To remove the head from the stand,
the lungs and stomach bag must first
be removed. Do this by sliding each
lung out from the connector fitting
and removing the clamp that holds
the stomach in place (Figure 3).
Then use the provided red cap plugs to
plug the esophagus and the left bron-
chus (Figure 7). This will ensure the sys-
tem is sealed and operational.
Figure 6
Connecting the Airways:
Once the head is in place, connect the
CPARLENE
®
lung bag to the right bron-
chus by sliding the cap plug over the
white adapter in the bronchus (Figure 6).
Remove the Resusci
®
Anne™* head
and the connected section of corru-
gated tubing down to the valve. Install
the Airway Management Trainer head
and hook it up to the lung system with
the adapter piece. Place the red cap
end over the white fitting of the right
bronchus and hook the other end to
the lung bag valve nipple (where the
previous corrugated tubing had been
connected).
To remove the head from the manikin,
reverse the attachment procedure.
PLEASE NOTE: NASCO recommends
the use of the provided lubricant or a
similar vegetable-based lubricant for
the “Airway Larry” Airway Management
Trainer. The use of a silicone-based
lubricant may cause damage to the
simulator, thus voiding NASCO’s war-
ranty on the trainer.
To remount the head on the stand,
simply reverse this procedure.
NOTE: Our Airway Management Trainer
will fit on all models of
CPARLENE
®
and
Resusci
®
Anne™* manikins. To adapt
the Airway Management Trainer head to
the Resusci
®
Anne™*, we have included
an adapter piece
(Figure 8).
Stabilize the head on the counter
face-up (towels work well for this)
with the plugged tubes hanging over
the sink. Carefully pour warm soapy
water (a mild dish soap works best)
into the mouth until the water level
reaches halfway up the tongue.
Now tilt the head back and bring
the neck up 3" off the countertop.


