


26
ENGLISH
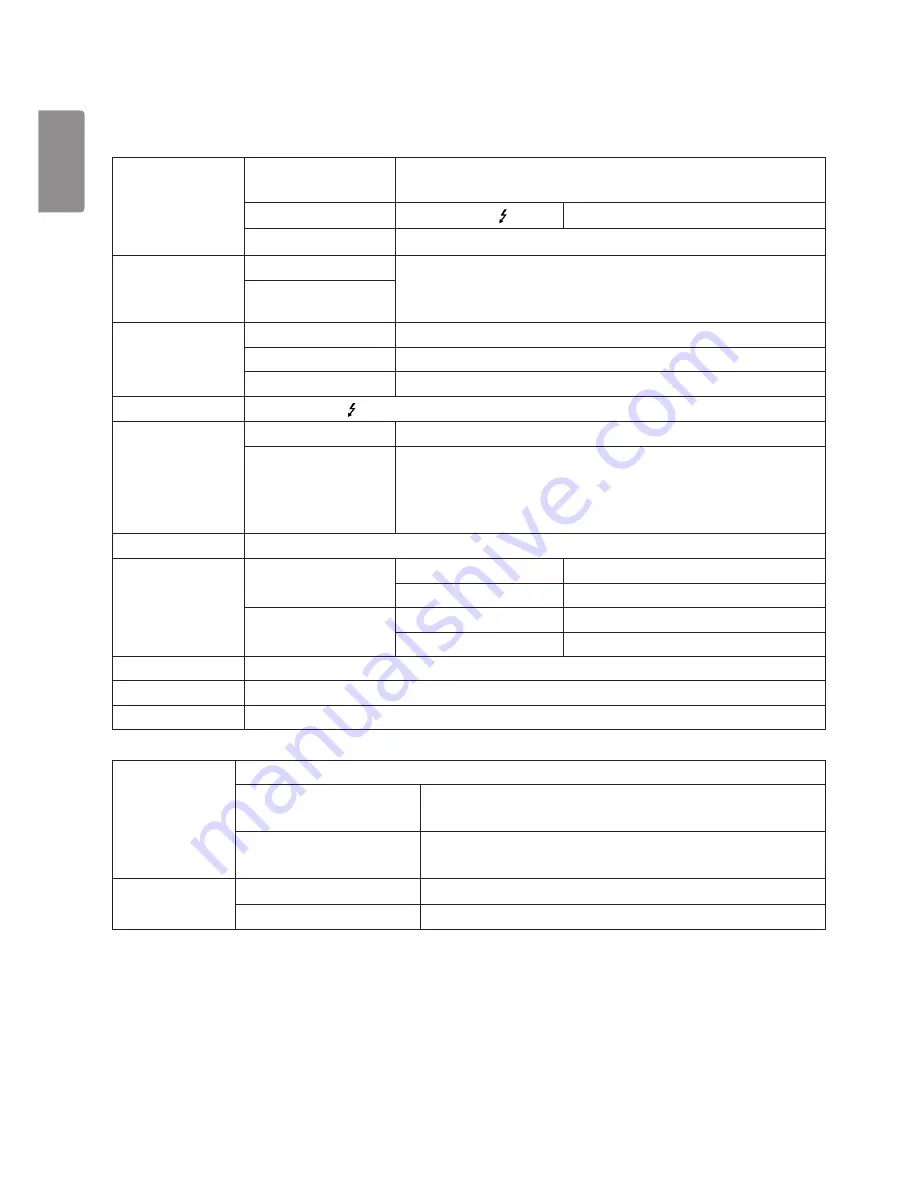
PRODUCT SPECIFICATION
The product specifications below may be changed without prior notice due to upgrade of product functions.
LCD Screen
Type
TFT (Thin Film Transistor)
LCD (Liquid Crystal Display) Screen
Color Depth
Thunderbolt
TM
3 ( )
10-bit color is supported.
Pixel Pitch
0.11625 mm x 0.11625 mm
Resolution
Max Resolution
5120 x 2880 @ 60 Hz
Recommended
Resolution
Video Signal
Horizontal Frequency
88 kHz to 178 kHz
Vertical Frequency
48 Hz to 60 Hz
Synchronization
Separate Sync.
Input Connector
Thunderbolt
TM
3 ( ), USB-C expansion x 3
Power Sources
Power Rating
100 - 240 V~ 50/60 Hz 2.0 A
Power Consumption
(Typical)
On Mode: 140 W (Typical, USB excluded) (Outgoing condition)*
45.65 W (ENERGY STAR® standard)**
Sleep Mode: ≤ 1.2 W
Off Mode: ≤ 0.5 W (No cable connection to host and USB expansion)
Stand Angle
Forward/Backward: -5° to 25° (Head)
Environmental
Conditions
Operating Conditions
Temperature
0 °C to 40 °C (32 °F to 104 °F)
Humidity
Less than 80 %
Storing Conditions
Temperature
-20 °C to 60 °C (-4 °F to 140 °F)
Humidity
Less than 85 %
Speaker
Stereo Speakers
Camera
Built-in USB Camera
Microphone
Built-in USB Microphone
Dimensions
Monitor Size (Width x Height x Depth)
With Stand
625.6 x 464.4 x 239.9 (mm)
(24.6 x 18.2 x 9.4 (inches))
Without Stand
625.6 x 375.1 x 53.8 (mm)
(24.6 x 14.7 x 2.1 (inches))
Weight (Without
Packaging)
With Stand
8.5 (18.7) (kg (lbs))
Without Stand
6.4 (14.1) (kg (lbs))
* The On Mode of Power Consumption is measured with LGE test standard. (Full White pattern, Maximum resolution)
** The Power Consumption level can be different by operating condition and monitor setting.
** The On Mode of Power Consumption is measured with ENERGY STAR® test standard.


