8
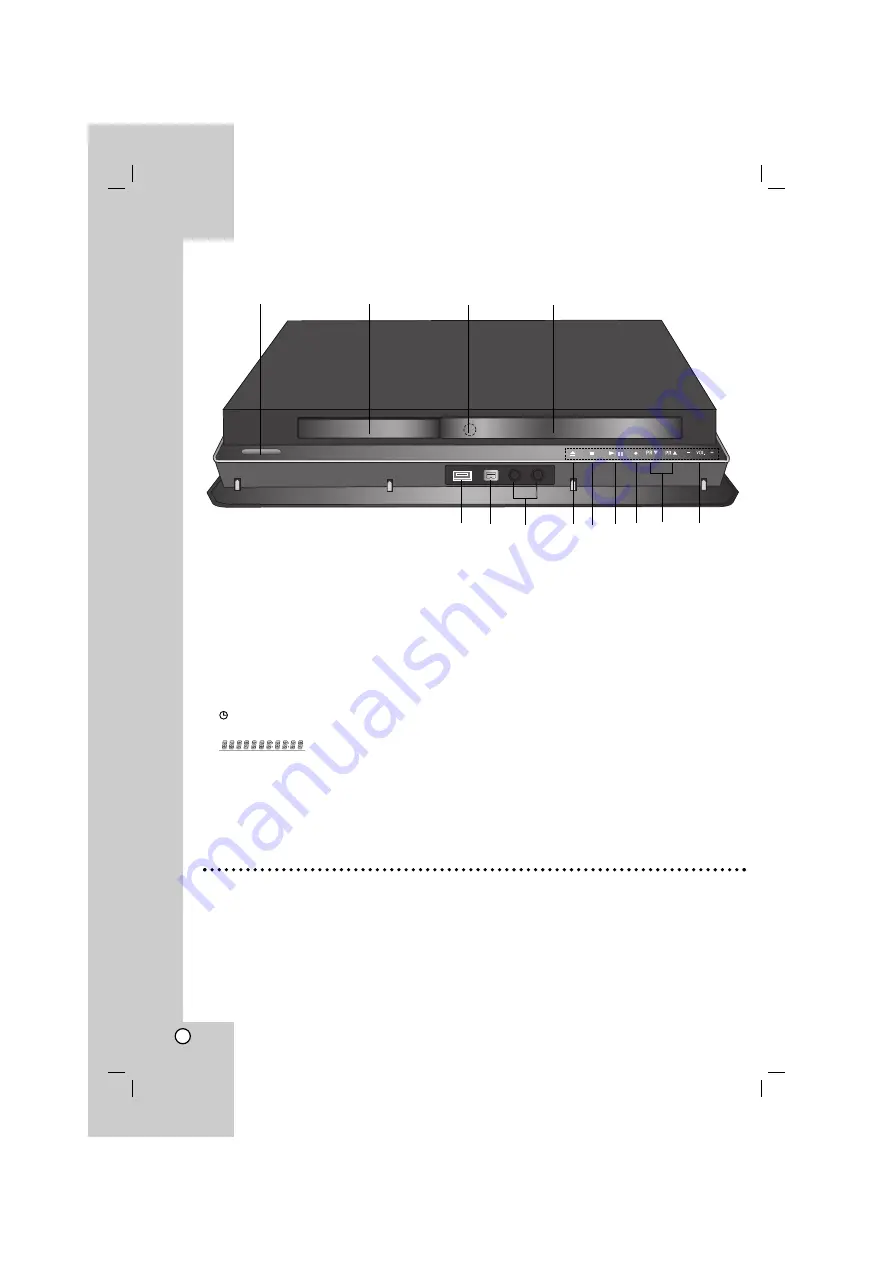
Front Panel
a
POWER
Switches the unit ON or OFF.
b
Disc Tray
Insert a disc here.
c
Remote Sensor
Point the recorder remote control here.
d
Display window
Shows the current status of the recorder.
REC:
The recorder is recording.
DVD:
The recorder is DVD mode.
:
Indicates when the recorder is in timer
recording or a timer recording is programmed.
:
Indicates clock, total playing
time, elapsed time, title number, volume,
chapter/track number, channel, etc.
e
USB
Connect it to a USB port of multimedia (USB
memory etc.)
f
DV IN
Connect the DV output of a digital camcorder.
g
MIC 1/MIC 2
Connect a microphone to MIC 1 or MIC 2 or to
both sockets.
h
Z
(OPEN/CLOSE)
Opens or closes the disc tray.
i
x
(STOP)
Stops playback or recording.
j
B
/
X
(PLAY / PAUSE)
Starts playback.
Pause playback or recording temporarily,
press again to exit pause mode.
k
z
(REC)
Starts recording. Press repeatedly to set the
recording time.
l
PR
V/v
- Scan up or down through memorized channels.
-
Selects menu options.
m
MICROPHONE VOLUME CONTROL
Tap
+
to increase microphone sound level, or tap
-
to decrease microphone sound level.
a
b
c
d
e
f
g
h i j k
l
m
Touch Pad Operation
The buttons from
h
to
m
are touch pad buttons that
are operated with brief touch.
When you operate the button on the touch pad, you
should follow the directions as below.
1. Touch any botton on the touch pad. The LEDs on
the touch pad light up.
2. Touch the button you want to operate. The LEDs
on the touch pad will be off in 10 seconds after the
operation.
Precautions in using the touch pad
The LEDs on the touch pad lights only when the
power of the unit is on.
Use the touch pad with clean and dry hands.
Do not press the button on the touch pad with too
much force.
Do not touch the button on the touch pad with any
conductive material such as metallic object.
It may cause a malfunction.
Содержание RKS-7000
Страница 60: ...P NO MFL38637192 ...


