background image

18

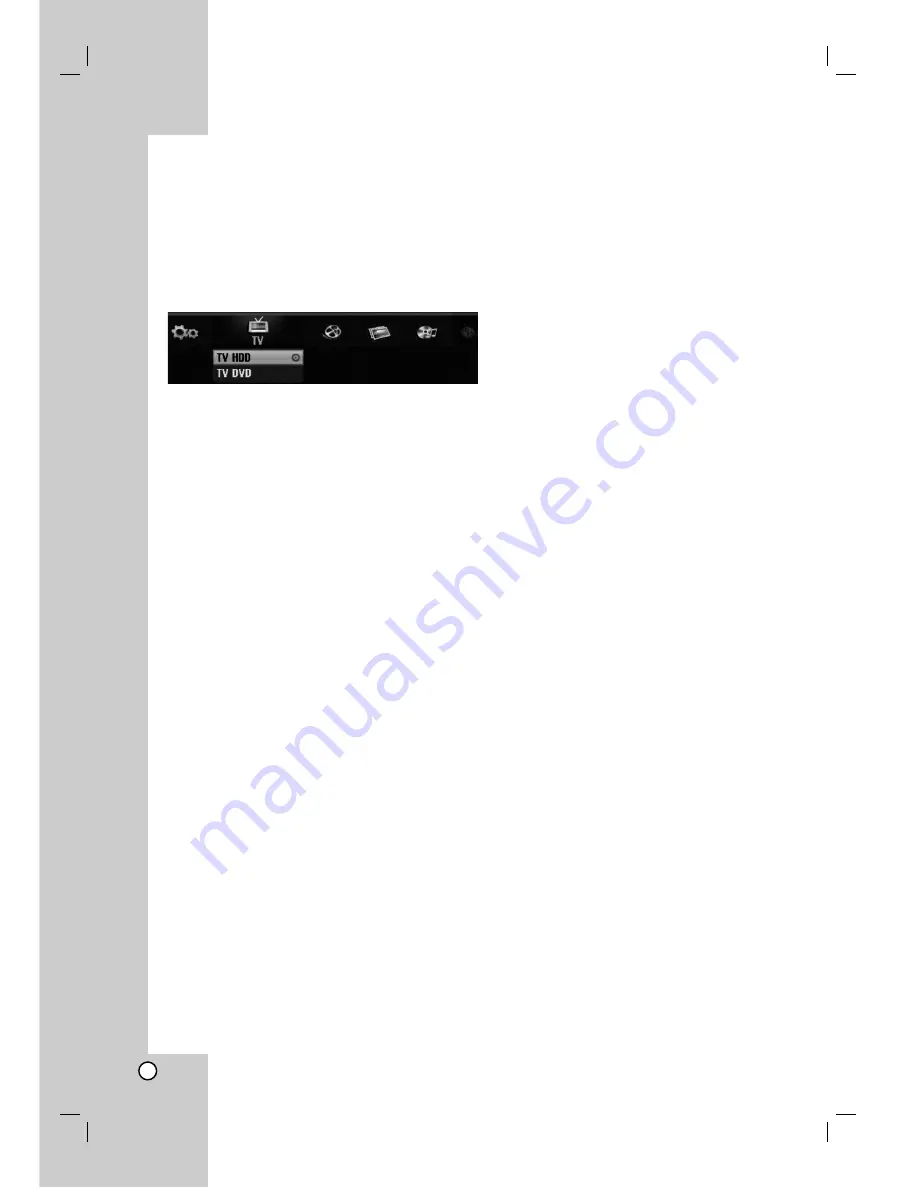
Using the Home Menu

From the Home Menu screen you can access all the
Media for playback and recording of the recorder. 

1. Press HOME to display the Home Menu screen.

2. Use the 

b

/

B

buttons to select a main option you

want. Sub options appears.

3. Use the 

v

/

V

and ENTER buttons to select the

sub option you want. 

4. To exit the HOME menu, press HOME.

TV

TV HDD: 

Returns to live TV viewing for HDD

recording.

TV DVD: 

Returns to live TV viewing for DVD

recording.

MOVIE

HDD:

Displays the Title List menu for HDD. (page 43)

HDD DivX: 

Displays the Movie menu for HDD.

(page 28)

DISC:
-

Displays Title List menu for recordable disc (page 43)

- Displays Movie menu for DivX disc. (page 28)
- Plays back Video CD or DVD-Video disc (page

24-27).

PHOTO 

(See page 31)

HDD:

Displays Photo menu for HDD.

DISC:

Displays Photo menu for disc.

Memory Card 1/2: 

Displays Photo menu for

memory card 2.

MUSIC

(See page 29)

HDD:

Displays Music menu for HDD.

DISC:

Displays Music (or Audio CD) menu for disc.

Memory Card 1/2: 

Displays Music menu for

memory card 2.

SETUP

(See page 16)

Start:

Displays Setup menu.

Initial Settings

In this menu system, there are several ways to
customize the settings provided. Most menus consist
of three levels to set up the options, but some require
greater depth for the variety of settings.

General Operation

1. Press SETUP and the Setup menu appears.

2. Use 

v / V

to select the desired option.

3. While the desired item is selected, press 

B

to

move to the second level.

4. Use 

v / V

to select the second desired option.

5. Press 

B

to move to the third level.

6. Use 

v / V

to select the desired setting then press

ENTER to confirm your selection.
Some items require additional steps.

7. Press SETUP to exit the Setup menu.

Note:

Press

b

to go back to the previous level.

Содержание RH1999M

Страница 1: ...HDD DVD RECORDER OWNER S MANUAL MODEL RH1999M Before connecting operating or adjusting this product please read this instruction booklet carefully and completely RH1999M_OM_EVENT ...

Страница 2: ... or the manufacturer s instruction have been adhered to CAUTION This product employs a Laser System To ensure proper use of this product please read this owner s manual carefully and retain it for future reference Should the unit require maintenance contact an authorized service center Performing controls adjustments or carrying out procedures other than those specified herein may result in hazard...

Страница 3: ...ween the product and receiver Connect the product into an outlet on a circuit different from that to which the receiver is connected Consult the dealer or an experienced radio TV technician for help FCC COMPLIANCE The responsible party for this product s compliance is LG Electronics U S A Inc 1000 Sylvan Avenue Englewood Cliffs NJ Phone 1 800 243 0000 CAUTION concerning the Power Cord Most applian...

Страница 4: ... plug has two blades and a third grounding prong The wide blade or the third prong are provided for your safety If the provided plug does not fit into your outlet consult an electrician for replacement of the obsolete outlet 10 Protect the power cord from being walked on or pinched particularly at plugs convenience receptacles and the point where they exit from the product 11 Only use attachments ...

Страница 5: ...3 WMA file 29 Program Playback with Audio CD and MP3 WMA file 30 Viewing a JPEG File 31 32 Editing a MP3 WMA JPEG DivX file 33 34 Recording 35 42 About DVD recording 35 About HDD recording 35 Timeshift 36 Basic Recording from a TV 37 Instant Timer Recording 37 Timer Recording 38 Checking Timer Recording Details 40 Recording from an External Input 40 Recording from DV Input 41 Simultaneous recordin...

Страница 6: ...eo disc Video CDs Audio CDs DivX files MP3 files WMA files JPEG files Notes on Discs Handling Discs Do not touch the playback side of the disc Hold the disc by the edges so that fingerprints do not get on the surface Never stick paper or tape on the disc Storing Discs After playing store the disc in its case Do not expose the disc to direct sunlight or sources of heat and never leave it in a parke...

Страница 7: ...ontents are playable on DVD RW compatible players only after finalization Recordings can be edited the title chapter DVD R Digital Video Disc Recordable These Discs can be recorded only once After you finalize a DVD R you cannot record on it or edit it any more Playable on DVD R compatible players after finalization Any edited contents are not be compatible on DVD R compatible players Hide chapter...

Страница 8: ...he software publisher for more detailed information This recorder requires discs and recordings to meet certain technical standards in order to achieve optimal playback quality Pre recorded DVDs are automatically set to these standards There are many different types of recordable disc formats including CD R containing MP3 or WMA files and these require certain pre existing conditions see above to ...

Страница 9: ...il after a few years of use Signs of problems include playback unexpectedly freezing and noticeable block noise mosaic in the picture However sometimes there will be no warning signs of HDD failure If the HDD fails no playback of recorded material will be possible In this case it will be necessary to replace the HDD unit Card useable on this unit Compact Flash Card CF Micro Drive MD ST1 MD Secure ...

Страница 10: ...AUSE Starts playback Pause playback or recording temporarily press again to exit pause mode h z REC Starts recording Press repeatedly to set the recording time i PROG V v Scans up or down through memorized channels j RESOLUTION Sets the HDMI s output resolution to 1080i 720p 480p or 480i formats for your TV or monitor k Remote Sensor Point the recorder remote control here l MEMORY CARD Slot 1 Inse...

Страница 11: ...option in the menu ENTER Acknowledges menu selection Displays information while viewing a TV program PR CH Scans up or down through memorized channels DISPLAY Accesses On Screen Display RETURN O Removes the menu e TIMESHIFT Activates pause live TV playback timeshift for a live TV program MARKER Marks any point during playback SEARCH Displays Marker Search menu SETUP Accesses or removes the Setup m...

Страница 12: ...nal source Audio system TV Monitor VCR Camcorder etc e COAXIAL Digital audio out jack Connect to digital coaxial audio equipment f OPTICAL Digital audio out jack Connect to digital optical audio equipment g Cooling fan h AC Power Cord Plug into the power source i RF OUT Passes the signal from the AERIAL to your TV monitor j S VIDEO OUT Connect to a S Video Input on TV k COMPONENT PROGRESSIVE SCAN ...

Страница 13: ...If it is a round 75 ohm coaxial cable connect it directly to the jack marked ANT IN on your Recorder If your antenna cable is flat connect it to a 300 ohm to 75 ohm antenna adaptor not supplied and slip the adaptor over the ANT IN jack Don t attempt to screw it into to the Recorder b Cable TV If your cable connection has no converter or descrambler unscrew the cable from your TV and attach it to t...

Страница 14: ...ck on the TV using the S Video cable S Component Video connection Connect the COMPONENT VIDEO OUT PROGRESSIVE SCAN jacks on the recorder to the corresponding input jacks on the TV using an Y Pb Pr cable C If your television is a high definition or digital ready television you may take advantage of the recorder s progressive scan output for the highest video resolution possible If your TV does not ...

Страница 15: ...ult in malfunctions To solve the problem turn off the recorder and then turn it on again About HDMI HDMI High Definition Multimedia Interface supports both video and audio on a single digital connection for use with DVD Players Set Top Boxes and other AV devices HDMI was developed to provide the technologies of HDCP High Definition Contents Protection HDCP is used to protect digital content transm...

Страница 16: ...ed by your recorder MPEG 2 Dolby Digital and DTS Check the receiver manual and the logos on the front of the receiver Caution Due to the DTS Licensing agreement the digital output will be in DTS digital out when DTS audio stream is selected Notes If the audio format of the digital output does not match the capabilities of your receiver the receiver will produce a strong distorted sound or no sound...

Страница 17: ...der Using the front panel DV IN jack it is possible to connect a DV digital camcorder and digitally transfer DV tapes to DVD Use a DV cable not supplied to connect the DV in out jack of your DV camcorder to the front panel DV IN jack of this recorder Note This jack is for connection to DV digital camcorder only It is not compatible with digital satellite tuners or D VHS video decks L R VIDEO OUTPU...

Страница 18: ...DD DISC Displays Photo menu for disc Memory Card 1 2 Displays Photo menu for memory card 2 MUSIC See page 29 HDD Displays Music menu for HDD DISC Displays Music or Audio CD menu for disc Memory Card 1 2 Displays Music menu for memory card 2 SETUP See page 16 Start Displays Setup menu Initial Settings In this menu system there are several ways to customize the settings provided Most menus consist o...

Страница 19: ...h The tuner will automatically cycle through all available channels in the area and place them in the tuner s memory Note After the Auto Channel Set proceeding is complete make sure the Tuning Band is set appropriately TV or CATV on tuning band follow steps 1 2 as shown previous Tuning Band Select to choose the correct Tuning Band TV or CATV To Add or Erase Channels This feature allows you to add ...

Страница 20: ...r Box Displays a wide picture with bands on the upper and lower portions of the screen Pan Scan Automatically displays a wide picture on the entire screen and cuts off the portions that do not fit Progressive Scan Progressive Scan Video provides the highest quality pictures with less flickering If you are using the COMPONENT PROGRESSIVE SCAN VIDEO OUT jacks but are connecting the recorder to a sta...

Страница 21: ... audio system you use Dolby Digital DTS MPEG Bitstream Select Bitstream if you connect the recorder s DIGITAL AUDIO OUT jack to an amplifier or other equipment with a Dolby Digital DTS or MPEG decoder PCM for Dolby Digital MPEG Select when connected to a two channel digital stereo amplifier DVDs encoded in Dolby Digital or MPEG will be automatically downmixed to two channel PCM audio Off for DTS I...

Страница 22: ...elect the Change press ENTER and input the new 4 digit code then press ENTER Input it again to verify To delete the password select Delete then press ENTER If you forget your 4 digit code If you forget your password to clear the current password follow the procedure below 1 During Setup menu is displaying use the Number buttons to enter the 6 digit number 210499 2 Select Yes then press ENTER The 4...

Страница 23: ...ording in Video mode chapter markers are put in specified setting You can change this interval to 5 minutes 10 minutes or 15 minutes If you select None switch off automatic chapter marking altogether with the None setting Disc Settings Disc Format If you load a completely blank disc the recorder will initialize the disc DVD R The recorder initialize the disc to Video mode The recording mode will a...

Страница 24: ...finalize it by choosing Unfinalize from the Finalize menu After doing this you can edit and re record onto the disc You cannot unfinalize a DVD R and DVD R disc If Disc Protect option is set to ON the finalize is not available To finalize set Disc Protect option to OFF Disc Label Use this to enter a name for the disc This name appears when you load the disc and when you display disc information on...

Страница 25: ... to show various playback information The items displayed differ depending on the disc type or playing status 3 You can select an item by pressing v V and change or select the setting by pressing b B For details about each item see the pages in parentheses Title Current title or track number total number of titles or tracks page 24 Chapter Current chapter number total number of chapters page 24 Ti...

Страница 26: ... back up the picture frame by frame by pressing b B repeatedly during PAUSE mode The picture frame by frame in reverse is not available for Video CD SKIP During playback press SKIP or to go to the next chapter track or to return to the beginning of the current chapter track Press SKIP twice briefly to step back to the previous chapter track Tips To go directly to any chapter during DVD playback pr...

Страница 27: ...yback press SUBTITLE then press b B repeatedly to select a desired subtitle language AUDIO Press AUDIO then press b B repeatedly to hear a different audio language or audio track Note Some discs feature both Dolby Digital and DTS soundtracks There is no analog audio output when DTS is selected To listen to the DTS soundtrack connect this recorder to a DTS decoder via one of the digital outputs See...

Страница 28: ... the wrong numbers press b B to move the under bar _ to the wrong number Then enter the correct numbers 4 Press ENTER to confirm Playback starts from the selected time Marker Search To enter a Marker You can start playback from up to six memorized points To enter a marker press MARKER at the desired point on the disc The Marker icon appears on the TV screen briefly Repeat to enter up to six marker...

Страница 29: ...oes not memorize settings of a disc if you switch off the recorder before commencing to play it PIP Picture in Picture This function enables you to view the stored stations in sub picture during playback On and off Press PIP to switch on the sub picture press this button again to switch it off Input mode selection for sub picture Press AV INPUT to select the input mode for the sub picture Each tim...

Страница 30: ...er depending on the selected media 2 Press v V b B to select an option and press ENTER Play Start playback the selected title Open Opens the folder and a list of files in the folder appears Delete Deletes the file s or folder s from the media Rename Edits the file name page 33 Move Moves the file s to another folder or media Copy Copies the file s to another folder or media DivX file requirement A...

Страница 31: ... options 1 Press v V to select a folder file on the Audio CD or Music menu then press ENTER The menu options appear The menu options displayed differ depending on the selected media 2 Press v V b B to select an option and press ENTER Play Start playback the selected title Random Start or stop random playback Open Opens the folder and a list of files in the folder appears Delete Deletes the file s ...

Страница 32: ...LAY N Tip You can access or remove the Program List screen by pressing MENU LIST Program List menu options 1 Press v V to select a track file on the Program List then press ENTER The menu options appear 2 Use v V to select an option then press ENTER to confirm your selection Play Playback begins in the order in which you programmed the tracks from the selected track Delete Deletes the track s from...

Страница 33: ... and folders on the menu by pressing CLEAR button To cancel the selections press CLEAR again Selecting multiple files folders 1 Press MARKER A check mark appears on the file or folder Press MARKER again to cancel the marked file or folder 2 Repeat step 1 to mark additional file folders 2 Use v V to select an option then press ENTER to confirm your selection Open Opens the folder and a list of file...

Страница 34: ...de Show and returns to the Photo menu To Pause the Slide Show 1 Press PAUSE STEP X to pause slide show 2 When you want to continue slide show press PLAY N To listen to music while slide show simultaneously You can display photo files while listening to MP3 WMA music files recorded on HDD 1 Select Slide Show option on the Photo menu Refer to Photo menu options on page 31 2 Press ENTER The Slide Sho...

Страница 35: ...cel the selections press CLEAR again Selecting multiple files folders 1 Press MARKER A check mark appears on the file or folder Press MARKER again to cancel the marked file or folder 2 Repeat step 1 to mark additional file folders 2 Press ENTER The menu options appear on the menu 3 Select Delete option then press ENTER The selected file s is deleted Naming a file on the HDD or Memory Card 1 You ca...

Страница 36: ...ENTER The album folder list appears 2 Select a folder Also you can create new album folder Select New Album option on the Copy menu then press ENTER NONAME folder is created 6 Select Copy option then press ENTER to begin copying Note If a folder s depth is more than 5 level the copy is not available Moving a file s You can move a file s folder s to another media or folder After moving the file s f...

Страница 37: ...r recordings Note The maximum number of titles that can be recorded on the HDD is 255 Using the HDD allows you to record a maximum of 12 hours continuously Notes for recording The recording times shown are not exact because the recorder uses variable bit rate video compression This means that the exact recording time will depend on the material being recorded When recording a TV broadcast if the r...

Страница 38: ...de You can mark one in Timeshift mode Press MARKER at the desired point during Timeshift Press SEARCH to recall the marked scene Clip Record You can edit during Timeshift to store the program on the HDD Hard Disk Drive 1 During Timeshift use pause step search and slow motion to find the starting point 2 Press REC at the starting point of the section you want to record Progress of the edit is indic...

Страница 39: ... disc or HDD is full To record for a fixed length of time see Instant Timer Recording on right 7 Press STOP x to stop recording To Pause the Recording 1 Press PAUSE STEP X to pause recording 2 When you want to continue recording press PAUSE STEP X To record one TV program while watching another 1 Press TV DVD to select the TV mode during recording The TV indicator appears 2 Using the TV select the...

Страница 40: ...o exit the Timer Record menu Press ENTER after filling in all the program information Press TIMER REC to display Timer Record List 3 Set a recording mode as necessary by pressing REC MODE repeatedly XP SP LP EP 4 Press ENTER the program will be memorized by the recorder To check the programming the Timer Record List will appear Check field s Rec OK on the Timer Record List indicates that the timer...

Страница 41: ... timer programs set If two or more timer programs overlap The earlier program takes priority When the earlier program finishes the later program starts If two programs are set to start at exactly the same time the program entered first takes priority If the disc is damaged the recording may not complete successfully In this case even though the Check field shows Rec OK it may not be Recording from...

Страница 42: ...om this one You cannot control this unit remotely from a component connected to the DV IN jack You cannot record date and time information from a DV cassette 1 Make sure your digital camcorder is connected to the front panel DV IN jack See page 15 2 Select TV HDD or TV DVD option on the HOME menu then press ENTER see page 16 3 Check that the DV audio input is as you require You can choose between ...

Страница 43: ...ng will continue while playing back the media from the other mode Notes You can t use simultaneous playback and recording while copying You cannot edit programs during simultaneous recording and playback Time Slip You can play back the current title in recording simultaneously 1 Start HDD recording 2 Press PLAY N The playback starts and the recording will continue while playing back You can use PA...

Страница 44: ...ng Title Thumbnails on page 44 Press DISPLAY to display the information of selected title on the Title List menu After selecting a title or chapter on the Title List or Chapter List menu then press ENTER The menu options appears on the left side of the menu Use v V to select a option then press ENTER to confirm your selection 2 To exit the Title List menu press RETURN O repeatedly 1 Menu options T...

Страница 45: ...Original and Playlist Throughout this manual you will often see the words Original and Playlist to refer to the actual content and the edited version Original content refers to what s actually recorded on the disc Playlist content refers to the edited version of the disc how the Original content is to be played Adding Chapter Markers You can create chapters within a title by inserting chapter mark...

Страница 46: ...ions appears on the left side of the menu 2 Use v V to select Playlist Add option then press ENTER 3 Select New Playlist then press ENTER The new title appears in the updated Playlist All chapters of the title are added to the Playlist Adding Additional Title Chapters to the Playlist You can add an Original title or chapter to add to a Playlist title even if it is already registered 1 Choose a tit...

Страница 47: ...epeatedly deleted the titles are combined into one When you are deleting a title or chapter only the last one on DVD RW increases remaining recording time Deleting a Part You can delete a part which you do not want in the title 1 Use b B v V to choose a title you want to delete on the Title List menu then press ENTER The options appears on the left side of the menu 2 Select Delete Part option then...

Страница 48: ... cursor position Moves cursor to left or right Numbers 0 9 Enters the corresponding character at the cursor position Tip You can add the genre only for HDD title name 4 Choose OK then press ENTER to fix the name and return to the previous menu screen 5 Press RETURN O repeatedly to exit the menu Notes Names can be up to 32 characters long For discs formatted on a different recorder you will see onl...

Страница 49: ...t deletion is undone Notes You can t undo a recording You can t undo anything after ejecting the disc from the recorder or switching the recorder into standby mode You can still undo a deletion even after exiting the menu display Tip You can redo the last undo action using the Redo option Combining Two Titles Into One Use this function to combine two adjacent Original HDD titles into one Notes Thi...

Страница 50: ...hoose Done option then press ENTER to fix the dividing point The title is divided into two new titles It take up to 4 minutes to divide Note You cannot select dividing point less than 3 seconds Combining Two Chapters Into One Use this function to combine two adjacent Playlist or Original chapters into one Note This function is not available if there is only one chapter within the title 1 On the Ch...

Страница 51: ...left side of the screen 2 Select Hide option Example Title List DVD RW 3 Press ENTER to confirm The chapter s or title s thumbnail will dim Tip If you select a hidden chapter or title on the Title List or Chapter List menu you can show it by choosing Show option on the menu After doing that you are able to see the chapter or title Protect a Title Use this function to protect against accidental rec...

Страница 52: ...of this copyright protection technology must be authorized by Macrovision Corporation and is intended for home and other limited viewing uses only unless otherwise authorized by Macrovision corporation Reverse engineering or disassembly is prohibited CONSUMERS SHOULD NOTE THAT NOT ALL HIGH DEFINITION TELEVISION SETS ARE FULLY COMPATIBLE WITH THIS PRODUCT AND MAY CAUSE ARTIFACTS TO BE DISPLAYED IN ...

Страница 53: ...e The Fast mode is not available for edited HDD title and Clip Recording title Dubbing from DVD to HDD 1 On the Title List menu select a title you want to dub then press ENTER Menu options appears on the left side of the screen 2 Use v V to select Dubbing option then press ENTER Dubbing menu appears 3 Use b B to select record mode XP SP LP EP or Fast then press V Start icon is highlighted Fast Onl...

Страница 54: ...to HDD copies a single title to the HDD in real time When you start copying playback jumps back to the start of the title then continues through to the end of the title when recording automatically stops The copy will be made in the recording mode XP SP LP EP that is currently set During DVD playback press DUBBING to copy the current title to HDD Playback starts again from the beginning of the cur...

Страница 55: ...or DVD RW disc recorded already 2 Press TITLE in play or stop mode Title List menu will appear as shown below Tip You can remove the Title List menu by pressing STOP x 3 To play back a title select the title you want then press ENTER or PLAY N Playing Your Recordings on Other DVD Players Finalizing a Disc Most regular DVD players can play finalized discs recorded in Video mode finalized DVD R or D...

Страница 56: ...sian 6669 Cambodian 7577 Catalan 6765 Chinese 9072 Corsican 6779 Croatian 7282 Czech 6783 Danish 6865 Dutch 7876 English 6978 Esperanto 6979 Estonian 6984 Faroese 7079 Language Code Fiji 7074 Finnish 7073 French 7082 Frisian 7089 Galician 7176 Georgian 7565 German 6869 Greek 6976 Greenlandic 7576 Guarani 7178 Gujarati 7185 Hausa 7265 Hebrew 7387 Hindi 7273 Hungarian 7285 Icelandic 7383 Indonesian ...

Страница 57: ...he table below set the appropriate manufacturer code 1 While holding down TV POWER button press the number buttons to select the manufacturer code for your TV see the table below 2 Release TV POWER button Code numbers of controllable TVs If more than one code number is listed try entering them one at a time until you find the one that works with your TV Manufacturer Code Number LG GoldStar 1 Defau...

Страница 58: ...onnect the video cable securely Turn on the TV Select the correct input mode on the audio receiver so you can listen to the sound from the recorder Connect the audio cable securely Turn on the equipment connected with the audio cable Replace it with new one Clean the disc Insert a disc Check that the disc indicator in the display window is lit Insert a playable disc Check the disc type color syste...

Страница 59: ...he recorder The remote control is too far from the recorder There is an obstacle in the path of the remote control and the recorder The batteries in the remote control are exhausted Solution Finalize the disc page 22 No solution The other player must be RW compatible in order to play it No solution Use another disc You cannot record the source Select the channel on the recorder s built in TV tuner...

Страница 60: ... Frequency response DVD PCM 48 kHz 8 Hz to 22 kHz CD 8 Hz to 20 kHz DVD PCM 96 kHz 8 Hz to 44 kHz Signal to noise ratio More than 100 dB AUDIO OUT connector Harmonic distortion Less than 0 008 AUDIO OUT connector Dynamic range More than 95 dB AUDIO OUT connector Inputs AERIAL IN Aerial input 75 ohms VIDEO IN 1 0 Vp p 75 ohms sync negative RCA jack x 2 AUDIO IN 2 0 Vrms more than 47 kohms RCA jack ...

Отзывы: