background image

Clean the Evaporator and Base lint by water. 

1) Wash by water and brush.


2) Be careful electric parts by splash water.


Service Bulletin 

WASHING MACHINE 
Bulletin Number:------------ 

7/8 

3) Clean the Base under the Evaporator by water.


Sample 
picture. 

Содержание RC7055*P*Z

Страница 1: ...HEAT PUMP DRYER SERVICE MANUAL CAUTION READ THIS MANUAL CAREFULLY TO DIAGNOSE TROUBLE CORRECTLY BEFORE OFFERING SERVICE MODEL RC9055 P Z RH9051WH RC8055 P Z RH8051WH RC7055 P Z RH7050WH ...

Страница 2: ...ESD problems are present everywhere ESD may damage or weaken the electronic control assembly The new control assembly may appear to work well after repair is finished but failure may occur at a later date due to ESD stress એ Use an anti static wrist strap Connect wrist strap to green ground connection point or unpainted metal in the appliance OR Touch your finger repeatedly to a green ground conne...

Страница 3: ... 5 3 PART IDENTIFICATION 6 4 PROGRAM CYCLE 7 5 INSTALLATION INSTRUCTIONS 10 6 MAINTENANCE INSTRUCTIONS 13 7 COMPONENT TESTING TIPS 15 8 WIRING DIAGRAM 18 9 TROUBLESHOOTING 19 10 DIAGNOSTIC TEST 24 11 DISASSEMBLE INSTRUCTIONS 37 12 EXPLODED VIEW 43 3 ...

Страница 4: ...d switch 6 Sump water Sensing Electrode sensor Removable 52 53 rpm Stainless steel Available Running status indicator all Error display all Condensation Opaque 56kg Gross 61kg Glass 57kg Gross 62kg 600 W x 640 D x 850 H 9 0kg 8 0kg 7 0kg Electronic Control AC230V 50Hz 16A 210W 1000W 690W DC12V 30mA 250V 5A 240V 25A 121 Liter Over current protect Motor Over Load Protect Compressor Thermostat P N LP...

Страница 5: ...g at once saving time LG Heat pump dryers use less energy than conventional dryers due to optimized heat exechanger and auto cleaningTM technology This LG Heat pump dryer has been designed to save your money Drying times are now shorter due to Hybrid heating system and optimized heat exechanger on this LG dryer We have reduced the operating noise of this LG dryer by using innovative sound absorbin...

Страница 6: ...L1002C 2 Dryer Rack Assembly 3 Stacking kit Assembly Purchased Seperately Accessory parts 6 Holder 2EA Screw 4EA Purchased Separately Product Layout RC 055 PZ RC 055 P2Z RC 055 P3Z RH9051WH RH8051WH RC 055 P1Z RH7050WH Water Container Control Panel Air Ventilation Grill Opaque Door Glass Door ...

Страница 7: ...um Light Whilst the dryer is running it is possible to see inside the drum if you select the Drum Light function Light on Door is opened For 3 sec drum light button are selected Light off Door is closed Off automatically Eco HybridTM This additional program is able to save energy or time Eco energy saving course Heat Pump only Hybrid time saving course Heat Pump Heater You will see speed indicatio...

Страница 8: ... dressers skirts and blouses For fabrics that do need to be ironed Tumbles without heat All fabrics that need refreshing Cool Air T shirts pillowcase and towels Skin Care Shirts and blouses Refresh Refer to the Note For cotton fabrics which do not need to be ironed Odor removal of fabric For fabrics in need of odor removal Bath towels bath robes dishcloth and quilted fabrics made of acrylic Warm A...

Страница 9: ...PROGRAM CYCLE 4 9 ...

Страница 10: ...noise and vibration Place your dryer on a solid level floor Leveling the dryer prevents unnecessary noise and vibration Place your dryer on a solid level floor 2 If the dryer is not properly level adjust the front levelling feet as necessary Turn them clockwise to raise and counter clockwise to lower until the dryer no longer wobbles both front to back and side to side ...

Страница 11: ...lign the stacking kit holes and the rear cover holes 3 1 23 6 inch 600mm 3 2 21 7 inch 550mm Fasten the 2 screws that were removed earlier from dryer to stacking kit Use 4 screws in accessory box 0 6inch 16mm to assemble washer rear cover and stacking kit The procedure for the opposite side will be the same WARNING Incorrect installation can cause serious accidents The weight of the dryer and the ...

Страница 12: ...INSTALLATION INSTRUCTIONS 5 12 ...

Страница 13: ...ater is collected until manually emptied Water can also be drained out directly to a mains drain especially when the dryer is stacked on top of a washing machine With a connecting kit for the mains drain hose simply change the water path and re route to the drainage facility as below Note Warm air is exhausted through the ventilation grille Adequate ventilation should be provided to avoid the back...

Страница 14: ...MAINTENANCE INSTRUCTIONS 6 1 2 4 5 6 7 CAUTION 3 8 14 ...

Страница 15: ...COMPONENT TESTING TIPS 7 15 ...

Страница 16: ...mpressor set 10 OLP 11 Cooling fan 12 Comp capacitor 7 Door S W Resistance value 1Ω Resistance value Resistance value Resistance value 1Ω Terminal COM NC 1 3 Terminal COM NO 1 2 Terminal COM NC 1 3 Terminal COM NO 1 2 1 2 1 2 Measure resistance of the Following terminal 1 2 Measure resistance of the Following terminal DC 12V Start up Voltage Up 6V Rate current 0 5A 10 Locked current Under 1A Resis...

Страница 17: ...Following terminal White housing 2 wire Two of five colors Measure resistance of the Following terminal Blue housing 2wire Measure resistance of the Following terminal Measure resistance of the Following terminal 14 Inlet valve 15 Convert valve 16 LID switch 17 Thermistor Comp out 18 Thermistor Eva In Left picture plate White housing 2wire Blue housing 2wire 17 ...

Страница 18: ...WIRING DIAGRAM 8 18 ...

Страница 19: ...20 Main Version 20 1d 09 Display Version 09 0 1 2 3 4 5 61 7 0 1 7 1 5 31 11 2 8 99 61 2 8 99 7 7 4 07 11 5 11 6 5 1 73 2 5 1 7 7 7 3 3 8 A 2 A B 4 4 B 4 B C C 3 4 4 3 1 6 4 4 1 1 D 7 B D 3 3 7 8 8 3 2 C 0 E31 1 B 7 B F F 4 4 7 4 4 8 99 19 ...

Страница 20: ...TROUBLESHOOTING 9 20 ...

Страница 21: ...Error Mode TROUBLESHOOTING 9 21 ...

Страница 22: ... correct or not 2 If the covering has been peeled away or touch Short If the penetration of water Short Check if any damage in harness or not 3 Thermistor element dead Check if thermistor resistance in normal or not 4 Check the voltage from main PCB to thermistor High or low voltage Replace Main PCB See page No 17 Thermistor Resistance 10kΩ 5 at 25 1 Check the filter is properly seated 2 Check the...

Страница 23: ... Filter or Check the Eva Clogging Empty water container Drum Belt broken Clean Filter sign display Empty water sign display Reduce clothes load Spin the load more Check motor TP Trip Check blower damage locking Door is not closed display Insert Filter sign display See the Page 24 check list Check the magnet Replace the Filter Properly Drying Dryness level Time LQC Mode 1 Check LEV Check Heater Pow...

Страница 24: ... grounding check Power voltage is within standard range AC 215V 245V Check the Circuit breaker Check after disconnecting Yellow relay and Black relay connector of Main PCB Check the range of Blue and Brown wire is within AC 215 245V Check the short of harness assembly and the connection Check or replace the Power cord Check or replace the Noise filter Check or replace the Controller 24 ...

Страница 25: ...e Measurement condition Check if they are working while being connected to power supply When door is closed does lamp turn off When Start button is pressed the dryer is working When door is opened does lamp turn on Tumbling stops When door is opened or closed door switch hook is broken Check or replace Controller Assembly Replace Harness and connector With door closed when Start button is pressed ...

Страница 26: ...ly Lay out Check the harness connection Motor part White 3 pin housing Controller part Red 3 pin housing Orange and Blue wire Capacitor part White 2 pin housing Check the belt position broken Check the Controller TR1 TR2 Broken Check the slide 3 ea Check Capacitor volume Power on press the start button See the left picture Check belt is burst Check structural restriction Motor supporter Air guide ...

Страница 27: ...mptom Motor malfunction ventilation error Heater On Off occurs frequently 1 Check and replace controller See page 17 PCB assembly lay out Check harness connection Check the resistance of thermostat to heater Is it less than 1Ω Replace Heater Check harness connection Manually reset thermostat Press button And check resistance thermostat Check the heater resistance 1 Yellow tab relay violet wire Whi...

Страница 28: ...dition Power cord is unplugged Check the hose blocked with foreign body or kinked Measure after power is off With Yellow 3pin disconnected from controller YL3 white wire YL3 orange wire resistance ranges 4 5Ω YL3 white wire YL3 yellow wire resistance ranges 4 5Ω Check or replace pump Check harness connection Check Pump sensor With White 6pin disconnected from controller check White6 blue White6 bl...

Страница 29: ...2 5 4kΩ 4 2 5kΩ 2 5kΩ 10 20 30 30 40 Dryer Temperature 40 50 50 60 60 With White9 White 6 disconnected from Controller check 1 High temperature thermistor Wire color White White 6 pin white White 6 pin red resistance ranges table data according to surrounding temperature 2 Low temperature thermistor Wire color Blue White 9 pin Blue White 9 pin white resistance ranges table data according to surrou...

Страница 30: ...rom controller White9pin White 9 pin Resistance is unlimited Green wire Orange wire Withmetaltapeattachedto sensortips White9pin White9pin resistanceislessthan10Ω Aftermakingdampclothestouch sensortips therangearewithin thebelowtableinLQCtestmode 30 ...

Страница 31: ...ermistor Improve dryer installation environment Refer to installation environment Page 10 12 Leg leveling Refer to how to adjust leveling Page 10 Check Evaporator clogging status Refer to humidity sensor inspection method Page 30 Does the defect occur after PCB replacement Clean filter Clean Evaporator clogging Refer to exploded view Page 45 NO The course Show details 1 2 3 4 5 6 7 8 9 10 11 12 Re...

Страница 32: ...cur after PCB replacement 2 For Comp defect Replace Comp Refer to R code C145 Page 45 3 For LEV defect Replace LEV 4 After Comp on check corresponding thermistor temp Release thermostat trip or replace thermostat Replace heater or repair connection Leg leveling Refer to how to leveling Page 10 NO The course Show details 1 2 3 4 5 6 7 8 9 10 11 12 Refresh Skin Care Jeans Bulky Item Easy Care Mixed ...

Страница 33: ...ses of the product If noise of metal materials bumping each other occurs check if screw is properly locked or if it is properly assembled Is the washer between Drum and Rear cover flat Refer to picture D page35 2 After Comp on check corresponding thermistor temp ta ta ta sound NO The course Show details 1 2 3 4 5 6 7 8 9 10 11 12 Refresh Skin Care Jeans Bulky Item Easy Care Mixed Fabric Cotten Spo...

Страница 34: ... Refer to picture F page35 Pump Cover assembly status Gap Screw missing etc NO The course Show details 1 2 3 4 5 6 7 8 9 10 11 12 Refresh Skin Care Jeans Bulky Item Easy Care Mixed Fabric Cotten Sports Wear Quick Dry Delicate Wool Rack Dry Humidity values Low Temp Comp Temp T_heater High Thermistor Eva in Temp Sump Water Level Drain Pump RPM LEV Pulse Main PGM Tool Main Version Check the status of...

Страница 35: ...DIAGNOSTIC TEST 10 Reference picture Picture A Picture B Picture C Picture D Picture E Picture F 35 ...

Страница 36: ...1 4 HIGH THERMISTOR No 2 3 COMP THERMISTOR No 2 6 EVAINLET THERMISTOR No 2 5 5V No 2 GROUND BL 8PIN MAIN TO DISPLAY COMUNICATION Control Valve No 2 3 4 5 LEV No 6 7 8 9 COOLING FAN No 10 11 13V No 1 WH 11PIN WH 9PIN DOOR LAMP No 1 2 FILTER SENSING No 3 4 LOW THERMISTOR No 5 6 ELECTRODE No 3 9 Door SW 36 ...

Страница 37: ...mble control panel by unscrewing 2 screws on the Rear of the panel frame DRAWER TOP PLATE CAUTION To reduce the risk of personal injury adhere to all industry recommended safety procedures including the use of long sleeved gloves and safety glasses Failure to follow all of the safety warnings in this manual could result in property damage personal injury or death 37 ...

Страница 38: ... cabinet by unscrewing 2 at the top and 3 at the rear Left and right are the same 6 Disassemble panel frame by unscrewing 4 at the front 4 Disassemble the lower cover by pulling to the front 2 n d P u l l 1st Pull CABINET DRAWER PANEL FRAME 38 ...

Страница 39: ...hook 9 2 Pull out the harness from the housing Pull the hook P U L L 7 1 Disassemle the door by releasing the 2 screws 7 2 Disassemble the door switch 7 3 Disassemble the cabinet cover by releasing the 10 screws 7 4 Disassemble the Door Switch 7 5 Disassemble the cover cabinet CABINET COVER DOOR Pull DOOR SWITCH P u l l 1 Pull the Hook Push 1 2 2 39 ...

Страница 40: ...the LED or LCD display 11 Disassemble the housing of motor compressor heater and thermistor 12 Releasing the dispenser by unscrewing 1 screw 10 Disassembling the side frame by releasing 4 screws DISPENSER Heater thermistor WH Small 2pin Heater housing WH Big 2pin Motor housing WH 3pin Compressor housing BLUE 3pin 40 ...

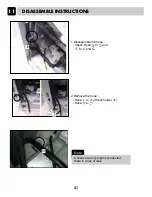
Страница 41: ...1 Disassemble the hose Check Hose to and to and 2 Remove the hose Hose to Check holder Hose to Note If hoses are not properly connected there is a risk of leak DISASSEMBLE INSTRUCTIONS 11 41 ...

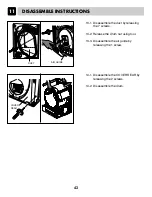
Страница 42: ...le the duct by releasing the 7 screws 13 2 Release the drum nut using tool 13 3 Disassemble the air guide by releasing the 1 screw 14 1 Disassemble the COVER REAR by releasing the 2 screws 14 2 Disassemble the drum DUCT COVER REAR AIR GUIDE 42 ...

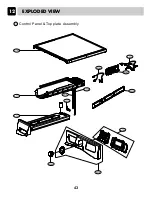
Страница 43: ...EXPLODED VIEW 12 Control Panel Top plate Assembly A100 A111 A120 A130 A110 A190 A180 A150 A160 A200 A112 A114 A113 43 ...

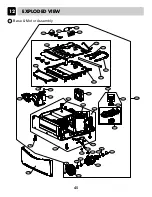
Страница 44: ...or B103 Transparent door B100 B101 B102 B106 B107 B139 Note If you want to exchange themistor Replace B139 assembly If you want to replace the B150 part Locker Assembly Check out the product manufacture date on the rating label And apply it as shown below Products produced before February 2014 4027EL1001A products produced since February 2014 AFK73489601 Note B109 B109 B109 44 EXPLODED VIEW 12 ...

Страница 45: ...bly C290 C291 C251 C250 C313 C360 C312 C142 C145 C143 C146 C160 C230 C240 C200 C252 C180 C240 C230 C150 C165 C140 C120 C311 C147 C600 C253 C310 C360 C361 C241 C148 C315 C318 C317 C319 C316 C314 C350 EXPLODED VIEW 12 45 ...

Страница 46: ...EXPLODED VIEW 12 Back Cover Drum Assembly D122 D120 D128 D100 D110 D121 D130 D157 D151 D170 D173 D210 D200 D180 C360 D150 D152 D158 D156 D157 46 ...

Страница 47: ...e of warranty Applicable only with symptoms below Applicable with every repair x Applicable Serial Number LGE 406KWxxxxxxx 3 Solution Short explanation of the solution First of all check the Water container is emptied Drain hose is twisted or kinked Replace Pump cover and Lint filter at the same time Clean the Control valve and Evaporator by water 1 Symptoms Customer Complaint Empty water is displ...

Страница 48: ...tin Number 2 8 Part P no location No Action How to SVC Pump cover 383EEL3003C C252 Replacement Lint filer ADQ55998604 B121 Replacement Control valve AJU73292501 C313 Clean By water Evaporator Base lint Clean By water and brush Change Point ...

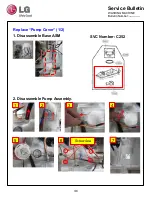
Страница 49: ...Replace Pump Cover 1 2 1 Disassemble Base ASM Service Bulletin WASHING MACHINE Bulletin Number Screw 4ea 1 2 3 4 5 6 7 2 Disassemble Pump Assembly 3 8 SVC Number C252 ...

Страница 50: ...heck if rubber ring is attached 2 Put the Drain motor on the New Pump cover 3 Press down the Drain motor 4 Turn the Drain motor counter clockwise 6 Assemble in reverse order to Base Assembly Take off from old part Check if correctly insert 5 Assemble the rubber cap Replace Pump cover 2 2 ...

Страница 51: ...ilter Service Bulletin WASHING MACHINE Bulletin Number 1 Change point Added Rib for minimizing the inflow lint into the Evaporator through the gap between filter and cabinet Add Rib SVC Number B121 2 Improvement 5 8 ...

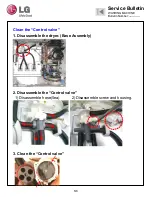
Страница 52: ...trol valve 1 Disassemble the dryer Base Assembly 2 Disassemble the Control valve 1 Disassemble hose 5ea 2 Disassemble screw and housing Service Bulletin WASHING MACHINE Bulletin Number 3 Clean the Control valve 6 8 ...

Страница 53: ...porator and Base lint by water 1 Wash by water and brush 2 Be careful electric parts by splash water Service Bulletin WASHING MACHINE Bulletin Number 7 8 3 Clean the Base under the Evaporator by water Sample picture ...

Страница 54: ...YES 5 Destroy Old Parts X X Old unit New unit Old part New part 4 Part Usage NO 6 SVC Bulletin History Prior Bulletins Bulletin Number Date Content x Service Bulletin WASHING MACHINE Bulletin Number 8 8 ...

Страница 55: ...AUGUST 2011 PRINTED IN KOREA P No 3828EL9001Y ...

Отзывы: