background image

Copyright              LG Electronics. Inc. All right reserved. 
Only for training and service purposes

LGE Internal Use Only

C

2009

- 16 -

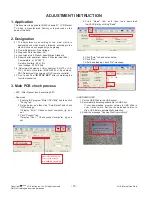
4.  Updating is staring.

5.  Updating Completed, The TV will restart automatically.
6.  If your TV is turned on, check your updated version and

Tool option. (explain the Tool option, next stage)

* If downloading version is more high than your TV have, TV

can lost all channel data. In this case, you have to channel
recover. if all channel data is cleared, you didn’t have a
DTV/ATV test on production line.

• After downloading, have to adjust TOOL OPTION again.

1. Push "IN-START" key in service remote controller 
2. Select "Tool Option 1" and Push "OK" button
3. Punch in the number. (Each model has their number.)
4. Completed selecting Tool option

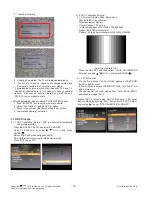
3.1 ADC Process 

3.1.1 ADC Calibration Internal : ADC is executed automatically

using internal pattern.

· Press the ADJ KEY on R/C and enter EZ ADJUST.

· Select  “5.EDID D/L” by using

/

(CH +/-) and press

ENTER(

).

· Select “Start” and press navigation key(¢

).

· ADC Calibration Internal is executed automatically.
· Press EXIT key on R/C

3.1.2 ADC Calibration External

3.1.2.1 Auto RGB Gain/Offset Adjustment
· Convert to PC in Input-source
· Signal equipment displays

Output Voltage: 700 mVp-p
Impress Resolution XGA (1024 x 768 @ 60Hz)
Model : 60 in Pattern Generator
Pattern : 29 in Pattern Generator (MSPG-925 SERISE)

Adjustment pattern (PC )

· Press the ADJ KEY and then select “2.ADC CALIBRATION

External” by using 

/

(CH +/-) and press ENTER(

).

3.1.2.2 Confirmation
· We confirm whether “0xAA (RGB)” address of EEPROM

“0xA2” is “0xAA” or not.

· If “0xAA (RGB)” address of EEPROM “0xA2” isn’t “0xAA”, we

adjust once more

· We can confirm the ADC values from “0xA4~0XA9 (RGB)”

addresses in a page “0xA2”

* Manual ADC process using Service Remocon. After enter

Service Mode by pushing “ADJ” key, execute “4.ADC Adjust”

by pushing “

” key at “ADC CALIBRATION: RGB-PC”.


Содержание M2794DP-PZL

Страница 1: ...SIS READ THE SAFETY PRECAUTIONS IN THIS MANUAL CHASSIS LD84K MODEL M2794DP M2794DP PZL North Latin America http aic lgservice com Europe Africa http eic lgservice com Asia Oceania http biz lgservice com Internal Use Only P NO MFL49414512 0904 REV00 Printed in Korea ...

Страница 2: ...t reserved Only for training and service purposes LGE Internal Use Only C 2009 2 CONTENTS CONTENTS 2 PRODUCT SAFETY 3 SPECIFICATION 6 ADJUSTMENT INSTRUCTION 15 DISASSEMBLY 19 TROUBLE SHOOTING 20 BLOCK DIAGRAM 28 EXPLODED VIEW 30 SVC SHEET ...

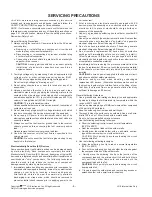
Страница 3: ...tain that treatment person s body are grounded through wrist band Do not leave the module in high temperature and in areas of high humidity for a long time The module not be exposed to the direct sunlight Avoid contact with water as it may a short circuit within the module If the surface of panel become dirty please wipe it off with a softmaterial Cleaning with a dirty or rough cloth may damage th...

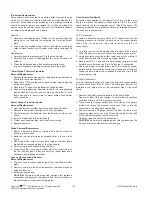
Страница 4: ...ge on your body by touching a known earth ground Alternatively obtain and wear a commercially available discharging wrist strap device which should be removed to prevent potential shock reasons prior to applying power to the unit under test 2 After removing an electrical assembly equipped with ES devices place the assembly on a conductive surface such as aluminum foil to prevent electrostatic char...

Страница 5: ... the solder joints of the two original leads If they are not shiny reheat them and if necessary apply additional solder Fuse and Conventional Resistor Removal Replacement 1 Clip each fuse or resistor lead at top of the circuit board hollow stake 2 Securely crimp the leads of replacement component around notch at stake top 3 Solder the connections CAUTION Maintain original spacing between the repla...

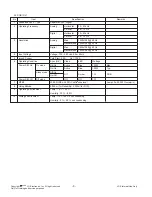
Страница 6: ...each drawing and specification by part number in accordance with BOM 2 5 The receiver must be operated for about 5 minutes prior to the adjustment 3 Test method 3 1 Performance LGE TV test method followed 3 2 Demanded other specification Safety CE IEC specification EMC CE IEC No Item Specification Unit Remark 1 Type TFT Color LCD Module HD 2 Diagonal Size 27 inches 68 6cm diagonal 3 Active Display...

Страница 7: ...V 3 Receiving system Analog Upper Heterodyne Digital COFDM 4 Scart Jack 2EA PAL SECAM Scart 1 Jack is Full scart and support RF OUT ATV Scart 2 Jack is Full scart and support MNT DTV OUT 5 Component Input 1EA Y Cb Cr Y Pb Pr 6 CVBS Input 1EA PAL SECAM NTSC 4 System Rear PAL50 SECAM NTSC PAL60 7 S Video Input 1EA PAL SECAM NTSC 4 System Rear PAL50 SECAM NTSC PAL60 8 RGB Input RGB PC Analog D SUB 15...

Страница 8: ...x 1920x1080 60Hz Recommend 1920x1080 60Hz 4 Input Voltage Voltage 100 240 Vac 50 or 60Hz 5 Inrush Current Cold Start 50 A Hot 120 A 6 Operating Condition Sync H V Video LED Wattage Power S W On On mode On On Active Blue 135W Max On On Active Blue 120W Typ Sleep mode Off On Off Amber 1W RGB On Off Power S W Off Off mode Off Off 1W 7 MTBF 50 000 HRS with 90 Confidence level Lamp Life 40 000 Hours mi...

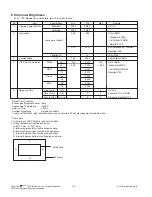
Страница 9: ... Interval between right of active area and bezel C Interval between top of active area and bezel D Interval between bottom of active area and bezel No Item Specification Min Typ Max Remark 1 Viewing Angle CR 10 Right Left 70 70 85 85 CR 10 Up Down 60 70 75 85 2 Luminance 320 400 DVI or RGB Standard 6500K Luminance cd m2 Full White 100IRE Backligth 100 270 320 DVI RGB 6500K 100IRE Backlight 100 Var...

Страница 10: ...83 0 300 Measurement White Balance Y axis 0 278 0 298 0 308 AV Mode RF AV1 2 3 Componet HDMI 2 Medium White Balance X axis 0 280 0 295 0 310 Vivid White Balance Y axis 0 290 0 305 0 320 Cool Medium Warm 85IRE 3 Warm White Balance X axis 0 298 0 313 0 328 White Balance Y axis 0 314 0 329 0 344 PC Mode RGB DVI 4 6500K White Balance X axis 0 283 0 313 0 343 Standard White Balance Y axis 0 299 0 329 0...

Страница 11: ...x1050 64 674 59 883 119 0 12 1680x1050 65 290 59 954 146 25 13 1600X1200 75 0 60 0 162 0 14 1920X1080 66 587 59 934 138 5 9 Component Video Input Y PB PR No Specification Remark Resolution H freq kHz V freq Hz 1 720x480 15 73 60 00 SDTV DVD 480i 2 720x480 15 63 59 94 SDTV DVD 480i 3 720x480 31 47 59 94 480p 4 720x480 31 50 60 00 480p 5 720x576 15 625 50 00 SDTV DVD 625 Line 6 720x576 31 25 50 00 H...

Страница 12: ...8 28 321 2 640x480 31 469 59 94 25 175 Input 848x480 60Hz 852x480 60Hz 640x480 60Hz Display 3 640x480 37 5 75 31 5 4 800x600 37 879 60 317 40 0 5 800x600 46 875 75 0 49 5 6 1024x768 48 363 60 0 65 0 7 1024x768 60 123 75 029 78 75 8 1152x864 67 500 75 000 108 0 9 1280x1024 63 981 60 02 108 0 10 1280x1024 79 976 75 035 135 0 11 1680x1050 64 674 59 883 119 0 12 1680x1050 65 290 59 954 146 25 13 1600X...

Страница 13: ... 3 1280x720 37 500 50 74 25 HDTV 720P 4 1280x720 44 96 45 59 94 60 74 17 74 25 HDTV 720P 5 1920x1080 33 72 33 75 59 94 60 74 17 74 25 HDTV 1080I 6 1920x1080 28 125 50 00 74 25 HDTV 1080I 7 1920x1080 26 97 27 23 97 24 74 17 74 25 HDTV 1080P 8 1920x1080 33 716 33 75 29 976 30 00 74 25 HDTV 1080P 9 1920x1080 56 250 50 148 5 HDTV 1080P 10 1920x1080 67 43 67 5 59 94 60 148 35 148 50 HDTV 1080P 12 2 EDI...

Страница 14: ...le Base detachable Assy Size W x D x H 330 0x 210 0x 51 8 Tilt Degree 5 10 degree Tilt force 1 0 3 7 kgf Swivel Degree 358 degree Swivel Force 0 5 2 kgf 13 Power No Item Min Typ Max Unit Remarks 1 AC Power Shut Down Voltage 90 264 Vac 2 DC Voltage LCD Panel 4 4 5 5 2 Vdc 3 DC Voltage Stand By 4 6 5 5 4 Vdc DC Voltage Sound AMP 16V 16 Vdc 4 DC Voltage Sound AMP 3 3V 2 97 3 3 3 63 Vdc NTP3000A DC Vo...

Страница 15: ...C Adjustment Jig equipment SVC remote controller 2 7 Don t push The IN STOP KEY after completing the function inspection 3 Main PCB check process APC After Manual Insult executing APC Download 1 Execute ISP program Mstar ISP Utility and then click Config tab 2 Set as below and then click Auto Detect and check OK message If display Error Check connect computer jig and set 3 Click Connect tab If dis...

Страница 16: ...d automatically using internal pattern Press the ADJ KEY on R C and enter EZ ADJUST Select 5 EDID D L by using CH and press ENTER Select Start and press navigation key ADC Calibration Internal is executed automatically Press EXIT key on R C 3 1 2 ADC Calibration External 3 1 2 1 Auto RGB Gain Offset Adjustment Convert to PC in Input source Signal equipment displays Output Voltage 700 mVp p Impress...

Страница 17: ...eparation W B Equipment condition CA210 CH 13 Test signal Inner pattern 85IRE Above 5 minutes H run in the inner pattern power on key of adjust remote control 15 Pin D Sub Jack is connected to the AUTO W B EQUIPMENT Adjust Process will start by execute I2C Command Inner pattern 0xF3 0xFF Adjust Process will finish by execute I2C Command Inner pattern Inner pattern 0xF3 0x00 Caution Color Temperatu...

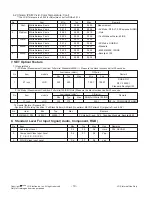
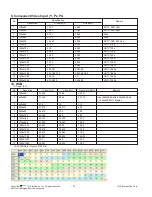
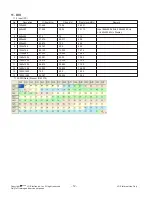
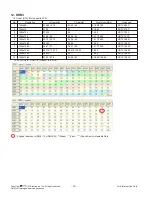
Страница 18: ...rial number RS 232C Press Power on key of service remocon Baud rate 115200 bps Connect RS232 Signal Cable to RS 232 Jack Write Serial number by use RS 232 Must check the serial number at the Diagnostics of SET UP menu Refer to below 4 7 M2794DP PZL EDID DATA 4 7 1 EDID download 1 Press the ADJ KEY on R C and enter EZ ADJUST 2 Select 8 EDID D L by using CH and press ENTER 3 Select Start and press n...

Страница 19: ...s LGE Internal Use Only C 2009 DISASSEMBLY Disassemble the top of Cabinet assy Disassemble Back cover by lifting up the top lightly Caution Hands off from the latch in the bottom Disassemble the side of Cabinet Assy Disassemble the side of Cabinet Assy 2 4 3 1 3 2 1 Remove the screw 4 point ...

Страница 20: ...Check P100 All Voltage Level 5V 12V Check Pow er con nector OK Replace P ower board Y Check IC1104 out put Voltage Level 3 3V Replace IC 1104 Recheck Y N Check X101 Clock 12MHz Replace X 101 Y N Replace IC 105 Flash Memory Check IC1102 Output Voltage Level 5V Replace IC1102 N Y Wave form of X101 N N Power Up Boot Fail Trouble Shooting ...

Страница 21: ...s problem Check L VDS Cable for damage or open con ductors Check L CD Module Control board Refer to Module CAS Y N Y Replace Ca ble N Y 1 Check Po wer Board 12V 2 Check IC1102 Output vol tage 5V 3 Check P402 29 30 5V 1 Replace Power Board 2 Replace IC1141 N Check P11 00 12 INV_ON high Check GPIO Path Refer to Appe ndix 1 N Y No OSD Trouble Shooting ...

Страница 22: ...aybe Tun er IC500 has problems Check P40 2 LVDS output 3 4 15 16 Y N Check Tu ner 5V Power Q1105 5V Replace Q1 105 Y N Y Replace IC100 has problems N Y Check D50 1 color Bad Tun er Replace Tuner None Yello w none Check Demod ulator Input Clock X500 50 48MHz Replace X500 N Y Check L CD Module Control board Refer to Mo dule CAS Wave form of X500 Digital TV Video Trouble Shooting ...

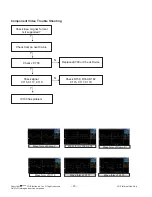
Страница 23: ...al for mat Is it supported Check signal C115 C117 C119 Check R15 8 R160 R162 C115 C117 C119 Y N Check J K700 Replace JK700 or Che ck Divice Y N Y IC100 has problem Y Check Compo nent Cab le Wave form of C119 Wave form of C117 Wave form of C115 Wave form of Comp Y Wave form of Comp Pb Wave form of Comp Pr Component Video Trouble Shooting ...

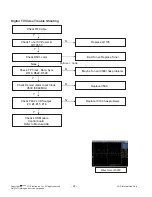
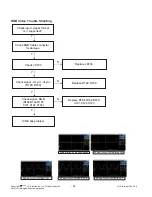
Страница 24: ...gnal Hsync Vsync R729 R730 Replace R7 29 R730 Check signal RGB R164 R144 R145 C121 C122 C123 Y N Check J K703 Replace JK703 Y N Y Replace R1 64 R144 R145 C121 C122 C123 N IC100 has problem Y Check RGB Cable connector for damage Y Wave form of R730 Vsync Wave form of R729 Hsync Wave form of R144 C122 Wave form of R164 C121 Wave form of R145 C123 RGB Video Trouble Shooting ...

Страница 25: ...supported Check signal RGB R167 R156 R168 C131 C132 C133 Replace R1 16 R113 R114 C137 C134 C135 Y N Check signal R771 AV_CVBS R772 R768 S_Video Replace R7 71 R772 R768 Y N Y IC100 has problem Check AV Ca ble S Video Cable f or damage or open conn ector Y Wave form of R768 S video Wave form of R771 CVBS Wave form of R772 S video AV Video Trouble Shooting ...

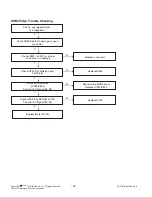
Страница 26: ...901 for proper connectio n or damage Replace c onnector Y N Y Check HDMI Cable for damage or open conn ector Check EDID NVRAM IC902 IC903 Power I2C Signal 5 6 Redownload EDID data or Replace IC801 IC802 Y N Check HDCP Key NVRAM IC102 Power I2C Signal 5 6 Replace IC102 Y N Check IC900 Out Voltage Level 3 3V Pin 6 Replace IC900 Y N Replace Ms tar IC100 HDMI Video Trouble Shooting ...

Страница 27: ...m ally Check Speaker and it s wire con nectio n P1000 And the resistance Check Sig nal from IC1000 L104 L105 L106 L107 Y Replace IC 1000 N Check 12V From Po wer board P1100 Pin 1 2 And Check Aud io Amp Pow er 12V IC1000 Y Replace P ower Board or Check L1002 L1003 N Y Check Sig nal from IC101 R1008 R1009 R179 R180 Y Replace IC 100 N Replace co nnector or Speaker N All Source Audio Trouble Shooting ...

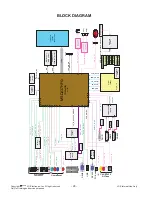
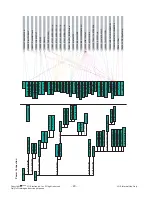
Страница 28: ...emory 16MB IC104 SC1_CVBS_IN SC2_CVBS_IN SC1_TV_VOUT DTV MNT_V_OUT SC1_L R_IN TV_L R_OUT DTV MNT_L R_OPOUT LCD Panel P402 1920 x 1080 RESET SYSTEM_I2C TS_Serial TPA6110 IC1002 H phone_L R_OUT Tuner Tuner 24C02 24C02 SPI DDR DDC_I2C UART J1000 SPDIF_OUT OPTIC SCART SCART Component Component DSUB DSUB USB USB RS232 RS232 DVI DVI D D HDMI1 HDMI1 HDMI2 HDMI2 MSG1040 IC103 I O Expand er for I nput D et...

Страница 29: ... Amber IC500 XC5000 JK601 Scart Half Jack JK600 Scart Full Jack P800 CI Slot IC1002 TPA6110A2DGNRG4 IC1000 TAS5709PHPR JK1000 SPDIF Optic IC103 LGE40RC LF 3 3V_AVDD_AU 3 3V_AVDD_VIF 3 3AVDD 3 3V_VDDP 3 3V_VDDP_ST 5V_ST 5V_CI 12V IC1104 MP2212DN IC1102 MP2212DN IC1106 AP2121N 3 3TRB1 PANEL_POWER Q1106 SI4925BDY 3 3V_EXP 5V_HP 3 3V_AVDD_LPLL 5V_GENERAL 5V_TU Q1105 SI4925BDY 3 3V_EXPANDER 1 8V_EXPAND...

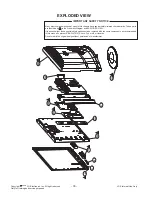
Страница 30: ...anical parts in this chassis have special safety related characteristics These parts are identified by in the Schematic Diagram and EXPLODED VIEW It is essential that these special safety parts should be replaced with the same components as recommended in this manual to prevent X RADIATION Shock Fire or other Hazards Do not modify the original design without permission of manufacturer IMPORTANT SA...

Страница 31: ...Copyright ⓒ 2009 LG Electronics Inc All right reserved Only for training and service purposes LGE Internal Use Only ...

Страница 32: ...Copyright ⓒ 2009 LG Electronics Inc All right reserved Only for training and service purposes LGE Internal Use Only ...

Страница 33: ...Copyright ⓒ 2009 LG Electronics Inc All right reserved Only for training and service purposes LGE Internal Use Only ...

Страница 34: ...Copyright ⓒ 2009 LG Electronics Inc All right reserved Only for training and service purposes LGE Internal Use Only ...

Страница 35: ...Copyright ⓒ 2009 LG Electronics Inc All right reserved Only for training and service purposes LGE Internal Use Only ...

Страница 36: ...Copyright ⓒ 2009 LG Electronics Inc All right reserved Only for training and service purposes LGE Internal Use Only ...

Страница 37: ...Copyright ⓒ 2009 LG Electronics Inc All right reserved Only for training and service purposes LGE Internal Use Only ...

Страница 38: ...Copyright ⓒ 2009 LG Electronics Inc All right reserved Only for training and service purposes LGE Internal Use Only ...

Страница 39: ...Copyright ⓒ 2009 LG Electronics Inc All right reserved Only for training and service purposes LGE Internal Use Only ...

Страница 40: ...Copyright ⓒ 2009 LG Electronics Inc All right reserved Only for training and service purposes LGE Internal Use Only ...

Страница 41: ...Copyright ⓒ 2009 LG Electronics Inc All right reserved Only for training and service purposes LGE Internal Use Only ...

Страница 42: ...Feb 2009 Printed in Korea P NO MFL49414512 ...

Отзывы: