background image

19

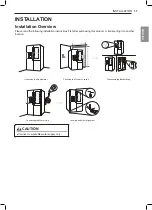
INSTALLATION

ENGLISH

3

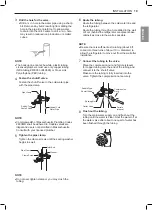
Drill the hole for the valve.


Drill a ¼ in. hole in the water pipe using a sharp 

bit. Remove any burrs resulting from drilling the 

hole in the pipe. Be careful not to allow water 

to drain into the drill. Failure to drill a ¼ in. hole 

may result in reduced ice production or smaller 

cubes.

NOTE


The hookup line cannot be white, plastic tubing. 

Licensed plumbers must use only copper tubing 

(NDA tubing #49595 or #49599) or Cross Link 

Polyethylene (PEX) tubing.

4

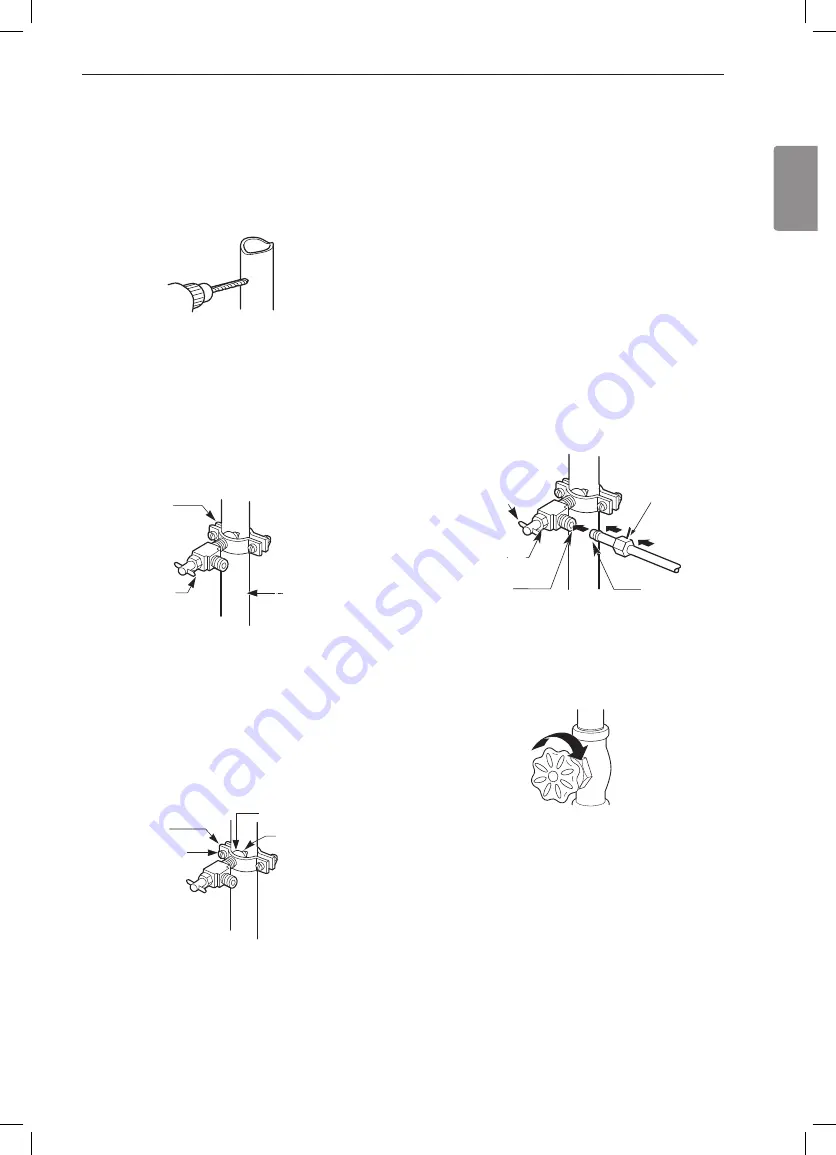
Fasten the shutoff valve.

Fasten the shutoff valve to the cold water pipe 

with the pipe clamp.

Pipe Clamp

Saddle-Type 

Shutoff Valve

Vertical Cold 

Water Pipe

NOTE


Commonwealth of Massachusetts Plumbing Codes 

248CMR shall be adhered to. Saddle valves are 

illegal and use is not permitted in Massachusetts. 

Consult with your licensed plumber.

5

Tighten the pipe clamp.

Tighten the clamp screws until the sealing washer 

begins to swell.

Pipe Clamp

Clamp Screw

Washer

Inlet End

NOTE


Do not over tighten clamp or you may crush the 

tubing.

6

Route the tubing.

Route the tubing between the cold water line and 

the refrigerator.
Route the tubing through a hole drilled in the wall 

or floor (behind the refrigerator or adjacent base 

cabinet) as close to the wall as possible.

NOTE


Be sure there is sufficient extra tubing (about 8 ft. 

coiled into three turns of about 10 in. diameter) to 

allow the refrigerator to move out from the wall after 

installation.

7

Connect the tubing to the valve.

Place the compression nut and ferrule (sleeve) 

for copper tubing onto the end of the tubing and 

connect it to the shutoff valve.
Make sure the tubing is fully inserted into the 

valve. Tighten the compression nut securely.

Saddle-Type 

Shutoff Valve

Packing Nut

Outlet Valve

Compression 

Nut

Ferrule 

(sleeve)

8

Flush out the tubing.

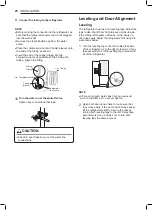
Turn the main water supply on and flush out the 

tubing until the water is clear. Shut the water off at 

the water valve after about one quart of water has 

been flushed through the tubing.

Содержание LSXC22396S

Страница 1: ...REFRIGERATOR Read this owner s manual thoroughly before operating the appliance and keep it handy for reference at all times LSXS26396S LSXC22396S MFL67653459 Rev 02_030817 www lg com Copyright 2017 LG Electronics Inc All Rights Reserved ...

Страница 2: ...g installation instructions first after purchasing this product or transporting it to another location Unpacking the Refrigerator Choosing the Proper Location Disassembling Assembling Connecting the Water Line Leveling and Door Alignment CAUTION Connect to a potable water supply only ...

Страница 3: ...e products can damage the surface of your refrigerator Reinstall or adjust shelves as needed Refrigerator shelves are installed in the shipping position Reinstall shelves according to your individual storage needs Choosing the Proper Location Water Water supply must be easily connected for the automatic icemaker NOTE The water pressure must be 20 120 psi or 138 827 kPa or 1 4 8 4 kgf cm2 If the re...

Страница 4: ...nce from adjacent items may result in lowered freezing capability and increased electricity consumption charges Allow at least 24 inches 610 mm in front of the refrigerator to open the doors and at least 2 inches 50 8 mm between the back of the refrigerator and the wall B A C D F G E M List LSXS26396S LSXC22396S A Depth without handle 33 2 5 848 mm 29 2 5 747 mm B Width 35 9 10 912 mm 35 9 10 912 ...

Страница 5: ...nd handle using a 1 4 in Allen wrench and remove the mounting fasteners Assembling the Refrigerator Handles 1 Assemble the mounting fasteners 1 at both ends of the handle with a 1 4 in Allen rench 2 Place the handle on the door by fitting the handle footprints over the mounting fasteners and tightening the set screws 2 with a 3 32 in Allen wrench Removing Assembling the Doors If the entrance door ...

Страница 6: ...ckwise 1 and lift the upper hinge 2 1 2 Hinge Lever Upper Hinge 4 Lift the door to remove it from the lower hinge pin Be careful to pull the water lines from behind the lower hinge pin Enough for the water feed tube to be completely pulled out water feed tube Lower Hinge CAUTION When lifting the hinge free of the latch be careful that the door does not fall forward Place the door inside facing up ...

Страница 7: ...rd the inside Water hoses should be behind the leg to prevent damage Correct Incorrect Disassembling Assembling the Water Lines Collet Tube Insert line Clip Correct 2 Gently press the collet and insert the tube until only one line shows on the tube Correct Incorrect NOTE Water hoses should be cut with a clean straight edge to avoid leaks 3 Fit the top over the hinge lever latch and into place Rota...

Страница 8: ...r supply line to the refrigerator Water banging in the pipes or water hammer in residential plumbing can cause damage to refrigerator parts and lead to water leakage or flooding Turn the icemaker OFF if the refrigerator will be used before the water line is connected Do not install the icemaker tubing in areas where the ambient temperatures fall below freezing WARNING Connect to a potable water su...

Страница 9: ...valve If your existing copper water line has a flared fitting at the end purchase an adapter available at plumbing supply stores to connect the water line to the refrigerator OR cut off the flared fitting with a tube cutter and then use a compression fitting Shutoff valve to connect to the cold water line The shutoff valve should have a water inlet with a minimum inside diameter of 5 32 in at the ...

Страница 10: ...ng washer begins to swell Pipe Clamp Clamp Screw Washer Inlet End NOTE Do not over tighten clamp or you may crush the tubing 6 Route the tubing Route the tubing between the cold water line and the refrigerator Route the tubing through a hole drilled in the wall or floor behind the refrigerator or adjacent base cabinet as close to the wall as possible NOTE Be sure there is sufficient extra tubing a...

Страница 11: ... line connections Leveling and Door Alignment Leveling The refrigerator has two front leveling legs Adjust the legs to alter the tilt from front to back or side to side If the refrigerator seems unsteady or the doors do not close easily adjust the refrigerator s tilt using the instructions below 1 Turn the leveling leg to the left to raise that side of the refrigerator or to the right to lower it ...

Страница 12: ...n the Power After installing plug the refrigerator s power cord into a 3 prong grounded outlet and push the refrigerator into the final position CAUTION Connect to a rated power outlet Have a certified electrician check the wall outlet and wiring for proper grounding Do not damage or cut off the ground terminal of the power plug Position the Rrigerator Arrange the coil of tubing so that it does no...

Отзывы: