


COMPONENT ACCESS
3-15
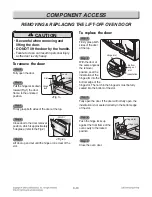
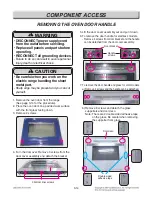
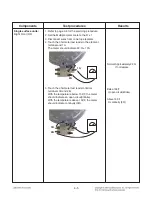
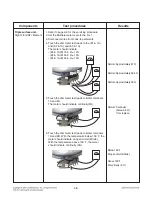
6. To remove a hinge hanger assembly:
Remove 4 screws and detach the hinge hanger
from the door frame slot.
7. To remove the door’s inner glass assembly:
a) Remove 6 screw.
b) Detach the inner cover and the inner glass
assembly can be detached.
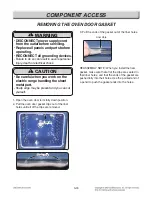
REASEMBLY NOTE: When you reinstall the
insulation around the oven door glass, make sure
that the insulation is not visible in the glass after the
door is reassembled.
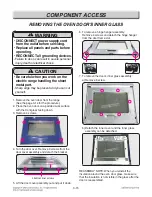
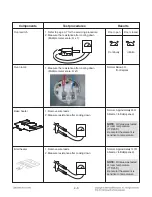
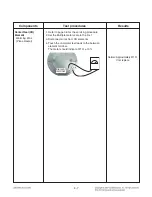
REMOVING THE OVEN DOOR’S INNER GLASS
1. Remove the oven door from the range
(See the page 3-14 for the procedure).
2. Place the oven door on a padded work surface
with the front glass facing down.
3. Remove 4 screws.
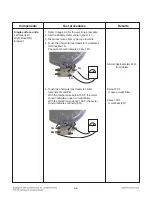
4. Turn the door over. Remove 3 screws from the
door cover assembly and detach the bracket
5. Lift the door cover assembly out and put it down.
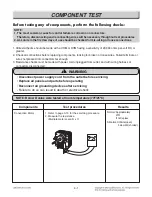
WARNING
• DISCONNECT power supply cord
from the outlet before servicing.
• Replace all panels and parts before
operating.
• RECONNECT all grounding devices.
- Failure to do so can result in severe personal
injury, death or electrical shock.
!
!
CAUTION
• Be careful when you work on the
electric range handling the sheet
metal part.
- Sharp edge may be present and you can cut
yourself.
!
!
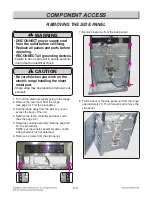
3 bottom liner screws
Bracket
Содержание LRE3194BD
Страница 39: ...5 2 Composition of control Key Matrix ...
Страница 42: ...5 5 Composition of control Cook top display PCB Key Pad ...
Страница 71: ...12 3 BAKE COOK WARM PROOF CONV BAKE CONV ROAST SELF CLEANING CR Warming Zone ...
Страница 72: ...12 4 RR Cook top Element LR Cook top Element LF Cook top Element RF Cook top Element ...
Страница 75: ... EV CONTROLLER PARTS 2381 2031 2050 2006 2048 2037 2042 2036 3006 2034 2041 2075 ...
Страница 76: ... EV COOKTOP PARTS 3057 3014 3056 3302 3301 3303 3303 3401 3022 3204 3401 3204 3204 3204 ...
Страница 79: ......


