background image

7

Introduction

Disc-related terms

MP3

MP3 is a popular compression format used for digital
audio files that yields very high near-CD quality. 

WMA

Windows Media

®

audio file. A type of coding / decoding

developed by Microsoft Corp.

JPEG

Joint Pictures Expert Group. JPEG is a compressed file
format that allows you to save images with no limit on
the number of colors.

Note on Windows Media

Windows Media is either a registered trademark or
trademark of Microsoft Corporation in the United States
and/or other countries.

Title (DVD video discs only)

A title is generally a distinct section of a DVD disc. For
example the main feature could be title 1, a
documentary describing how the film was made could
be title 2, and cast interviews could be title 3. Each title
is assigned a reference number enabling you to locate it
easily.

Chapter (DVD video discs only)

A chapter is a segment of a title such as a scene in a
film or one interview in a series. Each chapter is
assigned a chapter number, enabling you to locate the
chapter you want. Depending on the disc, chapters
may not be recorded.

Track 

A distinct element of audiovisual information, such as
the picture or sound track for a specific language
(DVD), or a musical piece on audio CD. Each track is
assigned a track number, enabling you to locate the
track you want. DVD discs allow one track of video
(with multiple angles) and several tracks of audio.

Caution

Never throw batteries into a fire.

Notes:

Be sure to use AAA size batteries.

Dispose of batteries in a designated disposal area.

Batteries should always be disposed of with the
environment in mind. Always dispose of batteries in
accordance with applicable laws and regulations.

If the Remote Control does not operate correctly, or if the
operating range becomes reduced, replace batteries with
new ones.

When necessary to replace batteries in the Remote
Control, always replace both batteries with new ones.
Never mix battery types or use new and used batteries in
combination.

Always remove batteries from Remote Control if they are
dead or if the Remote Control is not to be used for an
extended period of time. This will prevent battery acid from
leaking into the battery compartment.

Remote Control Operation Range

Point the Remote Control at the remote sensor and
press the buttons.

Distance:

About 7m (23ft) from the front of the

remote sensor

Angle:

About 30° in each direction of the front of the

remote sensor

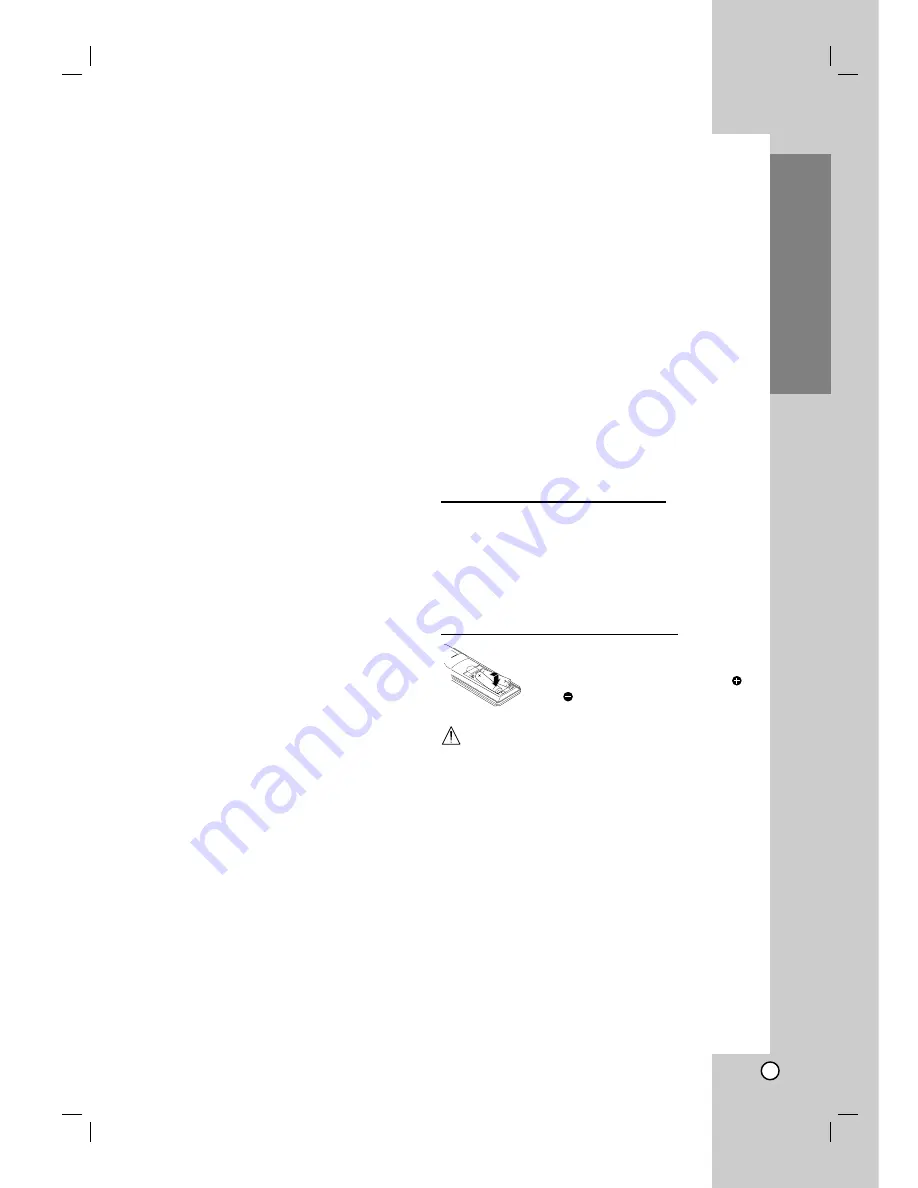
Remote Control battery installation

Detach the battery cover on the rear
of the Remote Control, and insert
two R03 (size AAA) batteries with 
and aligned 

correctly.

Содержание LH-E9674

Страница 1: ...S 96PAC LHS 96PAS LHS 96PAW Before connecting operating or repairing this product please read this instruction booklet carefully and completely LH E9674PA_NA1ULLA_ENG For service support Call Toll Free Number 1 800 243 0000 FOR THE WARRANTY TERMS CONDITIONS PLEASE REFER TO BACK COVER OF THIS MANUAL R USB ...

Страница 2: ...terference to radio communications However there is no guarantee that interference will not occur in a particular installation If this product does cause harmful interference to radio or television reception which can be determined by turning the product off and on the user is encouraged to try to correct the interference by one or more of the following measures Reorient or relocate the receiving ...

Страница 3: ... the manufacturer s instructions have been adhered to 8 Do not install near any heat sources such as radiators heat registers stoves or other apparatus including amplifiers that produce heat 9 Do not defeat the safety purpose of the polarized or grounding type plug A polarized plug has two blades with one wider than the other A grounding type plug has two blades and a third grounding prong The wid...

Страница 4: ...tup 25 To open all discs 25 To select a playback disc 25 To play all discs on the disc trays 25 Special DVD Features 25 Checking the contents of DVD discs Menus 25 Camera Angle 25 Additional features 26 Time Search 26 Marker Search 26 Last Scene Memory 26 Sleep Timer Setting 26 Dimmer 26 Mute 26 Using Headphone Jack 26 Playing an Audio CD or MP3 WMA file 27 Programmed Playback 27 Viewing a JPEG fi...

Страница 5: ...e only to the disc represented by the symbol DVD and finalized DVD R RW Audio CDs MP3 Discs WMA Discs JPEG Discs About the Symbol Display may appear on your TV display during operation and indicates that the function explained in this owner s manual is not available on that specific DVD video disc Notes on Discs HANDLING DISCS Do not touch the playback side of the disc Hold the disc by the edges s...

Страница 6: ...487 535 and other US and world wide patents issued and pending DTS and DTS Digital Surround are registered trademarks of Digital Theater Systems Inc Copyright 1996 2003 Digital Theater Systems Inc All rights reserved Note on DTS encoded CDs When playing DTS encoded CDs excessive noise may be exhibited from the analog stereo output To avoid possible damage to the audio system turn down the volume b...

Страница 7: ...nguage DVD or a musical piece on audio CD Each track is assigned a track number enabling you to locate the track you want DVD discs allow one track of video with multiple angles and several tracks of audio Caution Never throw batteries into a fire Notes Be sure to use AAA size batteries Dispose of batteries in a designated disposal area Batteries should always be disposed of with the environment i...

Страница 8: ...y PAUSE X X STEREO MONO Pause playback of a disc in the DVD deck temporarily press repeatedly for frame by frame playback Tuner function There will be no stereo effect when you press this button but the reception will improve Press this button again to restore the stereo effect Reverse SKIP SCAN S S Q Q XM CH FM AM CH Goes to the beginning of current chapter track or to the previous chapter track ...

Страница 9: ...n a stereo broadcast is being received MP3 MP3 disc inserted WMA WMA disc inserted PHOTO PHOTO disc inserted Programmed playback active DISC INDICATORS Flashes when a disc is loaded in the disc tray Indicates sound mode Dolby Digital DTS Dolby Pro Logic II Indicates the unit is playing back a disc or indicates the unit is pause playback of a disc temporarily MUTE The speaker sound is muted Lights ...

Страница 10: ...panel during power on status TV Control Buttons POWER Switches TV ON and OFF CHANNEL v V Selects TV s channel VOLUME Adjusts TV s volume INPUT Selects the TV s source MUTE Turns the sound on and off temporarily POWER Turns unit ON and OFF DVD Select the unit s function mode to DVD BAND Select FM AM XM band as the listening choice FM AM and XM bands AUX Selects external input source AV1 or AV2 USB ...

Страница 11: ...o an S Video Input on TV FOR DVD VIEWING ONLY FM ANTENNA CONNECTORS Connect the FM antenna to this terminal COMPONENT VIDEO OUT Y Pb Pr Connect to a TV with Y Pb Pr inputs XM IN Connector Connect an XM Passport System to this terminal sold separately HDMI OUT HDMI output providing a high quality interface for digital audio and video SPEAKER CONNECTORS Connect the six supplied speakers to these ter...

Страница 12: ...OUT and S VIDEO OUT is always at 480i standard resolution HDMI mode must be set to OFF for VIDEO OUT and S VIDEO OUT jack connection Component Video ColorStream Connect the COMPONENT VIDEO OUT jacks on the unit to the corresponding in jacks on the TV using an Y Pb Pr cable C Progressive Scan ColorStream Pro If your television is a high definition or digital ready television you may take advantage ...

Страница 13: ...ick MS Secure Digital Card SD Multi Media Card MMC Memory Stick Pro MS Pro Compatable with FAT16 FAT 32 Only use the memory cards recommended Devices which require additional program installation when you have connected the unit to a computer are not supported In case of a USB HDD make sure to connect an auxiliary power cord to the USB HDD for porper operation Up to four primary partitions of driv...

Страница 14: ...Connect he FM Wire antenna to the FM antenna connector Connect the AM Loop antenna to the AM antenna connector Notes Be sure to fully extend the FM wire antenna After connecting the FM Wire antenna keep it as horizontal as possible To prevent noise pickup keep the AM Loop antenna away from the DVD CD Receiver and other components ...

Страница 15: ...I to DVI adaptor HDMI has the capability to support standard enhanced or high definition video plus standard to multi channel surround sound audio HDMI features include uncompressed digital video a bandwidth of up to 5 gigabytes per second one connector instead of several cables and connectors and communication between the AV source and AV devices such as DTVs HDMI the HDMI logo and High Definitio...

Страница 16: ...m Connection Connect the speakers using the supplied speaker cables To obtain the best possible surround sound adjust the speaker parameters volume distance etc Notes Be sure to match the speaker cable to the appropriate terminal on the components to and to If the cables are reversed the sound will be distorted and will lack base If you use front speakers with low maximum input rating adjust the v...

Страница 17: ...e Center speaker The center speaker and front speakers are ideally the same height But normally place it above or below the television Rear speakers Place left and right behind the listening area These speakers recreate sound motion and atmosphere required for surround sound playback For best results do not install the rear speakers too far behind the listening position and install them at or abov...

Страница 18: ...t panel display Audio will come from an external source connected to the DIGITAL AUDIO IN OPTICAL jack and video will come from an external source connected to the VIDEO IN jack of AV IN for rear panel or LINE IN 2 AV 2 for front panel Press D INPUT on the Remote Control twice AV 1 COAX or AV 2 COAX will appear on the front panel display Audio will come from an external source connected to the DIG...

Страница 19: ...reception may be simply to force the audio to mono 3D SURROUND This unit can produce a 3D Surround effect using 3D Surround Sound technology which simulates multi channel audio playback from two conventional stereo speakers instead of the five or more speakers normally required to listen to multi channel audio from a home theatre This feature works with DVD discs encoded with Dolby Pro Logic and D...

Страница 20: ...r total number of titles or tracks Chapter Current chapter number total number of chapters Time Elapsed playing time Audio Selected audio language or channel Subtitle Selected subtitle Angle Selected angle total number of angles Sound Selected sound mode Note If no button is pressed for a few seconds the on screen display disappears Initial Settings By using the Setup menu you can make various adj...

Страница 21: ...ge code list on page 36 If you enter the wrong language code press CLEAR DISPLAY TV Aspect 4 3 Select when a standard 4 3 TV is connected 16 9 Select when a 16 9 wide TV is connected Display Mode Display Mode setting works only when the TV Aspect mode is set to 4 3 Letterbox Displays a wide picture with bands on the upper and lower portions of the screen Panscan Automatically displays the wide pic...

Страница 22: ...eaker 3 Adjust options using v V b B buttons 4 Press ENTER to confirm your selection Returns to the previous menu Speaker selection Select a speaker that you want to adjust Front speakers Left Front speakers Right Center Speaker SubWoofer Rear speakers Left or Rear speakers Right Note Certain speaker settings are prohibited by the Dolby Digital licensing agreement Size Since the speaker settings a...

Страница 23: ...menu If you forget your password If you forget your password you can clear it using the following steps 1 Press SETUP to display the Setup menu 2 Input the 6 digit number 210499 and press ENTER The password is cleared Area Code Enter the code of the area whose standards were used to rate the DVD video disc based on the list on page 36 1 Select Area Code on the LOCK menu then press B 2 Follow step ...

Страница 24: ...MP3 WMA discs Track All Off A B During playback each press of A B button to select point A and point B and repeats a sequence from point A Starting point to point B End point Press REPEAT A B to exit ZOOM During playback or pause mode press ZOOM to enlarge the video image 3 steps You can move through the zoomed picture using b B v V buttons TITLE If the current DVD title has a menu the title menu ...

Страница 25: ...le discs will play once Tip During playback track number and elapsed playing time of the current track will appear in the display window Note If on the disc trays have inserted only MP3 disc WMA disc and Audio disc all discs will repeat playback This function is not available during Repeat playback or Programmed playback mode If the discs that contain its own menu has inserted you can not use this...

Страница 26: ... memorizes last scene from the last disc that is viewed The last scene remains in memory even if you remove the disc from the receiver or switch off the receiver If you load a disc that has the scene memorized the scene is automatically recalled Note This receiver does not memorize the scene of a disc if you switch off the receiver before commencing to play the disc Sleep Timer Setting You can set...

Страница 27: ...from the Program list 2 Press CLEAR Alternatively select Delete icon then press ENTER to place the selected track on the Program list Repeat to erase additional tracks on the list Erasing the Complete Program List Use v V to select Del all then press ENTER Note The programs are also cleared when the disc is removed or others disc was played Program List Track1 Track2 Track3 Track4 Track5 Track6 Tr...

Страница 28: ...how The unit will now go into PAUSE mode 2 To return to the slide show press PLAY or press PAUSE STEP again Moving to another File Press SKIP or once while viewing a picture to advance to the next or previous file To rotate picture Press b B 3 4during showing a picture to rotate the picture clockwise or counter clockwise JPEG Preview List JPEG Folder 1 JPEG Folder 2 JPEG Folder 3 JPEG Folder 4 JPE...

Страница 29: ...aying a DivX file When the subtile has more than two languages in the file original subtile is only available The DivX files in your memory card can not be played You can not adjust sound mode and VIRTUAL sound during the DivX file playing List Movie Folder 1 Movie Folder 2 Movie Folder 3 Movie Folder 4 Movie Folder 5 Movie Folder 6 Movie Folder 7 Movie Folder 8 MOVIE 0 00 00 DivX disc compatibili...

Страница 30: ...ROUP Some DVD Audio discs divide content into different groups Your player enables you to quickly access different groups during playback via the on screen display 1 Press DISPLAY during playback on in stop mode 2 Press 3 3 4 4 to select Group icon 3 Press 1 2 or the numbered buttons 0 9 to select a group number Note Sometimes the author of the disc creates hidden content that can only be accessed...

Страница 31: ...o off by itself and change to normal mode Note If all stations have already been entered the FULL message will appear in the display window for a moment and then a preset number will flash To change the preset number follow the steps 5 6 as above Listening to the Radio Preset radio stations in the unit memory first see Presetting radio stations on the left 1 Press BAND until FM or AM appears in th...

Страница 32: ... XM service make sure your XM equipment is tuned to the XM Preview Channel Channel 1 2 Determine your eight character XM Satellite Radio ID number by referencing the label on your XM Passport System packaging rear cover or by selecting channel 0 The ID number will appear on the display Note Carefully check your XM Satellite Radio ID The letter I O S and F are not used 3 Activate your XM Satellite ...

Страница 33: ...tely Channel up down Use XM CH or XM CH repeatedly to select the channel you want Category Search 1 Select the Category Search mode using the CAT key on the Remote Control CAT Icon Blinking in Category Search mode 2 3 4 changes target of category for search XM CH or XM CH selects next channel of selected category in category search mode Note Category type of current channel displays for 3 seconds ...

Страница 34: ...between the TV and other input sources MUTE Turns on or off TV sound Note Depending on the unit being connected you may not be able to control your TV using some of the buttons Controlling other TVs with the Supplied Remote Control You can control the sound level input source and power switch of non LG TVs as well If your TV is listed in the table below set the appropriate manufacturer code refer ...

Страница 35: ...15 38 43 58 PHILIPS 06 07 43 61 62 65 PIONEER 30 PORTLAND 09 PROSCAN 03 37 44 QUASAR 11 13 RADIO SHACK 16 17 23 RCA 01 03 37 44 69 REALISTIC 16 17 23 SAMPO 08 SAMSUNG 01 08 09 25 68 SANYO 28 29 SCOTT 01 08 SEARS 09 25 26 27 28 29 SEMP 64 SHARP 09 22 23 24 60 66 SIGNATURE 2000 01 06 08 09 10 23 24 33 34 SONY 12 62 SOUNDESIGN 51 SYLVANIA 01 04 05 06 07 08 35 51 SYMPHONIC 46 47 TATUNG 11 TEKNIKA 07 0...

Страница 36: ...orussian 6669 Cambodian 7577 Catalan 6765 Chinese 9072 Corsican 6779 Croatian 7282 Czech 6783 Danish 6865 Dutch 7876 English 6978 Esperanto 6979 Estonian 6984 Faroese 7079 Language Code Fiji 7074 Finnish 7073 French 7082 Galician 7176 Georgian 7565 German 6869 Greek 6976 Greenlandic 7576 Guarani 7178 Gujarati 7185 Hausa 7265 Hebrew 7387 Hindi 7273 Hungarian 7285 Icelandic 7383 Indonesian 7378 Inte...

Страница 37: ...is dirty A menu is on the TV screen The Rating level is set The disc is dirty The speakers and components are connected poorly The DVD CD Receiver is located too close to the TV Correction Plug the power cord securely into the wall outlet Insert a disc Check that the DVD or audio CD indicator in the DVD display is lit Select the appropriate video input mode on the TV so the picture from the DVD CD...

Страница 38: ...e Control Maintenance and Service Refer to the information in this chapter before contacting a service technician HANDLING THE UNIT When shipping the unit Please save the original shipping carton and packing materials If you need to ship the unit for maximum protection re pack the unit as it was originally packed at the factory Keeping the exterior surfaces clean Do not use volatile liquids such a...

Страница 39: ...diate Frequency 10 7 MHz Signal to Noise Ratio 60 dB Mono Frequency Response 150 8 000 Hz Tuning Range 522 1 620 kHz or 520 1 720 kHz Intermediate Frequency 450 kHz Stereo mode 155W 155W Rated Output Power 130W 4Ω at 1 kHz THD 10 Surround mode Front 155W 155W Rated Output Power 130W THD 10 Centre 155W Surround 155W 155W Rated Output Power 130W 4Ω at 1 kHz THD 10 Subwoofer 225W Rated Output Power 1...

Страница 40: ...ystem components and z Damages or operating problems that result from normal wear and tear misuse abuse operation outside environmental specifications or contrary to the requirements or precautions in the Operating Guide accident lightning strikes or other natural causes unauthorized modification or alteration incorrect electrical current or voltage reception problem caused by inadequate home ante...

Отзывы: