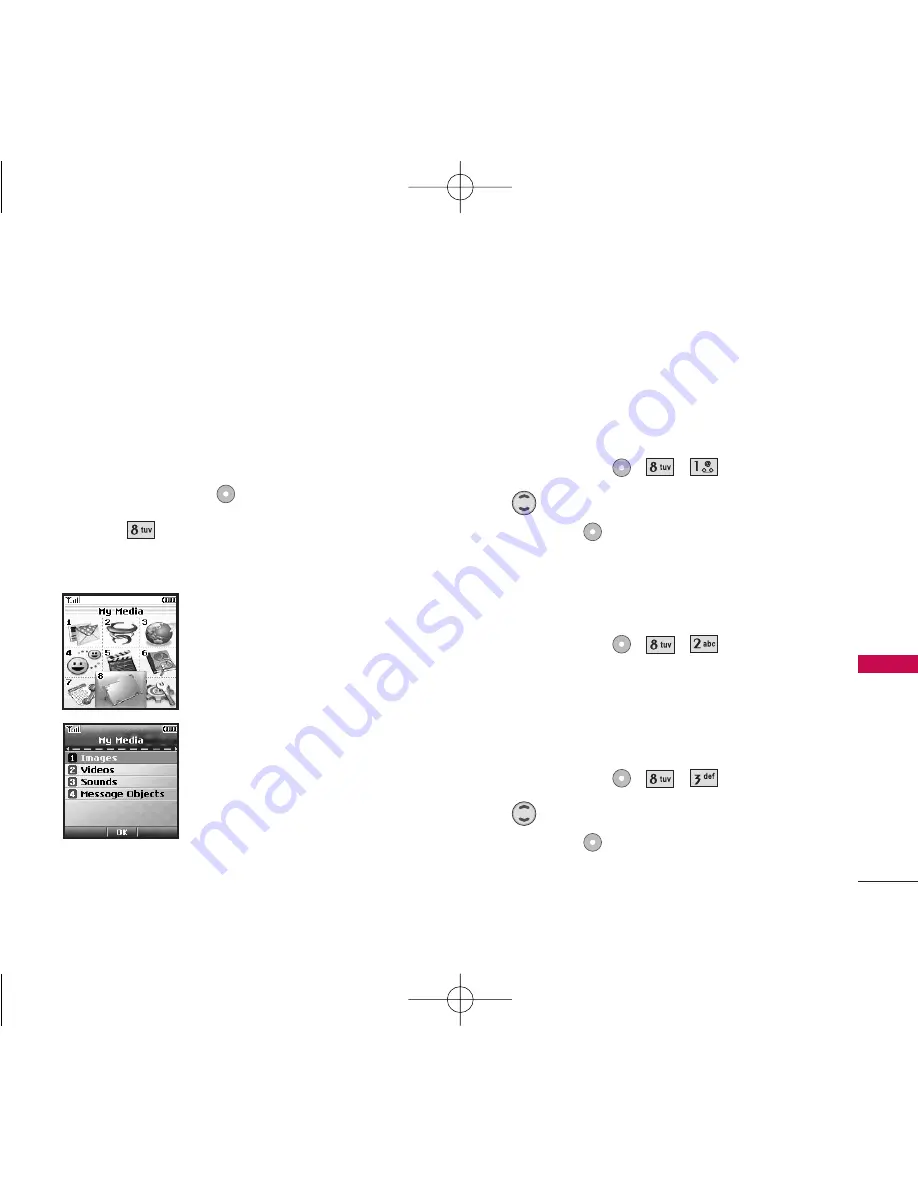
background image

My Media

This menu allows you to use a wide variety of images,
sounds, and more.

Access and Options

1. Press Left Soft Key 

Menu

.

2. Press 

My Media

.

3. Select a sub-menu.

1. Images
2. Videos
3. Sounds
4. Message Objects

1. Images

Allows you to choose images to your phone to
display as the background image displayed on the
phone.

1. Press Left Soft Key 

.

2. Use 

to highlight your selection, then press

Right Soft Key 

Options 

to select.

2. Videos

Allows you to choose video clips.

1. Press Left Soft Key 

.

3. Sounds

Allows you to choose the downloaded ringtones
heard for incoming calls.

1. Press Left Soft Key 

.

2. Use 

to highlight your selection, then press

Right Soft Key 

Options

to select.

My Media

63

My Media

LG357_Eng_new.qxd  12/1/06  6:57 PM  Page 63

Содержание LG357

Страница 1: ...USER GUIDE LG 357 Please read this manual carefully before operating your mobile phone Retain it for future reference ENGLISH P N MMBB0228301 1 0 W U S E R G U I D E L G 3 57 ...

Страница 2: ...tronics Inc All rights reserved LG and the LG logo are registered trademarks of LG Group and its related entities All other trademarks are the property of their respective owners LG357 cover final qxd 12 1 06 7 13 PM Page 2 ...

Страница 3: ...plode 2 Never place your phone in a microwave oven as it will cause the battery to explode 3 Never store your phone in temperatures less than 4 F or greater than 122 F 4 Do not dispose of your battery by fire or with hazardous or flammable materials 5 When riding in a car do not leave your phone or set up the hands free kit near to the air bag If wireless equipment is improperly installed and the ...

Страница 4: ...internal circuit boards of the phone 4 Do not use your phone in high explosive areas as the phone may generate sparks 5 Do not damage the power cord by bending twisting pulling or heating Do not use the plug if it is loose as it may cause a fire or electric shock 6 Do not place any heavy items on the power cord Do not allow the power cord to be crimped as it may cause electric shock or fire 7 Do n...

Страница 5: ...lugs earphone connection parts of the phone etc This could cause asphyxiation or suffocation resulting in serious injury or death 6 Unplug the power cord and charger during lightning storms to avoid electric shock or fire 7 Only use the batteries and chargers provided by LG The warranty will not be applied to products provided by other suppliers 8 Only authorized personnel should service the phone...

Страница 6: ...stakes 19 Redialing Calls 19 Receiving Calls 19 Quick Access to Convenient Features 20 Manner Mode 20 Lock Mode 20 Mute Function 20 Volume Quick Adjustment 20 Call Waiting 21 Caller ID 21 Speed Dialing 21 Entering and Editing Information 22 Text Input 22 Key Functions 22 Text Input Modes 22 T9Word T9 Mode 22 Abc Multi tap Mode 22 123 Numbers Mode 22 Symbols Mode 23 Changing Letter Case 23 Text Inp...

Страница 7: ...ing a Pause to an Existing Number 30 Searching Your Phone s Memory 31 Scrolling Through Your Contacts 31 Searching by Letter 31 Searching Options 31 Making a Call From Your Phone s Memory 32 From Contacts 32 From Recent Calls 32 Speed Dialing 32 Using Phone Menus 33 Messaging 33 1 New Text Message 34 2 New Photo Message 36 3 Inbox 38 4 Sent 39 5 Drafts 40 6 Voice Mail 40 7 Settings 41 7 1 Auto Sav...

Страница 8: ...T Calls with the Flip Closed 54 Receiving PTT Calls Alerts 54 Incoming Barge PTT 54 Incoming Alert PTT 54 Incoming Group PTT 54 Multimedia 55 1 Take Photo 55 2 Take Video 56 3 Record Voice 57 4 Photo Gallery 57 5 Video Gallery 57 6 Voice Clip 57 Contacts 58 1 Contacts 58 2 New Contact 59 3 Groups 59 4 Speed Dials 60 5 My Contact Info 60 Recent Calls 61 1 Missed Calls 61 2 Dialed Calls 62 3 Receive...

Страница 9: ...3 8 Color Schemes 72 4 System 73 4 1 System Select 73 4 2 Set NAM 73 4 3 Auto NAM 73 4 4 Serving System 73 4 5 Force Call 73 5 Security 74 5 1 Lock Phone 74 5 2 Restrict Calls 74 5 3 Emergency s 75 5 4 Change Lock Code 75 5 5 Reset Default 75 6 Call Setup 76 6 1 Auto Retry 76 6 2 Answer Call 76 6 3 Auto Answer 76 6 4 One Touch Dial 76 6 5 Voice Privacy 77 6 6 Auto Volume 77 6 7 Application Mode 77...

Страница 10: ...ve Atmosphere 85 For Vehicles Equipped with an Air Bag85 Safety Information 85 Charger and Adapter Safety 85 Battery Information and Care 85 Explosion Shock and Fire Hazards 86 General Notice 86 Avoid damage to your hearing 87 FDA Consumer Update 88 10 Driver Safety Tips 95 Consumer Information on SAR 97 FCC Hearing Aid Compatibility HAC Regulations for Wireless Devices 99 Accessories 101 Limited ...

Страница 11: ...use of the phone Any unapproved changes or modifications will void your warranty FCC Part 15 Class B Compliance This device and its accessories comply with part 15 of FCC rules Operation is subject to the following two conditions 1 This device and its accessories may not cause harmful interference and 2 this device and its accessories must accept any interference received including interference th...

Страница 12: ...TIA EIA IS 657 IS 801 TIA EIA IS 707 A Speech CODEC Async Data and Fax Short message service Packet Data Position Determination Service gpsOne High Speed Packet Data Network Service Performance Designator Description compared with analog mode In addition features such as soft softer handoff Hard handoff and dynamic RF power control technologies combine to reduce call interruptions The Cellular and...

Страница 13: ...he phone including the antenna whether extended or retracted Third party belt clips holsters and similar accessories containing metallic components should not be used Avoid the use of accessories that cannot maintain 0 6 inches 1 5 cm distance between the user s body and the back of the phone and have not been tested for compliance with FCC RF exposure limits Vehicle Mounted External Antenna Optio...

Страница 14: ...arger Port Flip LCD Screen Left Soft Key Navigation Keys Right Soft Key Camera Key SEND Key Side Keys My Menu Key BACK Key PTT Push to Talk Key Manner Mode Key Alphanumeric Keypad Lock Mode Key Microphone END PWR Key Outside Display Flash LG357_Eng_new qxd 12 1 06 6 57 PM Page 12 ...

Страница 15: ...e Manner mode from standby mode press and hold for about 3 seconds Navigation Key Use for quick access to Messages Scheduler Speaker on off mode Right Soft Key Use to select an action within a menu Camera Key Use for quick access to Camera function END PWR Key Use to turn the power on off and to end a call Also use to return to the main menu display screen Alphanumeric Keypad Use to enter numbers ...

Страница 16: ...ts Push to Talk 1 PTT Contacts 2 New PTT Contact 3 New PTT Group 4 Recent PTT 5 PTT Speed Dials 6 PTT Buddy Alert 7 PTT Invitations 8 PTT Settings 1 My Availability 2 My Name 3 Auto Acceptance 4 Sort Options 5 Auto Login 9 PTT Logout 0 PTT SMS Draft Multimedia 1 Take Photo 2 Take Video 3 Record Voice 4 Photo Gallery 5 Video Gallery 6 Voice Clip Contacts 1 Contacts 2 New Contact 3 Groups 4 Speed Di...

Страница 17: ...lling Fonts 8 Color Schemes 4 System 1 System Select 2 Set NAM 3 Auto NAM 4 Serving System 5 Force Call 5 Security 1 Lock Phone 2 Restrict Calls 3 Emergency s 4 Change Lock Code 5 Reset Default 6 Call Setup 1 Auto Retry 2 Answer Call 3 Auto Answer 4 One Touch Dial 5 Voice Privacy 6 Auto Volume 7 Application Mode 8 TTY 7 Data Settings 1 PC Connection 2 Mode 1X QNC 3 PPP ID 4 PPP Password 8 Bluetoot...

Страница 18: ... menu items Use to scroll through the list of menus 2 Press the appropriate number key corresponding to the menu item you want to select The sub menu list will be displayed 3 Press the appropriate number key corresponding to the sub menu you want to access 4 Use to highlight your preferred setting then press to select it Note Press to go back one step while accessing a menu or selecting a setting ...

Страница 19: ...e the charger provided with your phone Warning Use only the charger provided with the phone Using any charger other than the one included with the LG357 may damage your phone or battery 1 Plug the end of the adapter into the phone s charger port and the other end into an electrical outlet 2 The charge time varies depending upon the battery level Battery Charge Level The battery charge level is sho...

Страница 20: ...isplay turns off Signal Strength Call quality depends on the signal strength in your area The signal strength is indicated on the screen as the number of bars next to the signal strength icon The more bars the better the signal strength If the signal quality is poor move to an open area If you are in a building the reception may be better near a window Screen Icons To see the icon glossary go to M...

Страница 21: ...dialing Calls 1 Press twice to redial the last number you dialed The last numbers dialing incoming missed for each are stored in the call history list and you can also select one of these to redial Receiving Calls 1 When the phone rings or vibrates press to answer 2 Press twice to end the call Note If you press or the side keys while the phone is ringing the ringing or vibration is muted for that ...

Страница 22: ...uickly activate Mute press Left Soft Key Mute then to cancel press Left Soft Key Unmute Volume Quick Adjustment Use the side keys to adjust the earpiece and ringer volumes The upper key increases the volume and the lower key decreases the volume Earpiece volume can be adjusted during a call Ringer volume can be adjusted during a call Quick Access to Convenient Features Note Key Tone Volume is adju...

Страница 23: ...ored in Contacts the name appears with the number Check with your service provider to ensure they offer this feature Speed Dialing Speed dialing is a convenient feature that allows you to make phone calls quickly and easily with a few keystrokes Your phone recalls the number from your Contacts displays it briefly and then dials it Speed Dial Number 1 is assigned to Voice Mailbox by default but you...

Страница 24: ... Hold to delete the whole message Punctuation In T9 mode press to insert punctuation in a word and complete a sentence Text Input Modes There are five modes for entering text numbers special characters and punctuation In a text entry field pressing Left Soft Key displays a pop up list of text modes T9Word T9 Mode Use to type text using one keystroke per letter The phone translates keystrokes into ...

Страница 25: ...ck T9WORD ABC All letters are capitalized Lower Case T9word abc All letters are in lower case Text Input Examples Display the text modes and select a text mode 1 In a text entry field press Right or Left Soft Key to display text modes 2 Press to use the text input mode you want to use 3 Press to select the text input mode Using Abc Multi tap Text Input 1 Press Left Soft Key to change to Abc mode 2...

Страница 26: ...es such as Home Gone Hood etc Adding Words to the T9 Database If a word is not in the T9 database add it using Abc Multi tap mode text entry 1 Press Left Key to change to Abc multi tap mode 2 Press Bop is displayed 3 Press Left Soft Key to change to T9 mode to add the word bop to the T9 database 4 Press to erase the existing word 5 Press Cop is displayed 24 Entering and Editing Information E n te ...

Страница 27: ...and press A confirmation message is displayed briefly Options to Customize Your Contacts Once the basic phone number and name information is stored in your Contacts you can edit and customize each entry 1 Press Right Soft Key Contacts and use to highlight the contact entry you want to edit then press View 2 Press Left Soft Key Edit to access the Edit Contact screen 3 Use to highlight the informati...

Страница 28: ... the Ringtone available then press 5 Press Save to save the change Adding or Changing the Memo Allows you to enter up to 32 characters as a memo to the Contact entry 1 Press Right Soft Key Contacts and use to highlight an entry then press 2 Press Left Soft Key Edit 3 Use to highlight Memo 4 Enter text 5 Press Save to save the change Adding or Changing the Picture ID Allows the phone to display an ...

Страница 29: ...mode 1 From standby mode enter the phone number you want to save up to 48 digits 2 Press Left Soft Key Save 3 Select Update contact 4 Use to highlight the existing Contact entry then press 5 Use to highlight a Label then press Mobile1 Home Work Mobile2 Fax 6 Press to save Contact Default Numbers The phone number saved when a Contact is created is the Default Number If more than one number is saved...

Страница 30: ...ing Stored Names 1 Press Right Soft Key Contacts to display your Contacts alphabetically 2 Use to highlight the Contact entry you want to edit then press 3 Press Left Soft Key Edit 4 Use to highlight the name 5 Edit the name as necessary then press 6 Press Save to save the change Editing Customized Options Edit any of the Contacts options in the same manner as when the Contact is created 1 Press R...

Страница 31: ... Deleting a Speed Dial 1 Press Right Soft Key Contacts to display your Contacts alphabetically 2 Use to highlight the Contact entry then press 3 Press Left Soft Key Edit 4 Use to highlight the number 5 Press Right Soft Key Options 6 Press Remove speed dial 7 Press Yes A confirmation message is displayed Phone Numbers With Pauses When you call automated systems such as voice mail or credit billing ...

Страница 32: ...cts 3 Press New Contact 4 Enter the name up to 22 characters and enter a number 5 Press Right Soft Key Options and select 2 sec pause 6 Enter additional number s then press Adding a Pause to an Existing Number 1 Press Right Soft Key Contacts to display your Contacts alphabetically 2 Use to highlight the Contact entry to edit then press 3 Press Left Soft Key Edit 4 Use to highlight the number 5 Pre...

Страница 33: ...rching by Letter 1 Press Right Soft Key Contacts to display your Contacts alphabetically 2 Press or press repeatedly the key on the keypad that corresponds with the search letter Searching Options 1 Press Right Soft Key Contacts 2 Press Right Soft Key Options 3 Select the search criteria use then press or press the corresponding number on the keypad Send message Send a text message or photo messag...

Страница 34: ...Soft Key Contacts to display your Contacts alphabetically 2 Use to select the Contact entry then press 3 Use to select the phone number 4 Press to place the call From Recent Calls 1 Press Left Soft Key Menu 2 Press Recent Calls 3 Use to select the type of recent call then press Missed Calls Dialed Calls Received Calls All Calls 4 Use to select the phone number 5 Press to place the call Speed Diali...

Страница 35: ...ome available as soon as the phone is powered on Check types of messages by pressing the message key Make a call to the callback number by pressing during an Inbox message check Read and edit messages saved in the outbox after transmission and resend them The phone can store up to 385 messages The LG357 supports up to 160 characters per message up to 10 supported by EMS including header informatio...

Страница 36: ...messages pages and e mail transmissions Each message has a destination Address 1 and information Message These are dependent upon the type of message you want to send The Basics of Sending a Text Message 1 Press Left Soft Key 2 Enter the recipient s address then press 3 Type your message text or e mail then press Note If you receive the same message twice your phone deletes the older one and the n...

Страница 37: ...Group Cancel Cancels editing your message 4 Complete and send the message Text Options While you are composing your message you can insert customized text 1 Create a new message 2 Use to highlight Message and then press 3 Press Right Soft Key Options 4 Select the option s to customize Add Graphic Animation Sound Quick text Signature Text format Alignment Font size Font style Text color Background ...

Страница 38: ...ient s address then press 4 Press to access the message screen 5 Type your message then press 6 With the highlight on Photo Video press 7 Use to highlight a picture then press Left Soft Key Add 8 With the highlight on Sounds use to highlight a sound 9 Use to highlight a sound then press Or you can record your voice memo by pressing Left Soft Key Add and send it with your message 10 Press Right Sof...

Страница 39: ...Delivery notice Remove Cancel Editing Sounds Preview Record voice Save as draft Priority level Delivery notice Remove Cancel Editing Subject Preview Add Save as draft Priority level Delivery notice Remove Cancel 12 Complete and send the message Message Icon Reference Photo Message Read Photo Message Unread Photo Message Read Urgent Photo Message Unread Urgent Photo Message Read Photo Message Notif...

Страница 40: ...ceive new photo For photo notifications NOTI msg 100 full Erase notification from Inbox now to receive new noti is displayed When your Auto Delete is on the messages are received even when the memory is full Viewing Your Inbox Up to 50 received messages can be stored in the Inbox 1 Press Left Soft Key 2 Use to highlight an Inbox message Left Soft Key Reply complying with the kinds of messages Righ...

Страница 41: ...se to highlight an Outbox message Press Left Soft Key Resend Press Right Soft Key Options 3 Use to highlight an Outbox message then press While viewing the selected Outbox message press Left Soft Key Resend to or press Right Soft Key Options Delete Deletes the selected message Forward Forwards a received message to other destination address es Save contact Stores the callback number e mail address...

Страница 42: ...Erase Saved or Erase All feature is used Delete multiple Selective All 6 Voice Mail Allows you to view new voice messages recorded in the voice mail box Your phone will alert you when you receive a new voice message Checking Your Voice Mail Box 1 Press Left Soft Key 2 Options from here Press Left Soft Key Clear to delete information then select Clear Count Press to listen to the message s Messagin...

Страница 43: ...play the content when receiving a message On Off 7 4 Photo Auto Receive Allows you to set photos to be received automatically On Off 7 5 Text Callback Allows you to automatically send a designated callback number when you send a message Allows you to manually enter the number On Off Edit 7 6 Voice Mail Allows you to manually enter the number for Voice Mail Service This number should be only used w...

Страница 44: ...Off 8 Delete All Allows you to erase all the messages stored in your Inbox Sent or Saved messages folders You can also erase all messages at the same time 1 Press Left Soft Key Press Inbox to erase all messages stored in the Inbox Press Sent to erase all messages stored in the Outbox Press Drafts to erase all messages stored in the Saved messages folder Press All to erase all messages stored in th...

Страница 45: ...and use Brew Apps wherever service is available see map for details Incoming Calls While downloading an application incoming calls will automatically be sent to your voice mail if available If you do not have voice mail downloading will not be interrupted by an incoming call and the caller will receive a busy signal When using applications an incoming call will automatically pause the application ...

Страница 46: ...tions Add new applications and remove old ones at any time Removing Brew Apps Applications By deleting an application you will restore memory capacity to the phone To restore an application once it has been removed will require that you pay and download it again 1 Access Brew Apps 2 Use to select Settings then press 3 Use to highlight Manage Apps then press 4 Use to highlight the application to be...

Страница 47: ...ssion 1 Press Left Soft Key 2 After a few seconds you see the Home Page Ending a MiniBrowser Session End a MiniBrowser session by pressing Navigating Through the Browser On screen items may be presented in one of the following ways Numbered options You can use your numeric keypad or you can select the items by moving the cursor and pressing the appropriate Soft Key s Links embedded in content You ...

Страница 48: ...h the Soft Keys can change for each page and depends on each highlighted item Left Soft Key Left Soft Key is used primarily for first options or selecting an item but its function may change depending on the content displayed Right Soft Key Right Soft Key is used primarily for secondary options or a menu of secondary options Entering Text Numbers or Symbols When prompted to enter text the current ...

Страница 49: ...ey appears as Call The browser connection is terminated when you initiate the call After you end the call your phone returns to the screen from which you initiated the call 2 Web Messages Allows you to view Web messages If there are any browser messages the list is displayed from newest to oldest 1 Press Left Soft Key Your list of Web messages is displayed 3 Web Alerts Allows you to select a brows...

Страница 50: ...ogin in Settings 3 The sub menus are as follows 1 PTT Contacts 2 New PTT Contact 3 New PTT Group 4 Recent PTT 5 PTT Speed Dials 6 PTT Buddy Alert 7 PTT Invitations 8 PTT Settings 9 PTT Logout 0 PTT SMS Draft 1 PTT Contacts From the PTT Contacts list you have the option to send your contact a Call me Alert A Call me Alert will send a notification to the contact asking them to call you via PTT Optio...

Страница 51: ...nter the number then press 4 Press Left Soft Key Done to connect to the server and update contact information Press to SAVE 3 New PTT Group Allows you to add a new PTT group 1 Press Left Soft Key 2 Enter the PTT Group name then press 3 Select individuals with to add to the group then press Left Soft Key Or press Right Soft Key to add new members to the group 49 P u s h to Ta l k Note Group PTT SMS...

Страница 52: ...done when finished 7 PTT Invitations It s a list of all invitations you have not yet chosen to respond to 8 PTT Settings 8 1 My Availability Allows you to set your PTT staus 1 Press Left Soft Key 2 Set Available Do Not Disturb with up down navi key then press Available allows both incoming and outgoing PTT calls You can use all PTT functions and receive all incoming PTT calls and alerts will appea...

Страница 53: ...ct lists of other parties 1 Press Left Soft Key 2 Enter a name using the entry mode and press 8 3 Auto Acceptance Allows other people to add you as a contact without prompting you 1 Press Left Soft Key 2 Select one of the options Disable All You ll be prompted for all invitations Contact Only You ll receive a prompt only for group invitations Group Only You ll receive a prompt only for contact inv...

Страница 54: ...sh to talk Making PTT Calls Alerts Barge Calls from PTT Contact List 1 Standby mode press and old PTT Key to access your PTT Contact list 2 Use to highlight the PTT Contact you wish to call 3 Press and hold PTT Key Sender hears PTT talk tone and can begin speaking 4 Release PTT Key Receiver hears incoming barge tone Receiver hears sender s voice followed by the floor available tone Sender s device...

Страница 55: ...o make a multiparty call with all or selected members of a PTT Group displaying all the contacts You can also send an alert message to one of your Group Contacts 1 Press and hold PTT Key to access PTT Contacts list 2 Use to highlight the PTT Group 3 Press and hold PTT Key to make a PTT call to all members in the Group For PTT calls to the selected members use to highlight the PTT group and press A...

Страница 56: ...an start speaking 3 Release PTT Key Incoming Alert PTT 1 Buddy Alert Message is displayed 2 Choose Accept Ignore and press 3 When you select Accept press and hold PTT Key to make a PTT call 4 Release PTT Key Incoming Group PTT 1 The Group name will be displayed One person can speak at a time 2 If you wish to speak wait for the floor control to be released 3 Press and hold PTT Key and speak after t...

Страница 57: ...the brightness zoom and press Right Soft Key Options to change other settings Select the option s to customize Resolution 1280X960 640X480 320X240 160X120 Quality Fine Normal Economy Zoom Brightness Flash Always On On Off Multishot 1 shot 3 shots Self Timer None 3 seconds 5 seconds White Balance Auto Sunny Cloudy Tungsten Fluorescent Night Mode On Off Multimedia 55 M u l t i m e d i a Note Pressin...

Страница 58: ...er the Take Photo mode 2 Take a picture by pressing Side Camera Key 2 Take Video 1 Press Left Soft Key 2 Set the brightness zoom and press Right Soft Key Options to change other settings Select the option s to customize Resolution High 176X144 Low 128X96 Zoom Brightness Flash Always On On Off White Balance Auto Sunny Cloudy Tungsten Fluorescent 3 Press to begin recording and again to stop 4 Press ...

Страница 59: ...ss Left Soft Key 2 Select your desired picture with and press Right Soft Key Options Send Set as Delete Rename List view Delete all Information 5 Video Gallery Allows you to view videos stored in the phone 1 Press Left Soft Key 2 Select your desired video with and press Right Soft Key Options Send Set as wallpaper Delete Rename List view Delete all Information 6 Voice Clip 1 Press Left Soft Key 2 ...

Страница 60: ... Select a sub menu 1 Contacts 2 New Contact 3 Groups 4 Speed Dials 5 My Contact Info 1 Contacts Allows you to view your Contacts list 1 Press Left Soft Key 2 Options from here Press to scroll through your Contacts alphabetically Press Right Soft Key Options to select one of the following Send message Delete Edit Call Send via Bluetooth Delete all Cancel Copy to PTT Press Left Soft Key New to store...

Страница 61: ... the name of a group or delete a whole group 1 Press Left Soft Key 2 Options from here Use to highlight a group to view then press Press Left Soft Key New to add a new group to the list Use to highlight a group then press Right Soft Key Options to change the name of the group or delete the group Delete Send message Rename group Set group ringtone Delete all 59 C o n ta c ts Note Using this sub men...

Страница 62: ...ess 3 Use to highlight the Contact then press 4 Use to highlight the number then press A confirmation message is displayed 5 My Contact Info Allows you to view your contact information 1 Press Left Soft Key 2 Use to select the feature you want to edit then press 3 Edit the information as necessary Contacts 60 C o n ta c ts Note You cannot edit phone number but you can add an additional phone numbe...

Страница 63: ...of the list Access and Options 1 Press Left Soft Key Menu 2 Press Recent Calls 3 Select a sub menu 1 Missed Calls 2 Dialed Calls 3 Received Calls 4 All Calls 5 Call Timer 6 Data Count 1 Missed Calls Allows you to view the list of missed calls up to 30 entries 1 Press Left Soft Key 2 Use to highlight an entry Recent Calls 61 Re c e n t C a l l s Note To view a quick list of all your recent calls pr...

Страница 64: ...es 1 Press Left Soft Key 2 Use to highlight an entry 4 All Calls Allows you to erase selected call list s 1 Press Left Soft Key 2 The history of all calls are displayed 5 Call Timer Allows you to view the duration of selected calls 1 Press Left Soft Key 2 Use to highlight a call list then press Last call Home calls Roam calls All calls 6 Data Count Allows you to view the list of received and trans...

Страница 65: ...splay as the background image displayed on the phone 1 Press Left Soft Key 2 Use to highlight your selection then press Right Soft Key Options to select 2 Videos Allows you to choose video clips 1 Press Left Soft Key 3 Sounds Allows you to choose the downloaded ringtones heard for incoming calls 1 Press Left Soft Key 2 Use to highlight your selection then press Right Soft Key Options to select My ...

Страница 66: ...ft Soft Key 2 Select one of the following highlight and press or press corresponding key Small Pictures Large Pictures My Pictures Sounds My Melodies Animations My Animations 3 Use to highlight your selection then press My Media 64 M y M e d i a LG357_Eng_new qxd 12 1 06 6 57 PM Page 64 ...

Страница 67: ... phone recalls the number from your Contacts displays it briefly and then dials it This menu also includes feature for those who are in driving or blind It delivers time information by voice and allows to check out the missed calls messages and voicemails 1 Press Left Soft Key 2 When prompted say Call Someone 3 When prompted say the name of the Contact you want to call The phone will ask you to co...

Страница 68: ... Left Soft Key New 3 In Quick Alarm option you can select Off Manual 10 minutes later 20 minutes later 30 minutes later 1 hour later For example you can take a nap in the afternoon with the quick alarm set to 30 min later It will allow you to wake up on time 4 Use to highlight Once recurring setting 5 Press to select one of the following Once Daily Mon Fri Sat Sun 6 Use to highlight Alarm tone 7 P...

Страница 69: ...ration 5 Press Save 1 5 Tip Calculator Allows you to quickly and easily estimate the initial amounts for a bill with the calculated amount of the bill the amount and percentage of the tip and the number of people as variables 1 Press Left Soft Key 1 6 Notepad Allows you to add read edit and erase notes to yourself 1 Press Left Soft Key 2 Press Left Soft Key New to write a new note 3 Type the note ...

Страница 70: ... to complete equation 1 8 World Clock Allows you to determine the current time in another time zone or country 1 Press Left Soft Key 2 Press Right Soft Key Cities to move the time bar across the world map and display the date time in that location 3 Press Left Soft Key Set DST 1 9 Stopwatch Stopwatch is available just as common stopwatches we see and use in daily life 1 Press Left Soft Key 2 Press...

Страница 71: ...ylophone Drum kit Keyboard Business Beep None 3 Press Left Soft Key Select 2 3 Flip Tone Allows you to select the Flip Tone type 1 Press Left Soft Key 2 Select a tone style then press Flip tone 1 Flip tone 2 Flip tone 3 Flip tone 4 None 2 4 Volume Allows you to set various volume settings 1 Press Left Soft Key 2 Select Master Volume Key Tone Volume Flip Tone Volume Earpiece Volume Speaker Volume 3...

Страница 72: ...tion 2 6 1 Service Change Alerts you when service changes 2 6 2 Minute Beep Alerts you 10 seconds before the end of every minute during a call 2 6 3 Call Connect Alerts you when the call is connected 2 6 4 Back To Top Alerts you when you scroll through the end of a menu list 3 Use to set On Off then press 2 7 Power On Off Tones Allows you to set the phone to sound a tone when the phone is powered ...

Страница 73: ...f up to 12 characters which display on the LCD screen 1 Press Left Soft Key 2 Set the Main banner On Off 3 Enter your banner text then press 3 3 Backlight Allows you to set the duration for illuminating the backlight 1 Press Left Soft Key 2 Choose a sub menu then press Timer Brightness 3 4 Menu Style Allows you to view the Menu as an Icon or List display 1 Press Left Soft Key 2 Select Icon or List...

Страница 74: ...r Main LCD Normal clock Digital clock Analog clock Dual clock Calendar Options for Front LCD Digital Minimize 3 7 Calling Fonts Allows you to set the size and color of the font only for calling digits and text editor 1 Press Left Soft Key 2 Select Size or Color sub menu 3 Press to choose a setting then press to save Control the size Normal Large Select the color of calling fonts Black Blue Red Gre...

Страница 75: ...viders 1 Press Left Soft Key 2 Use to select NAM1 or NAM2 then press 4 3 Auto NAM Allows the phone to automatically switch between programmed telephone numbers corresponding to the service provider area 1 Press Left Soft Key 2 Use to select On or Off then press 4 4 Serving System Identifies the channel number of a system that is served as a SID Number This information should only be used for techn...

Страница 76: ...r phone number 3 Press Lock Phone 4 Use to select an option then press Unlock The phone is never locked Lock mode can be used Lock The phone is always locked When locked you can receive incoming calls and make only emergency calls On power up The phone is locked when it is turned on 5 2 Restrict Calls Allows you to restrict incoming and outgoing calls 1 Press Left Soft Key 2 Enter the four digit l...

Страница 77: ... Press Left Soft Key 2 Enter the four digit lock code 3 Press Change Lock Code 4 Enter a new 4 digit lock code 5 For confirmation it will ask you to enter the new lock code again 5 5 Reset Default Allows you to reset your phone to the factory default settings 1 Press Left Soft Key 2 Enter the four digit lock code 3 Press Reset Default 4 Select Memory Default 5 For Memory choose Handset Contents or...

Страница 78: ...n Any key SEND only 6 3 Auto Answer Allows you to select the number of rings before the phone automatically answers a call This feature is intended for use with hands free devices but is an independent feature of the phone and must be manually turned on off when connected or disconnected from the device 1 Press Left Soft Key 2 Use to select a setting then press On Off 6 4 One Touch Dial Allows you...

Страница 79: ...eaker and environments 1 Press Left Soft Key 2 Use to select a setting then press On Off 6 7 Application Mode Allows you to use the general application and restricts the output of RF communication 1 Press Left Soft Key 2 Use to select a setting then press On Off 6 8 TTY Allows you to attach a TTY Teletypewriter device enabling you to communicate with parties also using a TTY device A phone with TT...

Страница 80: ...tions match the network 7 1 PC Connection Allows you to select the data port 1 Press Left Soft Key 2 Use to select a setting then press USB RS 232C COM Port Bluetooth Closed 7 2 Mode 1X QNC This is setting enables you to set the speed for WAP BREW and Tethered Mode 1 Press Left Soft Key 2 Use to select a setting then press Auto 1x only QNC only 7 3 PPP ID It is the user s ID for PPP Authentication...

Страница 81: ...ss 4 If Bluetooth is set to off you will be prompted to turn power on Select Yes and press 5 The device will appear in the Found Devices menu once it has been located Highlight the device and press 6 The handset will prompt you for the passkey Consult the Bluetooth accessory instructions for the appropriate passkey typically 0000 4 zeroes Enter the passkey and press 79 S ett i n g s Note Read user...

Страница 82: ...s Left Soft Key 2 Use to select a setting then press When the Bluetooth functionality is set to Yes the options are Hidden Visible 8 4 My Bluetooth Name Allows you to edit the name of the Bluetooth device 1 Press Left Soft Key 2 Press to clear the existing name 3 Use the numeric keypad to enter a new custom name 4 Press to save and exit Settings 80 S ett i n g s Note By default your device s Bluet...

Страница 83: ... phone model 1 My Number Allows you to view your phone number 1 Press Left Soft Key 2 SW Version Allows you to view the SW PRL Brew and BT Bluetooth 1 Press Left Soft Key 3 Icon Glossary Allows you to view all the icons and their meanings 1 Press Left Soft Key 4 Memory Status Allows you to view condensed information about using the phone 1 Press Left Soft Key Common Memory Reserved Memory 81 S ett...

Страница 84: ...diation Protection and Measurements International Commission on Non Ionizing Radiation Protection Those standards were based on comprehensive and periodic evaluations of the relevant scientific literature For example over 120 scientists engineers and physicians from universities government health agencies and industry reviewed the available body of research to develop the ANSI Standard C95 1 The d...

Страница 85: ...c equipment is shielded from RF signals However certain electronic equipment may not be shielded against the RF signals from your wireless phone Pacemakers The Health Industry Manufacturers Association recommends that a minimum separation of six 6 inches be maintained between a handheld wireless phone and a pacemaker to avoid potential interference with the pacemaker These recommendations are cons...

Страница 86: ...ealth care facilities may use equipment that could be sensitive to external RF energy Vehicles RF signals may affect improperly installed or inadequately shielded electronic systems in motor vehicles Check with the manufacturer or its representative regarding your vehicle You should also consult the manufacturer of any equipment that has been added to your vehicle Posted Facilities Turn your phone...

Страница 87: ...less equipment in the area over the air bag or in the air bag deployment area If in vehicle wireless equipment is improperly installed and the air bag inflates serious injury could result Safety Information Please read and observe the following information for safe and proper use of your phone and to prevent damage Also keep the user guide in an accessible place at all times after reading it Cauti...

Страница 88: ...m required distance between the power cord and heat sources Unplug the power cord prior to cleaning your phone and clean the power plug pin when it s dirty When using the power plug ensure that it s firmly connected If not it may cause excessive heat or fire If you put your phone in a pocket or bag without covering the receptacle of the phone power plug pin metallic articles such as a coin papercl...

Страница 89: ... of the software Please backup your important phone numbers Ring tones text messages voice messages pictures and videos could also be deleted The manufacturer is not liable for damage due to the loss of data When you use the phone in public places set the ringtone to vibration so you don t disturb others Do not turn your phone on or off when putting it to your ear Use accessories such as earphones...

Страница 90: ... difficulty in reproducing those studies or in determining the reasons for inconsistent results 2 What is the FDA s role concerning the safety of wireless phones Under the law the FDA does not review the safety of radiation emitting consumer products such as wireless phones before they can be sold as it does with new drugs or medical devices However the agency has authority to take action if wirel...

Страница 91: ...for safety questions about wireless phones The FCC also regulates the base stations that the wireless phone networks rely upon While these base stations operate at higher power than do the wireless phones themselves the RF exposures that people get from these base stations are typically thousands of times lower than those they can get from wireless phones Base stations are thus not the subject of ...

Страница 92: ...hours per day These conditions are not similar to the conditions under which people use wireless phones so we do not know with certainty what the results of such studies mean for human health Three large epidemiology studies have been published since December 2000 Between them the studies investigated any possible association between the use of wireless phones and primary brain cancer glioma menin...

Страница 93: ...exposure to Radio Frequency RF energy The FDA has been a leading participant in the World Health Organization International Electro Magnetic Fields EMF Project since its inception in 1996 An influential result of this work has been the development of a detailed agenda of research needs that has driven the establishment of new research programs around the world The project has also helped develop a...

Страница 94: ...your phone so you can find your phone s RF exposure level in the online listing 8 What has the FDA done to measure the Radio Frequency energy coming from wireless phones The Institute of Electrical and Electronic Engineers IEEE is developing a technical standard for measuring the Radio Frequency RF energy exposure from wireless phones and other wireless handsets with the participation and leadersh...

Страница 95: ...d about the RF exposure from these products you can use measures like those described above to reduce your RF exposure from wireless phone use 10 What about children using wireless phones The scientific evidence does not show a danger to users of wireless phones including children and teenagers If you want to take steps to lower exposure to Radio Frequency RF energy the measures described above wo...

Страница 96: ...tronic Engineers IEEE This standard specifies test methods and performance requirements for hearing aids and wireless phones so that no interference occurs when a person uses a compatible phone and a compatible hearing aid at the same time This standard was approved by the IEEE in 2000 The FDA continues to monitor the use of wireless phones for possible interactions with other medical devices Shou...

Страница 97: ...mounted device for your wireless phone or a speaker phone accessory take advantage of these devices if available to you 3 Make sure you place your wireless phone within easy reach and where you can reach it without removing your eyes from the road If you get an incoming call at an inconvenient time if possible let your voicemail answer it for you 4 Suspend conversations during hazardous driving co...

Страница 98: ...ly three numbers away Dial 91 1 or other local emergency number in the case of fire traffic accident road hazard or medical emergency Remember it s a free call on your wireless phone 9 Use your wireless phone to help others in emergencies Your wireless phone provides you a perfect opportunity to be a Good Samaritan in your community If you see an auto accident crime in progress or other serious em...

Страница 99: ...transmitting at its highest certified power level in all tested frequency bands Although SAR is determined at the highest certified power level the actual SAR level of the phone while operating can be well below the maximum value Because the phone is designed to operate at multiple power levels to use only the power required to reach the network in general the closer you are to a wireless base sta...

Страница 100: ... ID BEJLX350 Additional information on Specific Absorption Rates SAR can be found on the Cellular Telecommunications Industry Association CTIA website at http www ctia org In the United States and Canada the SAR limit for mobile phones used by the public is 1 6 watts kg W kg averaged over one gram of tissue The standard incorporates a substantial margin of safety to give additional protection for ...

Страница 101: ... may be compatible with their hearing devices Not all phones have been rated Phones that are rated have the rating on their box or a label located on the box The ratings are not guarantees Results will vary depending on the user s hearing device and hearing loss If your hearing device happens to be vulnerable to interference you may not be able to use a rated phone successfully Trying out the phon...

Страница 102: ...S The U and UT marks are referenced in Section 20 19 of the FCC Rules The HAC rating and measurement procedure are described in the American National Standards Institute ANSI C63 19 standard When you re talking over the cell phone it s recommended you d turn the BT Bluetooth mode off for HAC Safety 100 S a f ety For information about hearing aids and digital wireless phones FCC Hearing Aid Compati...

Страница 103: ...peration Headset The headset connects to your phone allowing hands free operation It includes earpiece microphone Serial Data Cable The serial data cable enables you to connect your phone to your PC USB Cable Connects your phone to your PC Battery Pack Charger The battery pack charger allows you to charge the battery pack itself without the phone Holster Equip a holster with the phone to make it s...

Страница 104: ...o any subsequent purchaser end user 3 This warranty is good only to the original purchaser of the product during the warranty period as long as it is in the U S including Alaska Hawaii U S Territories and Canada 4 The external housing and cosmetic parts shall be free of defects at the time of shipment and therefore shall not be covered under these limited warranty terms 5 Upon request from LG the ...

Страница 105: ...G was not notified by consumer of the alleged defect or malfunction of the product during the applicable limited warranty period 5 Products which have had the serial number removed or made illegible 6 This limited warranty is in lieu of all other warranties express or implied either in fact or by operations of law statutory or otherwise including but not limited to any implied warranty of marketab...

Страница 106: ...ions on how long an implied warranty lasts so these limitations or exclusions may not apply to you This warranty gives you specific legal rights and you may also have other rights which vary from state to state 4 HOW TO GET WARRANTY SERVICE To obtain warranty service please call or fax to the following telephone numbers from anywhere in the continental United States Tel 1 800 793 8896 or Fax 1 800...

Страница 107: ...ts 58 D Data Count 62 Data Settings 78 Delete All 42 Deleting 29 Dialed Calls 62 Display 71 Drafts 40 E Emergency s 75 F FCC Part 15 Class B Compliance 9 FCC RF Exposure Information 1 1 Flip Tone 69 Force Call 73 G Groups 59 I Icon Glossary 81 Images 63 Important Information 9 Important Safety Precautions 1 Inbox 38 Installing the Battery 17 K Key Tone 69 L Languages 72 Location 81 Lock Mode 20 Lo...

Страница 108: ...5 Restrict Calls 74 Ringers 69 S Screens 71 Security 74 Sent 39 Service Alerts 70 Serving System 73 Set NAM 73 Settings 41 65 Signal Strength 18 Sound 69 Sounds 63 Speed Dialing 21 Speed Dials 60 Start Browser 45 Stopwatch 68 SW Version 81 System 73 System Select 73 T Table of Contents 4 Take Photo 55 Take Video 56 Technical Details 9 Text Input 22 Tip Calculator 67 Tools 65 TTY 77 Turning the Pho...

Отзывы: