background image

Troubleshooting

76

Trouble

shoo

ting

5

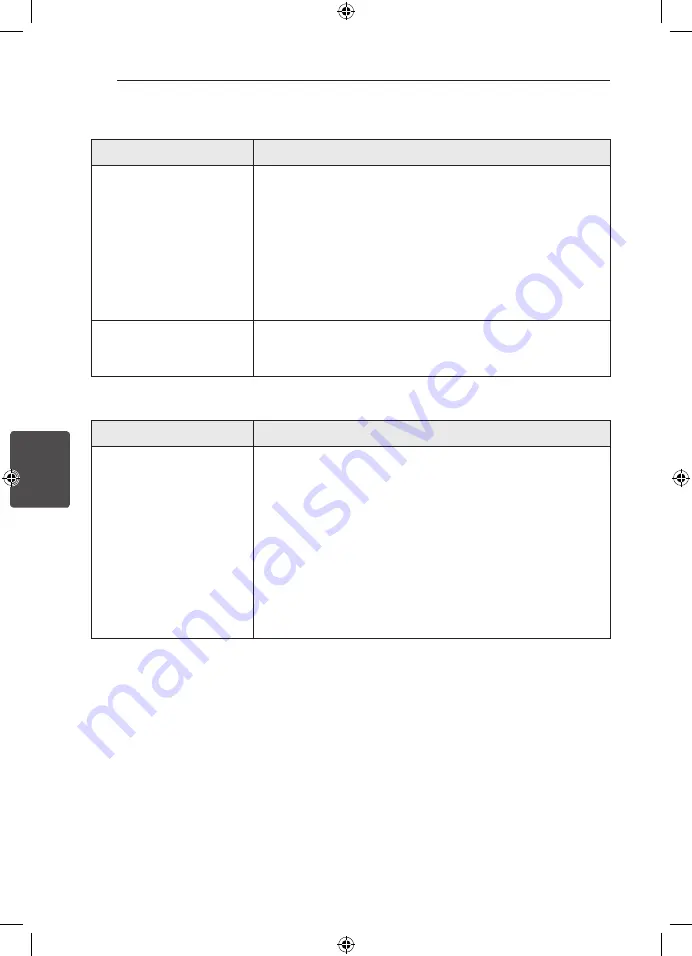
Picture

Symptom 

Cause & Solution

There is no picture.


y

Select the appropriate video input mode on the TV so the picture 
from the unit appears on the TV screen.


y

Connect the video connection securely.


y

Check the [HDMI Color Setting] in the [Setup] menu is set to the 
appropriate item that conforms to your video connection.


y

Your TV may not support the resolution you have set on the unit. 
Change the resolution to one that your TV accepts.


y

The player’s HDMI OUT jack is connected to a DVI device that does 
not support copyright protection.

Picture noise appears


y

You are playing a disc recorded in a colour system that is different 
from your TV.


y

Set the resolution to one that your TV accepts.

Sound

Symptom 

Cause & Solution

There is no sound or the sound 
is distorted.


y

Connect the audio connection securely.


y

The input source setting on the amplifier or the connection to the 
amplifier is incorrect.


y

The unit is in scan, slow motion, or pause mode.


y

The sound volume is low.


y

Check that the connected amplifier is compatible with the audio 
format output from the player.


y

The player’s HDMI OUT jack is connected to a DVI device. The DVI jack 
does not accept audio signal.


y

Check the device connected to the player’s HDMI OUT jack is 
compatible with the audio format output from the unit.

Содержание HR600

Страница 1: ...with built in HDD HD Tuner HR600 HR650 P NO MFL65225521 www lg com Please read this manual carefully before operating your set and retain it for future reference FOR THE GUARANTEE TERMS CONDITIONS PLEASE REFER TO INNER PAGE OF BACK COVER ...

Страница 2: ......

Страница 3: ...ion has been adhered to CAUTION This product employs a Laser System To ensure proper use of this product please read this owner s manual carefully and retain it for future reference Shall the unit require maintenance contact an authorized service centre Use of controls adjustments or the performance of procedures other than those specified herein may result in hazardous radiation exposure To preve...

Страница 4: ...ailed information about disposal of your old appliance please contact your city office waste disposal service or the shop where you purchased the product For Wireless product European Union Notice LG Electronics hereby declares that this these product s is are in compliance with the essential requirements and other relevant provisions of Directive 1999 5 EC 2004 108 EC 2006 95 EC and 2009 125 EC P...

Страница 5: ...y that is protected by U S patents and other intellectual property rights Use of this copyright protection technology must be authorized by Rovi Corporation and is intended for home and other limited viewing uses only unless otherwise authorized by Rovi Corporation Reverse engineering or disassembly is prohibited y y CONSUMERS SHOULD NOTE THAT NOT ALL HIGH DEFINITION TELEVISION SETS ARE FULLY COMP...

Страница 6: ...25 Playback content in the USB device 3 System Setting 26 Auto Set UP 27 Home Menu Overview 27 Basic button operations 27 Settings 27 Adjust the Setup Settings 28 Settings for Digital TV 28 Scanning programmes automatically Auto Tuning 28 Scanning programmes manually Manual Tuning 29 Editing Programme List Channel Edit 29 Setting the DTV Lock 30 Adjusting DTV Rating 30 Setting the antenna power 30...

Страница 7: ...e to a USB storage device 59 Deleting a file s folder s 59 Naming a file folder 60 Enjoying BD LIVE 61 Playing movie file and VR discs 61 Selecting a subtitle file 62 Changing subtitle code page 62 Viewing a photo 63 Options while viewing a photo 64 Listening to music during a slide show 65 Listening to music 65 Audio CD Archiving 66 Viewing information from Gracenote Media Database 67 Using the M...

Страница 8: ...title has one of the following symbols are applicable only to the disc represented by the symbol BD BD ROM disc DVD DVD Video DVD R RW in Video mode or VR mode and finalized AVCHD DVD R RW in AVCHD format ACD Audio CDs MOVIE Movie files contained in the Disc USB HDD MOVIE N Movie files in the DLNA server or PC MUSIC Music files contained on a Disc USB HDD MUSIC N Music files on a DLNA server or PC...

Страница 9: ...der may not play if the disc is damaged or dirty or if there is dirt or condensation on the player s lens y y If you record a disc using a personal computer even if it is recorded in a compatible format there are cases in which it may not play because of the settings of the application software used to create the disc Check with the software publisher for more detailed information y y This unit re...

Страница 10: ...3 y y HD movie files contained on the CD or USB 1 0 1 1 may not be played properly BD DVD or USB 2 0 are recommended to play back HD movie files y y This player supports H 264 MPEG 4 AVC profile Main High at Level 4 1 For a file with higher level there will be an warning message on the screen y y This player does not support the file that are recorded with GMC 1 or Qpel 2 Those are video encoding ...

Страница 11: ...r up conversion of standard definition DVD a HDMI or HDCP capable DVI input on your display device is required for copy protected content For Dolby Digital Plus Dolby TrueHD and DTS HD multi channel audio playback y y An amplifier receiver with a built in Dolby Digital Dolby Digital Plus Dolby TrueHD DTS or DTS HD decoder y y Main centre surround speakers and subwoofer as necessary for chosen form...

Страница 12: ...ns up or down through memorized programmes REC X Starts recording PR LIST Displays the Channel list TIMER REC Displays Timer Recording menu HOME n Accesses or removes the HOME menu MUSIC ID When the player is connected to the network it can provide information about the song played during movie playback INFO DISPLAY m Displays or exits On Screen Display W S A D left right up down Navigates on scre...

Страница 13: ...w e T Play Pause f I Stop g X Recording h Y U Skip PROG s w i B Open Close j USB Port a ANTENNA IN b LAN port c HDMI OUT 1080p d DIGITAL AUDIO OUT COAXIAL e 2CH AUDIO OUT Left Right f VIDEO OUT g AC IN connector Connect the supplied power cord h ANTENNA OUT TO TV i COMPONENT VIDEO OUT Y PB PR j TO TV SCART Jack ...

Страница 14: ...ake sure the player is connected directly to the TV Tune the TV to the correct video input channel y y Do not connect the player s AUDIO OUT jack to the phono in jack record player of your audio system y y Do not connect your player via your VCR The image could be distorted by the copy protection system Note Antenna connection to your TV and this unit Connect one end of the RF cable to ANTENNA OUT...

Страница 15: ...sult in malfunctions To solve the problem turn off the player and then turn it on again y y When the HDMI connection with HDCP is not verified TV screen is changed to black screen In this case check the the HDMI connection or disconnect the HDMI cable y y If there is noise or lines on the screen please check the HDMI cable length is generally limited to 4 5m Note Additional Information for HDMI y ...

Страница 16: ...f this unit Component video Cable Audio Cable Rear of this unit TV When you use COMPONENT VIDEO OUT connection you can change the resolution for the output Refer to Resolution setting on page 17 Note Composite connection Connect the VIDEO OUT jack on the Recorder to the video in jack on the TV using the video cable supplied Connect the Left and Right AUDIO OUT jacks on the Recorder to the audio le...

Страница 17: ...n Setting The player provides several output resolutions for HDMI OUT and COMPONENT VIDEO OUT jacks You can change the resolution using Setup menu 1 Press HOME n 2 Use A D to select the Setup and press ENTER b The Setup menu appears 3 Use W S to select DISPLAY option then press D to move to the second level 4 Use A D to select the Resolution option then press ENTER b to move to the third level 5 U...

Страница 18: ... channel Audio Video Receiver that supports one or more of the audio formats supported by your unit Check the receiver manual and the logos on the front of the receiver PCM Stereo PCM Multi Ch Dolby Digital Dolby Digital Plus Dolby TrueHD DTS and or DTS HD Connecting to an Amplifier via HDMI Output Connect the player s HDMI OUT jack to the corresponding in jack on your amplifier using a HDMI cable...

Страница 19: ...You will need to activate the unit s digital output See AUDIO Menu on pages 33 34 Amplifier Receiver Coaxial Cable Rear of this unit Amplifier Receiver Connecting to an Amplifier via 2 Channel Audio Output Connect the Left and Right 2CH AUDIO OUT jacks on the unit to the audio left and right in jacks on your amplifier receiver or stereo system using audio cables Amplifier Receiver Rear of this uni...

Страница 20: ...rresponding port on your Modem or Router using a commercially available LAN or Ethernet cable CAT5 or better with RJ45 connector In the example configuration for wired connection below this player would be able to access content from either of the PCs y y When plugging or unplugging the LAN cable hold the plug portion of the cable When unplugging do not pull on the LAN cable but unplug while press...

Страница 21: ...ss ENTER b to continue The new connection settings reset the current network settings 4 Use W S A D to select the IP mode between Dynamic and Static Normally select Dynamic to allocate an IP address automatically If there is no DHCP server on the network and you want to set the IP address manually select Static then set IP Address Subnet Mask Gateway and DNS Server using W S A D and numerical butt...

Страница 22: ...mmunication PC Refer to the setup instructions supplied with your access point or wireless router for detailed connection steps and network settings Wired internet connection is strongly recommended Using the Home Link features network update and video streaming services such as YouTube Videos with wireless network can be affected by household devices using radio frequencies Note Wireless Network ...

Страница 23: ...nt name SSID Check your router settings through your computer and either set your router to broadcast SSID or manually enter the access point name SSID in Manual Push Button If your access point or wireless router supports the Push Button Configuration method select this option and press the Push Button on your access point or wireless router within 120 counts You do not need to know the access po...

Страница 24: ...uding without limitation connection charges are your responsibility y y A 10 Base T or 100 Base TX LAN port is required for wired connection to this player If your internet service does not allow for such a connection you will not be able to connect the player y y You must use a Router to use xDSL service y y A DSL modem is required to use DSL service and a cable modem is required to use cable mod...

Страница 25: ...when using BD Live y y This unit can support up to 4 partitions of the USB device y y Do not extract the USB device during operation play recording etc y y A USB device which requires additional programme installation when you have connected it to a computer is not supported y y USB device USB device that supports USB1 1 and USB2 0 y y Movie Music and photo files can be played For details of opera...

Страница 26: ... and press ENTER b Auto Set the programme that broadcasts a clock signal and the clock will be set automatically If the time that has automatically set is not correct comparing your local time you can set additional time option Manual If there is no channel that broadcasts a clock signal in your area you can set the time and date manyally Use W S to select each field and input correct time and dat...

Страница 27: ...splays and play the shared contents from the selected server or PC pages 69 73 Netcast Shows YouTube videos Picasa Web Albums and Accu Weather streamed from the Youtube server via the internet to your TV page 74 Setup Displays Setup menu pages 31 37 Settings Adjust the Setup Settings You can change the settings of the player in the Setup menu 1 Press HOME n 2 Use A D to select Setup and press ENTE...

Страница 28: ...hannel search Select Stop and press ENTER b to stop the scanning programmes If the DTV Lock option is set to Lock this function is available when you enter the password correctly see page 29 Note Scanning programmes manually Manual Tuning Scans digital TV or radio programmes and adds the detected programmes to the programme list 1 Display Setup menu 2 Use W S to select DTV and press ENTER b 3 Use ...

Страница 29: ...blue coloured B button again 6 Press RETURN x to return to the previous step Skip If the programme is assigned to skip you can t select that programme with PR button in Remote control Edit It appears when unchecking the box Automatic Numbering Choose a channel you want Press green coloured G button and then change the location of channel by using W S A D Block unblock If the programme is assigned ...

Страница 30: ...ignal amplifier rated at DC 5V 100mA the recorder can supply power through ANTENNA IN jack 1 Display Setup menu 2 Use W S A D to select Antenna 5V and press ENTER b 3 Use W S to select On and press ENTER b to supply antenna power The Antenna 5V option must be set to Off when your indoor antenna is supplied the power from the mains If you set the Antenna 5V option to On for the indoor antenna which...

Страница 31: ...est software automatically through the built in digital tuner If the software update is available from the broadcaster Hard Of Hearing Hard of hearing for users who are hearing impaired If you set On and there is hard of hearing subtitle You can see the subtitle on screen DISPLAY Menu TV Aspect Ratio Select a TV aspect ratio option according to your TV type 4 3 Letter Box Select when a standard 4 ...

Страница 32: ...n this case select 50 Hz y y Even when 1080p Display Mode is set to 24 Hz if your TV is not compatible with 1080p 24 Hz the actual frame frequency of the video output will be 50 Hz or 60 Hz to match the video source format Note HDMI Color Setting Select the type of output from the HDMI OUT jack For this setting please refer to the manuals of your display device YCbCr Select when connecting to a HD...

Страница 33: ...while viewing digital TV See Selecting DTV subtitle language on page 39 AUDIO Menu Each disc has a variety of audio output options Set the player s Audio options according to the type of audio system you use Since many factors affect the type of audio output see Audio Output Specifications on pages 86 87 for details Note HDMI Digital Output Select the output sound format when a device equipped wit...

Страница 34: ... Dolby Digital Plus or Dolby TrueHD audio output Auto The dynamic range of the Dolby TrueHD audio output is specified by itself And the dynamic range of the Dolby Digital and Dolby Digital Plus are operated as same as the On mode The DRC setting can be changed only when a disc is not inserted or the unit is in complete stop mode Note DTS Neo 6 If the player is connected to the multi channel Audio ...

Страница 35: ...o set up specific programs and through blocking schemes Also allows you to activate or disable all of the lock schemes previously set up A password is required to gain access to the lock menu options When the DTV Lock is set to unlock See Setting the DTV Lock on page 29 DTV Rating You can set the rating to block out all the programs with rating above a specified level See Adjusting DTV Rating on p...

Страница 36: ...ontents OTHERS Menu Time Setting The clock must be set in order to use timer recording Auto Select a programme that broadcasts a clock signal and the clock will be set automatically If the time that has been automatically set is not correct when compared your local time you can set additional time option Manual If there is no channel that broadcasts a clock signal in your area you can set the time...

Страница 37: ...ory Set in the Setup menu All the channels will be deleted Note Internal HDD Format Everything recorded on the HDD will be erased 1 Press HOME 2 Use W S A D to select Setup in the Home menu and press ENTER b 3 Use W S to select OTHERS option from the Setup menu and press ENTER b 4 Use W S to select Initialize and press ENTER b to display the sub options 5 Use W S to select Internal HDD Format and ...

Страница 38: ...V press PR LIST 2 Use W S to select a desired programme and press ENTER b Press red coloured button R to sort the programmes into alphabetical order Press green coloured button G to sort the programmes into FTA CAS Press yellow colored Y button to sort the programmes into number order 3 Press RETURN x to exit the programme list Setting favourite programmes You can set the storage location where yo...

Страница 39: ...ods You can select an audio languages or an encoding method when it is available 1 While watching DTV press INFO DISPLAY m 2 Use A D to select an audio language or an encoding method and press INFO DISPLAY m Selecting Audio Description Audio description for users who are visually handicapped If you set On You can hear the explanation of display through a Main audio and Audio Description audio Sele...

Страница 40: ...ion window You can view the detail information for the highlighted program Press INFO DISPLAY m to display detail information window To exit the detail information window press ENTER b again To change date When the Program Guide with 8 days is displayed you can also change the date of the Program Guide by pressing the green colour button then use A D to select a date then press ENTER b After setti...

Страница 41: ...sable Note What is FREEVIEW PLAYBACK FREEVIEW PLAYBACK gives you over 40 FREEVIEW channels that you can pause record and rewind for no monthly subscription To check you re in a FREEVIEW coverage area text your postcode to 83331 or visit www freeview co uk Costs no more than a normal text The FREEVIEW service is subject to coverage The FREEVIEW service is subject to coverage An aerial upgrade may b...

Страница 42: ...o Live TV automatically y y If the timeshift data exceeds the capacity the date will be deleted automatically from the oldest one Note You can record Digital TV programmes and store them on the HDD Normal Recording 1 Use PR W S to select a programme you want to record 2 Press X REC to start recording Press M to pause recording press M again to resume recording The TV screen turns black with stop m...

Страница 43: ... an error message will appear and the timer recording cannot be made Timer Recording EPG You can also set the timer based on the information provided by the EPG 1 While watching TV press GUIDE 2 Use A D to select date field and select the date of recording schedule using W S 3 Use A D to select programme field and set the programme using W S 4 Use A D to select the programme list and select a prog...

Страница 44: ...lete the editing Instant Timer Recording You can set the recording time instantly to stop the recording automatically 1 Use PR W S to select a programme you want to record 2 Press X REC to start recording 3 While recording press A D repeatedly to set the recording duration 4 Press ENTER b 5 Press Z to stop recording y y The standard recording time is 3hours MAX 6hours Depending on the remaining ca...

Страница 45: ...ded for proper playback Note To stop playback Press Z STOP during playback To pause playback Press M PAUSE during playback Press d PLAY to resume playback To play frame by frame Press M PAUSE while movie playback Press M PAUSE repeatedly to playback Frame by Frame To scan forward or backward Press c or v to play fast forward or fast reverse during playback You can change the various playback speed...

Страница 46: ...sed for example 1 POWER B OPEN CLOSE etc y y On BD Video discs with BD J the resume playback function does not work y y If you press Z STOP once during BD ROM interactive title playback the unit will be in Complete Stop mode Note Playing the recorded titles REC 1 While watching TV press REC LIST to display the options menu or press REC LIST in Home menu 2 Use W S A D to select recording title 3 Pr...

Страница 47: ...the options menu 2 Press blue coloured B button repeatedly to sorted by recorded time in recent order or title name in alphabetical order ABC order by title name in alphabetical order Recent order sorted by recorded date Playing content contained in the internal hard disk drive 1 Press HOME n 2 Select Movie Photo or Music using A D and press ENTER b 3 Select the HDD option using W S and press ENTE...

Страница 48: ...c This player can play the Blu ray 3D discs which contains separate views for the left and right eyes Preparation In order to playback Blu ray 3D title in stereoscopic 3D mode you need to c a b d a Check if your TV is 3D capable and has HDMI 1 4 input s b Wear 3D glasses to enjoy the 3D experience if it is necessary If you want to purchase additional 3D ready glasses contact the dealer that you pu...

Страница 49: ...ray 3D ready device 3D ready TV refers to TVs that are compliant with HDMI 1 4 3D mandatory format standard The Blu ray 3D and Blu ray 3D ONLY may not be printed on your BD ROM disc even if the disc contains 3D contents Note Advanced Playback Repeat Playback BD DVD AVCHD ACD MUSIC MUSIC N During playback press REPEAT repeatedly to select a desired repeat mode BDs DVDs A Selected portion will be re...

Страница 50: ...on 4 Press RETURN x to exit the Zoom menu Marker Search BD DVD AVCHD MOVIE MOVIE N REC You can start playback from up to nine memorized points To enter a marker 1 During playback press MARKER at the desired point The Marker icon appears on the TV screen briefly 2 Repeat step 1 to add up to nine markers To recall a marked scene 1 Press SEARCH and the search menu appears on the screen 2 Press a numb...

Страница 51: ...hlight a marker number Use A D to select a marked scene that you want to playback 3 Press ENTER b to start playback from the marked scene y y This function may not work depending on discs titles server ability y y This function may not work on some Home Link content depending on the file type and ability of the DLNA server y y This function may not work in is file playback and on recording list No...

Страница 52: ... in the Movie menu 2 Press ENTER b Press ENTER b again to deselect the subtitle file Selected subtitle file will be displayed when you play the movie file y y If you press Z STOP while playback the subtitle selection is cancelled y y This function is not available for playing file on a server via home network Note Last Scene Memory BD DVD This unit memorizes the last scene from the last disc that ...

Страница 53: ...only 2 Select an option using W S 3 Use A D to adjust the selected option value 4 Press RETURN x to exit the On Screen display y y If no button is pressed for a few seconds the on screen display disappears y y A title number cannot be selected on some discs y y Available items may differ depending on discs or titles y y If BD interactive title is playing back some setting information is displayed ...

Страница 54: ... the Audio option 3 Use A D to select desired audio language audio track or audio channel y y Some discs allow you to change audio selections only via the disc menu In this case press TITLE POPUP or DISC MENU button and choose the appropriate audio from the selections on the disc menu y y Immediately after you have switched sound there may be a temporary discrepancy between the display and actual ...

Страница 55: ...On Screen display Even if you change the value of the TV Aspect Ratio option in On Screen display the TV Aspect Ratio option in the Setup menu is not changed Note Changing the Picture Mode BD DVD AVCHD MOVIE MOVIE N REC You can change the Picture mode option during playback 1 During playback press INFO DISPLAY m to display the On Screen display 2 Use W S to select the Picture Mode option 3 Use A D...

Страница 56: ...AY m to display the option menu 6 Use W S to select Copy option and press ENTER b to display the Copy menu 7 Use W S to select a file or a folder you wish to copy on the menu and press ENTER b Repeat this step to select files and folders as many as you can Select all the files and folders on the current directory Shows all type of files on the screen Movie Photo and Music Cancels the copying and r...

Страница 57: ...usic photo video file s folder s from the internal hard disk drive to a USB storage device 1 Insert a USB device to the USB port until it fits into place 2 Press HOME n 3 Select Movie Photo or Music using A D and press ENTER b 4 Select HDD using W S and press ENTER b 5 Use W S A D to select a directory that files or folders you want to copy are located 6 Press INFO DISPLAY m to display the option ...

Страница 58: ...lect the destination folder to be copied 11 Option If you want to create a new folder use W S A D to select New Folder and press ENTER b Enter folder name using virtual keyboard and press ENTER b while OK is selected 12 Use W S A D to select OK and press ENTER b to start copying y y Copying speed may vary depending on the file size number of files and network condition y y It is unable to do copy ...

Страница 59: ...ovie Photo and Music Cancels the copying and returns to the previous screen 5 Use W S A D to select Start and press ENTER b 6 Use A D to select OK and press ENTER b to delete the selected files and folders If a reserved recording is started during taking a copy the recording is discontinued then a notification pops up Note Naming a file folder You can re name a file or a folder in the internal har...

Страница 60: ...USB storage device is needed to download bonus content WIRELESS 3 Press HOME n and set the BD LIVE connection option on the Setup menu page 36 Depending on the disc the BD LIVE function may not operate if BD LIVE connection option is set to Partially Permitted 4 Insert a BD ROM with BD LIVE The operations may different depending on the disc Refer to the manual supplied with the disc Do not extract...

Страница 61: ... may not be played in this player y y Some DVD VR discs are made with CPRM data by DVD RECORDER This unit cannot support these kinds of discs What is CPRM CPRM is a copy protection system with scramble system only allowing the recording of copy once broadcast programs CPRM stands for Content Protection for Recordable Media Note Selecting a subtitle file MOVIE If a movie file name and the subtitle ...

Страница 62: ...t desired code option 4 Press RETURN x to exit the On Screen display Viewing a photo You can view photo files using this player 1 Press HOME n 2 Select Photo using A D and press ENTER b 3 Select Disc USB or HDD option using W S and press ENTER b This step is needed only when a disc or a USB device is connected on this unit While navigating Movie Photo or Music menu press green G colored button to ...

Страница 63: ...o in full screen 1 While viewing a photo in full screen press INFO DISPLAY m to display the option menu 2 Select an option using W S a Current photo Total number of photos Use A D to view previous next photo b Slide Show Press ENTER b to start or pause slide show c Music Select Select the background music for the slide show page 64 d Music Press ENTER b to start or pause background music e Rotate ...

Страница 64: ...the Music Select menu 7 Use W S to select a device and press ENTER b Devices that you can select may differ depending on the location of the photo file you are displaying in full screen Photo location Available Device Disc Disc USB HDD USB Disc USB HDD Internal HDD Disc USB HDD Share Folder on your PC CIFS CIFS DLNA server DLNA server 8 Use W S to select a file or a folder you wish to play Select ...

Страница 65: ... B and place an Audio CD on the disc tray Press OPEN CLOSE B to close the disc tray The playback starts automatically 2 Press INFO DISPLAY m to display the option menu 3 Use W S to select CD Archiving option and press ENTER b to display the CD Archiving menu 4 Use W S to select a track you wish to copy on the menu and press ENTER b Repeat this step to select tracks as many as you can Select all th...

Страница 66: ...or extract the connected USB storage device during Audio CD recording Note The making of unauthorized copies of copy protected material including computer programs files broadcasts and sound recordings may be an infringement of copyrights and constitute a criminal offense This equipment should not be used for such purposes Be responsible Respect copyrights Caution Viewing information from Gracenot...

Страница 67: ...y Audio CDs that users made for their only private purposes cannot be supported in this feature because they are not in the Gracenote Media Database Note Using the Music Library The player offers Music Library menu for the music contents stored in the internal hard disk drive The player accesses the Gracenote Media Database and loads the music information for all of the music contents in the inter...

Страница 68: ...t using power scroll bar Use D repeatedly to select the power scroll bar on the right side of the screen Use W S to select a letter and press ENTER b to move the cursor to the music title which start with the letter you were selected The player must be connected to the Internet in order to use the Music Library Note Adding an audio file to your playlist 1 Use W S A D to select a directory that fil...

Страница 69: ... DLNA certified media servers connected on your home network About DLNA This Player is a DLNA Certified digital media player that can display and play movie photo and music content from your DLNA compatible digital media server PC and Consumer Electronics The Digital Living Network Alliance DLNA is a cross industry organization of consumer electronics computing industry and mobile device companies...

Страница 70: ...le requirements and playback functions on the Home Link menu may differ depending on media servers y y The file requirements on page 10 are not always compatible There may have some restrictions by file features and media server s ability y y The thumbnail of the unplayable files can be displayed in the Home Link menu but those cannot be played on this player y y If there is an unplayable music fi...

Страница 71: ...d drive space for a typical installation of Nero MediaHome stand alone y y 1 2 GHz Intel Pentium III or AMD Sempron 2200 processors y y Memory 256 MB RAM y y Graphics card with at least 32 MB video memory minimum resolution of 800 x 600 pixels and 16 bit colour settings y y Windows Internet Explorer 6 0 or higher y y DirectX 9 0c revision 30 August 2006 or higher y y Network environment 100 Mb Eth...

Страница 72: ...of shared folders 7 Click Start Server icon to start the server y y If the shared folders or files are not displayed on the player click the folder on the Local Folders tab and click Rescan Folder at the More button y y Visit www nero com for more information and software tools Note Accessing a share folder from your PC 1 Start your PC that is connected on your local area network 2 On your PC shar...

Страница 73: ... Vista visit link below for more information on file share settings Note Entering a network user ID and the password Depending on your PC s environment you may need to enter a network user ID and the password for accessing a shared folder 1 The virtual keyboard appears automatically if the network user ID and the password are required 2 Use W S A D to select a character then press ENTER b to confi...

Страница 74: ...ess ENTER b y y Detailed information of each service contact to the content provider or visit suppot link of the service y y The content of Netcast services and service related information including user interface is subject to changes Please refer to the web site of each service for most up to date information y y Using Netcast features with wireless network connection may result in improper stre...

Страница 75: ...n the disc y y Cancel the Rating function or change the rating level The angle cannot be changed y y Multi angles are not recorded on the DVD Video being played Cannot play movie photo or audio files y y The files are not recorded in a format that the unit can play y y The unit does not support the codec of the movie file The remote control does not work properly y y The remote control is not poin...

Страница 76: ...otection Picture noise appears y y You are playing a disc recorded in a colour system that is different from your TV y y Set the resolution to one that your TV accepts Sound Symptom Cause Solution There is no sound or the sound is distorted y y Connect the audio connection securely y y The input source setting on the amplifier or the connection to the amplifier is incorrect y y The unit is in scan...

Страница 77: ...dband service speed may not be fast enough to stream video services Contact your Internet Service Provider ISP and increase the broadband speed is recommended Shared folder or files from your PC or a media server are not displayed on the Home Link menu y y The firewall or anti virus software on your media server is running Turn off the firewall or anti virus software running on your PC or media se...

Страница 78: ...her does Second Timer recording may proceed in minutes You cannot enter a timer programme when y y In the case that two channels is recording y y The time you re trying to set has already passed y y There are already 32 timer programs set If two or more timer programs overlap y y The earlier programme takes priority y y In the case a reserved recording is stared during recording two channels and a...

Страница 79: ...ns Note Setting up the remote to control your TV You can operate your TV with the supplied remote control If your TV is listed in the table below set the appropriate manufacturer code 1 While holding down 1 TV POWER button press the manufacturer code for your TV with the numerical buttons see the table below Manufacturer Code Number LG 1 Default 2 Zenith 1 3 4 GoldStar 1 2 Samsung 6 7 Sony 8 9 Hit...

Страница 80: ...GL Hong Kong HK Hungary HU India IN Indonesia ID Israel IL Italy IT Jamaica JM Japan JP Kenya KE Kuwait KW Libya LY Luxembourg LU Malaysia MY Maldives MV Mexico MX Monaco MC Mongolia MN Morocco MA Nepal NP Netherlands NL Antilles AN New Zealand NZ Nigeria NG Norway NO Oman OM Pakistan PK Panama PA Paraguay PY Philippines PH Poland PL Portugal PT Romania RO Russian Federation RU Saudi Arabia SA Sen...

Страница 81: ... Icelandic 7383 Indonesian 7378 Interlingua 7365 Irish 7165 Italian 7384 Japanese 7465 Kannada 7578 Kashmiri 7583 Kazakh 7575 Kirghiz 7589 Korean 7579 Kurdish 7585 Laothian 7679 Latin 7665 Latvian Lettish 7686 Lingala 7678 Lithuanian 7684 Macedonian 7775 Malagasy 7771 Malay 7783 Malayalam 7776 Maori 7773 Marathi 7782 Moldavian 7779 Mongolian 7778 Nauru 7865 Nepali 7869 Norwegian 7879 Oriya 7982 Pa...

Страница 82: ... of the Digital Living Network Alliance AVCHD and the AVCHD logo are trademarks of Panasonic Corporation and Sony Corporation YouTube is a trademark of Google Inc Picasa Web Albums is a trademark of Google Inc Manufactured under license under U S Patent s 5 451 942 5 956 674 5 974 380 5 978 762 6 226 616 6 487 535 7 212 872 7 333 929 7 392 195 7 272 567 other U S and worldwide patents issued pendi...

Страница 83: ... Data the Gracenote Software and the Gracenote Servers including all ownership rights Under no circumstances will Gracenote become liable for any payment to you for any information that you provide You agree that Gracenote Inc may enforce its rights under this Agreement against you directly in its own name The Gracenote service uses a unique identifier to track queries for statistical purposes The...

Страница 84: ...date the player using the latest software to enhance the products operation and or add new features You can update the software by connecting the unit directly to the software update server y y Before updating the software in your player remove any disc and USB Device from the unit y y Before updating the software in your player turn the player off and then turn it back on y y During the software ...

Страница 85: ...pdate is completed the message Update is complete will appear and then power will turn off automatically after 5 seconds 7 Turn the power back on The system now operates with the new version The Software Update function may not work properly depending on your internet environment In this case you can obtain the latest software from the authorized LG Electronics Service Centre then update your play...

Страница 86: ...S Dolby Tr ueHD DTS PCM 2ch PCM 5 1ch DTS DTS DTS HD PCM 2ch PCM 7 1ch DTS DTS HD Linear PCM 2ch PCM 2ch PCM 2ch DTS Linear PCM 2ch Linear PCM 5 1ch PCM 2ch PCM 5 1ch DTS Linear PCM 5 1ch Linear PCM 7 1ch PCM 2ch PCM 7 1ch DTS Linear PCM 7 1ch 1 The secondary and interactive audio may not be included in the output bitstream if Digital Output or HDMI option is set to Primary Pass Thru Except LPCM C...

Страница 87: ... will produce a strong distorted sound or no sound at all y y Multi channel Digital Surround Sound via digital connection can only be obtained if your receiver is equipped with a Digital Multi channel decoder About the internal hard disk drive The internal hard disk drive HDD is a fragile piece of equipment Please use the player following the guidelines below to protect against possible HDD failur...

Страница 88: ...e 576i resolution setting real output resolution of HDMI OUT will change to 576p y y If you select a resolution manually and then connect the HDMI jack to TV and your TV does not accept it the resolution setting is set to Auto y y If you select a resolution that your TV does not accept the warning message will appear After resolution change if you cannot see the screen please wait 20 seconds and t...

Страница 89: ... 2 HDMI OUT video audio 19 pin HDMI standard Type A ANALOGUE AUDIO OUT 2 0 Vrms 1 kHz 0 dB 600 Ω RCA jack L R x 1 DIGITAL OUT COAXIAL 0 5 V p p 75 Ω RCA jack x 1 ANTENNA IN Antenna input 75 Ω USB Port 4 pin USB 2 0 standard System Laser Semiconductor laser wavelength 405 nm 650 nm Signal system Standard PAL NTSC colour TV system Frequency response 20 Hz to 20 kHz 48 kHz 96 kHz 192 kHz sampling Sig...

Страница 90: ...ce of the unit Maintaining the Unit The unit is a high tech precision device If the optical pick up lens and disc drive parts are dirty or worn the picture quality could be diminished For details please contact your nearest authorized service centre Important Information Relating to Network Services All information data documents communications downloads files text images photographs graphics vide...

Страница 91: ...rantee must be directed to the dealer from whom the equipment was originally purchased The dealer may before carrying out service under guarantee require a receipted account as evidence of the date of purchase D We respectfully point out that your dealer is not obligated to replace batteries if they become exhausted or worn in use E Aerial alignment and consumer control adjustments are not covered...

Страница 92: ......

Отзывы: