background image

11

I N S TA L L AT I O N I N S T RU C T I O N S

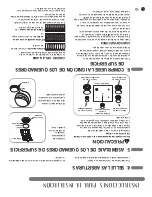
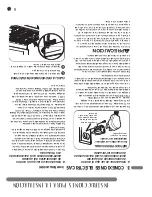
7. CHECK IGNITION OF OVEN BURNER

The oven is designed to operate quietly and
automatically. To operate the oven, press the

BAKE

pad and then press the number pads

until 350° appears in the display. Touch the

START

pad. After 30–90 seconds, the oven

burner will ignite and burn until the set
temperature is reached. The oven burner will
continue to cycle on and off as necessary to
maintain the oven at the temperature indicated
by the display.

To check ignition of the broil burner, touch the

BROIL HI/LO

pad and then the 

START

pad.

After 30–90 seconds, the broil burner will ignite.

Electric ignition requires electrical power to
operate. In case of a power outage, the oven
burners on these models cannot be lit manually
with a match. Gas will not flow unless the glow
bar is hot.

If the oven is in use when a power outage
occurs, the burner will shut off and cannot be
re-lit until power is restored.

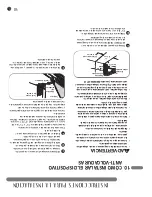
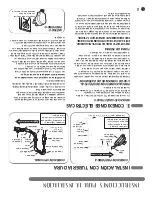
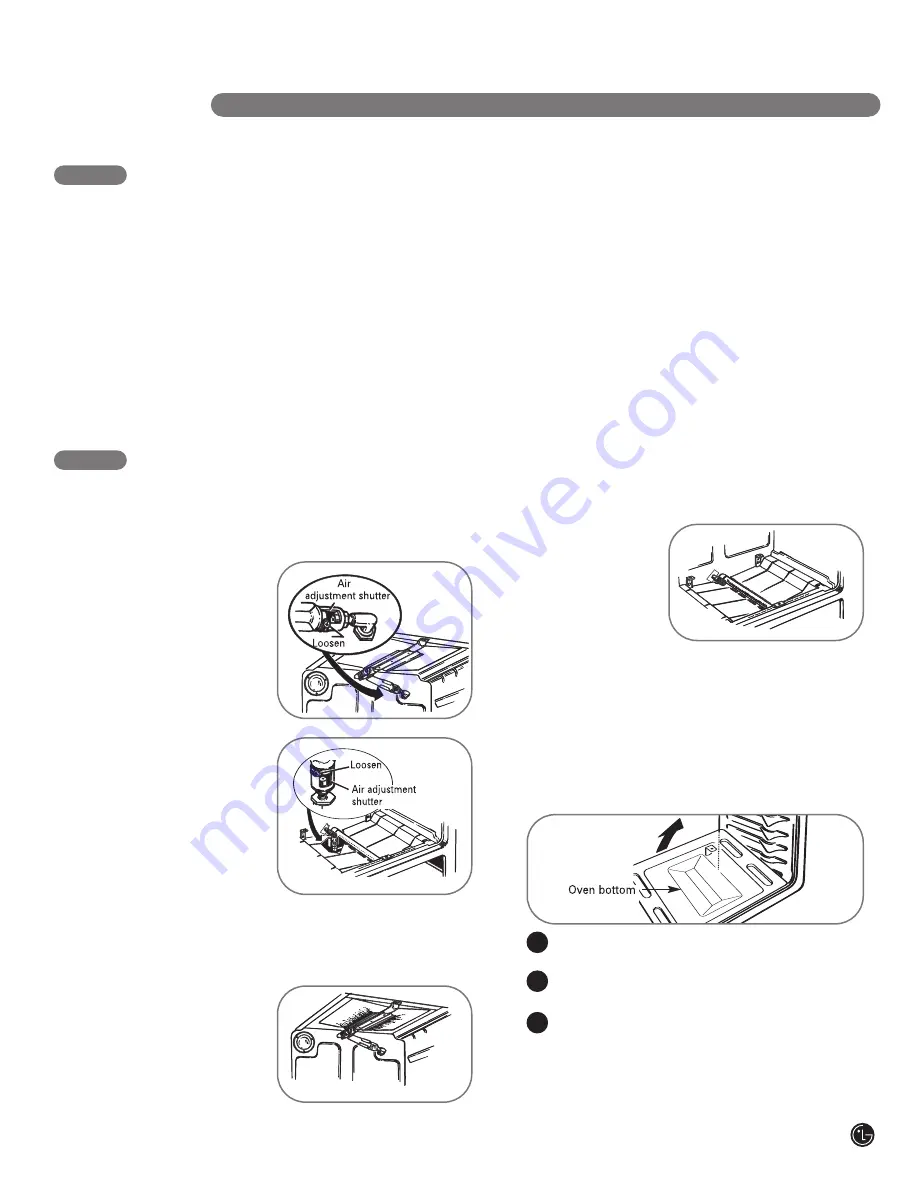
8. ADJUST BROIL AND OVEN BURNER AIR

ADJUSTMENT SHUTTERS, IF NECESSARY

Air adjustment shutters for the top and bottom
burners regulate the flow of air to the flames.

The air adjustment
shutter for the 
top (broil) burner 
is in the center 
of the rear wall 
of the oven.

The shutter for the
oven burner is 
near the back 
wall behind the
warming drawer.
Remove the 
drawer. See the

Care and Cleaning

of the Range

section

of your User’s Guide.

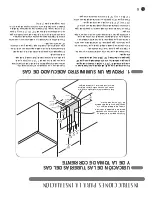
To adjust the flow of air to either burner, loosen

the Phillips head screw and rotate the shutter

toward open or closed position as needed.

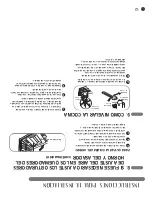
The flames for the
top (broil) burner
should be steady
with approximately
1

blue cones and

should not extend
out over the edges
of the burner baffle.

To determine if the
bottom burner
flames are burning
properly, remove
the oven bottom.
Flames should 
have approximately
1

blue cones and, if range is supplied with

natural gas, should burn with no yellow tipping.
(With most LP gas, small yellow tips at the end
of outer cones are normal.) Flames should not
lift off burner ports. If lifting is observed,
gradually reduce air shutter opening until flames
are stabilized.

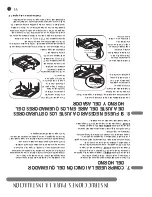
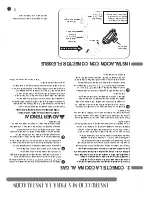
TO REMOVE THE OVEN BOTTOM:

Remove the knurled screws holding down
rear of the oven bottom.

Grasp the oven bottom at finger slots on
each side.

Lift the rear of the oven bottom enough to
clear the lip of the range frame, push it
back, and then pull it up and out.

A

B

C

Содержание GAS RANGE

Страница 1: ...ere are certain safety precautions you should follow You will find these precautions in the Important Safety Information section in your User s Guide Read them carefully IMPORTANT Save these instructions for local electrical inspector s use IMPORTANT Observe all governing codes and ordinances Note to Installer Leave these instructions with the appliance after installation is completed Note to Cons...

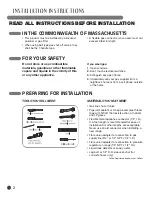
Страница 2: ... supplier from a neighbor s home or from a cell phone outside of the home FOR YOUR SAFETY PREPARING FOR INSTALLATION TOOLS YOU WILL NEED MATERIALS YOU MAY NEED Gas line shut off valve Pipe joint sealant or UL approved pipe thread tape with Teflon that resists action of natural and LP gases Flexible metal appliance connector 1 2 I D A 5 foot length is recommended for ease of installation but other ...

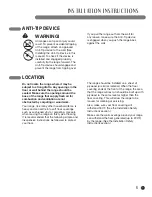
Страница 3: ...ching over the open flames of operating burners install a ventilation hood over the range that projects forward at least 5 beyond the front of the cabinets The ventilating hood must be constructed of sheet metal not less than 0 0122 thick Install above the cooktop with a clearance of not less than 1 4 between the hood and the underside of the combustible material or metal cabinet The hood must be ...

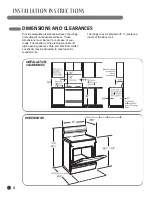
Страница 4: ...afe use of your range The location of the electrical outlet and pipe opening see Gas Pipe and Electrical Outlet Locations may be adjusted to meet specific requirements The range may be placed with 0 clearance flush at the back wall DIMENSIONS AND CLEARANCES INSTALLATION INSTRUCTIONS INSTALLATION CLEARANCES DIMENSIONS ...

Страница 5: ... for combustion and ventilation are not obstructed by carpeting or woodwork Your range like many other household items is heavy and can settle into soft floor coverings such as cushioned vinyl or carpeting Use care when moving the range on this type of flooring It is recommended that the following simple and inexpensive instructions be followed to protect your floor The range should be installed o...

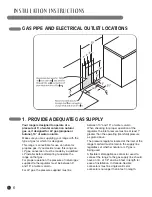
Страница 6: ...t be between 5 and 13 of water column For LP gas the pressure supplied must be between 10 and 13 of water column When checking for proper operation of the regulator the inlet pressure must be at least 1 greater than the operating manifold pressure as given above The pressure regulator located at the inlet of the range manifold must remain in the supply line regardless of whether natural or LP gas ...

Страница 7: ...inlet of regulator Use a backup wrench on the regulator fitting to avoid damage When installing the range from the front remove the 90 elbow for easier installation Install male 1 2 or 3 4 flare union adapter to the NPT internal thread of the manual shut off valve taking care to back up the shut off valve to keep it from turning Connect flexible metal appliance connector to the adapter on the rang...

Страница 8: ...mer should have the wall receptacle and circuit checked by a qualified electrician to make sure the receptacle is properly grounded Where a standard two prong wall receptacle is encountered it is the personal responsibility and obligation of the customer to have it replaced with a properly grounded three prong wall receptacle DO NOT UNDER ANY CIRCUMSTANCES CUT OR REMOVE THE THIRD GROUND PRONG FROM...

Страница 9: ...uations because disconnecting of the power cord places undue strain on the adapter and leads to eventual failure of the adapter ground terminal The customer should have the two prong wall receptacle replaced with a three prong grounding receptacle by a qualified electrician before using the appliance The installation of appliances designed for mobile home installation must conform with the Manufac...

Страница 10: ...ecked after the range and gas supply lines have been carefully checked for leaks ELECTRIC IGNITION Select a top burner knob and simultaneously push in and turn to LITE position You will hear a clicking sound indicating proper operation of the spark module Once the air has been purged from the supply lines burner should light within 4 seconds After burner lights rotate knob out of the LITE position...

Страница 11: ...he flow of air to the flames The air adjustment shutter for the top broil burner is in the center of the rear wall of the oven The shutter for the oven burner is near the back wall behind the warming drawer Remove the drawer See the Care and Cleaning of the Range section of your User s Guide To adjust the flow of air to either burner loosen the Phillips head screw and rotate the shutter toward ope...

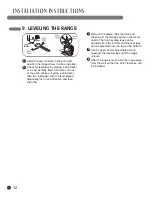
Страница 12: ...ings with the level placed diagonally first in one direction and then the other Remove the drawer See the Care and Cleaning of the Range section in the User s Guide The front leveling legs can be adjusted from the bottom and the rear legs can be adjusted from the top or the bottom Use an open end or adjustable wrench to adjust the leveling legs until the range is level After the range is level sli...

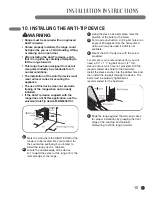
Страница 13: ... range is to be located Be sure to allow for the countertop overhang if you intend to install the range next to cabinets Locate the outside edge of the device 21 8 toward the center of the range from the marked edge of the range Using the device as a template mark the position of the hole for the screw For wood construction drill a pilot hole at an angle of 20 degrees from the horizontal A nail or...

Страница 14: ... BACK TO NATURAL GAS FROM LP This range leaves the factory set for use with natural gas If you want to convert to LP gas the conversion must be performed by a qualified LP gas installer The conversion instructions and LP orifices can be found attached to the range next to the pressure regulator Keep these instructions and the orifices in case you want to convert back to natural gas P No 49 85116 2...

Страница 15: ...iene ajustada de fábrica para usar gas natural Si usted quiere pasarse a propano líquido la conversión debe ser realizada por un instalador calificado de cocinas usando propano líquido Junto al regulador de presión en la cocina hallará pegadas las instrucciones de conversión la etiqueta adhesiva y los orificios para propano líquido Conserve estas instrucciones y los orificios en caso de que quiera...

Страница 16: ...esalga si desea instalar la cocina al lado de los gabinetes Ubique el extremo externo del dispositivo 2 1 8 5 4 cm hacia el centro de la cocina desde el extremo marcado de la cocina Utilizando el dispositivo como una plantilla marque la posición del orificio para el tornillo Para construcciones de madera perfore un orificio piloto a un ángulo de 20 grados desde la horizontal Si no cuenta con una p...

Страница 17: ...ba o desde abajo Use una llave española abierta o una llave ajustable para ajuste las patas niveladoras hasta que la cocina esté nivelada Después que la cocina esté nivelada separe la cocina de la pared para poder instalar el dispositivo anti volcaduras A B C D E 8 SI FUESE NECESARIO AJUSTE LOS OBTURADORES DE AJUSTE DEL AIRE EN LOS QUEMADORES DEL HORNO Y DEL ASADOR continuación PARA QUITAR LA SOLE...

Страница 18: ...RES DE AJUSTE DEL AIRE EN LOS QUEMADORES DEL HORNO Y DEL ASADOR Los obturadores de ajuste del aire para los quemadores superiores e inferiores regulan el flujo de aire hacia las llamas El obturador de ajuste del aire para el quemador superior asador está en el centro de la pared posterior del horno El obturador para el quemador inferior horno está cerca de la pared posterior detrás el cájon calent...

Страница 19: ...uemadores de superficie y a la vez empuje hacia adentro y hágalo girar hacia la posición de LITE encender Usted oirá un chasquido indicando el funcionamiento adecuado del módulo de chispa Una vez que el aire haya sido expulsado de las líneas de suministro los quemadores se encenderán en unos 4 segundos Después de que el quemador se encienda haga girar el botón para quitarlo de la posición de LITE ...

Страница 20: ...de alimentación hace que el adaptador trabaje forzadamente y esto resultará en el fallo eventual de la terminal de toma de tierra del adaptador Antes de usar el aparato electrodoméstico el cliente deberá hacer que un electricista calificado reemplace el receptáculo de pared de dos espigas por otro de tres espigas con toma de tierra Se debe hacer la instalación de aparatos electrodomésticos diseñad...

Страница 21: ...ectado a tierra NO CORTE O QUITE BAJO NINGUNA CIRCUNSTANCIA LA TERCERA ESPIGA TOMA DE TIERRA DEL CORDÓN DE ALIMENTACIÓN Los GFCIs no se requieren ni se recomiendan en un tomacorriente usado para una cocina de gas Los GFCI s o Interruptores de Circuito de Falla a Tierra Ground Fault Circuit Interrupters son dispositivos que detectan fugas de corriente en un circuito y automáticamente desconectan el...

Страница 22: ...a facilitar la instalación Aplique un adaptador macho abocinado de unión de 1 2 1 3 cm ó 3 4 1 9 cm al roscado interior NPT de la válvula manual de interrupción del suministro de gas poniendo cuidado de proteger la válvula de cierre para evitar que gire Conecte el conector de metal flexible para aparatos electrodomésticos al adaptador en la cocina Coloque la cocina en una posición que le permitirá...

Страница 23: ... ser por lo menos de 1 2 5 cm más que la presión de funcionamiento bifurcador indicada anteriormente El regulador de presión localizado a la entrada del bifurcador de la cocina debe permanecer en la línea de suministro sin importar qué tipo de gas natural o LP se está usando Para facilitar la instalación se debe tener un conector de metal flexible para aparatos electrodomésticos que conecte la coc...

Страница 24: ...las aberturas en la base de la cocina que suministran aire fresco para la combustión y la ventilación no estén obstruidas por cualquier alfombra o enmaderado Su cocina como muchos otros aparatos electrodomésticos es pesada y puede colocarse en recubrimientos suaves para suelo tales como vinilo acolchonado o alfombra Tenga cuidado cuando mueva la cocina en este tipo de suelo Se recomienda seguir la...

Страница 25: ... del panel lateral de la cocina delante del gabinete Hasta los gabinetes debajo de la cocina y en la parte trasera de la cocina Mínimo Distancia mínima respecto de la pared izquierda 18 45 7 cm 30 76 2 cm Profundidad con la puerta cerrada incluye la manija de la puerta 30 76 2 cm 29 3 4 75 6 cm 0 0 cm 13 33 0 cm 36 91 5 cm 1 4 0 64 cm 30 76 2 cm 3 7 6 cm 6 15 3 cm Mínimo con los gabinetes en ambos...

Страница 26: ...etos dentro de los gabinetes encima de la cocina cuando los quemadores estén funcionando instale una campana extractora de aire sobre la cocina que se proyecte hacia adelante por lo menos unas 5 12 7 cm más allá del frente de los gabinetes La campana extractora debe estar construída de hojas metálicas de un espesor no menor de 0 0122 31 mm Instálela encima de la superficie de cocción con un margen...

Страница 27: ...s Un sellador para tuberías o cinta adhesiva con Teflon para roscados de tuberías aprobada por UL que resista la acción del gas natural y del gas LP propano líquido Conector de metal flexible para aparatos electrodomésticos diámetro interior D I de 1 2 1 3 cm Se recomienda un largo de 5 pies 1 5 metros para facilitar la instalación pero otros tamaños también son aceptables Nunca use un conector vi...

Страница 28: ... que usted debe observar con respecto a su cocina que son aplicables a cualquier aparato electrodoméstico de gas que genere calor Encontrará estas precauciones en la sección de Instrucciones importantes de seguridad en la parte delantera de su Guía para el Uso Léalas cuidadosamente IMPORTANTE Guarde estas instrucciones para el uso de los inspectores eléctricos locales IMPORTANTE Cumpla con todos l...

Отзывы: