background image

60

Operation

4

Oper

ation

Hiding or Showing User Interface Elements

By default, the system information, status bar and navigation bar fade from the screen after a call has been connected for 
10 seconds. This interval resets after any interaction with the system. You can adjust the duration of the fade out interval by 
adjusting the Fade Out Timeout preference in 

User Preferences : Appearance

 menu. To hide or show these user interface 

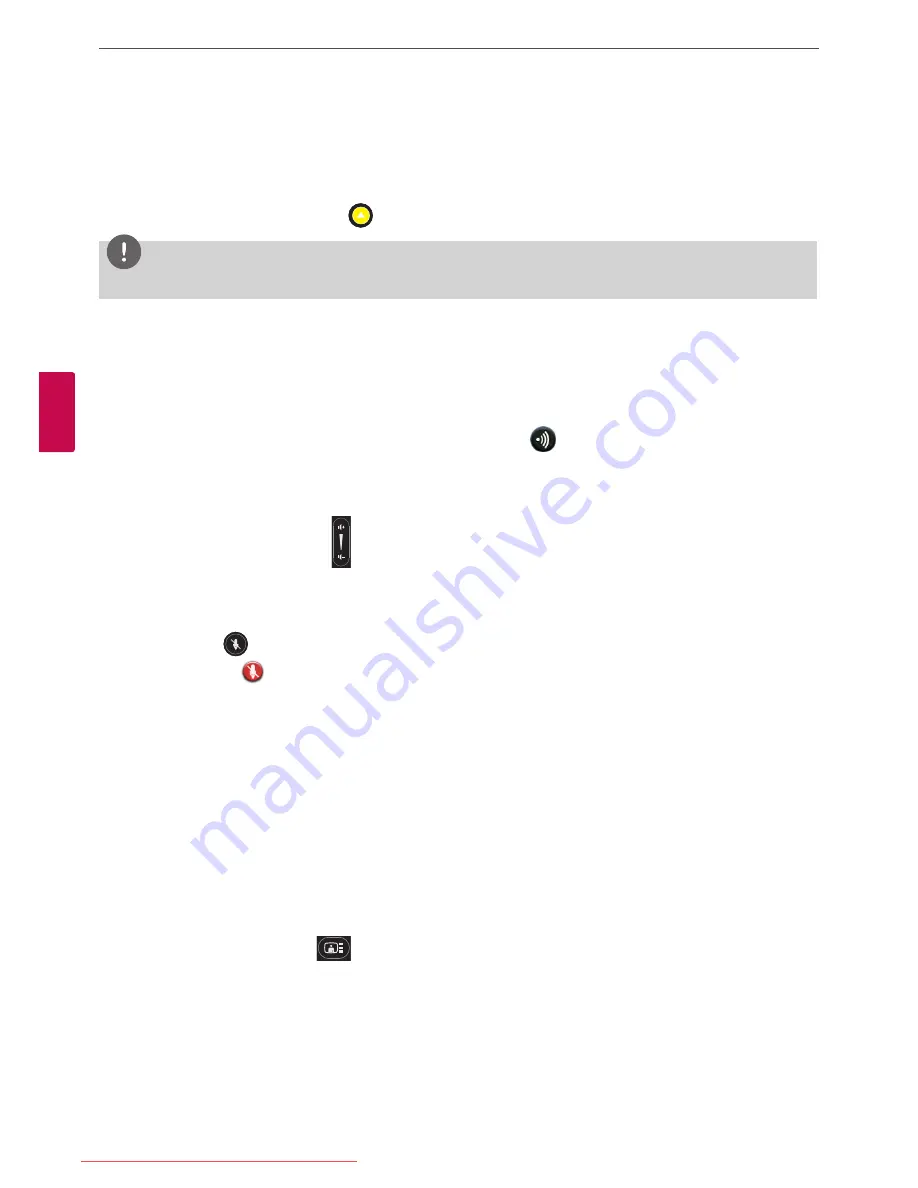
elements at any time during a call, press the 

 button.

NOTE

The user interface does not hide if the system is overheating. System overheating icons appear in the status bar. 

Managing Audio

You can identify the video caller who is speaking in the call, adjust the volume of the audio, and mute the active microphone.

Identifying the Dominant Speaker

When a video participant in a call is speaking, the dominant speaker icon 

 appears in the display in the video image from 

that participant.

Adjusting Volume

To adjust the volume in a call, use the 

 button on the remote control. You can also adjust the active microphone volume, 

or the treble and bass levels for audio out by adjusting preferences in [User Preferences > Audio] menu. 

Muting the Active Microphone

Pressing the mute 

 button on the remote control mutes the active microphone. When the near side active microphone 

is muted in a call, the 

 symbol appears.

Managing PIP

Your display shows the far-end and near-end video conferencing sites in addition to the menus and video images from 
connected video sources.
Picture-In-Picture (PIP) is a smaller window placed in one of the corners of the call screen. This second image is placed on top 
of the main image and always displays the primary (near) input by default. You can change the default setting so that PIP never 
appears or always appears by adjusting the 

User Preferences : Appearance : Picture in Picture

 preference.

Managing Video Layout

During a call, video from the connected caller appears in your display. You can change the screen layout of near and far end 
video that appear in the monitor.

To change the screen layout, press the 

 button.

Downloaded from ManualMonitor.com Manuals

Содержание AVS2400

Страница 1: ...MANUAL Video Conference Monitor Please read this manual carefully before operating your set and retain it for future reference MODEL AVS2400 P NO COV30805901 1101 V1 5 Downloaded from ManualMonitor com Manuals ...

Страница 2: ... Operation of this equipment in a residential area is likely to cause harmful interference in which case the user will be required to correct the interference at his own expense A suitable conduit for entries knock outs or glands shall be provided in the cable entries of this product in the end user Caution Danger of explosion if battery is incorrectly replaced Replace only with the same or equiva...

Страница 3: ...The lamps in this product contain mercury Please dispose according to state local or federal law This product contains a lamp s which contains mercury dispose according to local state or federal laws IMPORTANT SAFETY INSTRUCTIONS 1 Read these instructions 2 Keep these instructions 3 Heed all warnings 4 Follow all instructions 5 Do not use this apparatus near water 6 Clean only with dry cloth 7 Do ...

Страница 4: ...ng shelf unless properly secured Use only a stand recommended by the manufacturer Do not drop an object on or apply impact to the product Do not throw any toys or objects on the product screen It can cause injury to human problem to product and damage the display To Prevent Fire or Hazards Always turn the display OFF if you leave the room for more than a short period of time Never leave the displa...

Страница 5: ...c shock When cleaning the product unplug the power cord and scrub gently with a soft cloth to prevent scratching Do not clean with a wet cloth or spray water or other liquids directly onto the product An electric shock may occur Do not use chemicals such as benzene paint thinners or alcohol Spray water onto a soft cloth 2 to 4 times and use it to clean the front frame wipe in one direction only To...

Страница 6: ... cover 19 Adjusting the angle of the Monitor and camera 20 Initial settings for VCS 24 Main screen overview 26 Accessing the System Menu 27 User Preferences setup 28 Administrator Preferences 28 Accessing Administrative Features 30 Configuring Call Preferences 31 Configuring Security Preferences 33 Viewing Recent Configuration Changes 33 Configuring Audio Behaviors 35 Configuring Network Usage 39 ...

Страница 7: ...Call Status 59 Caller ID 60 Hiding or Showing User Interface Elements 60 Managing Audio 60 Managing PIP 60 Managing Video Layout 62 Viewing Call Statistics 62 Ending a Call 63 Managing the REDIAL List 63 Locking and Unlocking Entries in the REDIAL List 63 Removing an Entry from the REDIAL List 63 Adding a REDIAL List Entry to the Directory 64 Managing the Directory 64 Adding an Entry to the Local ...

Страница 8: ...ng and communicate with customers subcontractors and coworkers in real time but you can also make a decision and interchange information immediately saving you time and money VCS VCS Network Features IP based 1 to 1 Video conferencing system H 323 SIP communications 60 96 cm 1 920x1 080p Full HD wide LCD monitor 1 280x 720p 30 fps HD Camera H 261 3 4 H 239 receive video standard G 711 2 2 1C G 728...

Страница 9: ... product and item Video Conference Monitor Quick Setup Guide AVS2400 1 1 1 2 3 4 5 6 8 7 Optional P NO COV30806001 VCS Body Back cover Stand locking screw Stand base Power cord D sub 15 pin signal cable CD Owner s Manual Remote control and batteries Quick Setup Guide NOTE Illustrations of the product can be unlike actual product Some items of product can be changed depending on the circumstances D...

Страница 10: ...tons MENU Displays the MENU setup window or moves to the previous menu MODE w Displays the MODE setup window or navigates the menu items AUTO s When adjusting your display settings always press the AUTO button before entering the On Screen Display Only Analog Mode This will automatically adjust your display image to the ideal settings for the current screen resolution size display mode INPUT When ...

Страница 11: ...of the VCS j k lm n o p q r s j Power cord Inlet AC IN Connects the power plug k Main power switch Turns the unit on and off You must turn the unit on using the main power switch after connecting the power cable You can use this button to reset the system l LAN port Connects the LAN cable for this system m PC LAN port Connects the LAN cable between the VCS and your PC n HDMI port Connects the VCS ...

Страница 12: ...his button is not available Displays the system menu Use this button to set the far end camera preset or display the submenu of the directory menu Move to the next page on the current screen This button behaves as backspace when you enter text or numbers manually Use this button to adjust the volume in a call wsad Select or move between the menu options OK Confirms menu selections Use this button ...

Страница 13: ...n on a flat surface CAUTION Lay a foam mat or soft protective cloth on the surface and then lay the VCS carefully to prevent the camera from breaking and protect the screen from damage 2 Make sure to assemble the front and rear side of the stand Push it into the VCS body as shown in the following illustration 3 Turn the Stand locking screw clockwise to tighten Do not over tighten 3 Installation Do...

Страница 14: ...d by holding the camera It can be broken and damaged Disassembling the stand 1 Place the VCS with its front facing downward on a soft cloth 2 Turn the Stand locking screw counterclockwise to disconnect the stand base from the monitor Using the Kensington security system optional The Kensington security system connector is located at the rear of the VCS Connect the Kensington security system cable ...

Страница 15: ...your PC Refer to the following table HDMI D SUB Video O Digital O Analog Audio O Digital X HDMI connection Transmits the digital video and audio signals from your PC to the Monitor set Connect the PC and the Monitor set with the HDMI cable as shown in the following illustrations When using the HDMI cable Downloaded from ManualMonitor com Manuals ...

Страница 16: ...ansmits the analog video signal from your PC to the Monitor set Connect the PC and the Monitor set with the supplied D sub 15 pin signal cable as shown in the following illustrations When using the D SUB cable Downloaded from ManualMonitor com Manuals ...

Страница 17: ...rk and the other is for PC If you connect the PC as shown below you can use the network on the PC and VCS at the same time Network connection Broadband Service Connecting Power Connect the power cable as shown in the following illustrations Power connection CAUTION You must turn the unit on using the main power switch after connecting the power cable Downloaded from ManualMonitor com Manuals ...

Страница 18: ...hone connection Broadband Service Connecting a Microphone Connect a microphone to the microphone jack at the bottom of the VCS To use the external microphone you have to set the Active Microphone option to Microphone In on the Administrator Preferences Audio setup menu Microphone connection Downloaded from ManualMonitor com Manuals ...

Страница 19: ...itor and camera After installation adjust the angle of the Monitor and camera in various ways for maximum comfort It is recommended that the tilt angle of the monitor and camera should not exceed the degrees below in order to maintain an ergonomic and comfortable viewing position Camera tilt range 20 down to 20 up Monitor tilt range 5 forward to 15 backward 5 15 20 20 Downloaded from ManualMonitor...

Страница 20: ...press OK button 3 2 Press button to continue The password setting menu is displayed 4 Set the Administrator or User password 4 1 Press OK button on the New Password option Enter the password using number buttons and press OK button 4 2 Press OK button on the Confirm Password option Enter the password again using number buttons and press OK button 4 3 Select Set New Password option and press OK but...

Страница 21: ...Enter a descriptive name for the system The system name is used for far end system Video Number Enter the video number of the system Voice Number Enter the voice number of the system 6 Set the options of the Communication menu and press button Video Dialing Select the primary protocol you want to use when dialing video calls Voice Dialing Select the protocol you want to use when dialing voice call...

Страница 22: ...t mask IP address Default Gateway Enter the default gateway IP address Hostname Enter the hostname DNS Servers Enter the IP address to configure as DNS servers The IP addresses of the DNS server are separated by blanks Name Search Domains Enter the domain names to search when resolving hostnames Network Speed Select the speed and duplex capability of your network If the quality of the video and au...

Страница 23: ...udio output during video calls Voice Call Audio Output Select the location for audio output during voice calls HD Out Set this option to use the built in speakers for audio output during voice calls Line Out Set this option to use the connected external headphone for audio output during voice calls System Ringer Choose Enabled to enable the system ringer for the system System Ringer Volume Select ...

Страница 24: ...navigation bar contains icons that correspond to buttons on the remote control It also contains text that describes the action of a button performance The icons and text change depending on how you use the system NOTE Pressing and holding any button except the OK button on the remote control may cause the command associated with the button to repeat f Voice Call button Use this button to dial numb...

Страница 25: ...g operation the indicator stays green It will change to the red indicator after rebooting the system The indicator turns yellow when the network is progressing The indicator turns red if the network is disconnected and then the system is rebooted System Overheating This yellow indicator warns you when the system temperature is above normal operating temperature The system adjusts fan speed automat...

Страница 26: ...iguration menu are displayed The system information pages show the configuration and status information about your system Use the and buttons on the remote control to navigate the pages 2 Select a system menu and set the options Refer to the next pages for more details 3 Press the or button to exit the system menu Downloaded from ManualMonitor com Manuals ...

Страница 27: ...ust camera brightness and white balance and correct for some types of flicker that may appear in the video Adjusting Camera Brightness Camera brightness refers to the amount of light received through the lens of the camera You can improve dim scenes by manually adjusting the camera brightness NOTE Camera has auto exposure algorithm If the exposure is already high brightness will not change Adjusti...

Страница 28: ...nd press OK NOTE The default administrator password is 1 2 3 4 To change the administrator password refer to Changing the Administrator Password on page 32 If you enter an incorrect password press the button on the remote control to clear the Login Attempt Failed message Administration from a Web Browser To configure your system from a web browser you must have Adobe Flash Player installed and con...

Страница 29: ...reference in Administrator Preferences Security General Administration from a Telnet Session You can manage your system from a telnet session By default remote access through a telnet session is disabled LG recommends that you use the web administration interface or an ssh session to manage your system remotely To enable remote access through a telnet session select Enabled for the Telnet preferen...

Страница 30: ... user chooses Auto for the bandwidth when placing the call the system places the call at 1152 kb s The Auto Bandwidth preference addresses how the system responds to packet loss during a call When set to Enabled the system attempts to use the best available bandwidth after the call connects Selecting a Maximum Call Time You can control the amount of time that a call stays connected by selecting an...

Страница 31: ...ity for calls Controlling Remote Administration By default remote access to LG video conference system through the web http SNMP and ssh is enabled remote access through a telnet session is disabled To enable or disable remote access through any of these mechanisms configure preferences in Administrator Preferences Security General Enabling H 235 AES Security This unit supports H 235 128 bit AES s...

Страница 32: ...e enter the new password in the Confirm Password field and press OK 4 Select the Set New Password button and press OK Setting the User Password You can set a user password to control access to User Preferences screens By default the user password is not set To set the user password follow these steps 1 From the System Menu access Administrator Preferences Security Passwords 2 Enter a new password ...

Страница 33: ...ferences may not appear in Recent NOTE Upgrading the system software removes all preferences from the Recent screen Configuring Audio Behaviors You can adjust audio behaviors by configuring preferences in Administrator Preferences Audio Configuring Audio Codec Order To change the order of available audio codecs for the system to use to place calls select the Audio Codec Order preference select a c...

Страница 34: ...ve a microphone in connector on the codec and indicates the connection status of a device for the input None Ready or Error Testing Primary Audio Output You can send audio test tones to speakers that are connected to the system as the primary audio output device Navigate to Administrator Preferences Audio Primary Audio Output Test Select a channel to test or select Auto The Auto option cycles thro...

Страница 35: ...t mask used to partition the IP address into a network and host identifier and gateway IP address of the default gateway the system uses Specifying the Hostname and Domain Name Service DNS Servers You can enter the hostname of the system and the IP addresses to configure DNS servers You can also enter the domain names to search when resolving hostnames Domain Name System DNS translates names of ne...

Страница 36: ...nfiguration of IPv4 and IPv6 addressing for the system IP address only You cannot disable IPv4 addressing on your system Calls placed with an IPv6 address use the H 323 protocol In addition to specifying a local IPv4 IP address through either DHCP or by manually specifying a static IP address you can assign an IPv6 address to your system if you are using IPv6 addressing on your network Access Admi...

Страница 37: ...er to Enabling H 460 Support for H 323 Calls on page 43 for more information The following functions are not supported if your system is accessed from a web browser outside a firewall and static NAT is enabled System Upgrade Directory Import To work around this issue execute these functions from within the firewall Restricting Reserved Ports By default your system communicates through TCP and UDP ...

Страница 38: ...vice You can specify network Quality of Service QoS settings in the Administrator Preferences Network Network QoS preferences Set these preferences according to the settings used in your network NOTE Network QoS preferences are supported with IPv4 addressing only If you enable IPv6 addressing on your LifeSize system QoS preferences are ignored for IPv6 calls For more information about IPv6 address...

Страница 39: ...g the Corporate Directory Users can place calls from the directory by selecting a number to dial from a list of stored numbers The corporate directory is H 350 compliant and can store up to 1000 entries in both an alphabetical and hierarchical format All users can manage entries in the local directory Only administrators can manage entries in the corporate directory You can populate the corporate ...

Страница 40: ...wn Redial list but only if those addresses are allowed by the filters that you specify in the Auto Discovery Subnets and Auto Discovery Ignored Subnets preferences By default the system replies and sends queries to other systems in the local subnet only Configure the Auto Discovery Subnets and Auto Discovery Ignored Subnets preferences to enable the system to discover other systems outside the loc...

Страница 41: ...from the call and the mute indicators The navigation bar PIP windows caller ID information and call status messages do not appear on the screen Users can invoke the Call Manager dialog and call statistics and choose video inputs with the remote control The numeric keys on the remote control play touch tones Users can change this behavior from the Call Manager To enable or disable telepresence and ...

Страница 42: ...23 name and extension identify the device to the gatekeeper Any registered device can dial another one using this name and extension The H 323 Name preference is an optional value that is used when a gatekeeper is configured and requires the system to register with an H 323 ID If the gatekeeper administrator assigns an H 323 ID for the system enter that ID for the H 323 Name preference The H 323 E...

Страница 43: ...alls cannot be placed or received with this configuration For the server enter the username SIP server authorization name and password for the device if required The authorization name and password are the values the system uses for authentication these values are only required if the registrar or proxy require authentication If you are planning on placing and receiving calls on this system with M...

Страница 44: ...that affect the appearance or behavior of the following screen saver that appears when the system is idle and the screen saver timeout system sleep timeout timeout interval for the appearance of the user interface after a call connects language in which the user interface appears background image or color that appears in the user interface Help text appears at the bottom of the screen to assist us...

Страница 45: ...n adjust video behaviors to control cameras and video quality by configuring preferences in Administrator Preferences Video Controlling the Camera Use by Far End Users To prevent far end users from controlling your PTZ near end camera including configuring and controlling camera presets choose Disabled for the Administrator Preferences Video Video Control Far Control of Near Camera preference If y...

Страница 46: ...ackets Video packets that exceed the maximum transmission unit MTU size for any router or segment along the network path may be fragmented or dropped This results in poor quality video at the receiving device You can set the MTU of video packets that your system sends The default value is 1 440 bytes The allowed range is 900 to1 500 bytes To set the MTU for video packets access Administrator Prefe...

Страница 47: ...g information to update or install an upgrade license key on the system NOTE You can install a patch to a software release with an expired license key if the key was current when the software was released The third digit of the three digit version number of a release identifies a patch for example 4 3 1 is patch 1 to release v4 3 0 You can check for updates to license keys in either the user inter...

Страница 48: ...cense key server The server may be down or your system may not have HTTP access to the server Contact Technical Services if this condition persists and you have HTTP access to the server or install a key manually using the instructions in Installing a License Key Manually Invalid Key A license key exists but is invalid Contact Technical Services Installing a License Key Manually If you cannot obta...

Страница 49: ... must complete the initial configuration screens to complete the reset NOTE If you reset the system using a remote access method you must complete the reset from the user interface by navigating the initial configuration screens and pressing OK on the remote control when prompted to save the configuration Using Diagnostics Preferences and Tools Diagnostic preferences and tools that are available t...

Страница 50: ...eboot the system Administrator Preferences or User Preferences Diagnostics System Reboot Reset the system to its default state Administrator Preferences System System Reset Restore a system configuration using System Restore in the web administration interface Preferences System System Reset System Restore Enable or disable IPv6 Administrator Preferences Network General Change the VLAN Tag prefere...

Страница 51: ...Installation 51 3 Installation Do Not Disturb Activate the system Do Not Disturb feature For more information refer to Answering or Rejecting a Call on page 58 Downloaded from ManualMonitor com Manuals ...

Страница 52: ...em Restore feature restores a system configuration using the saved configuration file For more information about editing commands in the configuration file and saving and restoring a system configuration using the command line interface refer to LifeSize Passport Automation Command Line Interface NOTE Configuration preferences and options vary across the system software releases Restoring a system...

Страница 53: ...oting by enabling you to paste configuration information into an email or text editing application If a screen supports this feature a Copy button appears in the lower right corner of the screen Click the Copy button to copy the data on the screen to the clipboard Downloading Call History You can download call history as a comma separated value file csv file extension from the Diagnostics page in ...

Страница 54: ...Upgrade 9 If your upgrade requires you to reset the system to the original default settings select the Reset to Default State check box 10 Browse for the upgrade file you downloaded in step 5 11 Click Upgrade NOTE If calls are connected to the system a dialog appears prompting you to continue or cancel the upgrade Click Yes to continue with the upgrade and disconnect the active calls The upgrade m...

Страница 55: ...n After the image has been copied to the system the system failed to mount the image This typically occurs if the upgrade image is corrupt or when using an upgrade image for another product 8 No permission The system failed to read the upgrade partition 9 Corrupt image The upgrade image is corrupt and unusable This typically occurs due to a bad image or errors during upload to the device 10 Bad ar...

Страница 56: ...st The REDIAL list on the main screen stores up to 15 recently dialed numbers A scroll bar appears when more than five entries are available for selection The oldest entry in the list is automatically removed when the system receives a call after the maximum number of entries has been reached The last call placed always appears at the top of the list The entry includes the name of the system calle...

Страница 57: ...al or hierarchical method When you use the alphabetical method the entries appear in alphabetical order and you can select an alphabet group in the Browse column to quickly navigate to an entry Hierarchies are predefined organizational units similar to folders or directories on a computer system You can place an entry into a hierarchy when you create the entry or at any time by editing the Hierarc...

Страница 58: ...ess the call button to dial the number Manually Dialing a Voice Number To dial a voice number manually from the main screen follow these steps 1 Use the arrow keys on the remote control to select Voice Call and press OK 2 Enter the number you wish to call The last manually entered number appears in this field by default To edit the number use the following keys The button changes the text entry me...

Страница 59: ...ystem operation press the OK button Managing a Call During a call you can view information about the status of the call and the identity of the connected caller You can also manage audio output and video images Call Status When you place a call with your system a Call Status dialog appears The Call Status dialog shows the IP address that you are attempting to call and the status of the call for ex...

Страница 60: ... in a call use the button on the remote control You can also adjust the active microphone volume or the treble and bass levels for audio out by adjusting preferences in User Preferences Audio menu Muting the Active Microphone Pressing the mute button on the remote control mutes the active microphone When the near side active microphone is muted in a call the symbol appears Managing PIP Your displa...

Страница 61: ...ear End Video Near End Video Far End Video During a Presentation Far End Presentation Near End Video Far End Video Near End Video Far End Video Near End Video Far End Presentation Near End Video Near End Video Far End Presentation Near End Video Far End Video Downloaded from ManualMonitor com Manuals ...

Страница 62: ... packets arriving caused by network congestion timing drift or route changes packet loss shows the number of packets of data that fail to reach their destination Packet loss can be caused by a number of factors including signal degradation over the network medium oversaturated network links corrupted packets rejected in transit faulty networking hardware maligned system drivers or network applicat...

Страница 63: ...unlock an entry in the REDIAL list follow these steps 1 Using the arrow keys on the remote control select the entry you wish to lock or unlock 2 Press the button 3 Select Lock or Unlock if the entry is locked from the menu and press OK Removing an Entry from the REDIAL List To remove an entry from the REDIAL list follow steps below 1 Using the arrow keys on the remote control select the entry you ...

Страница 64: ...separated by commas of a predefined hierarchy in which to add an entry prior to completing the new entry screen If you leave the Hierarchy field empty the new entry is inserted at the top of the hierarchy if defined or is grouped alphabetically For example suppose your administrator defined a hierarchy by location where Home Office is the top of the hierarchy and Sales Office 1 and Sales Office 2 ...

Страница 65: ... OK Adding an Entry to the Meetings Directory To add an entry to the meetings directory follow the steps below 1 Access the directory by pressing the button from the main screen 2 Using the arrow buttons select the meetings directory and press OK 3 Select the Add New Entry button and press OK 4 Select the Meeting Name option and enter the meeting name 5 Select the Hierarchy option and enter the hi...

Страница 66: ...he main menu Change the input source Enter the sub menu option Select the sub menu option EXIT EXIT Exit the OSD setup menu MENU settings 1 Press the MENU button to access the main menu 2 Press the MENU button again to display the sub menu 3 Use the MODE or AUTO button to select the sub menu title 4 Press the INPUT button to enter the selected sub menu 5 Use the INPUT button to select the options ...

Страница 67: ...ed when you select the COLOR TEMP option to USER Set your own red color levels GREEN This option is activated when you select the COLOR TEMP option to USER Set your own green color levels BLUE This option is activated when you select the COLOR TEMP option to USER Set your own blue color levels GAMMA Set your own gamma value GAMMA0 GAMMA1 GAMMA2 On the monitor high gamma values display whitish imag...

Страница 68: ... main menu 2 Press MODE button again to display the sub menu 3 Use the MODE or AUTO button to select the sub menu title 4 Press INPUT button to enter the selected sub menu 5 Use the MODE or AUTO button to select or set the options 6 Press the MENU button to return to the previous menu 7 Press the EXIT button to exit the menu MENU Description f ENGINE STANDARD Adjusts the image for the normal envir...

Страница 69: ... on the front of the camera Check that the LED on front of the camera flashes bright blue when you use the remote control The image is not visible Verify that the blue LED on the front of the camera is lit indicating that power is active and reboot the system if necessary to verify that the camera turns on The sound is not audible If you are unable to hear the ringer when an incoming call arrives ...

Страница 70: ...again The message OSD LOCKED appears on the screen You can secure the current control settings so that they cannot be inadvertently changed You can unlock the OSD controls at any time by pushing the MENU button for several seconds the message OSD UNLOCKED will appear Display Position is incorrect Press the AUTO button to automatically adjust your display image to the ideal setting If the results a...

Страница 71: ...nal Input 15 pin D Sub Connector HDMI Connector Input Form RGB Analog 0 7 Vp p 75 Ω Digital Video standard H 261 H 263 H 263 H 263 MPEG4 H 264AVC H 239 receive compliant Resolution Maximum resolutions widescreen 16 9 aspect ratio All resolutions progressive scanning All resolutions at 30 frames per second 192 Kbps 432 x 240 pixels Widescreen FCIF 384 Kbps 720 x 400 pixels Cable TV 512 Kbps 800 x 4...

Страница 72: ... 245 H 281 BONDING ISO13871 via LifeSize Networker RFC 3261 RFC 3264 RFC 2190 RFC 3407 RFC 2833 Feature User Interface Context sensitive user interface Graphical user interface call manager Multiple languages supported Do Not Disturb mode Auto Call Establishment Call Scheduling Diagnostic logging Web Interface Directory Service H 350 System Log Reporting Data sharing Network Software Upgrade via i...

Страница 73: ...ncryption support including strict compliance TLS SRTP support IEEE 802 1x support Power AC Voltage 100 240 V 50 60 Hz 63 W 1 5 A Environmental Data Operating temperature 0 C 32 F to 40 C 104 F Operating Humidity 15 to 85 non condensing Storage temperature 20 C 4 F to 60 C 140 F Storage humidity 10 to 90 non condensing Dimensions Width 600 mm Depth 131 mm Height 499 mm Weight 8 1 kg Regulatory Cer...

Страница 74: ...t of the original proof of purchase is reserved a 12 months for Hardware b 3 months for Software 2 It is the user s responsibility to ensure that the product is used in accordance with the Manufacturer s guidelines detailed in the Instruction Manual supplied with your Video Conference Monitor Failure to do so may invalidate your Warranty 3 All warranties will be immediately invalidated if unauthor...

Страница 75: ... an Authorized Dealer e The product is not installed in accordance with the instructions furnished by the manufacturer f The END USER fails to provide a warranty card or invoice g The warranty period is over the due term 10 This warranty does not cover the damage done to other equipment used in conjunction with this unit 11 All defective peripheral devices should be returned together with the whol...

Страница 76: ...Downloaded from ManualMonitor com Manuals ...

Отзывы: