- 14 -
LGE Internal Use Only
Copyright ©
LG Electronics. Inc. All rights reserved.
Only for training and service purposes
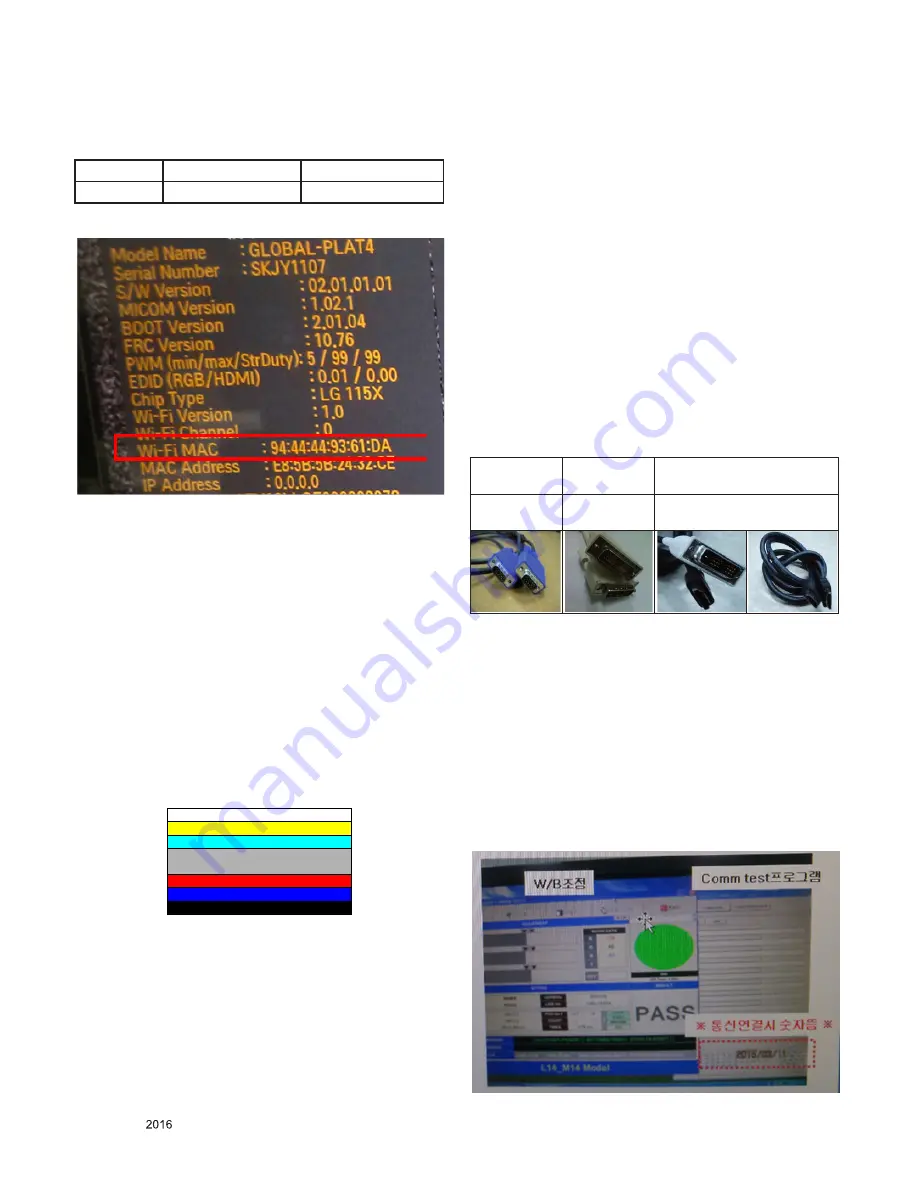
4.5. WIFI MAC ADDRESS CHECK
4.5.1. Using RS232 Command
- check the menu on in-start
5. Manual Adjustment
5.1. ADC adjustment
5.1.1. Overview
▪ ADC adjustment is needed to find the optimum black level
and gain in Analog-to-Digital device and to compensate RGB
deviation.
5.1.2. Equipment & Condition
▪ Adjust Remote control
▪ 801GF(802B, 802F, 802R) or MSPG925FA Pattern Genera
-
tor
- Resolution: 480i Comp1 (MSPG-925FA: model-209,
pattern-65)
- Resolution : 1024*768 RGB (Inner Pattern)
- Pattern : Horizontal 100% Color Bar Pattern
- Pattern level: 0.7±0.1 Vp-p
- Image or Inner pattern.
▪ Must use standard cable
5.1.3. Adjust method
5.1.3.1. ADC RGB
1) Press the In-start Key on the ADJ remote after at least 1
min of signal reception. Then, select ADC Calibration. And
Press OK Button on the menu “Start”. The adjustment will
start automatically.
2) If ADC RGB is successful, “ADC RGB Success” is dis
-
played and ADC RGB is completed. If ADC calibration is
failure, “ADC RGB Fail” is displayed.
3) If ADC calibration is failure, after rechecking ADC pattern or
condition, retry calibration
5.2. EDID / DDC Download(EDID PCM)
5.2.1. Overview
It is a VESA regulation. A PC or a MNT will display an optimal
resolution through information sharing without any necessity
of user input. It is a realization of “Plug and Play”.
5.2.2. Equipment
▪ Since embedded EDID data is used, EDID download JIG,
HDMI cable and D-sub cable are not need.
▪ Adjust remocon
5.2.3. Download method
1) Press Adj. key on the Adj. R/C,
2) Select EDID D/L (PCM) menu.
3) By pressing Enter key, EDID download will begin
4) If Download is successful, OK is display, but If Download is
failure, NG is displayed.
5) If Download is failure, Re-try downloads.
For Analog
EDID
For DVI EDID
For HDMI EDID
D-sub to D-
sub
DVI to DVI
DVI-D to HDMI
or HDMI to HDMI
* Caution) When EDID Download, must remove HDMI / D-sub
Cable.
5.2.4. RS232 IN / OUT INSPECTION
1) Connect RS232 In/Out cable with daisy chain. You can
control several products at one time by connecting them to
a single PC.,
2) Check the RS232 command.
i) RS232S Out Setting to PC
- Set device port “COM” ( check control panel on PC)
- Set Baud Rate “115200”
ii) Run RS232C Command program (ex. W/B adjust Program)
and Comm Test Program for RS232C Out Check.
iii) After Running Rs232C Command (ex. W/B adjust), Check
Data from RS232C out on Comm Test Program Window.
Command
Set ACK
Transmission
[A][l][][Set ID][][20][Cr] [O][K][x] or [N][G]


