background image

PICTURE 

CONTR

OL

74

PICTURE CONTROL

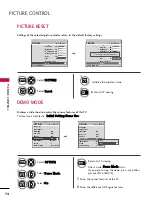
PICTURE RESET

Settings of the selected picture modes return to the default factory settings.

Select P

PIIC

CT

TU

UR

RE

E.

Select R

R ee ss ee tt.

Initialize the adjusted value.

1

MENU

3

2

ENTER

ENTER

4

Return to TV viewing.

Enter

Move

PICTURE

E

R

G

• Contrast

90

• Brightness

50

• H Sharpness 60

• V Sharpness 60

• Color

60

• Tint

0

• Expert Control

• Reset

Screen (RGB-PC)

Enter

Move

PICTURE

E

R

G

• Contrast

90

• Brightness

50

• H Sharpness 60

• V Sharpness 60

• Color

60

• Tint

0

• Expert Control

• Reset

Screen (RGB-PC)

Resetting video configuration...

ii

DEMO MODE

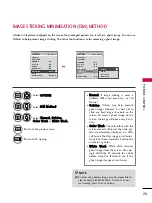
Displays a slide show to explain the various features of this TV.

This feature is disabled in “IIn

niittiiaall   S

Seettttiin

ng

g--H

Ho

om

mee   U

Ussee”.

Enter

Move

OPTION

Language

Input Label

SIMPLINK

: On

Key Lock

: Off

Caption

: Off

Demo Mode

: Off

ISM Method

: Normal

Set ID

: 1

Initial Setting

: Store Demo

Enter

Move

OPTION

Language

Input Label

SIMPLINK

: On

Key Lock

: Off

Caption

: Off

Demo Mode

: On

ISM Method

: Normal

Set ID

: 1

Initial Setting

: Store Demo

Off

On

Select O

OP

PT

TIIO

ON

N.

1

Select D

Deem

mo

o   M

Mo

od

dee.

2

Select O

O n

n.

3

Return to TV viewing.

After a while, D

Deem

mo

o   M

Mo

od

dee starts.

If you want to stop the demo, press any button.
(except VOL or MUTE)

4

Show the various features of the TV.

5

6

Show the difference XD Engine features.

MENU

ENTER

ENTER

EXIT

EXIT

Содержание 42PJ250

Страница 1: ... S A C 34173302 1001 REV01 R E C O R D E D I N K O R E A ...

Страница 2: ...erating your set and retain it for future reference P NO SAC34173302 1004 REV02 www lg com 42PJ250 50PJ250 50PK250 60PK250 60PK280 60PK290 42PJ340 50PJ340 42PJ350 50PJ350 50PK350 50PK340 50PK540 60PK540 42PJ550 50PJ550 50PK550 60PK550 42PJ350C 50PJ350C 50PK550C 60PK550C ...

Страница 3: ...nd 2 this device must accept any interference received including interference that may cause undesired operation of the device Any changes or modifications not expressly approved by the party responsible for compliance could void the user s authority to operate the equipment CAUTION Do not attempt to modify this product in any way without written authorization from LG Electronics Unauthorized modi...

Страница 4: ...into your outlet consult an electrician for replacement of the obsolete outlet Protect the power cord from being walked on or pinched particularly at plugs convenience receptacles and the point where they exit from the apparatus Only use attachments accessories specified by the manufacturer Use only with the cart stand tripod bracket or table specified by the manufacturer or sold with the apparatu...

Страница 5: ... upon Pay particular attention to plugs wall outlets and the point where the cord exits the appliance Do not make the TV with the power cord plugged in Do not use a damaged or loose power cord Be sure do grasp the plug when unplugging the power cord Do not pull on the power cord to unplug the TV WARNING To reduce the risk of fire or electrical shock do not expose this product to rain moisture or o...

Страница 6: ...A 7 70 0 C Cl le ea an ni in ng g When cleaning unplug the power cord and scrub gently with a soft cloth to prevent scratching Do not spray water or other liquids directly on the TV as electric shock may occur Do not clean with chemicals such as alcohol thinners or benzene M Mo ov vi in ng g Make sure the product is turned off unplugged and all cables have been removed It may take 2 or more people...

Страница 7: ...HANNEL CONTROL Remote Control Functions 36 Turning On TV 38 Channel Selection 38 Volume Adjustment 38 Initial Setting 39 On Screen Menus Selection 40 Quick Menu 42 Channel Setup Auto Scan Auto Tuning 43 Add Delete Channel Manual Tuning 44 Channel Editing 45 Channel List 46 Favorite Channel Setup 47 Favorite Channel List 47 Brief Information 48 Input List 49 Input Label 50 AV Mode 51 SIMPLINK 52 US...

Страница 8: ...Mode Analog Broadcasting System Captions 87 Digital Broadcasting System Captions 88 Caption Option 89 TIME SETTING Clock Setting Auto Clock Setup 90 Manual Clock Setup 91 Auto On Off Time Setting 92 Sleep Timer Setting 93 PARENTAL CONTROL RATINGS Set Password Lock System 94 Channel Blocking 97 Movie TV Rating 98 Downloadable Rating 103 External Input Blocking 104 Key lock 105 APPENDIX Troubleshoot...

Страница 9: ...s not available for all models This TV contains the detailed calibrations necessary for professional certification by the Imaging Science Foundation The resulting ISF day and night modes will then be accessible by the user to experience the best their LG HDTV has to offer Sophisticated and detailed calibrations can be made through the ISFccc mode Detailed calibration requires a licensed technician...

Страница 10: ...15 pin cable PC connection the user must use shielded signal interface cables with ferrite cores to maintain stan dards compliance x 2 EN ER GY CH VOL 1 2 3 4 5 0 6 7 8 9 LIS T FLAS HB K MA RK FR EE ZE SAVIN G TV AV MO DE INPU T FAV RATIO MENU IN FO Q M ENU EXIT ENTER MUTE BACK P A G E or x 3 M4x28 M5x14 Except 60PK250 60PK540 60PK550 60PK280 60PK290 60PK550C Ferrite Core Black This feature is not...

Страница 11: ... ENTER ENTER POWER Button INPUT Button MENU Button ENTER Button VOLUME Buttons Power Standby Indicator Illuminates red in standby mode The LED is off while the TV remains on Intelligent Sensor Adjusts picture according to the surrounding conditions CHANNEL Buttons Remote Control Sensor You can operate the button just by touching the button lightly with your finger ...

Страница 12: ...ENU Button ENTER Button VOLUME Buttons Power Standby Indicator Illuminates red in standby mode The LED is off while the TV remains on Intelligent Sensor Adjusts picture according to the surrounding conditions CHANNEL Buttons Remote Control Sensor You can operate the button just by touching the button lightly with your finger ...

Страница 13: ...0PJ350 42 50PJ340 50PK340 50PK350 42 50PJ350C Intelligent Sensor Adjusts picture according to the surrounding conditions CHANNEL Buttons G Do not step on the glass stand or subject it to any impact It may break causing possible injury from fragments of glass or the TV may fall G Do not drag the TV The floor or the product may be damaged Remote Control Sensor You can operate the button just by touc...

Страница 14: ...OUT Optical digital audio output for use with amps and home theater systems Note In standby mode this port doesn t work RS 232C IN CONTROL SERVICE PORT Used by third party devices AUDIO IN RGB 1 8 headphone jack for analog PC audio input RGB IN PC Analog PC Connection Uses a D sub 15 pin cable VGA cable REMOTE CONTROL IN PORT For a wired remote control COMPONENT IN Analog Connection Supports HD Us...

Страница 15: ... SERVICE PORT Used by third party devices AUDIO IN RGB 1 8 headphone jack for analog PC audio input RGB IN PC Analog PC Connection Uses a D sub 15 pin cable VGA cable REMOTE CONTROL IN PORT For a wired remote control COMPONENT IN Analog Connection Supports HD Uses a red green and blue cable for video red and white for audio AV Audio Video IN Analog composite connection Supports standard definition...

Страница 16: ...oned surface to protect the screen from damage Assemble the parts of the Stand Body with the Stand Base of the TV 1 2 Assemble the TV as shown 3 Installation Except 60PK250 60PK540 60PK550 60PK280 60PK290 60PK550C Fix the 4 bolts securely using the holes in the back of the TV 4 Stand Body Stand Base M4x28 M5x14 x 3 x 4 ...

Страница 17: ...luded p pr ro ot te ec ct ti io on n c co ov ve er r over the hole for the stand Press the P PR RO OT TE EC CT TI IO ON N C CO OV VE ER R into the TV until you hear it click Protection Cover Detachment PROTECTION COVER Fix a Guide to the Outsides M4x28 x 4 M4x30 x 5 60PK250 60PK540 60PK550 60PK280 60PK290 60PK550C 42 50PJ250 50PK250 42 50PJ340 42 50PJ350 50PK350 50PK340 50PK540 42 50PJ550 50PK550 ...

Страница 18: ...MANAGEMENT After connecting the cables as necessary install CABLE HOLDER as shown and bundle the cables To connect additional equipment see EXTERNAL EQUIPMENT SETUP section 1 CABLE HOLDER Image shown may differ from your TV ...

Страница 19: ... your TV 4 inches 4 inches 4 inches 4 inches G G Ensure adequate ventilation by following the clearance recommendations G G Do not mount near or above any type of heat source CAUTION SWIVEL STAND This feature is not available for all models After installing the TV you can adjust the TV manually to the left or right direction by 20 degrees to suit your viewing position ...

Страница 20: ...nd all parts necessary for assembly are provided G G Do not use screws longer then the standard dimen sion as they may cause damage to the inside to the TV G G For wall mounts that do not comply with the VESA standard screw specifications the length of the screws may differ depending on their specifica tions G G Do not use screws that do not comply with the VESA standard screw specifications Do no...

Страница 21: ...olts loosen the bolts Insert the eye bolts or TV brackets bolts and tighten them securely in the upper holes Secure the wall brackets with the bolts sold separately to the wall Match the height of the bracket that is mounted on the wall to the holes in the product Ensure the eye bolts or brackets are tightened securely Use a sturdy rope sold separately to tie the product It is safer to tie the rop...

Страница 22: ...eeds to be split for two TV s install a 2 Way Signal Splitter If the antenna is not installed properly contact your dealer for assistance R VARIABLE AUDIO OUT To prevent damage do not connect to the power outlet until all connections are made between the devices Wall Antenna Socket Outdoor Antenna VHF UHF Multi family Dwellings Apartments Connect to wall antenna socket RF Coaxial Wire 75 ohm Singl...

Страница 23: ...or the digital set top box operation Select the C Co om mp po on ne en nt t1 1 input source on the TV using the I IN NP PU UT T button on the remote control If connected to C CO OM MP PO ON NE EN NT T I IN N 2 2 input select the C Co om mp po on ne en nt t2 2 input source on the TV To prevent the equipment damage never plug in any power cords until you have finished connecting all equipment Image ...

Страница 24: ...rol 2 1 HDMI DTV Horizontal Vertical Frequency KHz Frequency Hz 31 47 59 94 31 47 60 00 44 96 59 94 45 00 60 00 33 72 59 94 33 75 60 00 27 00 24 00 33 75 30 00 67 432 59 939 67 50 60 00 26 97 23 94 33 71 29 97 Resolution 720x480p 1280x720p 1920x1080i 1920x1080p HDMI DVI IN 2 1 HDMI DTV OUTPUT RGB IN PC RS 232C IN CONTROL SERVICE OPTICAL DIGITAL AUDIO OUT AUDIO RGB DVI 1 G G Check HDMI cable over v...

Страница 25: ...te audio connection is necessary NOTE Connect the DVI output of the digital set top box to the H HD DM MI I D DV VI I I IN N 1 1 2 2 or 3 3 jack on the TV Connect the audio output of the digital set top box to the A AU UD DI IO O I IN N R RG GB B D DV VI I jack on the TV 1 How to connect 2 How to use Turn on the digital set top box Refer to the owner s man ual for the digital set top box Select th...

Страница 26: ...Y green PB blue and PR red Connect the audio outputs of the DVD to the C CO OM MP PO ON NE EN NT T I IN N A AU UD DI IO O 1 1 jacks on the TV 1 How to connect 2 How to use Turn on the DVD player insert a DVD Select the C Co om mp po on ne en nt t1 1 input source on the TV using the I IN NP PU UT T button on the remote control If connected to C CO OM MP PO ON NE EN NT T I IN N 2 2 input select the ...

Страница 27: ...e audio connection is necessary HDMI supports both audio and video 1 How to connect 2 How to use Select the H HD DM MI I1 1 2 2 or 3 3 input source on the TV using the I IN NP PU UT T button on the remote control Refer to the DVD player s manual for operating instructions 2 1 HDMI DVI IN 2 1 RGB IN PC RS 232C IN CONTROL SERVICE OPTICAL DIGITAL AUDIO OUT AUD RGB D HDMI DVD OUTPUT 1 ...

Страница 28: ...s manual 2 1 Composite RCA Connection Connect the A AU UD DI IO O V VI ID DE EO O jacks between TV and VCR Match the jack colors Video yellow Audio Left white and Audio Right red 1 How to connect 2 How to use Insert a video tape into the VCR and press PLAY on the VCR Refer to the VCR owner s manual Select the A AV V1 1 input source on the TV using the I IN NP PU UT T button on the remote control I...

Страница 29: ...A AV V2 2 input source on the TV using the I IN NP PU UT T button on the remote control If connected to A AV V I IN N 1 1 input select the A AV V1 1 input source on the TV Operate the corresponding external equipment 1 1 AV IN 2 L MONO R AUDIO VIDEO USB IN HDMI IN 3 1 i e Connect the USB device to the U US SB B I IN N jack on the side of TV 1 How to connect 1 2 How to use After connecting the U US...

Страница 30: ...m may damage your vision G G Audio with ACP Audio Copy Protection function may block digital audio output CAUTION Connect one end of the optical cable to the TV s O OP PT TI IC CA AL L port of D DI IG GI IT TA AL L A AU UD DI IO O O OU UT T Connect the other end of the optical cable to the digital audio input on the audio equipment Set the TV Speaker option Off in the AUDIO menu G G p p 8 82 2 See...

Страница 31: ...IO 1 2 2 How to use Turn on the PC and the TV Select the R RG GB B P PC C input source on the TV using the I IN NP PU UT T button on the remote control Connect the VGA output of the PC to the R RG GB B I IN N P PC C jack on the TV Connect the PC audio output to the A AU UD DI IO O I IN N R RG GB B D DV VI I jack on the TV 1 How to connect 2 1 2 How to use Turn on the PC and the TV Select the H HD ...

Страница 32: ...keeping a fixed image on the screen for a long period of time The fixed image could become permanently imprinted on the screen G G The synchronization input form for Horizontal and Vertical frequencies is separate G G Depending on the graphics card some resolution settings may not allow the image to be posi tioned on the screen properly NOTES Supported Display Specifications RGB PC HDMI PC Resolut...

Страница 33: ...usted Select P PI IC CT TU UR RE E Select S Sc cr re ee en n R RG GB B P PC C Select R Re es so ol lu ut ti io on n Select the desired resolution 1024 x 768 1280 x 768 1360 x 768 Auto config Resolution G Position Size Phase Reset Screen Move Prev 1 MENU 3 4 2 ENTER ENTER ENTER 5 ENTER Enter Move PICTURE Contrast 90 Brightness 50 H Sharpness 60 V Sharpness 60 Color 60 Tint 0 Expert Control Reset Sc...

Страница 34: ...R RG GB B P PC C Select A Au ut to o c co on nf fi ig g Auto config G Resolution Position Size Phase Reset Screen Move To Set 3 2 ENTER ENTER Select Y Ye es s 4 ENTER Start Auto Configuration 5 ENTER Select P PI IC CT TU UR RE E MENU If the position of the image is still not correct try Auto adjustment again If picture needs to be adjusted again after Auto adjustment in RGB PC you can adjust the P...

Страница 35: ...een Move 3 ENTER 4 ENTER P Po os si it ti io on n This function is to adjust pic ture to left right and up down as you prefer S Si iz ze e This function is to minimize any vertical bars or stripes visible on the screen background And the horizontal screen size will also change P Ph ha as se e This function allows you to remove any horizontal noise and clear or sharpen the image of characters Selec...

Страница 36: ...y in RGB PC mode Select R Re es se et t 3 ENTER Select P PI IC CT TU UR RE E Select S Sc cr re ee en n R RG GB B P PC C 1 MENU 2 ENTER Select Y Ye es s 4 ENTER 5 ENTER Auto config Position Resolution Size Phase Reset G Screen Move Initialize Settings Enter Move PICTURE Contrast 90 Brightness 50 H Sharpness 60 V Sharpness 60 Color 60 Tint 0 Expert Control Reset Screen RGB PC R G E Yes No Prev MENU ...

Страница 37: ...G G p p 5 51 1 Rotates through inputs Also switches the TV on from standby G G p p 4 49 9 Select the remote operating mode TV Used to enter a program number for multiple program channels such as 2 1 2 2 etc Displays the channel list Tunes to the last channel viewed Programme edit FF Rewind GG Fast Forward G Playback l ll l Pause Controls the SIMPLINK compatible devices Freezes the current frame St...

Страница 38: ...r preference Displays the main menu or clears all on screen displays and returns to TV viewing Displays channel information at the top of the screen Opens the list of Quick Menu options Allows the user to move return one step in an interactive application or other user interaction function Displays channel information at the top of the screen Clears all on screen displays and return to TV viewing ...

Страница 39: ... be er r 0 0 9 9 button on the remote control Select the viewing source by using the I IN NP PU UT T button on the remote control When finished using the TV press the P PO OW WE ER R button on the remote control The TV reverts to standby mode 1 2 Press the C CH H or or N NU UM MB BE ER R buttons to select a channel number 1 VOLUME ADJUSTMENT CHANNEL SELECTION Adjust the volume to suit your persona...

Страница 40: ...store mode after 5 minutes You can also adjust I In ni it ti ia al l S Se et tt ti in ng g in the O OP PT TI IO ON N menu Factory defaults are set when you choose H Ho om me e U Us se e If you do not complete the I In ni it ti ia al l s se et tt ti in ng g it will appear whenever the TV is switched on until the I In ni it ti ia al l s se et tt ti in ng g procedure is completed Select Home Use to u...

Страница 41: ... Reset TV Speaker On AUDIO Enter Move Clock Off Time Off On Time Off Sleep Timer Off TIME Enter Move Photo List Music List USB Enter Move TV AV1 AV2 Component1 Component2 RGB PC HDMI1 HDMI2 HDMI3 INPUT Enter Move Lock System Off Set Password Block Channel Movie Rating TV Rating Children TV Rating General Downloadable Rating Input Block LOCK Lock System Off Set Password Block Channel TV Rating Engl...

Страница 42: ...und Off Treble 50 Bass 50 Reset AUDIO Enter Move Clock Off Time Off On Time Off Sleep Timer Off TIME Enter Move Lock System Off Set Password Block Channel Movie Rating TV Rating Children TV Rating General Downloadable Rating Input Block LOCK Auto Tuning Manual Tuning Channel Edit Enter Move Language Input Label SIMPLINK On Key Lock Off Caption Off Demo Mode Off ISM Method Normal Set ID 1 OPTION Lo...

Страница 43: ...lects your desired picture format P Pi ic ct tu ur re e M Mo od de e Selects the factory preset picture depend on the viewing environment S So ou un nd d M Mo od de e Selects the factory preset sound for type of program M Mu ul lt ti i A Au ud di io o Changes the audio language Digital signal S SA AP P Selects MTS sound Analog signal S Sl le ee ep p T Ti im me er r Select the amount of time before...

Страница 44: ...assword if parental control has been activated LOCK Menu Use the password you set up in the LOCK Menu to allow a channel search When setting the Auto tuning or Manual tuning the number of maximum channel you can store is 900 It is subject to change depending on the broadcasting signal environment Memorizes all the available channels in the order of DTV TV CADTV and CATV 5 BACK Return to the previo...

Страница 45: ... Ad dd d or D De el le et te e 5 ENTER The TV will ask for a password if parental control has been activated LOCK Menu Use the password you set up in the LOCK Menu to allow a channel search When setting the Auto tuning or Manual tuning the number of maximum channel you can store is 900 It is subject to change depending on the broadcasting signal environment 6 BACK Return to the previous menu Retur...

Страница 46: ...ER buttons or select it in the Channel Edit menu Channel Editing Select C CH HA AN NN NE EL L 1 MENU 2 ENTER Select C Ch ha an nn ne el l E Ed di it t Enter Move CHANNEL Auto Tuning Manual Tuning Channel Edit Ch Change Move Page CH Move Previous Add Delete 5 BACK Return to the previous menu Return to TV viewing Keep pressing the button and use the or buttons to move between DTV TV CADTV and CATV I...

Страница 47: ...y the C Ch ha an nn ne el l L Li is st t 1 LIST Displaying Channel List Select a channel 1 Switch to the chosen channel number 2 ENTER Selecting a channel in the channel list Turn the pages 1 CH P A G E Return to TV viewing 2 Paging through a channel list 2 1 3 1 4 1 Channel List Exit This padlock is displayed when the channel is locked with parental control EXIT ...

Страница 48: ...1 CH P A G E 1 2 3 4 5 0 6 7 8 9 Select your desired channel or 3 Select F Fa av vo or ri it te e 4 Return to TV viewing Q Menu Close Vivid Standard Off English Off Eject Aspect Ratio Picture Mode Sound Mode Caption Multi Audio Sleep Timer Del Add Fav Eject USB CH F F Favorite G G 16 9 FAVORITE CHANNEL LIST Select a channel 1 Switch to the chosen channel number 2 ENTER Selecting a channel in the f...

Страница 49: ... Use the Q Q M ME EN NU U menu to select wanted Audio C Ca ap pt ti io on n The program contains one or more caption services Use the Q Q M ME EN NU U menu to select wanted Closed caption D Do ol lb by y D Di ig gi it ta al l The program contains a Dolby Digital audio signal in TV and HDMI input source The original aspect ratio of the video is 4 3 The original aspect ratio of the video is 16 9 wid...

Страница 50: ...nput H HD DM MI I Select them to watch high definition devices HDMI3 When new external device is connected this popup menu is displayed automatically If selecting Y Ye es s you can select input source that you want to appreciate But when selecting S SI IM MP PL LI IN NK K O On n popup menu for HDMI input will not be displayed No New external device is connected Do you want to enjoy this AV1 Input ...

Страница 51: ...ing OPTION menu Select the source except T TV V Select the label 1 2 3 BACK Return to the previous menu Return to TV viewing With using INPUT button Enter Move OPTION Language Input Label SIMPLINK On Key Lock Off Caption Off Demo Mode Off ISM Method Normal Set ID 1 Initial Setting Home Use Enter Move OPTION Language Input Label SIMPLINK On Key Lock Off Caption Off Demo Mode Off ISM Method Normal S...

Страница 52: ... a will be selected both for PIC TURE menu Picture Mode and AUDIO menu Sound Mode respectively If you select O Of ff f in AV mode the P Pi ic ct tu ur re e M Mo od de e and S So ou un nd d M Mo od de e return to previous selected value O Of ff f Disables the AV MODE C Ci in ne em ma a Optimizes video and audio for watching movies S Sp po or rt t Optimizes video and audio for watching sports events...

Страница 53: ...with the INPUT button on the remote control the SIMPLINK device will stop G G When you select a device with home theater functionality the sound output automatically switches to the home theater speakers and the TV speakers are turned off G G If a connected SIMPLINK home theater system doesn t play the audio from the TV connect the DIGITAL AUDIO OUT terminal on the back of the TV to the DIGITAL AU...

Страница 54: ... cable over Version 1 3 with CEC function should be used CEC Consumer Electronics Control SIMPLINK Menu T TV V v vi ie ew wi in ng g Switch to the previous TV channel regardless of the current mode D DI IS SC C p pl la ay yb ba ac ck k Select and play discs When multiple discs are available the titles of discs are conveniently displayed at the bottom of the screen V VC CR R p pl la ay yb ba ac ck ...

Страница 55: ... Please connect power to a USB storage device which requires an external power supply If not the device may not be recognized G G Please connect a USB storage device with cable is offered by USB maker If connected with cable is not offered by USB maker or an excessively long cable the device may not be recognized G G Some USB storage devices may not be supported or operate properly G G The TV will...

Страница 56: ... page Total pages Total number of marked photos Usable USB memory Corresponding buttons on the remote control Supported photo file JPG You can play JPG files only Only baseline scan is supported among JPG USB Device Page 1 1 No Marked PHOTO LIST Up Folder Free Space 150MB Move PopUp Menu Move Page Mark 0 folder 4 file s 3 4 5 1 1 2 Select U US SB B Select P Ph ho ot to o L Li is st t 2 Top Folder ...

Страница 57: ...otos If no photos are marked you can view all photos individually or all pho tos in the folder in a slide show Top Folder DriveA 4 Select the desired Popup menu ENTER ENTER ENTER Move Move Page Mark CH MARK PopUp Menu Move Move Page Mark CH MARK PopUp Menu DriveA DriveA Butterfly Up Folder Photo X Box 1366x768 125KB View Mark All Delete Close When you select a file not folder this PopUp menu is di...

Страница 58: ...rive Select the desired photos Show the Popup menu 5 Select V Vi ie ew w The selected photo is displayed in full size 2 3 1 4 ENTER ENTER ENTER USB Device Page 1 1 No Marked PHOTO LIST Up Folder Free Space 150MB 0 folder 4 file s USB Device Page 1 1 No Marked PHOTO LIST Up Folder Free Space 150MB 1366x768 125KB Top Folder DriveA DriveA DriveA Butterfly 1366x768 125KB View Mark All Delete Close Up ...

Страница 59: ... cur rent folder are displayed during slide show Set the time interval of the slide show in O Op pt ti io on n G G B BG GM M Listen to music while viewing photos in full size Set the BGM device and album in O Op pt ti io on n G G R Ro ot ta at te e Rotate photos Rotates the photo 90 180 270 360 clockwise G G D De el le et te e Delete photos G G C Cl lo os se e Hide the menu on the full sized scree...

Страница 60: ... S Se et t V Vi id de eo o or S Se et t A Au ud di io o 2 1 G G When you select the S Se et t P Ph ho ot to o V Vi ie ew w You cannot change M Mu us si ic c F Fo ol ld de er r while BGM is playing Show the S Sl li id de e S Sp pe ee ed d or M Mu us si ic c F Fo ol ld de er r Make appropriate adjustments 2 1 Choose option Set photo view Set video Set audio Exit Prev Q MENU ENTER ENTER ENTER ...

Страница 61: ... select the S Se et t V Vi id de eo o G G When you select the S Se et t A Au ud di io o Show the P Pi ic ct tu ur re e M Mo od de e Make appropriate adjustments 2 1 Show the S So ou un nd d M Mo od de e A Au ut to o V Vo ol lu um me e C Cl le ea ar r V Vo oi ic ce e I II I and B Ba al la an nc ce e Make appropriate adjustments 2 1 Tint 100 50 70 80 0 0 0 ENTER ENTER ENTER ENTER APS mode is not sup...

Страница 62: ...Length 999 59 Sec Moves to upper level file Preview Display the title folder name of the music in the selected folder Current page Total pages Total number of marked music Usable USB memory Corresponding buttons on the remote control 1 3 4 5 2 Select U US SB B Select M Mu us si ic c L Li is st t 1 2 MENU ENTER ENTER USB Device MUSIC LIST Up Folder Free Space 150MB A A 00 00 04 16 Title Duration Up...

Страница 63: ...CH MARK PopUp Menu Duration Title Up Folder Good Bye Arirang 05 30 04 12 3945 KB 128 Kbps Play Play with Photo Mark All Delete Close G G P Pl la ay y During stop Play the selected music Once a song finishes playing the next selected one will be played When there are no selected music to play the next one in the current fold er will be played If you go to a different folder and press the E EN NT TE...

Страница 64: ...G Press E EN NT TE ER R A A M ME EN NU U Q Q M Me en nu u B BA AC CK K E EX XI IT T or E EN NE ER RG GY Y S SA AV VI IN NG G button to stop the screen saver G G This TV can not play music files less than 16 Kbytes L R Set audio Sound Mode Auto Volume Clear Voice ll Balance Cinema Off Off Exit Using the Music List Option play Show the S So ou un nd d M Mo od de e 2 1 Make appropriate adjustments 0 ...

Страница 65: ... ratio Zoom Cinema Zoom 16 9 Just Scan 4 3 Q Menu Close F F 16 9 G G Vivid Standard Off English Off Add Eject Aspect Ratio Picture Mode Sound Mode Caption Multi Audio Sleep Timer Del Add Fav Eject USB CH Select the A As sp pe ec ct t R Ra at ti io o Select the desired picture format 1 Q MENU 2 3 Return to TV viewing Set By Program You can also press the R RA AT TI IO O button repeatedly on the rem...

Страница 66: ...HDMI DTV DVI DTV 720p 1080i 1080p input source Set by program Selects the proper picture proportion to match the source s image 4 3 Choose 4 3 when you want to view a picture with an original 4 3 aspect ratio Zoom Choose Zoom when you want to view the picture without any alteration However the top and bot tom portions of the picture will be cropped Cinema Zoom Choose Cinema Zoom when you want to e...

Страница 67: ...screen above identical to the Recommended sample below Next Previous Low High Recommended Contrast 90 E E E E Tint Set the screen above identical to the Recommended sample below Next Previous Low High Recommended Tint 0 E E E E R G This feature lets you adjust the picture quality of the original image Use this to calibrate the screen quality by adjusting the Black and White Level etc You can calib...

Страница 68: ...nded sample below Next Previous H Sharpness 50 E E E E Low High Recommended Vertical Sharpness Set the screen above identical to the Recommended sample below Next Previous V Sharpness 50 E E E E Low High Recommended DTV TV AV1 AV2 Component1 Component2 RGB HDMI1 HDMI2 HDMI3 Select an input s to apply the settings Warning The picture quality may vary according to the different types of signal and i...

Страница 69: ... Ratio 16 9 Picture Wizard Energy Saving Intelligent Sensor Picture Mode Standard Contrast 90 Brightness 50 Sharpness 60 Color 60 Tint 0 It reduces the TV s power consumption You can increase the brightness of your screen by adjusting the Energy Saving level or by setting the P Pi ic ct tu ur re e M Mo od de e This feature is disabled in P Pi ic ct tu ur re e M Mo od de e C Ci in ne em ma a E E In...

Страница 70: ... for the optimum picture quality at the factory You can also adjust P Pi ic ct tu ur re e M Mo od de e in the P PI IC CT TU UR RE E menu V Vi iv vi id d This is the mode to maximize the effect of the video in the retail store Strengthen the contrast brightness color and sharpness for vivid picture This mode maximizes reducting the power consumption without hurting the picture quality S St ta an nd...

Страница 71: ...ard Energy Saving Intelligent Sensor Picture Mode Standard Contrast 90 Brightness 50 Sharpness 60 Color 60 Tint 0 Contrast 80 E E E E E E E E Enter R G C Co on nt tr ra as st t Increase or decrease the gra dient of the video signal You may use Contrast when the bright part of picture is satu rated B Br ri ig gh ht tn ne es ss s Adjusts the base level of the signal in the picture You may use bright...

Страница 72: ... ce ed d C Co on nt tr ro ol l Select your desired options 1 MENU 3 2 ENTER ENTER 5 BACK Return to the previous menu Return to TV viewing Make appropriate adjustments 4 Enter Move PICTURE Enter Move PICTURE Contrast 90 Brightness 50 Sharpness 60 Color 60 Tint 0 Color Temperature 0 Advanced Control Reset Screen RGB PC R G Contrast 90 Brightness 50 Sharpness 60 Color 60 Tint 0 Color Temperature Adva...

Страница 73: ...also be used be a professional to help optimize the TV performance in the environment the TV is in 7 BACK Return to the previous menu Return to TV viewing Enter Move PICTURE E Aspect Ratio 16 9 Picture Wizard Energy Saving Intelligent Sensor Picture Mode Expert1 Contrast 80 Brightness 50 H Sharpness 50 V Sharpness 50 Color 50 R G Enter Move PICTURE Energy Saving Intelligent Sensor Picture Mode Exp...

Страница 74: ...e Reduction Gamma Black Level Film Mode Standard Displays standard color area Wide Mode to use and set the rich color area of the display Maximize the utilization of color to increase color quality Show clearer and distinctive yet natural corners of the video Convert the color of a different video to HD color This is the function to adjust the overall color of the screen to the feeling you want a ...

Страница 75: ...lays a slide show to explain the various features of this TV This feature is disabled in I In ni it ti ia al l S Se et tt ti in ng g H Ho om me e U Us se e Enter Move OPTION Language Input Label SIMPLINK On Key Lock Off Caption Off Demo Mode Off ISM Method Normal Set ID 1 Initial Setting Store Demo Enter Move OPTION Language Input Label SIMPLINK On Key Lock Off Caption Off Demo Mode On ISM Method ...

Страница 76: ... moved a little and the white pat tern are alternately displayed It is diffi cult to see the after image on all colors Once it has been corrected it will not be visible in any color W Wh hi it te e W Wa as sh h White Wash removes ghost images from the screen Use spar ingly Watch the TV normally for a while before using this feature to see if the ghost image disappears on its own Select O OP PT TI ...

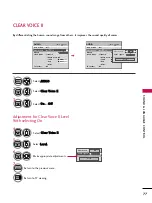
Страница 77: ...s users to enjoy stable volume levels by making automatic adjustments for each program Select A AU UD DI IO O Select A Au ut to o V Vo ol lu um me e Select O On n or O Of ff f 1 MENU 3 2 ENTER ENTER 4 BACK Return to the previous menu Return to TV viewing Enter Move AUDIO Auto Volume Off Clear Voice II Off 3 Balance 0 Sound Mode Standard Infinite sound Off Treble 50 Bass 50 Reset TV Speaker On Ente...

Страница 78: ...tandard Infinite sound Off Treble 50 Bass 50 Reset TV Speaker On Enter Move AUDIO Auto Volume Off Clear Voice II Off 3 Balance 0 Sound Mode Standard Infinite sound Off Treble 50 Bass 50 Reset TV Speaker On L R Adjustment for Clear Voice II Level With selecting On Select C Cl le ea ar r V Vo oi ic ce e I II I 4 Make appropriate adjustments 6 ENTER 7 BACK Return to the previous menu Return to TV vie...

Страница 79: ...9 G G Vivid Off English Off Add Eject Aspect Ratio Picture Mode Sound Mode Caption Multi Audio Sleep Timer Del Add Fav Eject USB CH F F Standard G G 16 9 S St ta an nd da ar rd d M Mu us si ic c C Ci in ne em ma a S Sp po or rt t and G Ga am me e are preset for optimum sound quality at the factory You can also adjust S So ou un nd d M Mo od de e in the A AU UD DI IO O menu S St ta an nd da ar rd d...

Страница 80: ...e em ma a S Sp po or rt t or G Ga am me e 3ENTER ENTER Make appropriate adjustments 5 ENTER 6 BACK Return to the previous menu Return to TV viewing Enter Move AUDIO Auto Volume Off Clear Voice II Off 3 Balance 0 Sound Mode Standard Infinite Sound Off Treble 50 Bass 50 Reset TV Speaker On Enter Move AUDIO Auto Volume Off Clear Voice II Off 3 Balance 0 Sound Mode Standard Infinite Sound Off Treble 5...

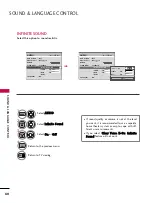
Страница 81: ...to use a separate home theater system or amp to cope with dif ferent user environments If you select C Cl le ea ar r V Vo oi ic ce e I II I O On n I In nf fi in ni it te e S So ou un nd d feature will not work Enter Move AUDIO Auto Volume Off Clear Voice II Off 3 Balance 0 Sound Mode Standard Infinite Sound Off Treble 50 Bass 50 Reset TV Speaker On Enter Move AUDIO Auto Volume Off Clear Voice II O...

Страница 82: ...and room situations 4 BACK Return to the previous menu Return to TV viewing Enter Move AUDIO Auto Volume Off Clear Voice II Off 3 Balance 0 Sound Mode Standard Infinite Sound Off Treble 50 Bass 50 Reset TV Speaker On Enter Move AUDIO Auto Volume Off Clear Voice II Off 3 Balance 0 Sound Mode Standard Infinite Sound Off Treble 50 Bass 50 Reset TV Speaker On L R L R Close E E E E Balance 0 L R EXIT ...

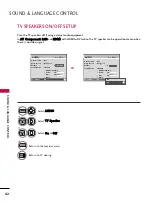
Страница 83: ...video signal Select A AU UD DI IO O Select T TV V S Sp pe ea ak ke er r Select O On n or O Of ff f 1 MENU 3 2 ENTER ENTER 4 BACK Return to the previous menu Return to TV viewing Enter Move AUDIO Auto Volume Off Clear Voice II Off 3 Balance 0 Sound Mode Standard Infinite Sound Off Treble 50 Bass 50 Reset TV Speaker On Enter Move AUDIO Auto Volume Off Clear Voice II Off 3 Balance 0 Sound Mode Standa...

Страница 84: ...ize the adjusted value 3 ENTER 4 Return to TV viewing Enter Move AUDIO Auto Volume Off Clear Voice II Off 3 Balance 0 Sound Mode Standard Infinite Sound Off Treble 50 Bass 50 Reset TV Speaker On Enter Move AUDIO Auto Volume Off Clear Voice II Off 3 Balance 0 Sound Mode Standard Infinite Sound Off Treble 50 Bass 50 Reset TV Speaker On L R L R Resetting audio configuration i i EXIT ...

Страница 85: ... automatically used if the broadcast is only in Mono Select S SA AP P Select M Mo on no o S St te er re eo o or S SA AP P Return to TV viewing 1 Q MENU 3 2 Select M Mu ul lt ti i A Au ud di io o Select other languages Return to TV viewing 1 Q MENU 3 2 Analog TV Digital TV F F English G G Q Menu Close F F 16 9 G G Vivid Off Off Add Eject Aspect Ratio Picture Mode Sound Mode Caption Multi Audio Slee...

Страница 86: ...sired language 1 MENU 4 2ENTER ENTER 5 BACK Return to the previous menu Return to TV viewing Enter Move OPTION Language Input Label SIMPLINK On Key Lock Off Caption Off Demo Mode Off ISM Method Normal Set ID 1 Initial Setting Home Use Enter Move OPTION Language Input Label SIMPLINK On Key Lock Off Caption Off Demo Mode Off ISM Method Normal Set ID 1 Initial Setting Home Use Close Menu English Audi...

Страница 87: ...n in the selected language 1 MENU 4 3ENTER ENTER 5 BACK Return to the previous menu Return to TV viewing Enter Move OPTION Language Input Label SIMPLINK On Key Lock Off Caption Off Demo Mode Off ISM Method Normal Set ID 1 Initial Setting Home Use Enter Move OPTION Language Input Label SIMPLINK On Key Lock Off Caption Off Demo Mode Off ISM Method Normal Set ID 1 Initial Setting Home Use Close Menu ...

Страница 88: ...R ENTER Select C CC C1 1 4 4 or T Te ex xt t1 1 4 4 4 Analog Broadcasting System Captions When selecting O Of ff f Sub menus for Analog DTV and Digital Option become disabled C CA AP PT TI IO ON N The term for the words that scroll across the bottom of the TV screen usually the audio portion of the pro gram provided for the hearing impaired T TE EX XT T The term for the words that appear in a larg...

Страница 89: ...ect C Ca ap pt ti io on n Select O On n 1 MENU 3 2 ENTER ENTER Select C CC C1 1 4 4 T Te ex xt t1 1 4 4 or S Se er rv vi ic ce e1 1 6 6 4 5 BACK Return to the previous menu Return to TV viewing Enter Move OPTION Language Input Label SIMPLINK On Key Lock Off Caption Off Demo Mode Off ISM Method Normal Set ID 1 Initial Setting Home Use Enter Move OPTION Language Input Label SIMPLINK On Key Lock Off ...

Страница 90: ...r r Choose a color for the text T Te ex xt t O Op pa ac ci it ty y Specify the opacity for the text color B Bg g B Ba ac ck kg gr ro ou un nd d C Co ol lo or r Select a background color B Bg g B Ba ac ck kg gr ro ou un nd d O Op pa ac ci it ty y Select the opacity for the background color 7 BACK Return to the previous menu Return to TV viewing Enter Move OPTION Language Input Label SIMPLINK On Key...

Страница 91: ... en nt tr ra al l M Mo ou un nt ta ai in n P Pa ac ci if fi ic c A Al la as sk ka a or H Ha aw wa ai ii i Canada E Ea as st te er rn n C Ce en nt tr ra al l M Mo ou un nt ta ai in n P Pa ac ci if fi ic c N Ne ew w F F l la an nd d or A At tl la an nt ti ic c 4 Select A Au ut to o O On n or O Of ff f depending on whether or not your viewing area observes Daylight Saving time 5 6 BACK Return to the ...

Страница 92: ...option 4 Set the Year Month Date Hour or Minutes option 5 6 BACK Return to the previous menu Return to TV viewing Enter Move TIME Clock Off Time Off On Time Off Sleep Timer Off Enter Move TIME Clock Off Time Off On Time Off Sleep Timer Off Year Month 2 Date 21 Hour 2 AM 2008 Minute 10 Time Zone Eastern Daylight Saving Auto Close F F Manual G G G G If you unplug the TV once or turn the main power o...

Страница 93: ...n Select I In np pu ut t Select the desired input source Select T TI IM ME E Select O Of ff f t ti im me e or O On n t ti im me e Select R Re ep pe ea at t 1 MENU 3 2 ENTER ENTER Select O Of ff f O On nc ce e D Da ai il ly y M Mo on n F Fr ri i M Mo on n S Sa at t W We ee ek ke en nd d or S Su un nd da ay y 4 Select and set H Ho ou ur r or M Mi in nu ut te e 5 1 ENTER 3 4 2 When Selecting T TV V s...

Страница 94: ...Ti im me er r in the T TI IM ME E menu Q Menu Close F F 16 9 G G Vivid Off English Off Add Eject Aspect Ratio Picture Mode Sound Mode Caption Multi Audio Sleep Timer Del Add Fav Eject USB CH 16 9 F F Off G G Standard Select S Sl le ee ep p T Ti im me er r 1 Q MENU 2 Select O Of ff f 1 10 0 2 20 0 3 30 0 6 60 0 9 90 0 1 12 20 0 1 18 80 0 or 2 24 40 0 minutes 3 Return to TV viewing EXIT ...

Страница 95: ...ies that have been shown at the theaters or direct to video movies use the Movie Rating System MPAA only Ratings for Television programs including made for TV movies TV G General audience TV PG Parental guidance suggested TV 14 Parents strongly cautioned TV MA Mature audience only TV Y All children TV Y7 Children 7 years older Set up blocking schemes to block specific channels ratings and external...

Страница 96: ...le Select L LO OC CK K 1 MENU ENTER Input the password 21 2 3 4 5 0 6 7 8 9 5 BACK Return to the previous menu Return to TV viewing Enter Move LOCK Lock System Off Set Password Block Channel Movie Rating TV Rating Children TV Rating General Downloadable Rating Input Block Enter Move LOCK Lock System On Set Password Block Channel Movie Rating TV Rating Children TV Rating General Downloadable Rating...

Страница 97: ...on nf fi ir rm m 4 3 ENTER 1 2 3 4 5 0 6 7 8 9 Select L LO OC CK K 1 MENU ENTER Input the password 21 2 3 4 5 0 6 7 8 9 5 BACK Return to the previous menu Return to TV viewing Enter Move LOCK Lock System Off Set Password Block Channel Movie Rating TV Rating Children TV Rating General Downloadable Rating Input Block Enter Move LOCK Lock System Off Set Password Block Channel Movie Rating TV Rating C...

Страница 98: ...o not want to watch or that you do not want your children to watch Select L LO OC CK K 1 MENU ENTER Input the password 21 2 3 4 5 0 6 7 8 9 6 BACK Return to the previous menu Return to TV viewing Enter Move LOCK Lock System Off Set Password Block Channel Movie Rating TV Rating Children TV Rating General Downloadable Rating Input Block Block Unblock Ch Change Move Page CH Move Previous EXIT Blue ...

Страница 99: ...TER G General audience PG Parental guidance suggested PG 13 Parents strongly cautioned R Restricted NC 17 No one 17 and under admitted X Adult only Blocking Off Permits all programs G G If you set PG 13 G and PG movies will be available PG 13 R NC 17 and X will be blocked Select L LO OC CK K 1 MENU ENTER Input the password 21 2 3 4 5 0 6 7 8 9 5 BACK Return to the previous menu Return to TV viewin...

Страница 100: ... not apply to other TV programs Unless you block certain TV programs intended for mature audi ences in the TV Rating sub menu your children can view those programs Select L LO OC CK K 1 MENU ENTER Input the password 21 2 3 4 5 0 6 7 8 9 6 BACK Return to the previous menu Return to TV viewing Enter Move LOCK Lock System Off Set Password Block Channel Movie Rating TV Rating Children TV Rating Genera...

Страница 101: ... dialogue applies to TV PG TV 14 Language adult language applies to TV PG TV 14 TV MA Sex sexual situations applies to TV PG TV 14 TV MA Violence applies to TV PG TV 14 TV MA Select L LO OC CK K 1 MENU ENTER Input the password 21 2 3 4 5 0 6 7 8 9 6 BACK Return to the previous menu Return to TV viewing Enter Move LOCK Lock System Off Set Password Block Channel Movie Rating TV Rating Children TV Ra...

Страница 102: ...arental Guidance 14 Viewers 14 years and older 18 Adult programming Blocking Off Permits all programs Select L LO OC CK K 1 MENU ENTER Input the password 21 2 3 4 5 0 6 7 8 9 5 BACK Return to the previous menu Return to TV viewing Enter Move LOCK Lock System Off Set Password Block Channel TV Rating English TV Rating French Downloadable Rating Input Block Enter Move LOCK Lock System Off Set Passwor...

Страница 103: ...3 years and younger 16ans Not convenient for children of 16 years and younger 18ans This programs is only for adults Blocking off Permits all programs Select L LO OC CK K 1 MENU ENTER Input the password 21 2 3 4 5 0 6 7 8 9 5 BACK Return to the previous menu Return to TV viewing Enter Move LOCK Lock System Off Set Password Block Channel TV Rating English TV Rating French Downloadable Rating Input ...

Страница 104: ...o oa ad da ab bl le e R Ra at ti in ng g option 4 3 ENTER Select desired option and block it 5 ENTER Select L LO OC CK K 1 MENU ENTER Input the password 21 2 3 4 5 0 6 7 8 9 6 BACK Return to the previous menu Return to TV viewing Enter Move LOCK Lock System Off Set Password Block Channel Movie Rating TV Rating Children TV Rating General Downloadable Rating Input Block Enter Move LOCK Lock System O...

Страница 105: ...2 3 4 5 0 6 7 8 9 6 BACK Return to the previous menu Return to TV viewing Enter Move LOCK Lock System Off Set Password Block Channel Movie Rating TV Rating Children TV Rating General Downloadable Rating Input Block Enter Move LOCK Lock System Off Set Password Block Channel Movie Rating TV Rating Children TV Rating General Downloadable Rating Input Block AV1 F F Off G G AV2 Off Component1 Off HDMI1...

Страница 106: ...V is turned off press the power INPUT CH button on the TV or POWER INPUT CH or NUMBER buttons on the remote control With the K Ke ey y L Lo oc ck k O On n the display K Ke ey y L Lo oc ck k appears on the screen if any button Except power button on the front panel is pressed while view ing the TV 4 BACK Return to the previous menu Return to TV viewing Enter Move OPTION Language Input Label SIMPLIN...

Страница 107: ...on Try another channel The problem may be with the broadcast Is the power cord inserted into wall power outlet Check your antenna direction and or location Test the wall power outlet plug another product s power cord into the outlet where the product s power cord was plugged in This is normal the image is muted during the product startup process Please contact your service center if the picture ha...

Страница 108: ...icture OK No sound Unusual sound from inside the product No sound when connecting HDMI USB No output from one of the speakers T Th he e a au ud di io o f fu un nc ct ti io on n d do oe es s n no ot t w wo or rk k Press the VOL or VOLUME button Sound muted Press MUTE button Try another channel The problem may be with the broadcast Are the audio cables installed properly Adjust Balance in menu optio...

Страница 109: ... water and a little fabric softener or dish washing detergent Wring the cloth until it s almost dry and then use it to wipe the screen Make sure the excess water is off the screen and then let it air dry before you turn on your TV Cleaning the Cabinet To remove dirt or dust wipe the cabinet with a soft dry lint free cloth Please be sure not to use a wet cloth Extended Absence G G If you expect to ...

Страница 110: ...50C UD 1 392 mm x 91 5 mm x 367 mm 54 8 inch x 36 inch x 1 4 4 inch 1 392 mm x 852 mm x 55 3 mm 54 8 inch x 33 5 inch x 2 1 inch 49 5 kg 1 09 1 lb 45 kg 99 2 lb 42PJ350 42PJ350C 42PJ350 UB 42PJ350C UB 988 mm x 688 5 mm x 260 mm 38 8 inch x 27 1inches x 1 0 2 inch 988 mm x 61 7 8 mm x 55 3 mm 38 8 inch x 24 3 inch x 2 1inches 2 1 6 kg 47 6 lb 20 kg 44 lb 50PJ350 50PJ350C 50PJ350 UB 50PJ350C UB 1 1 ...

Страница 111: ...3mm 38 8 inch x24 4 inch x2 1 inch 2 1 6kg 47 6lb 20kg 44 0lb 50PJ550 50PJ550 UD 1 1 71 4mmx786 2mmx309 7mm 46 1 inch x30 9 inch x1 2 1 inch 1 1 71 4mmx724 4mmx55 3mm 46 1pouces x28 5 inch x2 1 inch 30 kg 66 1 lb 27 6 kg 60 8 lb 42PJ250 42PJ250 UA 42PJ250 UB 988 mm x 688 5 mm x 260 mm 38 8 inch x 27 1 inch x 1 0 2 inch 988 mm x 61 7 8 mm x 55 3 mm 38 8 inch x 24 3 inch x 2 1 inch 2 1 6kg 47 6lb 20...

Страница 112: ...h stand Without stand With stand Without stand MODEL 50PK350 50PK350 UC 1 1 71 4 mm x 781 8 mm x 309 7 mm 46 1 inch x 30 7 inch x 1 2 1 inch 1 1 71 4 mm x 720 9 mm x 55 3 mm 46 1 inch x 28 3 inch x 2 1 inch 3 1kg 68 3lb 28 6kg 63 0lb 60PK280 60PK280 UA 1 392 mm x 91 0 mm x 367 mm 40 9 inch x 28 5 inch x 1 2 1 inch 1 392 mm x 843 mm x 55 3 mm 40 9 inch x 26 3 inch x 3 0 inch 49 5 kg 1 09 1 lb 45 kg...

Страница 113: ...C7 C0 C1 C2 C3 C4 C5 C6 C7 D0 D1 D2 D3 D4 D5 D6 D7 D0 D1 D2 D3 D4 D5 D6 D7 Lead code Low custom code High custom code Data code Data code Repeat code Tf 4 5 ms 9 ms 2 25 ms 9 ms 0 55 ms 0 56 ms 1 12 ms 0 56 ms 2 24 ms Tf Tf Tf 108ms 455KHz Bit 0 Bit 1 1 How to Connect Connect your wired remote control to the Remote Control port on the TV 2 Remote Control IR Codes Output waveform Single pulse modul...

Страница 114: ... Remote control Button 0B INPUT Remote control Button 10 19 Number Key 0 9 Remote control Button 4C Dash List Remote control Button 1A FLASHBK Remote control Button 09 MUTE Remote control Button 02 VOL Remote control Button 03 VOL Remote control Button 00 CH Remote control Button 01 CH Remote control Button 1E FAV Remote control Button 40 Remote control Button 41 Remote control Button 07 Remote co...

Страница 115: ...s below are provided to help with programming software or to test functionality using telenet software RGB PC ANTENNA IN 1 2 COMPONENT IN VIDEO AUDIO L R HDMII IN 2 1 RS 232C IN CONTROL SERVICE Type of Connector D Sub 9 Pin Male No Pin Name 1 No connection 2 RXD Receive data 3 TXD Transmit data 4 DTR DTE side ready 5 GND 6 DSR DCE side ready 7 RTS Ready to send 8 CTS Clear to send 9 No Connection ...

Страница 116: ... Data Mapping Select O OP PT TI IO ON N Select S Se et t I ID D Choose the desired TV ID number The adjustment range of Set ID is 1 99 1 MENU 3 2 ENTER ENTER 4 BACK Return to the previous menu Return to TV viewing Enter Move OPTION Language Input Label SIMPLINK On Key Lock Off Caption Off Demo Mode Off ISM Method Normal Set ID 1 Initial Setting Home Use Enter Move OPTION Language Input Label SIMPL...

Страница 117: ...able functions or communication errors Data1 Illegal Code Data2 Not supported function Data3 Wait more time In this model TV will not send the status during the standby mode Data Format Command 2 Use as command Set ID Use the small character if set ID is 10 it will send the 0 a DATA Use the small character if data is 0 x ab it will send the a b NG Use the large character C Co om mm ma an nd d1 1 C...

Страница 118: ...ransmission k e Set ID Data Cr Data 00 Volume mute on Volume off Data 01 Volume mute off Volume on Acknowledgement e Set ID OK NG Data x 0 06 6 V Vo ollu um me e C Co on nt tr ro oll C Co om mm ma an nd d k k f f To adjust volume You can also adjust volume with the volume buttons on remote control Transmission k f Set ID Data Cr Data Min 00 Max 64 transmit by Hexadecimal code Refer to Real data ma...

Страница 119: ...ssion x u Set ID Data Cr Data Min 00 Max 64 transmit by Hexadecimal code Refer to Real data mapping G G p 1 1 6 Acknowledgement u Set ID OK NG Data x 1 18 8 I IS SM M M Me et th ho od d C Co om mm ma an nd d jj p p To avoid having a fixed image remain on screen Transmission j p Set ID Data Cr Data 02 Orbiter 04 White Wash 08 Normal 20 Color Wash Acknowledgement p Set ID OK NG Data x 1 19 9 E En ne...

Страница 120: ...e to the digital ATSC local channel 30 3 Data 00 Don t know Physical 00 Data 01 02 Major is 30 00 1E Data 03 04 Minor is 3 00 03 Data 05 0010 0010 in binary 22 Total ma 00 00 00 1E 00 03 22 Acknowledgement a Set ID OK Data00 Data01 Data02 Data03 Data04 x a Set ID NG Data00 x 2 22 2 C Ch ha an nn ne ell A Ad dd d D De ell C Co om mm ma an nd d m m b b To add and delete the channels Transmission m b...

Страница 121: ...arefully before operating your set and retain it for future reference P NO SAC34173302 0912 REV00 www lge com The model and serial number of the TV is located on the back and one side of the TV Record it below should you ever need service MODEL SERIAL ...

Страница 122: ...lire ce manuel attentivement avant d utiliser votre appareil et conservez le pour consultation ultérieure 42PJ250 50PJ250 50PK250 60PK250 60PK280 60PK290 42PJ340 50PJ340 42PJ350 50PJ350 50PK350 50PK340 50PK540 60PK540 42PJ550 50PJ550 50PK550 60PK550 42PJ350C 50PJ350C 50PK550C 60PK550C ...

Страница 123: ... toute interference reçue risquant causer une operation indésirable de l appareil Tout changement ou modification non expressément approuvé par la partie responsable concernant la conformité peut annuler la possibilité de l utilisateur à utiliser cet appareil ATTENTION Ne pas tenter de modifier cet appareil de quelle que façon que ce soit sans une autorisation écrite de LG Electronics Toute modifi...

Страница 124: ...a broche sont destinées à la sécurité Si la fiche ne peut être branchée sur la prise demander à un électricien qualifié de remplacer la prise usitée Protéger le cordon d alimentation afin qu il ne soit pas écrasé ni pincé surtout à la prise et au point où il sort de l appareil Utiliser seulement les accessoires spécifiés par le fabricant Utiliser seulement avec chariot support fixation ou table sp...

Страница 125: ...e pas déplacer le téléviseur lorsque le cordon d alimentation est branché Ne pas utiliser le téléviseur si le cordon est endommagé ou desserré Assurez vous de tirer sur la prise du cordon lorsque vous voulez le débrancher ne tirez pas sur le cordon pour débrancher le téléviseur AVERTISSEMENT Pour réduire le risque d in cendie ou de choc électrique n exposez pas ce produit à la pluie à l humidité o...

Страница 126: ...fon doux pour éviter d égratigner le téléviseur Ne pas vaporiser d eau ou d autres liquides directement sur le téléviseur puisque cela pourrait causer un choc électrique Ne pas nettoyer le téléviseur avec des produits chimiques comme de l alcool du diluant ou du benzène D Dé ép pl la ac ce em me en nt t Assurez vous que le téléviseur a été éteint qu il a été débranché et que tous les câbles et cor...

Страница 127: ...SION COMMANDE DES CHAÎNES Fonctions de la télécommande 36 Mise en circuit du téléviseur 38 Sélection de chaîne 38 Réglage du volume 38 Réglage initial 39 Sélection des menus affichés à l écran 40 Menu éclair Quick Menu 42 Repérage de canaux Recherche automatique des chaînes Syntonisation automatique 43 Ajout Effacement des chaînes Syntonisation manuelle 44 Édition des chaînes 45 Liste des Canaux 4...

Страница 128: ... analogique 87 Sous titres à système de diffusion numérique 88 Option sous titres 89 RÉGLAGE DE L HEURE Réglage de la pendule Réglage automatique 90 Réglage manuel 91 Réglage minuterie en marche arrêt 92 Réglage minuterie 93 COMMANDE PARENTALE CLASSEMENT Système de Réglage de mot de passe et Verrouillagae 94 Blocage des chaînes 97 Classement des films et des émissions télévisées 98 Téléchargeable ...

Страница 129: ...iseur offre les réglages précis exigés pour la certification professionnelle par l Imaging Science Foundation Les modes nuit et jour d ISF en résultant sont donc accessibles et permettent aux utilisateurs de profiter pleinement de leur télévision haute définition LG Des calibrations sophistiquées et détaillées peuvent être réalisées avec le mode ISFccc Un technicien qualifié est requis pour effect...

Страница 130: ...doit utiliser des câbles de pas sage de signaux blindés à noyaux de ferrite pour conserver la conformité du produit aux normes de la standard x 2 EN ER GY CH VOL 1 2 3 4 5 0 6 7 8 9 LIS T FLAS HB K MA RK FR EE ZE SAVIN G TV AV MO DE INPU T FAV RATIO MENU IN FO Q M ENU EXIT ENTER MUTE BACK P A G E ou x 3 M4x28 M5x14 Sauf 60PK250 60PK540 60PK550 60PK280 60PK290 60PK550C Tore de fer rite Noir Cette f...

Страница 131: ...L ENTER ENTER Touche ALIMEN TATION Touche INPUT Touche MENU Touche ENTER Touche VOLUME Voyant alimentation attente S allume en rouge lorsque l ap pareil est en Veille DEL reste éteinte lorsque le téléviseur est en marche Capteur intelligent Règle l image en fonction des conditions environ nantes Touche CHANNEL Capteur de télécom mande Vous pouvez appuyer sur le bouton en le touchant légèrement du ...

Страница 132: ... Touche ENTER Touche VOLUME Voyant alimentation attente S allume en rouge lorsque l appareil est en Veille DEL reste éteinte lorsque le téléviseur est en marche Capteur intelligent Règle l image en fonction des conditions environ nantes Touche CHANNEL Capteur de télécom mande Vous pouvez appuyer sur le bouton en le touchant légèrement du doigt ...

Страница 133: ...0 42 50PJ340 50PK340 50PK350 42 50PJ350C Capteur intelligent Règle l image en fonction des conditions environ nantes Touche CHANNEL G Ne marchez pas sur le support en verre et ne le soumettez à aucun impact Il pourrait se casser et les morceaux de verre peuvent occasionner des blessures ou le téléviseur pourrait tomber G Ne traînez pas le téléviseur Vous pourriez endommager le sol ou le produit Ca...

Страница 134: ...maison Remarque enmodeattente cesprisessontdésactivées RS 232C IN CONTROL SERVICE PORT Utilisé sur appareils offerts par des tiers AUDIO IN RGB Prise pour écouteurs de 1 8 pour l entrée du signal audio analogique du PC RGB IN PC Connexion analogique pour PC Nécessite un câble D sub à 1 5 broches câble VGA REMOTE CONTROL IN PORT Prise pour télécommande à fil COMPONENT IN Connexion analogique Prend ...

Страница 135: ...uteurs de 1 8 pour l entrée du signal audio analogique du PC RGB IN PC Connexion analogique pour PC Nécessite un câble D sub à 15 broches câble VGA REMOTE CONTROL IN PORT Prise pour télécommande à fil COMPONENT IN Connexion analogique Prend en charge les signaux haute définition Nécessite un câble rouge un câble vert et un câble bleu pour le signal vidéo et un câble rouge et un câble blanc pour le...

Страница 136: ...bas sur un coussin afin de ne pas endommager l appareil Assemblez les pièces du corps du pied à la base du pied du téléviseur 1 2 Assemblez le téléviseur tel qu illustré 3 Installation Sauf 60PK250 60PK540 60PK550 60PK280 60PK290 60PK550C Fixez bien les quatre boulons dans les trous situés au dos de l appareil 4 Corps du pied Base du pied M4x28 M5x14 x 3 x 4 ...

Страница 137: ... D DE E P PR RO OT TE EC CT TI IO ON N sur la cavité servant à accueillir la base Insérez le C CO OU UV VE ER RC CL LE E D DE E P PR RO OT TE EC CT TI IO ON N dans le téléviseur jusqu à ce que vous entendiez un clic Couvercle de Protection Démontage Couvercle de Protection fixer un guide aux extrémités M4x28 x 4 M4x30 x 5 60PK250 60PK540 60PK550 60PK280 60PK290 60PK550C 42 50PJ250 50PK250 42 50PJ3...

Страница 138: ...s selon les besoins installez le SUPPORT de CÂBLE comme indiqué et regroupez les câbles Pour relier un appareil supplémentaire reportez vous à la section CONFIGURATION DE LA SOURCE AUXILIAIRE 1 SUPPORT de CÂBLE Cette illustration peut ne pas correspondre à votre téléviseur ...

Страница 139: ...re à votre téléviseur 4 pouces 4 pouces 4 pouces 4 pouces G G Assurez une bonne ventilation en respectant ces recommandations G G Ne pas installer l appareil près ou au dessus d une source de chaleur ATTENTION SOCLE PIVOTANT Cette fonction n est pas disponible pour tous les modèles Après avoir installé le téléviseur le régler manuellement vers la gauche ou la droite de 20 selon la position de visi...

Страница 140: ...leau G G Avec l achat de notre ensemble de fixation murale un manuel d installation détaillé et toutes les pièces requises pour l assemblage sont fournis G G N utilisez pas des vis plus longues que la dimension standard puisqu elles peuvent endommager l intérieur du téléviseur G G Pour les fixations murales qui ne sont pas conformes aux spécifications de la norme VESA concernant les vis la longueu...

Страница 141: ...l et serrez les à fond dans les orifices supérieurs Fixez les supports au mur avec les boulons vendu séparément Faites correspondre la hauteur des supports montés au mur avec les orifices du produit Vérifiez que les boulons à œil et supports soient bien complètement serrés Utilisez une ficelle solide vendu séparément pour attacher l appareil Il est plus sûr d attacher la corde de façon à ce qu ell...

Страница 142: ...éléviseurs installer un séparateur de signal 2 façons pour les connexions Si l antenne n est pas installée adéquatement communiquer avec le marchand pour de l aide R VARIABLE AUDIO OUT Pour éviter d endommager le téléviseur ne branchez pas le cordon d alimentation avant de procéder au branchement de tous les appareils Douille antenne murale Antenne extérieure VHF UHF Appartement à logements branch...

Страница 143: ...opriétaire Sélectionnez la source d entrée C Co om mp po os sa an nt te e1 1 sur le téléviseur à l aide de la touche I IN NP PU UT T de la télécommande Si la composante est branchée à l entrée C CO OM MP PO ON NE EN NT T I IN N 2 2 sélectionnez la source d entrée C Co om mp po os sa an nt te e2 2 sur le téléviseur Pour éviter que l équipement ne subisse des dommages ne branchez aucun cordon d alim...

Страница 144: ...U UT T de la télécommande 2 1 HDMI DTV Fréquence Fréquence Horizontale KHz Verticale Hz 31 47 59 94 31 47 60 00 44 96 59 94 45 00 60 00 33 72 59 94 33 75 60 00 27 00 24 00 33 75 30 00 67 432 59 939 67 50 60 00 26 97 23 94 33 71 29 97 Résolution 720x480p 1280x720p 1920x1080i 1920x1080p HDMI DVI IN 2 1 HDMI DTV OUTPUT RGB IN PC RS 232C IN CONTROL SERVICE OPTICAL DIGITAL AUDIO OUT AUDIO RGB DVI 1 G G...

Страница 145: ...io autonome est requise REMARQUE Reliez la sortie DVI du boîtier de la télévision numérique à la prise H HD DM MI I D DV VI I I IN N 1 1 2 2 ou 3 3 de l appareil Reliez la sortie audio du boîtier de la télévision numérique à la prise A AU UD DI IO O I IN N R RG GB B D DV VI I de l ap pareil 1 Comment brancher 2 Comment l utiliser Allumez le boîtier de la télévision numérique Consultez le manuel de...

Страница 146: ...PB bleu et PR rouge Reliez les sorties audio du DVD aux prises C CO OM MP PO ON NE EN NT T I IN N A AU UD DI IO O1 1 de l appareil 1 Comment brancher 2 Comment l utiliser Allumez votre lecteur et insérez un DVD Sélectionnez la source d entrée C Co om mp po on ne en nt t1 1 sur le téléviseur à l aide de la touche I IN NP PU UT T de la télécommande Si la composante est branchée à l entrée C CO OM MP...

Страница 147: ...éparé n est pas nécessaire L interface HDMI prend en charge l audio et le vidéo 1 Comment brancher 2 Comment l utiliser Sélectionnez la source d entrée H HD DM MI I1 1 2 2 ou 3 3 sur le téléviseur à l aide de la touche I IN NP PU UT T de la télécommande Reportez vous au manuel d utilisation du lecteur DVD 2 1 HDMI DVI IN 2 1 RGB IN PC RS 232C IN CONTROL SERVICE OPTICAL DIGITAL AUDIO OUT AUD RGB D ...

Страница 148: ...RCA Reliez les prises A AU UD DI IO O V VI ID DE EO O du téléviseur et du magnétoscope Respectez les couleurs Vidéo jaune Audio Gauche blanc et Audio Droit rouge 1 Comment brancher 2 Comment l utiliser Insérez une cassette vidéo dans le magnétoscope et appuyez sur la touche PLAY Reportez vous au manuel de l utilisateur du magnétoscope Sélectionnez la source d entrée V Vi id dé éo o1 1 sur le télév...

Страница 149: ... Vi id dé éo o2 2 sur le téléviseur à l aide de la touche I IN NP PU UT T de la télécommande Si la composante est branchée à l entrée A AV V I IN N 1 1 sélectionnez la source d entrée V Vi id dé éo o1 1 sur le téléviseur Faites fonctionner l appareil externe 1 1 AV IN 2 L MONO R AUDIO VIDEO USB IN HDMI IN 3 1 i e Branchez le périphérique USB dans les prises U US SB B I IN N situées sur le côté du ...

Страница 150: ...er un rayon laser peut endommager vos yeux G G La fonction ACP Audio Copy Protection peut bloquer la sortie audio numérique ATTENTION Branchez l une des extrémités du câble optique au port O OP PT TI IC CA AL L de la D DI IG GI IT TA AL L A AU UD DI IO O O OU UT T du téléviseur Branchez l autre extrémité dans l entrée audio numérique optique de l équipement audio Réglez Option Haut parleurs intern...

Страница 151: ...O 1 2 2 Comment l utiliser Allumez votre ordinateur et l appareil Sélectionnez la source d entrée R RG GB B P PC C sur le téléviseur à l aide de la touche I IN NP PU UT T de la télécommande Reliez la sortie VGA de l ordinateur à la prise R RG GB B I IN N P PC C de l appareil Reliez la sortie audio du PC à la prise A AU UD DI IO O I IN N R RG GB B D DV VI I de l appareil 1 Comment brancher 2 1 2 Co...

Страница 152: ...age soit claire G G Évitez de laisser une image fixe à l écran pendant une période prolongée Celle ci pourrait s im primer de manière permanente à l écran G G La synchronisation des fréquences Horizontales et Verticales est séparée G G Sur certains modèles de carte graphique il se peut que certains réglages de résolution empêchent l affichage de l image au bon endroit sur l écran REMARQUE Spécific...

Страница 153: ...euvent également être modifiés Sélectionnez I IM MA AG GE E Sélectionnez É Éc cr ra an n R RG GB B P PC C Sélectionnez R Ré és so ol lu ut ti io on n Sélectionnez la résolution souhaitée 1024 x 768 1280 x 768 1360 x 768 Config auto Résolution G Position Taille Phase Remise Écran Déplacer Préc 1 MENU 3 4 2 ENTER ENTER ENTER 5 ENTER Entrée Déplacer IMAGE Contraste 90 Brillance 50 H Nêtteté 60 V Nêtt...

Страница 154: ...onnez C Co on nf fi ig g a au ut to o Config auto G Résolution Position Taille Phase Remise Écran Déplacer Régler 3 2 ENTER ENTER Sélectionnez O Ou ui i 4 ENTER Démarrage de la configuration automatique 5 ENTER Sélectionnez I IM MA AG GE E MENU Si la position de l image n est toujours pas satisfaisante essayez de nouveau l ajustement automatique Si vous avez encore besoin d ajuster l image après a...

Страница 155: ...R P Po os si it ti io on n Cette fonction sert à ajuster la position Gauche Droite et Haut Bas de l image en fonction de vos préférences T Ta ai il ll le e Cette fonction sert à réduire les lignes verticales ou les rayures visibles en fond d écran Les dimensions horizontales de l écran sont également modifiées P Ph ha as se e Cette fonction vous permet d éliminer le brouillage horizontal et d amél...

Страница 156: ...nalité n est offerte qu en mode RGB PC Sélectionnez R Re em mi is se e 3 ENTER Sélectionnez I IM MA AG GE E Sélectionnez É Éc cr ra an n R RG GB B P PC C 1 MENU 2 ENTER Sélectionnez O Ou ui i 4 ENTER 5 ENTER Config auto Position Résolution Taille Phase Remise G Écran Déplacer Initialiser les fixations Enter Move PICTURE Contraste 90 Brillance 50 H Nêtteté 60 V Nêtteté 60 Couleur 60 Teinte 0 Contrô...

Страница 157: ...modes G G p p 5 51 1 Alterne les sources d entrées Met le téléviseur en marche G G p p 4 49 9 Mode de fonctionnement de la télécommande TV Utilisé pour entrer un numéro d émission pour des canaux à émissions multiples comme 2 1 2 2 etc Affiche le tableau des chaînes Syntonise les canaux plus récents Modification du programme FF Retour arrière GG Avance rapide G Lecture l l l l Pause Permet de comm...

Страница 158: ...e le menu principal ou efface tous les affichages à l écran et revient au mode de vision nage TV Pour afficher les informations en haut de l écran Ouvre la liste d options du menu rapide Permet à l utilisateur de retourner à l opération précédente d une application ou d une fonc tion interactive Permet d afficher les informations sur les chaînes en haut de l écran Permet d effacer tous les afficha...

Страница 159: ...u N NU UM MÉ ÉR RI IQ QU UE ES S 0 0 9 9 sur la télécommande Sélectionner la source de visionnement avec les touches I IN NP PU UT T sur la télécommande Lorsque l on a terminé d utiliser le téléviseur presser P PO OW WE ER R sur la télécommande l appareil revient au mode attente 1 2 Appuyez sur la touche C CH H ou ou N NU UM MÉ ÉR RI IQ QU UE ES S pour définir un numéro de chaîne 1 RÉGLAGE DU VOLU...

Страница 160: ...i in n 5 prédéfini après un délai de 5 minutes Vous pouvez également régler l option R Ré ég gl la ag ge e i in ni it ti ia al l dans le menu O OP PT TI IO ON N Les réglages d usine par défaut sont définis si vous choisissez R Ré és si id de en nt ti ie el ll le e Si vous ne terminez pas la procédure d installation le menu de réglage initial sera affiché à chaque fois que vous mettrez le téléviseu...

Страница 161: ...ise Haut parleurs internes Marche AUDIO Entrée Déplacer Pendule Mise en arrêt Arrêt Mise en éveil Arrêt Arrêt différé Arrêt HEURE Entrée Déplacer Liste photo Liste musique USB Entrée Déplacer TV Vidéo1 Vidéo2 Composante1 Composante2 RGB PC HDMI1 HDMI2 HDMI3 SOURCE Entrée Déplacer Verrouillage Arrêt Mot de Passe Bloquez Canal Films Enfants Général Téléchargeable Blocage Sources VÉRROUILLÉ Verrouill...

Страница 162: ...d Arrêt Aiguës 50 Basses 50 Remise AUDIO Entrée Déplacer Pendule Mise en arrêt Arrêt Mise en éveil Arrêt Arrêt différé Arrêt HEURE Entrée Déplacer Verrouillage Arrêt Mot de Passe Bloquez Canal Films Enfants Général Téléchargeable Blocage Sources VÉRROUILLÉ Syntonisation auto Syntonisation manuelle Edit Chaînes Entrée Déplacer Langage Language Indentité source SIMPLINK Marche Touches verrouillées A...

Страница 163: ...e format d image désirée M Mo od de e i im ma ag ge e Pour choisir le mode image réglée en usine selon l environnement de visionnement M Mo od de e a au ud di io o Sélectionner le son approprié pour le pro gramme M Mu ul lt ti i a au ud di io o Modifier la langue audio signal numérique S SA AP P Permet de choisir la sonorité MTS signal analogique A Ar rr rê êt t d di if ff fé ér ré é Pour choisir ...

Страница 164: ...a été activé menu de verrouillage Utilisez le mot de passe que vous avez défini dans le menu de verrouillage pour autoriser une recherche de canal Lors du réglage de la syntonisation automatique ou manuelle le nombre maximum de stations pouvant être placées en mémoire est de 900 Sujet à changer dépendamment de l environ nement des signaux télédiffusés Permet de mémoriser toutes les chaînes disponi...

Страница 165: ...t te er r ou S Su up pp pr ri im me er r 5 ENTER Le téléviseur demandera un mot de passe si le contrôle parental a été activé menu de verrouillage Utilisez le mot de passe que vous avez défini dans le menu de verrouillage pour autoriser une recherche de canal Lors du réglage de la syntonisation automatique ou manuelle le nombre maximum de stations pouvant être placées en mémoire est de 900 Sujet à...

Страница 166: ...désirez sélectionner une chaîne supprimée saisissez directement le numéro de la chaîne respective avec les touches numériques ou réactivez la par le biais du menu Edit Chaînes Édition des chaînes Sélectionnez C CA AN NA AL L 1 MENU 2 ENTER Sélectionnez E Ed di it t C Ch ha aî în ne es s Entrée Déplacer CANAL Syntonisation auto Syntonisation manuelle Edit Chaînes Changez canal Déplacer page CH Dépl...

Страница 167: ... canaux Afficher la liste des chaînes 1 LIST Affichage de la liste des chaînes Choisir une chaîne 1 Se rendre au numéro de chaîne choisi 2 ENTER Sélection d une chaîne dans la liste des chaînes Tourner les pages 1 CH P A G E Retourner à l affichage télé 2 Pagination à l aide d une liste de chaînes 2 1 3 1 4 1 Liste des canaux Sortie Ce cadenas est affiché quand la chaîne est verrouillée avec le co...

Страница 168: ... E 1 2 3 4 5 0 6 7 8 9 Sélectionnez le canal souhaité ou 3 Sélectionnez P Pr ré éf fé ér ré é 4 Retourner à l affichage télé Q Menu Fermer Clair Standard Arrêt Français Arrêt Éjection Allongement Mode image Mode audio Sous titres Multi audio Arrêt différé Sup Ajo Pré Éjection USB CH F F Préféré G G 16 9 LISTE DES FAVORIS Choisir une chaîne 1 Se rendre au numéro de chaîne choisi 2 ENTER Sélection d...

Страница 169: ... Multilingue programme contenant un ou plusieurs ser vices audio Appuyez sur Q Q M ME EN NU U pour choisir l audio désiré S So ou us s t ti it tr re es s programme contenant un ou plusieurs services de sous titres Appuyez sur Q Q M ME EN NU U pour sélectionner celui désiré D Do ol lb by y D Di ig gi it ta al l Le programme contient un signal audio Dolby Digital dans la source d entrée TV et HDMI A...

Страница 170: ...ualiser le signal provenant d un appareil haute définition HDMI3 Lorsqu un nouvel appareil externe est branché à l appareil le menu contextuel suivant apparaît automatiquement Lorsque vous sélectionnez O Ou ui i vous pouvez choisir la source d entrée que vous souhaitez utiliser Par contre lorsque vous sélectionnez S SI IM MP PL LI IN NK K M Ma ar rc ch he e en mode HDMI le même menu contextuel n a...

Страница 171: ...l affichage télé Au moyen du menu OPTION Sélectionner la source sauf T TV V Sélectionner l identification appropriée 1 2 3 BACK Retourner au menu précédent Retourner à l affichage télé Au moyen de la touche INPUT Enter Move OPTION Langage Language Input Label SIMPLINK On Key Lock Off Caption Off Demo Mode Off ISM Method Normal Set ID 1 Réglage initial Résidentielle Enter Move OPTION Langage Langua...

Страница 172: ... AV Mode permet de choisir cette option à la fois dans le menu IMAGE Mode image et dans le Menu AUDIO Mode audio Lorsque vous sélectionnez A Ar rr rê êt t en mode AV l image que vous aviez sélec tionnée à l origine sera rétablie A Ar rr rê êt t l AV MODE F Fi il lm m Optimise la vidéo et l acoustique pour regarder des films S Sp po or rt t Optimise la vidéo et l acous tique pour regarder des manif...

Страница 173: ...d entrée avec la touche INPUT de la télécommande l appareil SIM PLINK cessera de fonctionner G G Lorsque vous sélectionnez un appareil cinema maison la sortie sonore est automatiquement relayée aux haut parleurs dudit système cinéma maison G G Si un cinéma maison SIMPLINK ne lit pas le signal audio du téléviseur auquel il est raccordé branchez la sor tie audio numérique DIGITAL AUDIO OUT située à ...

Страница 174: ...t utiliser le câble HDMI dans une version supérieure à 1 3 avec CEC CEC Consumer Electronics Control Menu SIMPLINK A Af ff fi ic ch ha ag ge e t té él lé é Passe à la chaîne de télévision précédente peu importe le mode courant L Le ec ct tu ur re e d de e d di is sq qu ue e Permet de sélection ner et de lire des disques Lorsque de mul tiples disques sont disponibles les titres de disques s affiche...

Страница 175: ...e reconnu G G Veuillez brancher l alimentation pour tout périphérique de stockage USB nécessitant une ali mentation externe Dans le cas contraire le périphérique peut ne pas être reconnu G G Veuillez brancher un périphérique de stockage USB à l aide d un câble certifié Si le périphériquee s t branché à l aide d un câble non certifié ou excessive ment long il peut ne pas être reconnu G G Quelques p...

Страница 176: ...urs Pages totales Nombre total de photos minia tures sélectionnées Mémoire USB utilisable Boutons correspondants de la télécommande Format de fichiers photo pris en charge JPG Vous pouvez uniquement lire des fichiers JPG Seul le balayage en mode baseline est pris en charge sur JPG Dispo USB Page 1 1 Non marqué LISTE PHOTO Dossier supérieur Espace libre 150MB Déplacer Menu contextue Déplacer page S...

Страница 177: ...lectionnée vous pouvez afficher toutes les photos individuellement ou un diapo rama de toutes les photos du dossier Top Folder DriveA 4 Sélectionner le menu contextuel ENTER ENTER ENTER Déplacer Déplacer page Mark CH MARK Menu contextuel Déplacer Déplacer page Sélectionner CH MARK Menu contextuel DriveA DriveA Butterfly Dossier supérieur Photo X Box 1366x768 125KB Vue Sélect tous Supprimer Fermer ...

Страница 178: ...r les photos Afficher le menu contextuel 5 Sélectionnez V Vu ue e La photo sélectionnée s affiche en mode plein écran 2 3 1 4 ENTER ENTER ENTER Dispo USB Page 1 1 Non marqué LISTE PHOTO Dossier supérieur Espace libre 150MB 0 folder 4 file s USB Device Page 1 1 No Marked PHOTO LIST Dossier supérieur Free Space 150MB 1366x768 125KB Top Folder DriveA DriveA DriveA Butterfly 1366x768 125KB Vue Sélect ...

Страница 179: ...ma Réglez l intervalle du diaporama à partir du menu O Op pt tiio on n G G B BG GM M Écoutez de la musique alors que vous visionnez les photos en mode plein écran Réglez le dispositif de musique d arrière plan et l album à partir du menu O Op pt ti io on n G G R Ro ot ta at ti io on n Fait pivoter les photos Permet de faire pivoter la photo de 90 180 270 360 dans le sens des aiguilles d une montre...

Страница 180: ...s o op pt ti io on ns s v ví íd de eo o ou D Dé éf fi in ni ir r l le es s o op pt ti io on ns s a au ud di io o 2 1 G G Lorsque vous sélectionnez l option définir les options de visualisation des photos Vous ne pouvez pas changer le dossier musique pendant que BGM est en lecture Affichage de la v vi it te es ss se e d di ia ap po os s ou du d do os ss si ie er r m mu us si iq qu ue e Procéder aux...

Страница 181: ... r l le es s o op pt ti io on ns s v ví íd de eo o G G Lorsque vous sélectionnez D Dé éf fi in ni ir r l le es s o op pt ti io on ns s a au ud di io o Affichage du mode image Procéder aux réglages appropriés 2 1 Affichage de m mo od de e a au ud di io o v vo ol l r ro or rm ma al li is sé é v vo oi ix x c cl la ai ir re es s I II I et de la É Éq qu ui il li ib br re e Procéder aux réglages appropr...

Страница 182: ...KHz Longueur maximum de musique 999 59 Sec Permet de passer au répertoire de fichiers supérieur Aperçu Affiche le titre le nom du fichier de la musique dans le dossier sélectionné Page en cours Pages totales Nombre total de misuque miniatures sélectionnées Mémoire USB utilisable Boutons correspondants de la télécommande 1 3 4 5 2 Sélectionnez U US SB B Sélectionnez L Li is st te e M Mu us si iq qu...

Страница 183: ...éplacer page Sélectionner CH MARK Menu contextuel Durée Titre Dossier supérieur Good Bye Arirang 05 30 04 12 3945 KB 128 Kbps Lire Lire avec photo Sélect tous Supprimer Fermer G G L Li ir re e pendant l arrêt Lit les pistes sélection nées Lorsque la lecture d une piste se termine la prochaine piste sélectionnée sera jouée Si aucune piste n est sélectionnée la piste suiv ante du dossier en cours se...

Страница 184: ... pas G G Appuyez sur E EN NT TE ER R A A ou R RE ET TU UR RN N pour arrêter l économiseur d écran G G Ce téléviseur ne lit pas les pistes de moins de 16 Ko L R Définir les options audio Mode audio Vol normalisé Voix claires II Équilibre Stardard Arrêt Arrêt Sortie Utilisation de l option liste Musique Affichage du m mo od de e a au ud di io o 2 1 Procéder aux réglages appropriés 0 Dispo USB Page 1...

Страница 185: ...t disponibles Zoom Zoom Cinéma 1 16 9 4 3 Q Menu Close F F 16 9 G G Clair Standard Arrêt Français Arrêt Ajouter Éjection Allongement Mode image Mode audio Sous titres Multi audio Arrêt différé Sup Ajo Pré Éjection USB CH Sélectionnez A Al ll lo on ng ge em me en nt t Sélectionner le format d image désirée 1 Q MENU 2 3 Retourner à l affichage télé Par Programme Vous pouvez aussi appuyer la touche R...

Страница 186: ...t Scan est activée Cette fonctionnalité est disponible uniquement en mode DTV CADTV Composante HDMI DTV DVI DTV 720p 1080i 1080p Par Programme Sélectionner la proportion appropriée pour cor respondre à la source d image 4 3 Choisir ce format pour visionner une image avec le rapport d origine Zoom Choisir pour visionner une image sans altération Toutefois les portions du haut et du bas sont coupées...

Страница 187: ... identique à l exemple ci dessous Suivant Préc Faible Élevé Recommandé Contraste 90 E E E E Teinte Ajustez l écran ci dessus de sorte qu il soit identique à l exemple ci dessous Suivant Préc Faible Élevé Recommandé Teinte 0 E E E E R G Cette fonction vous permet d optimiser la qualité de l image apparaissant à l écran Utilisez l A As ss si is st ta an nt t I Im ma ag ge e afin de raffiner et calib...

Страница 188: ...revious H Netteté 50 E E E E Faible Élevé Recommandé Netteté verticale Ajustez l écran ci dessus de sorte qu il soit identique à l exemple ci dessous Suivant Préc V Netteté 50 E E E E Faible Élevé Recommandé DTV TV Vidéo1 Vidéo2 Composante1 Composante2 RGB HDMI1 HDMI2 HDMI3 Choisissez une ou plusieurs entrées auxquelles appliquer les r églages Avertissement La qualité de l image peut varier selon ...

Страница 189: ...t 16 9 Picture Wizard Economie dénergie Capteur intelligent Mode image Standard Contraste 90 Brillance 50 Nêtteté 60 Couleur 60 Teinte 0 Réduit la consommation d énergie de la télévision Vous pouvez accroitre la luminositéde votre écran en réglant le niveau É Éc co on no om mi iq qu ue e d d é én ne er rg gi ie e d énergieou en réglant le M Mo od de e i im ma ag ge e Cette fonction est désactivée ...

Страница 190: ... u sont prédéterminés en usine pour une obtenir qualité d image optimale et ne peuvent pas être modifiés L on peut aussi M Mo od de e i im ma ag ge e le menu I IM MA AG GE E C Cl la ai ir r Ce mode maximise l effet de la vidéo dans le magasin de détail Renforce le contraste l éclat la couleur et l acuité pour une image vive Ce mode permet d optimiser la réduction de la consommation élec trique san...

Страница 191: ...apteur intelligent Mode image Standard Contraste 90 Brillance 50 Nêtteté 60 Couleur 60 Teinte 0 Contraste 80 E E E E E E E E Entrée R G C Co on nt tr ra as st te e Accroit ou décroît le dégradédu signal vidéo Régler lorsque les portions vives de l image sont sat urées B Br ri il ll la an nc ce e Règle le niveau de base du signal vidéo dans l image Régler lorsque les portions sombres de l image son...

Страница 192: ... e a av va an nc cé é Sélectionnez les options désirées 1 MENU 3 2 ENTER ENTER 5 BACK Retourner au menu précédent Retourner à l affichage télé Effectuez les réglages appropriés 4 Enter Move IMAGE Entrée Déplacer IMAGE Contraste 90 Brillance 50 Nêtteté 60 Couleur 60 Teinte 0 Température couleur 0 Contrôle avancé Reset Écran RGB PC R G Contraste 90 Brillance 50 Nêtteté 60 Couleur 60 Teinte 0 Tempéra...

Страница 193: ...es réglages entre les mains d un professionnel vous assurera l ultime optimisation de performance visuelle d image pour le contexte ambiant oùle téléviseur est installé 7 BACK Retourner au menu précédent Retourner à l affichage télé Enter Move IMAGE E Allongement 16 9 Picture Wizard Economie dénergie Capteur intelligent Mode image Proficient1 Contraste 80 Brillance 50 H Nêtteté 50 V Nêtteté 50 Cou...

Страница 194: ...fficheunesurfacedecouleursnormale Étendue modeconçuàamplifierlarichessedescouleursàl écrandanslesendroits éclatants Optimisel utilisationdescouleursafind accroîtrelaqualitédescouleurs Reproduit les coins dans l image plus clairement et distinctivement tout en conservant une allure naturelle Convertitlapalettedecouleursd unsignalvidéodifférentauxcouleursHD Cettefonctionsertàréglerlescouleursàl écra...

Страница 195: ...tivée sous R Ré ég gl la ag ge e i in ni it ti ia al l R Ré és siid de en nt tiie elllle e Entrée Déplace OPTION Language Language Indentité source SIMPLINK Marche Touches verrouillées Arrêt Sous titres Arrêt Mode démo Arrêt Méthode ISM Normal ID du Téléviseur 1 Réglage initial Magasin Entrée Déplace OPTION Language Language Indentité source SIMPLINK Marche Touches verrouillées Arrêt Sous titres A...

Страница 196: ...ativement Il est dif ficile de voir l image suivante avec toutes les couleurs Une fois que ceci a été cor rigé il ne sera pas visible dans aucune couleur C Cé ér ru us sé é Pour enlever les images perma nentes à l écran Utiliser cette fonction modérément Regardez la télé comme à l habitude pen dant un certain temps avant d utiliser cette fonction pour vérifier si l image fantôme disparaît d ellemê...

Страница 197: ... automatiques pour chaque programme Sélectionnez A AU UD DI IO O Sélectionnez V Vo ol l n no or rm ma al li is sé é Sélectionnez M Ma ar rc ch he e ou A Ar rr rê êt t 1 MENU 3 2 ENTER ENTER 4 BACK Retourner au menu précédent Retourner à l affichage télé Entrée Déplace AUDIO Vol normalisé Arrêt Voix Claires II Arrêt 3 Équilibre 0 Mode audio Standard Infinte Sound Arrêt Aiguës 50 Basses 50 Remise Ha...

Страница 198: ...êt Aiguës 50 Basses 50 Remise Haut parleurs internes Marche Entrée Déplacer AUDIO Vol normalisé Arrêt Voix Claires II Arrêt 3 Équilibre 0 Mode audio Standard Infinte Sound Arrêt Aiguës 50 Basses 50 Remise Haut parleurs internes Marche L R Réglage du niveau voix claires II lors de la mise en marche Sélectionnez V Vo oi ix x c cl la ai ir re es s I II I 4 Effectuez les réglages appropriés 6 ENTER 7 ...

Страница 199: ...16 9 G G Clair Arrêt Français Arrêt Ajouter Éjection Allongement Mode image Mode audio Sous titres Multi audio Arrêt différé Sup Ajo Pré Éjection USB CH F F Standard G G 16 9 S St ta an nd da ar rd d M Mu us si ic c C Ci in ne em ma a S Sp po or rt t and G Ga am me e are preset for optimum sound quality at the factory L on peut aussi M Mo od de e a au ud di io o le menu A AU UD DI IO O S St ta an ...

Страница 200: ...r rt t ou J Je eu u 3ENTER ENTER Effectuez les réglages appropriés 5 ENTER 6 BACK Retourner au menu précédent Retourner à l affichage télé Entrée Déplacer AUDIO Vol normalisé Arrêt Voix Claires II Arrêt 3 Équilibre 0 Mode audio Standard Infinte Sound Arrêt Aiguës 50 Basses 50 Remise Haut parleurs internes Marche Entrée Déplacer AUDIO Vol normalisé Arrêt Voix Claires II Arrêt 3 Équilibre 0 Mode aud...

Страница 201: ...s sélectionnez Clear Voice II On Activation de la fonction Voix Claires II la fonctionnalité Infinite Sound ne pourra pas être activée Entrée Déplace AUDIO Vol normalisé Arrêt Voix Claires II Arrêt 3 Équilibre 0 Sound Mode Standard Infinte Sound Arrêt Aiguës 50 Basses 50 Remise Haut parleurs internes Marche Entrée Déplace AUDIO Vol normalisé Arrêt Voix Claires II Arrêt 3 Équilibre 0 Sound Mode Sta...

Страница 202: ...de la pièce 4 BACK Retourner au menu précédent Retourner à l affichage télé Entrée Déplacer AUDIO Vol normalisé Arrêt Voix Claires II Arrêt 3 Équilibre 0 Mode audio Standard Infinte Sound Arrêt Aiguës 50 Basses 50 Remise Haut parleurs internes Marche Entrée Déplacer AUDIO Vol normalisé Arrêt Voix Claires II Arrêt 3 Équilibre 0 Mode audio Standard Infinte Sound Arrêt Aiguës 50 Basses 50 Remise Haut...

Страница 203: ...DI IO O Sélectionnez H Ha au ut t p pa ar rl le eu ur rs s i in nt te er rn ne es s Sélectionnez M Ma ar rc ch he e ou A Ar rr rê êt t 1 MENU 3 2 ENTER ENTER 4 BACK Retourner au menu précédent Retourner à l affichage télé Entrée Déplacer AUDIO Vol normalisé Arrêt Voix Claires II Arrêt 3 Équilibre 0 Mode audio Standard Infinte Sound Arrêt Aiguës 50 Basses 50 Remise Haut parleurs internes Marche Ent...

Страница 204: ...églée 3 ENTER 4 Retourner à l affichage télé Entrée Déplacer AUDIO Vol normalisé Arrêt Voix Claires II Arrêt 3 Équilibre 0 Mode audio Standard Infinte Sound Arrêt Aiguës 50 Basses 50 Remise Haut parleurs internes Marche Entrée Déplacer AUDIO Vol normalisé Arrêt Voix Claires II Arrêt 3 Équilibre 0 Mode audio Standard Infinte Sound Arrêt Aiguës 50 Basses 50 Remise Haut parleurs internes Marche L R L...

Страница 205: ...si le signal n est émis qu en mode mono Sélectionnez S SA AP P Sélectionnez M Mo on no o S St te er re eo o ou S SA AP P Retourner à l affichage télé 1 Q MENU 3 2 Sélectionnez M Mu ul lt ti i a au ud di io o Sélectionner d autres langues Retourner à l affichage télé 1 Q MENU 3 2 Téléviseur analogique Téléviseur numérique F F English G G Q Menu Fermer F F 16 9 G G Clair Arrêt Arrêt Ajouter Éjection...

Страница 206: ...ACK Retourner au menu précédent Retourner à l affichage télé Entrée Déplacer OPTION Langage Language Indentité source SIMPLINK Marche Touches verrouillées Arrêt Sous titres Arrêt Mode démo Arrêt Méthode ISM Normal ID du Téléviseur 1 Réglage initial Résidentielle Entrée Déplacer OPTION Langage Language Indentité source SIMPLINK Marche Touches verrouillées Arrêt Sous titres Arrêt Mode démo Arrêt Mét...

Страница 207: ... au menu précédent Retourner à l affichage télé Entrée Déplace OPTION Langage Language Indentité source SIMPLINK Marche Touches verrouillées Arrêt Sous titres Arrêt Mode démo Arrêt Méthode ISM Normal ID du Téléviseur 1 Réglage initial Résidentielle Entrée Déplace OPTION Langage Language Indentité source SIMPLINK Marche Touches verrouillées Arrêt Sous titres Arrêt Mode démo Arrêt Méthode ISM Normal...

Страница 208: ... ENTER Sélectionnez C CC C1 1 4 4 ou T Te ex xt t1 1 4 4 4 Sous titres à système de diffusion analogique Lorsque A Ar rr rê êt t est sélectionné les sous menus des options Analog Analogique DTV et Numérique sont désactivés S So ou us s t ti it tr re es s Il s agit des mots qui défilent au bas de l écran habituellement la portion audio d un programme pour malentendants T Te ex xt te e Il s agit de ...

Страница 209: ... it tr re es s Sélectionnez M Ma ar rc ch he e 1 MENU 3 2 ENTER ENTER Sélectionnez S S T Ti it tr re e1 1 4 4 ou T Te ex xt te e1 1 4 4 4 5 BACK Retourner au menu précédent Retourner à l affichage télé Entrée Déplacer OPTION Langage Language Indentité source SIMPLINK Marche Touches verrouillées Arrêt Sous titres Arrêt Mode démo Arrêt Méthode ISM Normal ID du Téléviseur 1 Réglage initial Résidentie...

Страница 210: ...onne le type des mots C Co ou ul le eu ur r t te ex xt te e Pour choisir la couleur du texte O Op pa ac ci it té é t te ex xt te e Spécifier l opacité pour la couleur du texte C Co ou ul le eu ur r f fo on nd d Pour choisir la couleur du fond O Op pa ac ci it té é f fo on nd d Pour choisir l opacité du fond 7 BACK Retourner au menu précédent Retourner à l affichage télé Entrée Déplacer OPTION Lang...

Страница 211: ... ch he eu us se es s P Pa ac ci if fi iq qu ue e A Al la as sk ka a ou H Ha aw wa ai ii i Canada E Es st t C Ce en nt tr ra al le e R Ro oc ch he eu us se es s P Pa ac ci if fi iq qu ue e M Ma ar ri it ti im me e ou A At tl la an nt ti iq qu ue e 4 Sélectionnez A Au ut to o A Ar rr rê êt t ou M Ma ar rc ch he e si votre pays est soumis au passage à l heure d été 5 6 BACK Retourner au menu précéden...

Страница 212: ...ate heure et minutes 5 6 BACK Retourner au menu précédent Retourner à l affichage télé G G Si la télévision est débranchée ou est éteinte avec coupez l alimentation secteur la fonction du pendule est remise à zéro Entrée Déplacer HEURE Pendule Mise en arrêt Arrêt Mise en éveil Arrêt Arrêt différé Arrêt Entrée Déplacer HEURE Pendule Mise en arrêt Arrêt Mise en éveil Arrêt Arrêt différé Arrêt Année ...

Страница 213: ...ez H HE EU UR RE E Sélectionnez M Mi is se e e en n a ar rr rê êt t ou M Mi is se e e en n é év ve ei il l Sélectionnez R Ré ép pé ét te er r 1 MENU 3 2 ENTER ENTER Sélectionnez A Ar rr rê êt t U Un ne e f fo oi is s Q Qu uo ot ti id di ie en n L Lu un n V Ve en n L Lu un n S Sa am m W We ee ek k e en nd d ou D Di im ma an nc ch he e 4 Sélectionner et Régler H He eu ur re e ou M Mi in nu ut te e 5...

Страница 214: ...é é le menu H HE EU UR RE E Sélectionnez A Ar rr rê êt t d di if ff fé ér ré é 1 Q MENU 2 Sélectionnez A Ar rr rê êt t 1 10 0 2 20 0 3 30 0 6 60 0 9 90 0 1 12 20 0 1 18 80 0 ou 2 24 40 0 minutes 3 Retourner à l affichage télé Q Menu Fermer F F 16 9 G G Clair Arrêt Français Off Ajouter Éjection Allongement Mode image Mode audio Sous titres Multi audio Arrêt différé Sup Ajo Pré Éjection USB CH 16 9 ...

Страница 215: ...m MPAA seulement Classifications pour les programmes de télévision y compris les téléfilms TV G Tout public TV PG Avis Parental Souhaité TV 14 Avis Parental Exigé TV MA Adultes TV Y Pour enfants TV Y7 Interdit aux moins de 7 ans Configurez vos options de blocage pour bloquer certaines chaînes classifications et sources externes de lecture Un code d accès est exigé pour accéder à ce menu Réglage de...

Страница 216: ... ch he e le système de verrouillage est activé Sélectionnez V VÉ ÉR RR RO OU UI IL LL LÉ É 1 MENU ENTER Entrer le mot de passe 21 2 3 4 5 0 6 7 8 9 5 BACK Retourner au menu précédent Retourner à l affichage télé Entrée Déplacer VÉRROUILLÉ Verrouillage Arrêt Mot de Passe Bloquez Canal Films Enfants Général Téléchargeable Blocage Sources Entrée Déplacer VÉRROUILLÉ Verrouillage Arrêt Mot de Passe Blo...

Страница 217: ...ntrés res saisissez le mot de passe pour R Ré ép pé ét te er r 4 3 ENTER 1 2 3 4 5 0 6 7 8 9 Sélectionnez V VÉ ÉR RR RO OU UI IL LL LÉ É 1 MENU ENTER Entrer le mot de passe 21 2 3 4 5 0 6 7 8 9 5 BACK Retourner au menu précédent Retourner à l affichage télé Entrée Déplacer VÉRROUILLÉ Verrouillage Arrêt Mot de Passe Bloquez Canal Films Enfants Général Téléchargeable Blocage Sources Entrée Déplacer ...

Страница 218: ...aitez pas regarder ou celles que vous ne souhaitez pas que vos enfants regardent Sélectionnez V VÉ ÉR RR RO OU UI IL LL LÉ É 1 MENU ENTER Entrer le mot de passe 21 2 3 4 5 0 6 7 8 9 6 BACK Retourner au menu précédent Retourner à l affichage télé Entrée Déplacer VÉRROUILLÉ Verrouillage Arrêt Mot de Passe Bloquez Canal Films Enfants Général Téléchargeable Blocage Sources Changez canal Déplacer page ...

Страница 219: ... 1 17 7 X X ou B Bl lo oc c D Dé és sa ac ct ti iv vé é 4 3 ENTER G Audience Générale PG Conseil Parental Suggéré PG 13 Parents Fortement Avertis R Restreint NC 17 Restreint pour 17 ans et moins X Adulte Seulement Bloc Désactivé tout programme permis G G Si vous classez un programme dans la catégorie PG 13 Les films de caté gorie G et PG pourront être visionnés les films PG 13 R NC 17 et X seront ...

Страница 220: ...pplique pas aux autres émissions TV À moins que vous ne bloquiez expressément certaines émissions TV réservées à un public mature dans le sous menu TV Rating vos enfants pourront visionner ces pro grammes Sélectionnez V VÉ ÉR RR RO OU UI IL LL LÉ É 1 MENU ENTER Entrer le mot de passe 21 2 3 4 5 0 6 7 8 9 6 BACK Retourner au menu précédent Retourner à l affichage télé Entrée Déplacer VÉRROUILLÉ Ver...

Страница 221: ... TV G TV PG TV 14 TV MA Dialogue s applique à TV PG TV 14 Langage s applique à TV PG TV 14 TV MA Sexe s applique à TV PG TV 14 TV MA Violence s applique à TV PG TV 14 TV MA Sélectionnez V VÉ ÉR RR RO OU UI IL LL LÉ É 1 MENU ENTER Entrer le mot de passe 21 2 3 4 5 0 6 7 8 9 6 BACK Retourner au menu précédent Retourner à l affichage télé Entrée Déplacer VÉRROUILLÉ Verrouillage Arrêt Mot de Passe Blo...

Страница 222: ...arental souhaitable 14 Public de 14 ans et plus 18 Émissions pour adulte Bloc Désactivé Filtrage désactivé Sélectionnez V VÉ ÉR RR RO OU UI IL LL LÉ É 1 MENU ENTER Entrer le mot de passe 21 2 3 4 5 0 6 7 8 9 5 BACK Retourner au menu précédent Retourner à l affichage télé Entrée Déplacer VÉRROUILLÉ Verrouillage Arrêt Mot de Passe Bloquez Canal Anglais Francais Téléchargeable Blocage Sources Entrée ...

Страница 223: ...ient pas aux moins de 13 ans 16ans Ne convient pas aux moins de 16 ans 18ans Pour adultes seulement Bloc Désactivé Tout programme per mis Sélectionnez V VÉ ÉR RR RO OU UI IL LL LÉ É 1 MENU ENTER Entrer le mot de passe 21 2 3 4 5 0 6 7 8 9 5 BACK Retourner au menu précédent Retourner à l affichage télé Entrée Déplacer VÉRROUILLÉ Verrouillage Arrêt Mot de Passe Bloquez Canal Anglais Francais Télécha...

Страница 224: ...s options et bloquez la 5 ENTER Sélectionnez V VÉ ÉR RR RO OU UI IL LL LÉ É 1 MENU ENTER Entrer le mot de passe 21 2 3 4 5 0 6 7 8 9 6 BACK Retourner au menu précédent Retourner à l affichage télé En fonction du tableau de classification l affichage à l écran de votre télévision peut différer légèrement de ce qui est illustré dans ce guide Entrée Déplacer VÉRROUILLÉ Verrouillage Arrêt Mot de Passe...

Страница 225: ... Sélectionner une source 4 3 Sélectionnez M Ma ar rc ch he e ou A Ar rr rê êt t 5 ENTER Sélectionnez V VÉ ÉR RR RO OU UI IL LL LÉ É 1 MENU ENTER Entrer le mot de passe 21 2 3 4 5 0 6 7 8 9 6 BACK Retourner au menu précédent Retourner à l affichage télé Vidéo1 F F Arrêt G G Vidéo2 Arrêt Composante1 Arrêt HDMI1 Arrêt RGB PC Arrêt Composante2 Arrêt HDMI2 Arrêt HDMI3 Arrêt Fermer Entrée Déplacer VÉRRO...

Страница 226: ...verrouillage est activé si le téléviseur est éteint peser sur le bouton INPUT CH de l appareil ou les boutons POWER INPUT CH ou N Nu um mé ér ri iq qu ue es s de la télécommande Verrouillage en circuit l affichage Verrouillées figure à l écran si toute touche sauf alimentation sur le panneau avant est pressée 4 BACK Retourner au menu précédent Retourner à l affichage télé Entrée Déplacer OPTION La...

Страница 227: ... particulière Le câble d alimentation est il correctement inséré dans la prise murale Vérifiez la direction et la location de votre antenne Contrôlez la prise de courant branchez la prise de courant d un autre appareil dans la prise dans laquelle la prise du poste de TV était branchée C est normal l image est absente durant le processus de démarrage du produit Veuillez contactez votre SAV si l ima...

Страница 228: ...met un son inhabituel Aucun son en connec tant la prise HDMI USB Un haut parleur ne produit aucun son L Le e s so on n n ne e f fo on nc ct ti io on nn ne e p pa as s Appuyez sur les touches VOL ou VOLUME Son en sourdine Appuyez sur la touche MUTE Essayez avec une autre chaîne Le problème vient peut être de la réception d une chaîne particulière Les connexions audio sont elles correctes Ajustez la...

Страница 229: ... de produit assouplissant ou de détergent liquide pour vais selle sur le chiffon Tordez le chiffon jusqu à ce qu il soit presque sec et utilisez le pour essuyer l écran Ne laissez pas l eau s accumuler sur l écran Laissez sécher avant de mettre le téléviseur sous tension Nettoyage du boîtier Pour enlever la poussière ou les saletés essuyez le boîtier avec un chiffon doux non pelucheux Ne mouillez ...

Страница 230: ...0PK550 60PK550C 60PK550 UD 60PK550C UD 1 392 mm x 91 5 mm x 367 mm 54 8 pouces x 36 pouces x 1 4 4 pouces 1 392 mm x 852 mm x 55 3 mm 54 8 pouces x 33 5 pouces x 2 1 pouces 49 5 kg 1 09 1 livres 45 kg 99 2 livres 42PJ350 42PJ350C 42PJ350 UB 42PJ350C UB 988 mm x 688 5 mm x 260 mm 38 8 pouces x 27 1pouces x 1 0 2 pouces 988 mm x 61 7 8 mm x 55 3 mm 38 8 pouces x 24 3 pouces x 2 1pouces 2 1 6 kg 47 6...

Страница 231: ...988mmx62 1 8mmx55 3mm 38 8pouces x24 4pouces x2 1pouces 2 1 6kg 47 6livres 20kg 44 0livres 50PJ550 50PJ550 UD 1 1 71 4mmx786 2mmx309 7mm 46 1pouces x30 9pouces x1 2 1pouces 1 1 71 4mmx724 4mmx55 3mm 46 1pouces x28 5pouces x2 1pouces 30 kg 66 1 livres 27 6 kg 60 8 livres 42PJ250 42PJ250 UA 42PJ250 UB 988 mm x 688 5 mm x 260 mm 38 8 pouces x 27 1 pouces x 1 0 2 pouces 988 mm x 61 7 8 mm x 55 3 mm 38...

Страница 232: ...r Poids Support y compris Support non compris Support y compris Support non compris MODÈLES 50PK350 50PK350 UC 1 1 71 4 mm x 781 8 mm x 309 7 mm 46 1 pouces x 30 7 pouces x 1 2 1 pouces 1 1 71 4 mm x 720 9 mm x 55 3 mm 46 1 pouces x 28 3 pouces x 2 1 pouces 3 1kg 68 3livres 28 6kg 63 0livres 60PK280 60PK280 UA 1 392 mm x 91 0 mm x 367 mm 40 9 pouces x 28 5 pouces x 1 2 1 pouces 1 392 mm x 843 mm x...

Страница 233: ...3 C4 C5 C6 C7 C0 C1 C2 C3 C4 C5 C6 C7 D0 D1 D2 D3 D4 D5 D6 D7 D0 D1 D2 D3 D4 D5 D6 D7 Lead code Low custom code High custom code Data code Data code Repeat code Tf 4 5 ms 9 ms 2 25 ms 9 ms 0 55 ms 0 56 ms 1 12 ms 0 56 ms 2 24 ms Tf Tf Tf 108ms 455KHz Bit 0 Bit 1 1 Comment brancher Brancher la télécommande à fil sur la prise télécommande du TV 2 Code IR de la télécommande Sortie onde Impulsion simp...

Страница 234: ...arche arrêt 45 Q MENU Touche télécommande 43 MENU Touche télécommande 0B INPUT Touche télécommande 10 19 Numériques 0 9 Touche télécommande 4C Tiret List Touche télécommande 1A FLASHBK Touche télécommande 09 MUTE Touche télécommande 02 VOL Touche télécommande 03 VOL Touche télécommande 00 CH Touche télécommande 01 CH Touche télécommande 1E FAV Touche télécommande 40 Touche télécommande 41 Touche t...

Страница 235: ...instructions ci dessous sont fournies pour vous aider à programmer le logiciel ou pour en vérifier la fonc tionnalité à l aide du logiciel Telenet RGB PC ANTENNA IN 1 2 COMPONENT IN VIDEO AUDIO L R HDMII IN 2 1 RS 232C IN CONTROL SERVICE Type de connecteur D sub mâle à 9 broches No Pin Name 1 Aucune connexion 2 RXD donnée reçue 3 TXD donnée envoyée 4 DTR côté DTE prêt 5 GND 6 DSR côté DCE prêt 7 R...

Страница 236: ...Sélectionnez I ID D d du u T Té él lé év vi is se eu ur r Choisir le numéro désiré La gamme de réglage est de 1 à 99 1 MENU 3 2 ENTER ENTER 4 BACK Retourner au menu précédent Retourner à l affichage télé Enter Move OPTION Langage Language Indentité source SIMPLINK Marche Touches verrouillées Arrêt Sous titres Arrêt Mode démo Arrêt Méthode ISM Normal ID du Téléviseur 1 Réglage initial Résidentielle...

Страница 237: ... non viables ou erreurs de communication Donnée1 code illégal Donnée2 fonction non supportée Donnée3 attendre plus Dans ce modèle TV n enverra pas la statut en mode attente Format de donnés Commande 2 Utilisation comme commande ID du Téléviseur Utilisation le petite caractère si ID du Téléviseur est 10 il enverra 0 a Donnée Utilisation le petite caractère si donnée est 0 x ab il enverra a b NG Uti...

Страница 238: ... e k k e e Contrôle volume sourdine marche arrêt Utiliser aussi la touche MUTE sur la télécommande Transmission k e ID du Téléviseur Donnée Cr Donnée 00 Volume sourdine marche Volume arrêt Donnée 01 Volume sourdine arrêt Volume marche Confirmation e ID du Téléviseur OK NG Donnée x 0 06 6 V Vo ollu um me e C Co om mm ma an nd de e k k f f Règle le contrôle Utiliser aussi les touches volumes sur la ...

Страница 239: ...régler la température de couleur au menu image Transmission x u Set ID Data Cr Donnée Min 00 Max 64 Transmis par hexadécimal code Voir planification de donnée réelle G G p 1 1 6 Confirmation u ID du Téléviseur OK NG Donnée x 1 18 8 M Mé ét th ho od de e I IS SM M C Co om mm ma an nd de e jj p p Évite d avoir une image fixe à l écran Transmission j p ID du Téléviseur Donnée Cr Donnée 02 Orbiteur 04...

Страница 240: ...0 00 00 01 2 Syntoniser sur le canal local numérique ATSC 30 3 Donnée 0 Le physique est inconnu 00 Donnée 1 2 Le majeur est 30 00 1E Donnée 3 4 Le mineur est 3 00 03 Donnée 5 0010 0010 en binaire 22 Total ma 00 00 00 1E 00 03 22 Confirmation a ID du Téléviseur OK Donnée0 Donnée1 Donnée2 Donnée3 Donnée4 x a ID du Téléviseur NG Donnée0 x 2 22 2 A Ajjo ou ut t s su up pp pr re es ss siio on n c ca an...

Страница 241: ...areil qui figurent sur l étiquette au dos du moniteur Et inscrivez les sur le dessus ou au verso de ce manuel MODÈLE PUBLICATION PÉRIODIQUE GUIDE DE L UTILISATEUR TÉLÉ PLASMA Veuillez lire ce manuel attentivement avant d utiliser votre appareil et conservez le pour consultation ultérieure ...

Страница 242: ...Lea atentamente este manual antes de poner en marcha su equipo y guárdelo para futuras consultas 42PJ250 50PJ250 50PK250 60PK250 60PK280 60PK290 42PJ340 50PJ340 42PJ350 50PJ350 50PK350 50PK340 50PK540 60PK540 42PJ550 50PJ550 50PK550 60PK550 42PJ350C 50PJ350C 50PK550C 60PK550C ...

Страница 243: ... interferen cias dañinas y 2 este dispositivo debe aceptar cualquier interferencia recibida incluyendo aquellas generadas por el funcionamiento no deseado del dispositivo Cualquier cambio o modificación no aprobada expresa mente por la parte responsable por conformidad podría anular la potestad del usuario para usar el equipo PRECAUCIÓN No intente modificar este producto de ningún modo sin dispone...

Страница 244: ...lectricista para que realice el reemplazo de la toma obsoleta Proteja el cable de alimentación para que no lo pisen ni aplasten especialmente en las clavijas las tomas y el punto de salida del aparato Utilice únicamente acoplamientos y accesorios especificados por el fabricante Utilícelo sólo con el estante fijo o con ruedas trípode soporte o mesa especificados por el fabricante o con el accesorio...

Страница 245: ... pared y el punto por donde el cable sale del aparato No manipule la TV con el cable de ali mentación enchufado No utilice cables de ali mentación dañados o mal conectados Asegúrese de desenchufar el cable de ali mentación sujetando el enchufe No tire del cable de alimentación para desenchufar la TV ADVERTENCIA A fin de reducir el riesgo de incendio o choque eléctrico no exponga este aparato a la ...

Страница 246: ...rañazos superficiales No rocíe directamente agua vaporizada u otros líquidos sobre la TV para evitar posibles choques eléctricos No limpie la unidad con productos químicos como alcoholes disolventes o benceno T Tr ra an ns sp po or rt te e Asegúrese de que el producto esté apagado desenchufado y que todos los cables hayan sido desconectados Harán falta dos o más personas para transportar TVs de gr...

Страница 247: ...de los botones del control remoto 36 Encendido del TV 38 Ajuste del Canal 38 Ajuste del volumen 38 Configuración Inicial 39 Selección y ajuste del menú pantalla 40 Quick Menu menú rápido 42 Búsqueda de canales Escaneo automático Sintonización automática 43 Agregar Eliminar los Canales Sintonización Manual 44 Edición de Canal 45 Lista de Canales 46 Configuración de los canales favoritos 47 Lista de...

Страница 248: ... 88 Opciones del texto oculto 89 CONFIGURACIÓN HORARIA Programacion del reloj Configuración Auto del Reloj 90 Configuración Manual del Reloj 91 Ajustes de Encendido Apagado Automático del temporizador 92 Configuración del temporizador de apagado automático 93 CONTROL PATERNO CLASIFICACIONES Establecer contraseña y bloqueo del sistema 94 Bloqueo de canales 97 Clasificaciones de Películas y TV 98 Cl...

Страница 249: ...ión son marcas comerciales o registradas de HDMI Licensing LLC Esta característica no se encuentra disponible para todos los modelos Este televisor cuenta con las calibraciones concretas necesarias para la certificación profesional por parte de la Imaging Science Foundation El usuario podrá acceder a los modos día y noche ISF resultantes a fin de aprovechar al máximo todo lo que su HDTV de LG pued...

Страница 250: ... la conexión VGA cable D sub de 15 pins para la PC el usuario debe usar cables de interfaz de señal recubiertos cable D sub de 15 clavijas con núcleos de ferrita para mantener el cumplimiento estándar del producto x 2 EN ER GY CH VOL 1 2 3 4 5 0 6 7 8 9 LIS T FLAS HB K MA RK FR EE ZE SAVIN G TV AV MO DE INPU T FAV RATIO MENU IN FO Q M ENU EXIT ENTER MUTE BACK P A G E o x 3 M4x28 M5x14 Excepto 60PK...

Страница 251: ...ENTER Botón POWER Botón INPUT Botón MENU Botón ENTER Botones de VOLUMEN Indicador de Encendido Standby Se ilumina en rojo en el modo de espera El LED está apagado mientras el televisor permanece prendido Sensor Inteligente Ajusta la imagen según las condiciones del entorno Botones de CANAL Sensor de Control Remoto Puede encender el televisor con sólo pulsar el botón ligeramente con el dedo ...

Страница 252: ...TER Botones de VOLUMEN Indicador de Encendido Standby Se ilumina en rojo en el modo de espera El LED está apagado mientras el televisor permanece prendido Sensor Inteligente Ajusta la imagen según las condiciones del entorno Botones de CANAL Sensor de Control Remoto Puede encender el televisor con sólo pulsar el botón ligeramente con el dedo ...

Страница 253: ...dido 42 50PJ350 42 50PJ340 50PK340 50PK350 42 50PJ350C Sensor Inteligente Ajusta la imagen según las condiciones del entorno Botones de CANAL G No se apoye sobre el cristal ni lo someta a ningún impacto Si se rompe los fragmentos de cristal podrían provo car lesiones o el televisor podría caer G No arrastre el televisor El piso o el producto podría resultar dañado Sensor de Control Remoto Puede en...

Страница 254: ...n casa Nota En el modo de espera este puerto no funciona RS 232C IN CONTROL SERVICE PORT Utilizado por otros fabricantes AUDIO IN RGB Enchufe de auriculares 1 8 0 3 cm para la entrada de audio análoga de la PC RGB IN PC Conexión análoga a la PC Utilice un cable D sub de 15 pins cable VGA Puerto de Control Remoto Para un control remoto con cables COMPONENT IN Conexión análoga Compatible con HD Util...

Страница 255: ...nchufe de auriculares 1 8 0 3 cm para la entrada de audio análoga de la PC RGB IN PC Conexión análoga a la PC Utilice un cable D sub de 15 pins cable VGA Puerto de Control Remoto Para un control remoto con cables COMPONENT IN Conexión análoga Compatible con HD Utiliza un cable rojo verde y azul para video y uno rojo y blanco para audio AV Audio Video IN Conexión análoga compuesta Compatible solo c...

Страница 256: ...colchada que la proteja de posi bles daños Coloque las piezas del soporte sobre la base de apoyo del televisor 1 2 Monte la TV como se ilustra 3 Instalación Excepto 60PK250 60PK540 60PK550 60PK280 60PK290 60PK550C Ajuste firmemente los 4 pernos en los huecos de la parte posterior de la TV 4 Soporte de apoyo Base de apoyo M4x28 M5x14 x 3 x 4 ...

Страница 257: ...E P PR RO OT TE EC CC CI IÓ ÓN N incluida sobre el hueco dejado por este Inserte la C CU UB BI IE ER RT TA A D DE E P PR RO OT TE EC CC CI IÓ ÓN N en el televisor hasta que escuche un sonido de chasquido Cubierta de protección Separación Cubierta de protección Fijar una guía para los exteri ores M4x28 x 4 M4x30 x 5 60PK250 60PK540 60PK550 60PK280 60PK290 60PK550C 42 50PJ250 50PK250 42 50PJ340 42 5...

Страница 258: ...nectar los cables como resulte necesario instale el SUJETACABLES y una los cables como se mues tra Para conectar un equipo adicional vea la sección de CONEXIONES DE EQUIPO EXTERNO 1 SUJETACABLES La imagen puede ser diferente a la de su televisor ...

Страница 259: ...e a la de su televisor 10 1 cm 10 1 cm 10 1 cm 10 1 cm G G Asegure la ventilación adecuada dejando el espacio recomendado G G No instale la unidad próxima o sobre ninguna fuente de calor CUIDADO SOPORTE DEL ESLABON GIRATORIO Esta característica no se encuentra disponible para todos los modelos Despues de instalar la TV puede ajustar el TV manualmente 20 grados a la izquierda y derecha para satisfa...

Страница 260: ...instrucciones detallado y todas las piezas necesarias para la instalación G G No utilice tornillos más largos que los de dimensión estándar mostrados ya que podría dañar el interior de la TV G G Para montajes murales que no cumplan con las especificaciones para tornillos del estándar VESA la longitud de estos puede diferir dependiendo de sus especificaciones G G No utilice tornillos que no cumplan...

Страница 261: ...ntes de insertar estos últimos afloje los pernos Asegúrese de los soportes con los pernos De venta por separado en la pared que estén ajustados firmemente Para usar el producto seguramente asegúrese de que la altura de los soportes montados en la pared sea la misma que la del producto Asegúrese de que los pernos de ojo o soportes estén apretados en forma segura Use un cordón fuerte De venta por se...

Страница 262: ...o utilizada una antena para dos unidades use un divisor de señal para conectarse El cable y el convertidor de antena no son proporcionados con el producto R VARIABLE AUDIO OUT Para prevenir daños no conecte a la corriente hasta que estén instaladas todas las conexiones entre los dispositivos Enchufe de antena de la pared Antena de exterior VHF UHF Viviendas Apartamentos Conectar al enchufe de ante...

Страница 263: ...o om mp po on ne en nt te e1 1 en el televisor con el botón de I IN NP PU UT T en el control remoto Si está conectado a la entrada C CO OM MP PO ON NE EN NT T I IN N 2 2 selec cione la fuente de entrada del C Co om mp po on ne en nt te e2 2 en el televisor Para evitar daños en el equipo no enchufe ningún cable de alimentación hasta haber finalizado la conexión completa de todo el equipo La imagen ...

Страница 264: ...encia Frecuencia Horizontal kHz Vertical Hz 31 47 59 94 31 47 60 00 44 96 59 94 45 00 60 00 33 72 59 94 33 75 60 00 27 00 24 00 33 75 30 00 67 432 59 939 67 50 60 00 26 97 23 94 33 71 29 97 Resolución 720x480 progresivo 1280x720 progresivo 1920x1080 entrelazado 1920x1080 progresivo HDMI DVI IN 2 1 HDMI DTV OUTPUT RGB IN PC RS 232C IN CONTROL SERVICE OPTICAL DIGITAL AUDIO OUT AUDIO RGB DVI 1 G G Ve...

Страница 265: ...necesita una conexión de audio por separado NOTA Conecte la salida de DVI del decodificador digital al puerto de H HD DM MI I D DV VI I I IN N 1 1 2 2 o 3 3 en la unidad Conecte las salidas de audio del decodificador al puer to de A AU UD DI IO O I IN N R RG GB B D DV VI I en la unidad 1 Cómo conectar 2 Cómo usar Encienda el decodificador digital Refiérase al manual de usuario del decodificador di...

Страница 266: ... de los conectores Y Verde PB Azul PR Rojo Conecte las salidas de audio del DVD a los puertos de C CO OM MP PO ON NE EN NT T I IN N A AU UD DI IO O 1 1 en la unidad 1 Cómo conectar 2 Cómo usar Encienda el reproductor de DVD inserte un DVD Seleccione la fuente de entrada del C Co om mp po on ne en nt te e1 1 en el televisor con el botón de I IN NP PU UT T en el control remoto Si está conectado a la...

Страница 267: ... de audio por separado HDMI admite audio y video 1 How to connect 2 Cómo usar Seleccione la fuente de entrada del H HD DM MI I1 1 2 2 o 3 3 en el tele visor con el botón de I IN NP PU UT T en el control remoto Refiérase al manual de usuario del reproductor de DVD para seguir las instrucciones 2 1 HDMI DVI IN 2 1 RGB IN PC RS 232C IN CONTROL SERVICE OPTICAL DIGITAL AUDIO OUT AUD RGB D HDMI DVD OUTP...

Страница 268: ...VCR 2 1 Conexión compuesta RCA Conecte las salidas de A AU UD DI IO O V VI ID DE EO O entre la TV y el VCR Coincida los colores de salidas Video amarillo Audio izquierdo blanco Audio derecho rojo 1 Cómo conectar 2 Cómo usar Inserte una cinta de video en el VCR y presione el botón PLAY del VCR Vea el manual de usuario del VCR Seleccione la fuente de entrada del A AV V1 1 en el televisor con el botó...

Страница 269: ... V2 2 en el televisor con el botón de I IN NP PU UT T en el control remoto Si está conectado a la entrada A AV V I IN N 1 1 selec cione la fuente de entrada del A AV V1 1 en el televisor Opere el equipo externo correspondiente Refiérase a la guía de la operación de equipo externo 1 1 AV IN 2 L MONO R AUDIO VIDEO USB IN HDMI IN 3 1 i e Conecte el dispositivo USB a los conectores U US SB B I IN N En...

Страница 270: ...ión ACP protección anticopia de audio podrían bloquear la salida de audio digital PRECAUCIÓN Conecte una salida del cable O OP PT TI IC CA AL L al puerto de TV óptico de la D DI IG GI IT TA AL L A AU UD DI IO O O OU UT T Conecte otro extremo de cable óptico a la entrada de audio digital óptico en el equipo de audio Ajuste la Parlantes de TV Apagado en el menú AUDIO G G p p 8 82 2 Cuando se conecta...

Страница 271: ...mo usar Encienda la PC y la unidad Seleccione la fuente de entrada del R RG GB B P PC C en el televisor con el botón de I IN NP PU UT T en el control remoto Conecte la salida de VGA de la PC al puerto de R RG GB B I IN N P PC C en la unidad Conecte las salidas de audio de la PC al puerto de A AU UD DI IO O I IN N R RG GB B D DV VI I en la unidad 1 Cómo conectar 2 1 2 Cómo usar Encienda la PC y la ...

Страница 272: ...vite mantener una imagen fija en pantalla durante largos periodos de tiempo La imagen fija podría grabarse permanentemente en pantalla G G Las formas de la entrada de sincronización para la frecuencia horizontal y vertical están separadas G G Según la tarjeta de gráficos que posea algunas resoluciones podrían no posicionarse adecuada mente en la pantalla NOTAS Resolución de Despliegue RGB PC HDMI ...

Страница 273: ... añ ño o Seleccione I IM MA AG GE EN N Seleccione P Pa an nt ta al ll la a R RG GB B P PC C Seleccione R Re es so ol lu uc ci ió ón n Seleccione la resolución deseada 1024 x 768 1280 x 768 1360 x 768 Auto config Resolución G Posicion Tamaño Fase Restablecer Pantalla Mover Previo 1 MENU 3 4 2 ENTER ENTER ENTER 5 ENTER Ingresar Mover IMAGEN Contraste 90 Brillo 50 H Nitidez 60 V Nitidez 60 Color 60 T...

Страница 274: ... R RG GB B P PC C Seleccione A Au ut to o c co on nf fi ig g Auto config G Resolución Posicion Tamaño Fase Restablecer Pantalla Mover Para ajustar 3 2 ENTER ENTER Seleccione S Sí í 4 ENTER Iniciar la auto configuración 5 ENTER Seleccione I IM MA AG GE EN N MENU Si la posición de la imagen aún no es la adecuada intente auto ajustar nuevamente Si la imagen debe ajustarse nuevamente luego del auto aj...

Страница 275: ... Mover 3 ENTER 4 ENTER P Po os si ic ci io on n Esta función es para ajustar la imagen a la izquierda derecha y arriba abajo a su preferencia T Ta am ma añ ño o Esta función es para minimizar cualquier barra vertical o rayas visibles en el fondo de pantalla Y también cambiará el tamaño de pantalla F Fa as se e Esta función le deja remover cualquier ruido horizontal y hace clara o nitida la imagen ...

Страница 276: ...odo RGB PC Seleccione R Re es st ta ab bl le ec ce er r 3 ENTER Seleccione I IM MA AG GE EN N Seleccione P Pa an nt ta al ll la a R RG GB B P PC C 1 MENU 2 ENTER Seleccione S Sí í 4 ENTER 5 ENTER Auto config Posicion Resolución Tamaño Fase Restablecer G Pantalla Mover Inicializar Configuración Ingresar Mover IMAGEN Contraste 90 Brillo 50 H Nitidez 60 V Nitidez 60 Color 60 Tinte 0 Control de Expert...

Страница 277: ... y audio G G p p 5 51 1 Alterna entre las entradas También prende el televisor desde el modo de espera G G p p 4 49 9 Selecciona los modos de operación remoto TV Entra al número de canales multiples de programa como 2 1 2 2 etc Muestra la lista de canales Regresa al último canal visto Edición de programa FF Retroceso GG Avance rápido G Reproducción l ll l Pausa Controla los dispositivos compatible...

Страница 278: ...stra el menú principal o cierra todas las visualizaciones en pantalla y regresa al visionado del televisor Muestra información sobre el canal en la parte superior de la pantalla Abre la lista de opciones del menú rápido Permite al usuario desplazarse un paso hacia atrás en una aplicación interactiva o en otras fun ciones interactivas Muestra información del canal en la parte superior de la pantall...

Страница 279: ... me er ro os s 0 0 9 9 del control remoto Seleccione la fuente de visualización utilizando el botón I IN NP PU UT T en el control remoto Cuando deje de usar la TV presione el botón P PO OW WE ER R en el control remoto El televisor vuelve al modo apagado 1 2 Presione el botón C CH H o o de N NÚ ÚM ME ER RO O para seleccionar un número del canal 1 AJUSTE DEL VOLUMEN AJUSTE DEL CANAL Ajuste el volume...

Страница 280: ...stablecida en almacén después de 5 minutos También ud puede hacer la C Co on nf fi ig gu ur ra ac ci ió ón n I In ni ic ci ia al l con el menú O OP PC CI IÓ ÓN N Se ajustarán los valores predeterminados de fábrica al escoger U Us sa ar r e en n C Ca as sa a Si no completa los ajustes iniciales estos aparecerán cada vez que prenda el televisor hasta que complete dicho proceso Seleccione Usar en Cas...

Страница 281: ...over Reloj Hora de Apagado Apagado Hora de Encendido Apagado Hora del Apagador Apagado HORA Ingresar Mover Lista de fotos Lista de música USB Ingresar Mover TV AV1 AV2 Component1 Component2 RGB PC HDMI1 HDMI2 HDMI3 ENTRADAS Ingresar Mover Sist de Bloqueo Apagado Fijar Contraseña Bloquear Canales Clasif Películas Clasif Edad Clasif General Clasif Descargable Bloqueo de Entradas BLOQUEAR Sist de Blo...

Страница 282: ...Ingresar Mover Reloj Hora de Apagado Apagado Hora de Encendido Apagado Hora del Apagador Apagado HORA Ingresar Mover Sist de Bloqueo Apagado Fijar Contraseña Bloquear Canales Clasif Películas Clasif Edad Clasif General Clasif Descargable Bloqueo de Entradas BLOQUEAR Sintonización automática Sintonización manual Edición de Canales Ingresar Mover Lenguaje Language Etiqueta de entrada SIMPLINK Apagad...

Страница 283: ...na el formato de imagen que desee M Mo od do o d de e I Im ma ag ge en n Selects the factory preset picture depend on the viewing environment M Mo od do o d de e a au ud di io o Selecciona modos de sonido prede terminados de fábrica para los diferentes tipos de pro grama M Mu ul lt ti i A Au ud di io o Changes the audio language Digital signal S SA AP P Selects MTS sound Analog signal H Ho or ra a...

Страница 284: ...da en el menú de B BL LO OQ QU UE EA AR R para permitir una búsqueda de canal Al ajustar la S Si in nt to on ni iz za ac ci ió ón n a au ut to om má át ti i c ca a o m ma an nu ua al l el número máximo de canales que podrá guardar es de 900 Este está sujeto a cambios dependiendo de las condiciones de la señal de emisión Memoriza todos los canales disponibles en el orden siguiente DTV TV CADTV y CA...

Страница 285: ...aseña si el control parental ha sido activado menú de B BL LO OQ QU UE EA AR R Use la contraseña establecida en el menú de B BL LO OQ QU UE EA AR R para permitir una búsqueda de canal Al ajustar la S Si in nt to on ni iz za ac ci ió ón n a au ut to om má át ti i c ca a o m ma an nu ua al l el número máximo de canales que podrá guardar es de 900 Este está sujeto a cambios dependiendo de las condici...

Страница 286: ...a directamente su número mediante los botones NUMÉRICOS o escójalo en el menú Edición de canales Edición de canal Seleccione C CA AN NA AL L 1 MENU 2 ENTER Seleccione E Ed di ic ci ió ón n d de e C Ca an na al le es s Ingresar Mover CANAL Sintonización automática Sintonización manual Edición de Canales Cambio de Canal Mover página CH Mover Previo Agregar Borrar 5 BACK Regresar al menú anterior Reg...

Страница 287: ...a de canales 1 LIST Muestra la Lista de canales Escoja un canal 1 Cambie al número de canal escogido 2 ENTER Selección de un canal de la lista de canales Pase las páginas 1 CH P A G E Regresar a la pantalla del televisor 2 Paso de páginas de una lista de canales 2 1 3 1 4 1 Lista de canales BACK Salir Este candado se indica cuando el canal está blo queado mediante el con trol parental ...

Страница 288: ...efiera o 3 Seleccione F Fa av vo or ri it to o 4 Regresar a la pantalla del televisor Q Menú Cerrar Vivo Estándar Apagado Inglés Apagado Expulsar Relación de Aspecto Modo imagen Modo de audio Subtítulo Multi Audio Hora del Apagador Bor Agr Fav Expulsar USB CH F F Favorito G G 16 9 LISTA DE FAVORITOS Escoja un canal 1 Cambie al número de canal escogido 2 ENTER Selección de un canal de la lista de c...

Страница 289: ...S Su ub bt tí ít tu ul lo o El programa contiene subtítulos disponibles en uno o más idiomas Use el menú Q MENÚ para escoger los subtítulos que desee D Do ol lb by y D Di ig gi it ta al l El programa contiene una señal de audio Dolby Digital en la TV y en la fuente de entrada HDMI El formato de imagen original del video es 4 3 El formato de imagen original del video es 16 9 wide La resolución de v...

Страница 290: ...I1 1 Selecciónelo para ver en dispositivos de alta definición HDMI3 Cuando se encuentra conectado un dispositivo externo este menú emergente se visualiza automática mente Si selecciona S Sí í puede seleccionar la fuente de entrada que desee percibir Pero si selecciona S SI IM MP PL LI IN NK K E En nc ce en nd di id do o en modo HDMI este menú emergente podría no visu alizarse No Nuevo dispositivo ...

Страница 291: ...eleccione la etiqueta 1 2 3 BACK Regresar al menú anterior Regresar a la pantalla del televisor Usando el botón de INPUT Ingresar Mover OPCIÓN Lenguaje Language Etiqueta de entrada SIMPLINK Apagado Bloqueo de Teclas Apagado Subtítulo Apagado Modo Demo Apagado Método de ISM Normal ID del Televisor 1 Configuración Inicial Usar en Casa Ingresar Mover OPCIÓN Lenguaje Language Etiqueta de entrada SIMPL...

Страница 292: ...GEN Modo imagen y para el menú AUDIO Modo de audio respectivamente Si selecciona A Ap pa ag ga ad do o en modo AV el M Mo od do o i im ma ag ge en n y el M Mo od do o d de e a au ud di io o volverán a tener el valor selec cionado anteriormente A Ap pa ag ga ad do o Desactiva el MODO AV C Ci in ne e Optimiza video y audio para dis frutar películas D De ep po or rt te e Optimiza video y audio para d...

Страница 293: ...á el dispositivo SIMPLINK G G Al escoger un dispositivo que disponga de la función de cine en casa la salida de sonido cambiará automáticamente a los altoparlantes del sistema de cine en casa desactivándose los del televisor G G Si un sistema de home theater SIMPLINK no se reproduce en el audio del televisor conecte la terminal de SALIDA DE AUDIO DIGITAL a la parte posterior del televisor a la ter...

Страница 294: ...ne y reproduzca los discos Cuando existan varios discos disponibles los títulos de los discos aparecerán en la parte inferior de la pantalla R Re ep pr ro od du uc cc ci ió ón n d de e V VC CR R Reproduzca y controle el VCR conectado R Re ep pr ro od du uc cc ci ió ón n d de e g gr ra ab ba ac ci io on ne es s H HD DD D Reproduzca y controle las grabaciones almacenadas en HDD S Sa al li id da a d ...

Страница 295: ...o de alma cenamiento USB que requiera una fuente de energía externa De no ser así el dispositivo podría no ser reconocido G G Conecte un dispositivo de almacenamiento USB con un cable certificado Si se conecta con un cable no certificado o con un cable excesivamente largo el dispositivo podría no ser reconocido G G Algunos dispositivos de almacenamiento USB pueden no ser compatibles o no funcionar...

Страница 296: ...actual Total de pági nas Número total de fotos en miniatura marcadas Memoria USB utilizable Botones correspondientes en el control remoto Archivo de foto compatible JPG Solo puede ejecutar archivos JPG Solo el escaneo baseline es compatible con JPG Dispos USB Página 1 1 No marcado LISTA DE FOTOS Carpeta arriba Espacio Libre 150MB Mover Menú emergente Mover página Marcar 0 Carpeta 4 archs 3 4 5 1 1...

Страница 297: ...nguna foto se pueden ver todas las fotos en forma individual o todas las fotos en la carpeta como presentación Top Folder DriveA 4 Seleccione el menú emergente deseado ENTER ENTER ENTER Mover Mover página Marcar CH MARK Menú emergente Mover Mover página Marcar CH MARK Menú emergente DriveA DriveA Butterfly Up Folder Photo X Box 1366x768 125KB Ver Marcar todo Borrar Cerrar Cuando selecciona un arch...

Страница 298: ... Seleccione las fotos deseadas Visualice el menú emergente 5 Seleccione V Ve er r La foto seleccionada se visualiza en el modo de pantalla completa 2 3 1 4 ENTER ENTER ENTER Dispos USB Página 1 1 No marcado LISTA DE FOTOS Carpeta arriba Espacio Libre 150MB 0 Carpeta 4 archs Dispos USB Página 1 1 No marcado LISTA DE FOTOS Up Folder Espacio Libre 150MB 1366x768 125KB Top Folder DriveA DriveA DriveA ...

Страница 299: ...os en la carpeta actual se visualizan durante la presentación de diapositivas Defina el intervalo de tiempo de la presentación en O Op pc ci ió ón n G G B BG GM M Escuche música mientras ve las fotos en tamaño completo Defina el dispositivo BGM y álbum en O Op pc ci ió ón n G G G Gi ir ra ar r Girar fotos Gira la foto 90 180 270 360 en el sentido de las agujas del reloj G G B Bo or rr ra ar r Borr...

Страница 300: ...eleccione Visualización de fotos Establecer vídeo o Establecer audio 2 1 G G Al seleccionar Visualización de fotos No puede cambiar a la carpeta de música durante la reproducción de BGM Mostrar Veloc de presentación o Carpeta de música Realice los ajustes apropiados 2 1 Seleccionar opciones Visualización de fotos Establecer vídeo Establecer audio Salir Previo Q MENU ENTER ENTER ENTER ...

Страница 301: ...omático Voz clara II Balance Cine Apagado Apagado Previo G G Al seleccionar Establecer vídeo G G Al seleccionar Establecer audio Mostrar el Modo imagen Realice los ajustes apropiados 2 1 Mostrar Modo de audio Volumen automático Voz clara II y Balance Realizar los ajustes apropiados 2 1 Matiz 100 50 70 80 0 0 0 ENTER ENTER ENTER ENTER El modo APS no es compatible con la función Establecer vídeo ...

Страница 302: ...59 segun dos Se desplaza al archivo de nivel superior Previsualizar Mostrar el título nom bre de carpeta de la música en la carpeta seleccionada Página actual Total de páginas Número total de música en miniatura marcadas Memoria USB utilizable Botones correspondientes en el control remoto 1 3 4 5 2 Seleccione U US SB B Seleccione L LI IS ST TA A D DE E M MÚ ÚS SI IC CA A 1 2 MENU ENTER ENTER Dispo...

Страница 303: ...do Borrar Cerrar G G R Re ep pr ro od du uc ci ir r Druante la parada Reproduzca la músi ca seleccionada Durante la reproducción puede seleccionar un archivo diferente para reproducir y el archivo comenzará en forma automática Una vez que finalice la reproducción de una música comenzará a reproducirse la siguiente seleccionada Cuando ya no haya música seleccionada para reproducción se repro ducirá...

Страница 304: ...n E EN NT TE ER R A A R RE ET TU UR RN N M ME EN NÚ Ú M Me en nú ú r rá áp pi id do o A AT TR RÁ ÁS S S SA AL LI IR R o o A AH HO OR RR RO O D DE E E EN NE ER RG GÍ ÍA A para detener el protector de pantalla G G Este televisor no puede reproducir archivos de música de menos de 16 kbytes L R Establecer audio Modo de audio Volumen automático Voz clara II Balance Cine Apagado Apagado Salir Uso de la ...

Страница 305: ... 9 4 3 Q Menú Close F F 16 9 G G Vivo Estándar Apagado Inglés Apagado Borrar Expulsar Relación de Aspecto Modo imagen Modo de audio Subtítulo Multi Audio Hora del Apagador Bor Agr Fav Expulsar USB CH Seleccione R Re el la ac ci ió ón n d de e A As sp pe ec ct to o Seleccione el formato de imagen deseado 1 Q MENU 2 3 Regresar a la pantalla del televisor Por Programa Usted también puede presionar el...

Страница 306: ...DTV CADTV Component HDMI DTV DVI DTV 720progresivo 1080entrelazado 1080progresivo Por Programa Selecciona la proporción de imagen adecuada para que se corresponda con la imagen fuente 4 3 La selección siguiente le dejará ver una imagen con la proporción original de aspecto 4 3 Zoom Seleccione cuando desea ver la imagen sin ningu na alteración Sin embargo las porciones superi or e inferior de la im...

Страница 307: ...onfigure la pantalla superior siguiendo el ejemplo de abajo Siguiente Previo Bajo Alto Recomendado Contraste 90 E E E E Tinte Configure la pantalla superior siguiendo el ejemplo de abajo Siguiente Previo Bajo Alto Recomendado Tinte 0 E E E E R G Esta función le permitirá ajustar la calidad de imagen de la imagen original Úsela para calibrar la calidad en pantalla ajustando el nivel de negro y blan...

Страница 308: ... el ejemplo de abajo Siguiente Previo H Nitidez 50 E E E E Bajo Alto Recomendado Nitidez vertical Configure la pantalla superior siguiendo el ejemplo de abajo Siguiente Previo V Nitidez 50 E E E E Bajo Alto Recomendado DTV TV AV1 AV2 Component1 Component2 RGB HDMI1 HDMI2 HDMI3 Seleccionar una s entrada s para aplicar configuración Advertencia La calidad de la imagen puede variar dependien do de lo...

Страница 309: ...te 0 Ingresar Mover IMAGEN R G Relación de Aspecto 16 9 Asistente de imagen Ahorro de energía Sensor Inteligente Modo imagen Standard Contraste 90 Brillo 50 Nitidez 60 Color 60 Tinte 0 Este reduce el consumo eléctrico del televisor Puede incrementar el brillo de su pantalla ajustando el nivel A Ah ho or rr ro o d de e E En ne er rg gí ía a o M Mo od do o i im ma ag ge en n Esta característica se d...

Страница 310: ...fábrica para lograr la mejor calidad de imagen También ud puede hacer la M Mo od do o i im ma ag ge en n con el menú I IM MA AG GE EN N V Vi iv vo o Este es el modo para maximizar el efecto delvideoenelexpositordelatienda Intensifica elcontraste brillo colorylanitidezparaofrecer imágenes vivas Este modo maximiza o reduce el consumo de energía sin afectar a la cali dad de la imagen E Es st tá án nd...

Страница 311: ...ensor Inteligente Modo imagen Estándar Contraste 90 Brillo 50 Nitidez 60 Color 60 Tinte 0 Luz de Fondo 80 E E E E E E E E Ingresar R G C Co on nt tr ra as st te e Aumenta o disminuye el gradiente de la señal de video Podría usar el mando de contraste cuando las partes brillantes de la imagen queden saturadas B Br ri il ll lo o Aumenta o disminuye el nivel de negro en la señal de video Usted puede ...

Страница 312: ... nz za ad do o Seleccione sus opciones deseadas 1 MENU 3 2 ENTER ENTER 5 BACK Regresar al menú anterior Regresar a la pantalla del televisor Realice los ajustes adecuados 4 Ingresar Mover IMAGEN Ingresar Mover IMAGEN Contraste 90 Brillo 50 Nitidez 60 Color 60 Tinte 0 Temperatura de Color 0 Control Avanzado Restablecer Pantalla RGB PC R G Contraste 90 Brillo 50 Nitidez 60 Color 60 Tinte 0 Temperatu...

Страница 313: ...ofrece una calidad de imagen óptima para los usuarios 7 BACK Regresar al menú anterior Regresar a la pantalla del televisor Ingresar Mover IMAGEN E Relación de Aspecto 16 9 Asistente de imagen Ahorro de energía Sensor Inteligente Modo imagen Experto1 Contraste 90 Brillo 50 H Nitidez 60 V Nitidez 60 Color 50 R G Ingresar Mover IMAGEN Ahorro de energía Sensor Inteligente Modo imagen Experto1 Contras...

Страница 314: ...l área Amplio modo para usar y ajustar la zona de color rica de la pantalla Maximizar el uso del color para aumentar la calidad del color Esta función se activa en T Te em mp pe er ra at tu ur ra a d de e C Co ollo or r C Cá ál li id do o Mostrar las esquinas del video más claras y nítidas pero siempre naturales Convierte a color HD un video que posea color diferente Esta es la función para ajusta...

Страница 315: ... Esta característica se desactiva en C Co on nf fi ig gu ur ra ac ci ió ón n I In ni ic ci ia al l U Us sa ar r e en n C Ca as sa a Ingresar Mover OPCIÓN Lenguaje Language Etiqueta de entrada SIMPLINK Apagado Bloqueo de Teclas Apagado Subtítulo Apagado Modo Demo Apagado Método de ISM Normal ID del Televisor 1 Configuración Inicial Tienda Ingresar Mover OPCIÓN Lenguaje Language Etiqueta de entrada ...

Страница 316: ...a ligeramente y el patrón blanco Es difícil visualizar la imagen resultante en todos los colores Una vez corregido no será visible en ningún color B Bl la an nq qu ue ea ar r Es la función que remueve las imágenes permanentes de la pantalla Use moderadamente Mire el televisor normalmente durante un momento antes de utilizar esta función para ver si desa parece la imagen fantasma por sí sola Selecc...

Страница 317: ...automáticos para cada canal Seleccione A AU UD DI IO O Seleccione V Vo ol lu um me en n a au ut to om má át ti ic co o Seleccione E En nc ce en nd di id do o o A Ap pa ag ga ad do o 1 MENU 3 2 ENTER ENTER 4 BACK Regresar al menú anterior Regresar a la pantalla del televisor Ingresar Mover AUDIO Volumen automático Apagado Voz Clara II Encendido 3 Balance 0 Modo de audio Estándar Infinite Sound Apag...

Страница 318: ...ound Apagado Agudos 50 Bajos 50 Restablecer Parlantes de TV Encendido Ingresar Mover AUDIO Volumen automático Apagado Voz Clara II Encendido 3 Balance 0 Modo de audio Estándar Infinite Sound Apagado Agudos 50 Bajos 50 Restablecer Parlantes de TV Encendido L R Ajuste del nivel de la función Voz Clara II Con la selección Encendido Seleccione V Vo oz z C Cl la ar ra a I II I 4 Realice los ajustes ade...

Страница 319: ...o J Ju ue eg go o 3 Regresar a la pantalla del televisor Q Menú Cerrar F F 16 9 G G Vivio Apagado Inglés Apagado Borrar Expulsar Relación de Aspecto Modo imagen Modo de audio Subtítulo Multi Audio Hora del Apagador Bor Agr Fav Expulsar USB CH F F Estándar G G 16 9 Usted tambien puede ajustar el M Mo od do o d de e a au ud di io o en el A AU UD DI IO O E Es st tá án nd da ar r Ofrece sonido de cali...

Страница 320: ... ue eg go o 3ENTER ENTER Realice los ajustes adecuados 5 ENTER 6 BACK Regresar al menú anterior Regresar a la pantalla del televisor Ingresar Mover AUDIO Volumen automático Apagado Voz Clara II Encendido 3 Balance 0 Modo de audio Estándar Infinite Sound Apagado Agudos 50 Bajos 50 Restablecer Parlantes de TV Encendido Ingresar Mover AUDIO Volumen automático Apagado Voz Clara II Encendido 3 Balance ...

Страница 321: ...l televisor Si selecciona Clear Voice II On Voz clara II Activada la característica Infinite Sound no funcionará Ingresar Mover AUDIO Volumen automático Apagado Voz Clara II Encendido 3 Balance 0 Modo de audio Estándar Infinite Sound Apagado Agudos 50 Bajos 50 Restablecer Parlantes de TV Encendido Ingresar Mover AUDIO Volumen automático Apagado Voz Clara II Encendido 3 Balance 0 Modo de audio Está...

Страница 322: ...enú anterior Regresar a la pantalla del televisor Ingresar Mover AUDIO Volumen automático Apagado Voz Clara II Encendido 3 Balance 0 Modo de audio Estándar Infinite Sound Apagado Agudos 50 Bajos 50 Restablecer Parlantes de TV Encendido Ingresar Mover AUDIO Volumen automático Apagado Voz Clara II Encendido 3 Balance 0 Modo de audio Estándar Infinite Sound Apagado Agudos 50 Bajos 50 Restablecer Parl...

Страница 323: ...eleccione E En nc ce en nd di id do o o A Ap pa ag ga ad do o 1 MENU 3 2 ENTER ENTER 4 BACK Regresar al menú anterior Regresar a la pantalla del televisor Ingresar Mover AUDIO Volumen automático Apagado Voz Clara II Encendido 3 Balance 0 Modo de audio Estándar Infinite Sound Apagado Agudos 50 Bajos 50 Restablecer Parlantes de TV Encendido Ingresar Mover AUDIO Volumen automático Apagado Voz Clara I...

Страница 324: ...ado 3 ENTER 4 Regresar a la pantalla del televisor Ingresar Mover AUDIO Volumen automático Apagado Voz Clara II Encendido 3 Balance 0 Modo de audio Estándar Infinite Sound Apagado Agudos 50 Bajos 50 Restablecer Parlantes de TV Encendido Ingresar Mover AUDIO Volumen automático Apagado Voz Clara II Encendido 3 Balance 0 Modo de audio Estándar Infinite Sound Apagado Agudos 50 Bajos 50 Restablecer Par...

Страница 325: ...icamente si se transmite solo en mono Seleccione S SA AP P Seleccione M Mo on no o S St te er re eo o o S SA AP P Regresar a la pantalla del televisor 1 Q MENU 3 2 Seleccione M Mu ul lt ti i A Au ud di io o Seleccione otro idioma Regresar a la pantalla del televisor 1 Q MENU 3 2 Televisor análogo Televisor digital F F English G G Q Menú Cerrar F F 16 9 G G Vivio Apagado Apagado Borrar Expulsar Rel...

Страница 326: ...terior Regresar a la pantalla del televisor Ingresar Mover OPCIÓN Lenguaje Language Etiqueta de entrada SIMPLINK Apagado Bloqueo de Teclas Apagado Subtítulo Apagado Modo Demo Apagado Método de ISM Normal ID del Televisor 1 Configuración Inicial Usar en Casa Ingresar Mover OPCIÓN Lenguaje Language Etiqueta de entrada SIMPLINK Apagado Bloqueo de Teclas Apagado Subtítulo Apagado Modo Demo Apagado Mét...

Страница 327: ... menú anterior Regresar a la pantalla del televisor Ingresar Mover OPCIÓN Lenguaje Language Etiqueta de entrada SIMPLINK Apagado Bloqueo de Teclas Apagado Subtítulo Apagado Modo Demo Apagado Método de ISM Normal ID del Televisor 1 Configuración Inicial Usar en Casa Ingresar Mover OPCIÓN Lenguaje Language Etiqueta de entrada SIMPLINK Apagado Bloqueo de Teclas Apagado Subtítulo Apagado Modo Demo Apa...

Страница 328: ... de programas analógicos Al seleccionar A Ap pa ag ga ad do o se desactivan los submenús para Análogo DTV y Opción digital S SU UB BT TÍ ÍT TU UL LO O Término que se utiliza para las palabras que aparecen en la parte inferior de la pantalla de la televisión Se trata normal mente de las partes de audio del progra ma que se proporcionan para las per sonas con deficiencias auditivas T TE EX XT TO O T...

Страница 329: ...o o 1 MENU 3 2 ENTER ENTER Seleccione S Su ub bt tí ít t 1 1 4 4 T Te ex xt to o1 1 4 4 o S Se er rv vi ic ci io o1 1 6 6 4 5 BACK Regresar al menú anterior Regresar a la pantalla del televisor Ingresar Mover OPCIÓN Lenguaje Language Etiqueta de entrada SIMPLINK Apagado Bloqueo de Teclas Apagado Subtítulo Apagado Modo Demo Apagado Método de ISM Normal ID del Televisor 1 Configuración Inicial Usar ...

Страница 330: ... el l T Te ex xt to o Escoja un color para el texto P Pa al li id de ez z d de el l T Te ex xt to o Especifique la opacidad del color del texto C Co ol lo or r d de e F Fo on nd do o Seleccione un color de fondo P Pa al li id de ez z d de el l F Fo on nd do o Seleccione la opacidad del color de fondo 7 BACK Regresar al menú anterior Regresar a la pantalla del televisor Ingresar Mover OPCIÓN Lengua...

Страница 331: ... l M Mo on nt ta añ ña a P Pa ac cí íf fi ic co o A Al la as sk ka a o H Ha aw wa ai ii i Canadá E Es st te e C Ce en nt tr ra al l M Mo on nt ta añ ña a P Pa ac cí íf fi ic co o T Te er rr ra an no ov va a o A Al lt ta an nt ti ic co o 4 Seleccione A Au ut to om má át ti ic co o A Ap pa ag ga ad do o E En nc ce en nd di id do o dependiendo de si su región hace o no uso del Horario de verano 5 6 B...

Страница 332: ...ha la hora o el minuto 5 6 BACK Regresar al menú anterior Regresar a la pantalla del televisor Ingresar Mover HORA Reloj Hora de Apagado Apagado Hora de Encendido Apagado Hora del Apagador Apagado Ingresar Mover HORA Reloj Hora de Apagado Apagado Hora de Encendido Apagado Hora del Apagador Apagado Año Mes 2 Fecha 21 Hora 2 AM 2008 Minuto 10 Zona horaria Este Horario de Verano Automático Cerrar F F...

Страница 333: ...En nt tr ra ad da a Seleccione la fuente de entrada deseada Seleccione H HO OR RA A Seleccione H Ho or ra a d de e A Ap pa ag ga ad do o o H Ho or ra a d de e E En nc ce en nd di id do o Seleccione R Re ep pe et ti ir r 1 MENU 3 2 ENTER ENTER Seleccione A Ap pa ag ga ad do o U Un na a v ve ez z D Di ia ar ri ia am me en nt te e L Lu un n V Vi ie e L Lu un n S Sá áb b F Fi in n d de e s se em ma an...

Страница 334: ... a d de el l A Ap pa ag ga ad do or r con el menú H HO OR RA A Q Menú Cerrar F F 16 9 G G Vivio Apagado Inglés Off Borrar Expulsar Relación de Aspecto Modo imagen Modo de audio Subtítulo Multi Audio Hora del Apagador Bor Agr Fav Expulsar USB CH 16 9 F F Apagado G G Estándar Seleccione H Ho or ra a d de el l A Ap pa ag ga ad do or r 1 Q MENU 2 Seleccione A Ap pa ag ga ad do o 1 10 0 2 20 0 3 30 0 6...

Страница 335: ... las películas de salida directa de alquiler utilizan únicamente el sistema de clasificación de películas de la Asociación Americana de Películas MPAA Clasificación para los programas de televisión que incluye a las películas para televisión TV G Para todos los públicos TV PG Se sugiere la compañía paterna TV 14 Para mayores de 14 años Se recomienda la supervisión paterna TV MA Sólo público adulto...

Страница 336: ...one B BL LO OQ QU UE EA AR R 1 MENU ENTER Meter la contraseña 21 2 3 4 5 0 6 7 8 9 5 BACK Regresar al menú anterior Regresar a la pantalla del televisor Ingresar Mover BLOQUEAR Sist de Bloqueo Apagado Fijar Contraseña Bloquear Canales Clasif Películas Clasif Edad Clasif General Clasif Descargable Bloqueo de Entradas Ingresar Mover BLOQUEAR Sist de Bloqueo Encendido Fijar Contraseña Bloquear Canale...

Страница 337: ... ma ar r 4 3 ENTER 1 2 3 4 5 0 6 7 8 9 Seleccione B BL LO OQ QU UE EA AR R 1 MENU ENTER Meter la contraseña 21 2 3 4 5 0 6 7 8 9 5 BACK Regresar al menú anterior Regresar a la pantalla del televisor Ingresar Mover BLOQUEAR Sist de Bloqueo Apagado Fijar Contraseña Bloquear Canales Clasif Películas Clasif Edad Clasif General Clasif Descargable Bloqueo de Entradas Ingresar Mover BLOQUEAR Sist de Bloq...

Страница 338: ...isualizar o que no desea que sus hijos puedan ver Seleccione B BL LO OQ QU UE EA AR R 1 MENU ENTER Meter la contraseña 21 2 3 4 5 0 6 7 8 9 6 BACK Regresar al menú anterior Regresar a la pantalla del televisor Ingresar Mover BLOQUEAR Sist de Bloqueo Apagado Fijar Contraseña Bloquear Canales Clasif Películas Clasif Edad Clasif General Clasif Descargable Bloqueo de Entradas Bloq Desbloq Cambio de Ca...

Страница 339: ...s públicos PG Se sugiere la compañía paterna PG 13 Para mayores de 13 años Se recomienda la supervisión paterna R Restringido Sólo para mayores NC 17 No recomendado a menores de 17 años X Sólo para adultos Desbloqueado Permite todos los pro gramas G G Si selecciona PG 13 Estarán disponibles las películas G y PG mientras que se bloquearán las PG 13 R NC 17 y X Seleccione B BL LO OQ QU UE EA AR R 1 ...

Страница 340: ...A menos que bloquee ciertos programas de TV pensados para audiencias maduras en el menú secundario de clasificación de la TV sus hijos estarán expuestos a estos programas Seleccione B BL LO OQ QU UE EA AR R 1 MENU ENTER Meter la contraseña 21 2 3 4 5 0 6 7 8 9 6 BACK Regresar al menú anterior Regresar a la pantalla del televisor Ingresar Mover BLOQUEAR Sist de Bloqueo Apagado Fijar Contraseña Bloq...

Страница 341: ... aplica a TV PG y TV 14 Lenguaje lenguaje adulto se aplica a TV PG TV 14 y TV MA Sexo situaciones sexuales se aplica a TV PG TV 14 y TV MA Violencia se aplica a TV PG TV 14 TV MA Seleccione B BL LO OQ QU UE EA AR R 1 MENU ENTER Meter la contraseña 21 2 3 4 5 0 6 7 8 9 6 BACK Regresar al menú anterior Regresar a la pantalla del televisor Ingresar Mover BLOQUEAR Sist de Bloqueo Apagado Fijar Contras...

Страница 342: ...de 14 años 18 Programación para adultos Desbloqueado Permitidos todos los programas Seleccione B BL LO OQ QU UE EA AR R 1 MENU ENTER Meter la contraseña 21 2 3 4 5 0 6 7 8 9 5 BACK Regresar al menú anterior Regresar a la pantalla del televisor Ingresar Mover BLOQUEAR Sist de Bloqueo Apagado Fijar Contraseña Bloquear Canales Clasif Inglés Clasif Francés Clasif Descargable Bloqueo de Entradas Ingres...

Страница 343: ...para niños menores de 16 años 18ans Este programa es exclusiva mente para adultos Desbloqueado Permitidos todos los programas Seleccione B BL LO OQ QU UE EA AR R 1 MENU ENTER Meter la contraseña 21 2 3 4 5 0 6 7 8 9 5 BACK Regresar al menú anterior Regresar a la pantalla del televisor Ingresar Mover BLOQUEAR Sist de Bloqueo Apagado Fijar Contraseña Bloquear Canales Clasif Inglés Clasif Francés Cla...

Страница 344: ...eccione la opción de frecuencia de descarga deseada 4 3 ENTER Seleccione la opción deseada y bloquéela 5 ENTER Seleccione B BL LO OQ QU UE EA AR R 1 MENU ENTER Meter la contraseña 21 2 3 4 5 0 6 7 8 9 6 BACK Regresar al menú anterior Regresar a la pantalla del televisor Ingresar Mover BLOQUEAR Sist de Bloqueo Apagado Fijar Contraseña Bloquear Canales Clasif Películas Clasif Edad Clasif General Cla...

Страница 345: ...21 2 3 4 5 0 6 7 8 9 6 BACK Regresar al menú anterior Regresar a la pantalla del televisor Ingresar Mover BLOQUEAR Sist de Bloqueo Apagado Fijar Contraseña Bloquear Canales Clasif Películas Clasif Edad Clasif General Clasif Descargable Bloqueo de Entradas Ingresar Mover BLOQUEAR Sist de Bloqueo Apagado Fijar Contraseña Bloquear Canales Clasif Películas Clasif Edad Clasif General Clasif Descargable...

Страница 346: ...ón INPUT CH D D E E de la unidad o los botones de POWER INPUT CH o números del control remoto ConB Bl lo oq qu ue ea ad do o E En nc ce en nd di id do o seaparecerá B Bl lo oq qu ue eo o d de e T Te ec cl la as s en la pantalla si cualquier botón Excepto botón de prendido del panel frontal ha presiona do cuando mira la unidad 4 BACK Regresar al menú anterior Regresar a la pantalla del televisor In...

Страница 347: ...l cordón de alimentación dentro del tomacorriente de la pared Verifique la dirección y o la ubicación de su antena Pruebe el tomacorriente enchufe un cordón de alimentación de otro producto en el tomacorriente donde estaba enchufado el cordón de alimentación del producto Es normal la imagen es muda durante el proceso de inicio del producto Favor de contactar a su centro de servicio si la imagen no...

Страница 348: ...orrecta Imagen OK pero No sonido Sonido raro desde interior del producto No hay sonido al conectar tomas HDMI USB No salida de una de las bocinas E El l a au ud di io o n no o f fu un nc ci io on na a Presione el botón VOL o Volume Sonido mudo Presione el botón MUTE Intente otro canal El problema puede ser con la transmisión Están instalados apropiadamente los cables de audio Ajuste el Balance en ...

Страница 349: ...ibia con un poco de suavizante de ropa o detergente de platos Escurra la tela hasta que esté casi seca luego limpie la pantalla con ella Asegurese que no haya exceso de agua por la pantalla luego dejela secar por el aire antes de encender su TV Limpiando el gabinete Para remover la suciedad o polvo limpie el gabinete con una tela suave seca y sin pelusa Favor de asegurarse no usar una tela mojada ...

Страница 350: ... 91 5 mm x 367 mm 54 8 pulgadas x 36 pulgadas x 1 4 4 pulgadas 1 392 mm x 852 mm x 55 3 mm 54 8 pulgadas x 33 5 pulgadas x 2 1 pulgadas 49 5 kg 1 09 1 libras 45 kg 99 2 libras 42PJ350 42PJ350C 42PJ350 UB 42PJ350C UB 988 mm x 688 5 mm x 260 mm 38 8 pulgadas x 27 1pulgadas x 1 0 2 pulgadas 988 mm x 61 7 8 mm x 55 3 mm 38 8 pulgadas x 24 3 pulgadas x 2 1pulgadas 2 1 6 kg 47 6 libras 20 kg 44 libras 5...

Страница 351: ...lgadas x2 1pulgadas 2 1 6kg 47 6libras 20kg 44 0libras 50PJ550 50PJ550 UD 1 1 71 4mmx786 2mmx309 7mm 46 1pulgadas x30 9pulgadas x1 2 1pulgadas 1 1 71 4mmx724 4mmx55 3mm 46 1pulgadas x28 5pulgadas x2 1pulgadas 30 kg 66 1 libras 27 6 kg 60 8 libras 42PJ250 42PJ250 UA 42PJ250 UB 988 mm x 688 5 mm x 260 mm 38 8 pulgadas x 27 1 pulgadas x 1 0 2 pulgadas 988 mm x 61 7 8 mm x 55 3 mm 38 8 pulgadas x 24 3...

Страница 352: ... base excluyendo la base MODELOS 50PK350 50PK350 UC 1 1 71 4 mm x 781 8 mm x 309 7 mm 46 1 pulgadas x 30 7 pulgadas x 1 2 1 pulgadas 1 1 71 4 mm x 720 9 mm x 55 3 mm 46 1 pulgadas x 28 3 pulgadas x 2 1 pulgadas 3 1kg 68 3libras 28 6kg 63 0libras 60PK280 60PK280 UA 1 392 mm x 91 0 mm x 367 mm 40 9 pulgadas x 28 5 pulgadas x 1 2 1 pulgadas 1 392 mm x 843 mm x 55 3 mm 40 9 pulgadas x 26 3 pulgadas x ...

Страница 353: ... C2 C3 C4 C5 C6 C7 C0 C1 C2 C3 C4 C5 C6 C7 D0 D1 D2 D3 D4 D5 D6 D7 D0 D1 D2 D3 D4 D5 D6 D7 Lead code Low custom code High custom code Data code Data code Repeat code Tf 4 5 ms 9 ms 2 25 ms 9 ms 0 55 ms 0 56 ms 1 12 ms 0 56 ms 2 24 ms Tf Tf Tf 108ms 455KHz Bit 0 Bit 1 1 Cómo conectar Conecte su control remoto de cable al puerto de control remoto en la TV 2 Códigos de IR de Control Remoto Salida de ...

Страница 354: ...moto 43 MENU Botón control Remoto 0B INPUT Botón control Remoto 10 19 Teclas de números 0 9 Botón control Remoto 4C Guión List Botón control Remoto 1A FLASHBK Botón control Remoto 09 MUTE Botón control Remoto 02 VOL Botón control Remoto 03 VOL Botón control Remoto 00 CH Botón control Remoto 01 CH Botón control Remoto 1E FAV Botón control Remoto 40 Botón control Remoto 41 Botón control Remoto 07 Bo...

Страница 355: ...nuación se entregan para servir de ayuda con el software de progra mación o para probar la funcionalidad del uso de software telenet RGB PC ANTENNA IN 1 2 COMPONENT IN VIDEO AUDIO L R HDMII IN 2 1 RS 232C IN CONTROL SERVICE Tipo del Conector Macho D Sub 9 Pines No Nombre de Pin 1 No conexión 2 RXD Recepción de datos 3 TXD Transmisión de datos 4 DTR Lado DTE listo 5 GND 6 DSR Lado DCE listo 7 RTS L...

Страница 356: ...leccione el número deseado de ID del monitor Rango de ajuste de I ID D d de el l T Te el le ev vi is so or r 1 99 1 MENU 3 2 ENTER ENTER 4 BACK Regresar al menú anterior Regresar a la pantalla del televisor Ingresar Mover OPCIÓN Lenguaje Language Etiqueta de entrada SIMPLINK Apagado Bloqueo de Teclas Apagado Subtítulo Apagado Modo Demo Apagado Método de ISM Normal ID del Televisor 1 Configuración ...

Страница 357: ...decimal 1 99 en el menú en Hexadecimal 0x0 0x63 en la transmisión recibiendo el pro tocolo DATO Para transmitir los datos de comando Transmite el dato FF a leer estados de comando Cr Retorno Código ASCII como 0x0D Código ASCII como espacio 0x20 En este modelo el televisor no enviará el estado durante el modo apagado R Re ec co on no oc ci im mi ie en nt to o d de e O OK K La TV transmite ACK recon...

Страница 358: ...olar el encendido apagado del silenciador de volumen También puede ajustar el silenciador utilizando el botón MUTE en el control remoto Transmisión k e ID del Televisor Dato Cr Dato 00 Encendido del silenciador de volumen Sin volumen Dato 01 Apagado del silenciador de volumen Con volumen Reconocimiento e ID del Televisor OK NG Dato x 0 06 6 C Co on nt tr ro oll d de e v vo ollu um me en n C Co om ...

Страница 359: ...mperatura de color en el Menú Imagen Transmisión x u ID del Televisor Dato Cr Dato Min 00 Max 64 transmitir por código hexadecimal Véase Mapeo de datos reales G G p 1 1 6 Reconocimiento u ID del Televisor OK NG Dato x 1 18 8 M Mé ét to od do o d de e I IS SM M C Co om ma an nd do o jj p p Para evitar tener una imagen fija permanente en pantalla Transmisión j p ID del Televisor Dato Cr Dato 02 Orbi...

Страница 360: ...l ATSC 30 3 Dato 00 No se conoce el Físico 00 Dato 01 02 Mayor es 30 00 1E Dato 03 04 Menor es 3 00 03 Dato 05 0010 0010 en binario 22 Total ma 00 00 00 1E 00 03 22 Reconocimiento a ID del Televisor OK Dato00 Dato01 Dato02 Dato03 Dato04 x a ID del Televisor NG Dato00 x 2 22 2 A Ag gr r E Ellii d de e c ca an na all C Co om ma an nd do o m m b b Para agregar y eliminar canales Transmisión m b ID de...

Страница 361: ...quipo y guárdelo para futuras consultas P NO SAC34173302 0912 REV00 www lge com El número de modelo y serie del televisor se encuentra en la parte posterior y en un lateral del televisor respectivamente Anótelo a continuación para tenerlo disponible en caso de necesitar asistencia MODELO SERIE ...

Отзывы: