


128
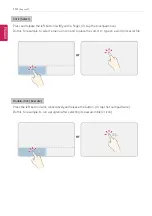
Using the PC
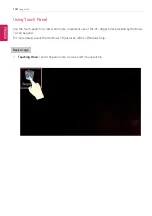
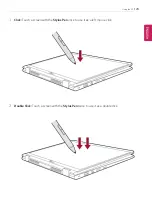
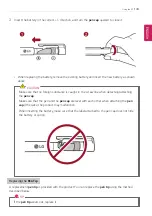
Using
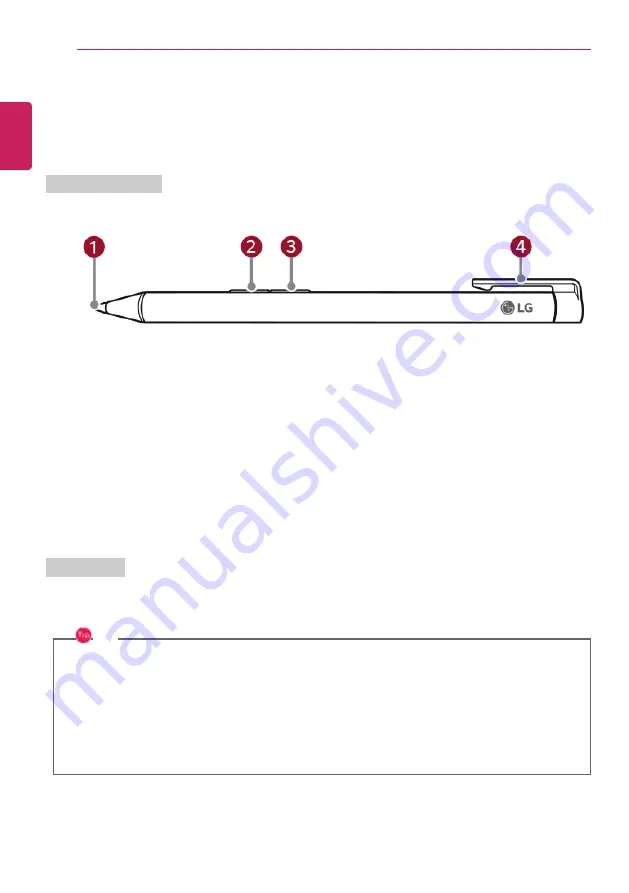
Stylus Pen
If you use a
Stylus Pen
for 14T90N model, you can perform more precise touch control than when
using fingers.
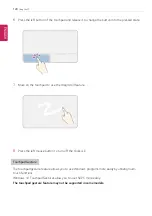
Name of Each Part
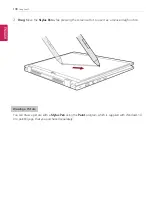
1
Pen tip
•
Performs the same function as a mouse cursor.
2
Left mouse button
•
Use to select or execute programs.
3
Right mouse button
•
Performs the same function as a right mouse button.
4
Pen cap
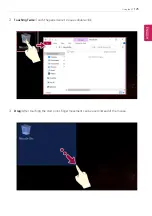
How to Use
The buttons on the
Stylus Pen
operate similarly to the mouse buttons and may function differently
depending on programs.
TIP
Applying excessive force when using the
Stylus Pen
may cause a failure of the pen or the
pen
tip
.
The
Stylus Pen
automatically enters the sleep mode if the pen is not used for more than 10
minutes or the
pen tip
is pressed for more than 4 minutes.
To leave the standby mode, simply touch the screen with the
Stylus Pen
or click the left or right
button on the pen.
ENGLISH
Содержание 14T90N Series
Страница 1: ...LG EASY GUIDE NOTEBOOK 14T90N Series www lg com Copyright 2020 LG Electronics Inc All rights reserved ...
Страница 20: ...20 Introduction Important Safety Precautions Regulatory Notices ENGLISH ...
Страница 21: ...Introduction Important Safety Precautions 21 ENGLISH ...
Страница 22: ...22 Introduction Important Safety Precautions ENGLISH ...
Страница 23: ...Introduction Important Safety Precautions 23 ENGLISH ...
Страница 24: ...24 Introduction Important Safety Precautions ENGLISH ...
Страница 25: ...Introduction Important Safety Precautions 25 ENGLISH ...
Страница 26: ...26 Introduction Important Safety Precautions ENGLISH ...
Страница 27: ...Introduction Important Safety Precautions 27 ENGLISH ...
Страница 28: ...28 Introduction Important Safety Precautions ENGLISH ...
Страница 29: ...Introduction Important Safety Precautions 29 ENGLISH ...
Страница 30: ...30 Introduction Important Safety Precautions ENGLISH ...
Страница 31: ...Introduction Important Safety Precautions 31 ENGLISH ...
Страница 32: ...32 Introduction Important Safety Precautions ENGLISH ...
Страница 33: ...Introduction Important Safety Precautions 33 ENGLISH ...
Страница 34: ...34 Introduction Important Safety Precautions ENGLISH ...
Страница 35: ...Introduction Important Safety Precautions 35 ENGLISH ...
Страница 36: ...36 Introduction Important Safety Precautions ENGLISH ...
Страница 37: ...Introduction Important Safety Precautions 37 ENGLISH ...
Страница 38: ...38 Introduction Important Safety Precautions ENGLISH ...
Страница 39: ...Introduction Important Safety Precautions 39 ENGLISH ...
Страница 40: ...40 Introduction Important Safety Precautions ENGLISH ...
Страница 41: ...Introduction Important Safety Precautions 41 ENGLISH ...
Страница 42: ...42 Introduction Important Safety Precautions ENGLISH ...
Страница 43: ...Introduction Important Safety Precautions 43 ENGLISH ...
Страница 44: ...44 Introduction Important Safety Precautions ENGLISH ...
Страница 45: ...Introduction Important Safety Precautions 45 ENGLISH ...
Страница 46: ...46 Introduction Important Safety Precautions ENGLISH ...
Страница 47: ...Introduction Important Safety Precautions 47 ENGLISH ...
Страница 48: ...48 Introduction Important Safety Precautions ENGLISH ...
Страница 49: ...Introduction Important Safety Precautions 49 ENGLISH ...
Страница 50: ...50 Introduction Important Safety Precautions ENGLISH ...
Страница 51: ...Introduction Important Safety Precautions 51 ENGLISH ...
Страница 52: ...52 Introduction Important Safety Precautions ENGLISH ...
Страница 53: ...Introduction Important Safety Precautions 53 ENGLISH ...
Страница 54: ...54 Introduction Important Safety Precautions ENGLISH ...
Страница 55: ...Introduction Important Safety Precautions 55 ENGLISH ...
Страница 72: ...72 Using Windows 10 3 Click the New Desktop tile 4 Desktop 1 and Desktop 2 are created ENGLISH ...
Страница 89: ...Using Windows 10 89 3 To change the detailed settings of the PC press the All Settings tile ENGLISH ...
Страница 104: ...104 Using the PC 3 Go to Keyboard Backlight and select your desired options ENGLISH ...
Страница 109: ...Using the PC 109 2 The on screen picture turns to a headphone icon when you connect a headphone or earphones ENGLISH ...
Страница 111: ...Using the PC 111 TIP A warning message will be displayed if the volume is high while this feature is on ENGLISH ...
Страница 118: ...118 Using the PC 2 When the Settings screen appears select Devices 3 Select Mouse Additional Mouse Options ENGLISH ...
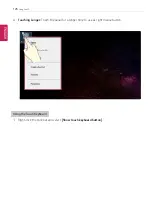
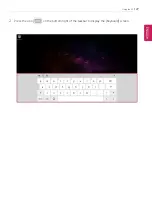
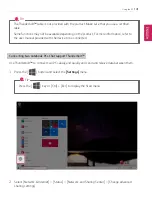
Страница 127: ...Using the PC 127 2 Press the icon on the bottom right of the taskbar to display the Keyboard screen ENGLISH ...
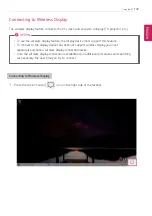
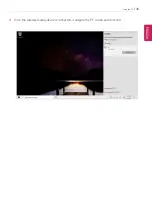
Страница 139: ...Using the PC 139 4 Once the wireless display device is connected it outputs the PC screen and its sound ENGLISH ...
Страница 149: ...Using the PC 149 2 When the Settings screen appears select Devices ENGLISH ...
Страница 151: ...Using the PC 151 4 Select a device to connect to 5 Complete the Bluetooth connection as directed ENGLISH ...
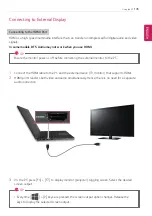
Страница 153: ...Using the PC 153 2 Connect the wired LAN cable to the LAN port ENGLISH ...
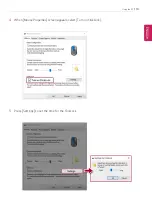
Страница 155: ...Using the PC 155 4 Select Network Internet Status Change adapter options ENGLISH ...
Страница 156: ...156 Using the PC 5 Right click Ethernet and select the Properties menu ENGLISH ...
Страница 157: ...Using the PC 157 6 Select Internet Protocol Version 4 TCP IPv4 and then click Properties ENGLISH ...
Страница 161: ...Using the PC 161 3 Select the Access Point you want to connect to and press Connect ENGLISH ...
Страница 175: ...Using Software 175 1 Select the All List Update needed menu item ENGLISH ...
Страница 177: ...Using Software 177 1 Select the Notification Setting menu 2 Set Auto Update Search to ON or OFF ENGLISH ...
Страница 180: ...180 Using Software 1 Press the icon on the taskbar ENGLISH ...
Страница 192: ...192 Restoring the System 1 Select Keep my files ENGLISH ...
Страница 195: ...Restoring the System 195 1 Select Remove everything ENGLISH ...
Страница 201: ...Setup and Upgrade 201 1 Reboot the system and press F2 2 In a few moments the system setup screen appears ENGLISH ...
Страница 221: ...Setup and Upgrade 221 2 Select System Display ENGLISH ...
Страница 226: ...226 FAQ 2 Select System Display ENGLISH ...
Страница 231: ...FAQ 231 1 Select Keep my files ENGLISH ...
Страница 234: ...234 FAQ 1 Select Remove everything ENGLISH ...
Страница 242: ...242 FAQ 3 Select the Access Point you want to connect to and press Connect ENGLISH ...