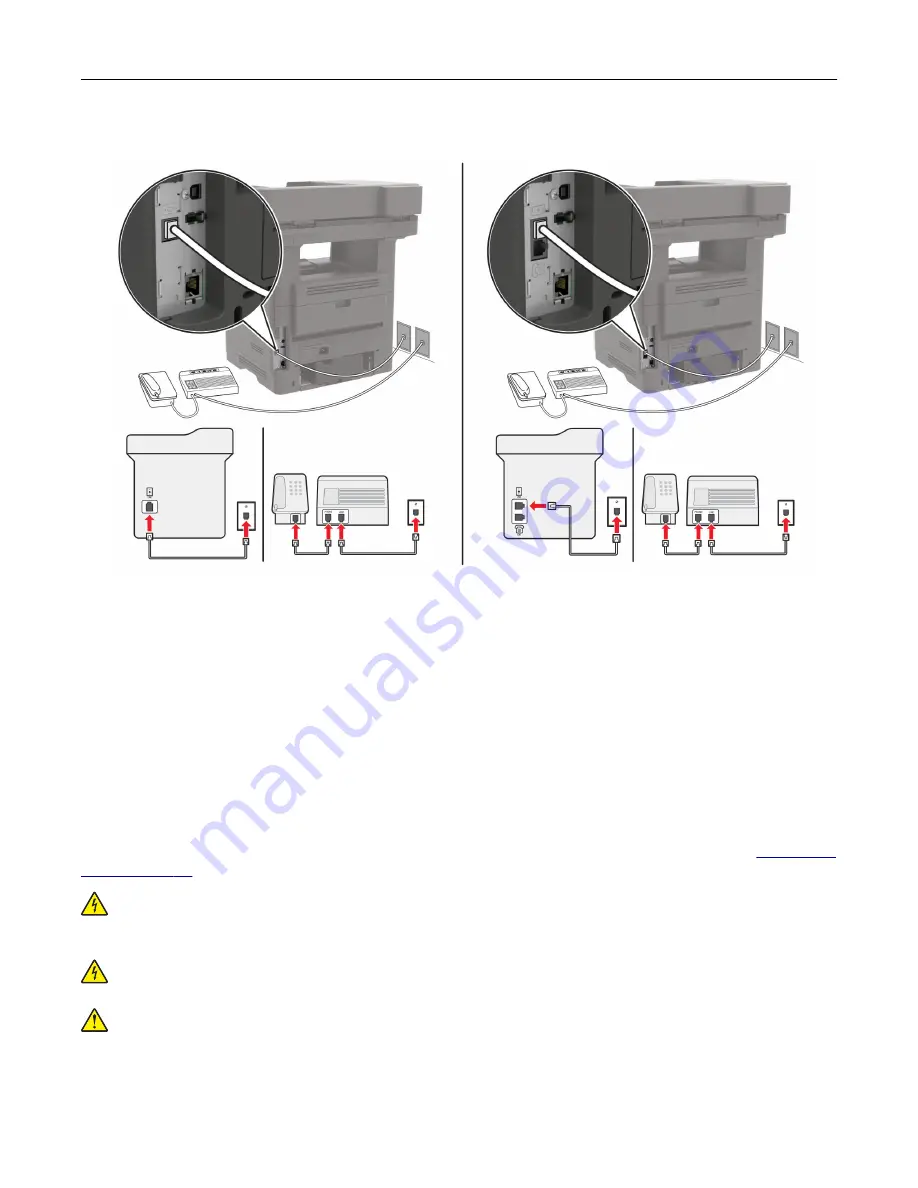
Connected to different wall jacks
1
Connect one end of the telephone cable to the line port of the printer.
2
Connect the other end of the cable to an active analog wall jack.
Notes:
•
If you have only one telephone number on your line, then set the printer to receive faxes automatically.
•
Set the printer to pick up calls two rings after the answering machine. For example, if the answering
machine picks up calls after four rings, then set the printer Rings to Answer setting to
6
.
Setting up fax in countries or regions with different telephone wall jacks
and plugs
Note:
These instructions apply only to printers that support analog fax. For more information, see
.
CAUTION—SHOCK HAZARD:
To avoid the risk of electrical shock, do not set up this product or make
any electrical or cabling connections, such as the power cord, fax feature, or telephone, during a
lightning storm.
CAUTION—SHOCK HAZARD:
To avoid the risk of electrical shock, do not use the fax feature during a
lightning storm.
CAUTION—POTENTIAL INJURY:
To reduce the risk of fire, use only a 26 AWG or larger
telecommunications (RJ-11) cord when connecting this product to the public switched telephone
network. For users in Australia, the cord must be approved by the Australian Communications and Media
Authority.
Faxing
61
Содержание XM3250
Страница 160: ... ADF glass pad Scanner glass Scanner glass pad 3 Close the scanner cover Maintaining the printer 160 ...
Страница 170: ...7 Close door A Replacing the staple cartridge 1 Open the stapler access door Maintaining the printer 170 ...
Страница 171: ...2 Remove the staple cartridge 3 Remove the spare staple cartridge Maintaining the printer 171 ...
Страница 173: ...4 Remove the used pick tires one after the other 5 Unpack the new pick tires Maintaining the printer 173 ...
Страница 175: ...Maintaining the printer 175 ...
Страница 177: ...7 Insert the new pick roller assembly 8 Flip the tray base and then insert the tray insert Maintaining the printer 177 ...
Страница 189: ...6 Insert the imaging unit Note Use the arrows inside the printer as guides Clearing jams 189 ...
Страница 198: ...4 Close the staple guard 5 Insert the staple cartridge holder 6 Close the staple access door Clearing jams 198 ...
Страница 262: ...b Connect the ISP extended cable to the ISP connector Upgrading and migrating 262 ...
Страница 263: ...c Install the hard disk Upgrading and migrating 263 ...


