


Setting
Value
Device Password
App password
Note:
To create an app password, go to the
page, log
in to your account, and then click
Generate app password
.
Comcast Mail
Setting
Value
Primary SMTP Gateway
smtp.comcast.net
Primary SMTP Gateway Port
587
Use SSL/TLS
Required
Require Trusted Certificate
Disabled
Reply Address
Your e
‑
mail address
SMTP Server Authentication
Login / Plain
Device
‑
Initiated E
‑
Use Device SMTP Credentials
Device UserID
Your e
‑
mail address
Device Password
Account password
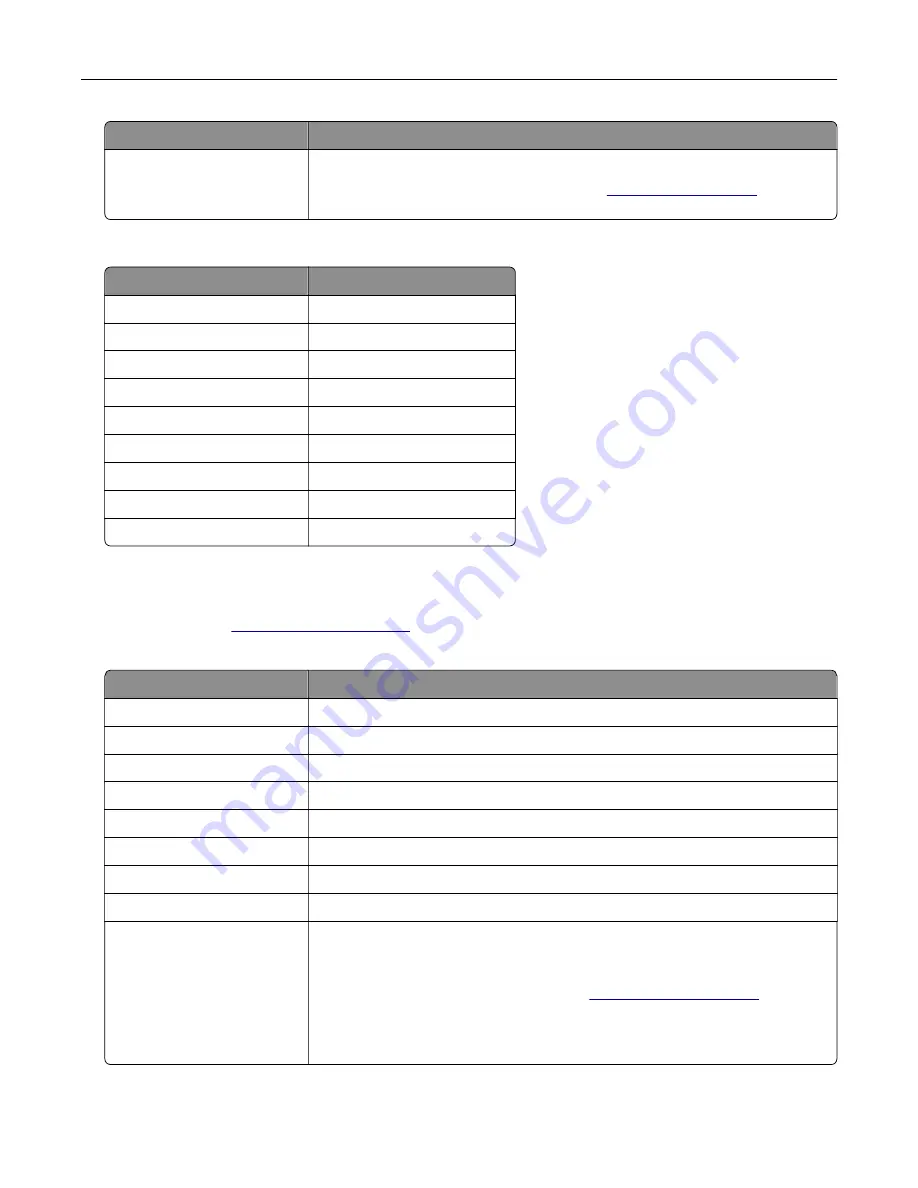
Gmail
TM
Note:
Make sure that two
‑
step verification is enabled on your Google account. To enable two
‑
step
verification, go to the
page, log in to your account, and then from the “Signing in to
Google” section, click
2
‑
Step Verification
.
Setting
Value
Primary SMTP Gateway
smtp.gmail.com
Primary SMTP Gateway Port
587
Use SSL/TLS
Required
Require Trusted Certificate
Disabled
Reply Address
Your e
‑
mail address
SMTP Server Authentication
Login / Plain
Device
‑
Initiated E
‑
Use Device SMTP Credentials
Device UserID
Your e
‑
mail address
Device Password
App password
Notes:
•
To create an app password, go to the
in to your account, and then from the “Signing in to Google” section, click
App passwords
.
•
“App passwords” shows only if two
‑
step verification is enabled.
E-mailing
53
Содержание XC2235
Страница 16: ...2 Locate the serial number at the left side of the printer Learning about the printer 16 ...
Страница 60: ...3 From the Shortcut Type menu select E mail and then configure the settings 4 Apply the changes E mailing 60 ...
Страница 181: ...2 Remove the used toner cartridge 3 Unpack the new toner cartridge Maintaining the printer 181 ...
Страница 185: ...6 Insert the new waste toner bottle 7 Insert the right side cover Maintaining the printer 185 ...
Страница 188: ...4 Remove the waste toner bottle 5 Remove the toner cartridges Maintaining the printer 188 ...
Страница 191: ...9 Insert the imaging kit until it is fully seated 10 Insert the toner cartridges Maintaining the printer 191 ...
Страница 192: ...11 Insert the waste toner bottle 12 Insert the right side cover Maintaining the printer 192 ...
Страница 199: ...2 Remove the jammed paper Note Make sure that all paper fragments are removed Clearing jams 199 ...
Страница 203: ...2 Remove the jammed paper Note Make sure that all paper fragments are removed 3 Close door A Clearing jams 203 ...
Страница 207: ...4 Close doors A and B Clearing jams 207 ...
Страница 263: ...Upgrading and migrating 263 ...


