background image

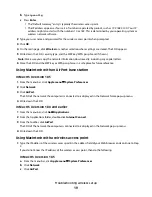
c

Press 

Enter

.

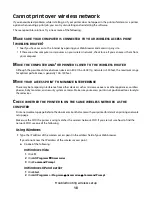
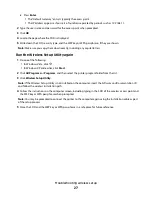
The “Default Gateway” entry is typically the access point.

The IP address appears as four sets of numbers separated by periods, such as 192.168.1.1.

2

Type the user name and password for the access point when prompted.

3

Click 

OK

.

4

Locate the page where the SSID is displayed.

5

Write down the SSID, security type, and the WEP key or WPA passphrase, if they are shown.

Note: 

Make sure you copy them down exactly, including any capital letters.

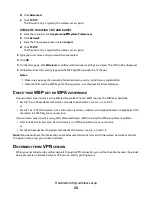
Run the Wireless Setup Utility again

1

Do one of the following:

In Windows Vista, click 

.

In Windows XP and earlier, click 

Start

.

2

Click 

All Programs

 or 

Programs

, and then select the printer program folder from the list.

3

Click 

Wireless Setup Utility

.

Note: 

If the Wireless Setup Utility is not installed on the computer, insert the 

Software and Documentation CD

and follow the wireless installation path.

4

Follow the instructions on the computer screen, including typing in the SSID of the wireless access point and
the WEP key or WPA passphrase when prompted.

Note: 

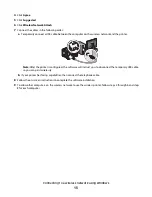
You may be prompted to connect the printer to the computer again using the installation cable as part

of the setup process.

5

Store the SSID and the WEP key or WPA passphrase in a safe place for future reference.

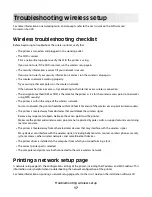
Troubleshooting wireless setup

27

Содержание E460 Series

Страница 1: ...Wireless Setup Guide 2008 Lexmark International Inc All rights reserved 740 West New Circle Road Lexington Kentucky 40550 ...

Страница 2: ...d warranties in certain transactions therefore this statement may not apply to you This publication could include technical inaccuracies or typographical errors Changes are periodically made to the information herein these changes will be incorporated in later editions Improvements or changes in the products or the programs described may be made at any time 2008 Lexmark International Inc All right...

Страница 3: ...he printer to a network using MAC address filtering 10 Connecting to a wireless network using Windows 12 Installing the printer on a wireless network Windows 12 Connecting to a wireless network using Macintosh 14 Installing the printer on a wireless network Macintosh 14 Troubleshooting wireless setup 17 Connecting using a USB cable 28 USB setup and connection 28 Connecting using an Ethernet networ...

Страница 4: ...4 ...
Страница 5: ...nstructed 1 Set up the printer hardware 2 Decide how you want to connect the printer This guide includes three methods Wireless Wired Ethernet Local USB Setting up the printer hardware Unpack the printer cables and CD 1 2 Press the door release button and lower the front door Setting up the printer 5 ...

Страница 6: ...he tape and packaging material from the unit Reinsert the unit into the printer Press the button on the base of the photoconductor kit Pull the toner cartridge up and out using the handle Firmly shake the cartridge side to side and front to back several times to distribute toner Setting up the printer 6 ...

Страница 7: ...ht guide as shown and then slide the width guides to the sides of the tray Notice that the two width guides move in unison when you move just the right width guide Squeeze the length guide tabs together as shown and then slide the length guide to the correct position for the paper size being loaded Flex the sheets back and forth to loosen them and then fan them Do not fold or crease the paper Stra...

Страница 8: ... the maximum fill line on the side of the width guide which indicates the maximum height for loading paper Do not try to overload the tray Squeezethewidthguidetabsontherightguide and then slide the width guides to lightly touch the side of the stack Insert the tray back into the printer Setting up the printer 8 ...

Страница 9: ...12 Connect to a wireless network using Macintosh For detailed steps see Information you will need to set up the printer on a wireless network on page 10 and Installing the printer on a wireless network Macintosh on page 14 Connect directly to a computer using a USB cable For detailed steps see Connecting using a USB cable on page 28 Connect to a wired network using an Ethernet cable For detailed s...

Страница 10: ...municate on the network No security If your wireless network does not use any type of security you will not have any security information Note Using an unsecured wireless network is not recommended If you are installing the printer on an 802 1X network using the Advanced method then you may need the following Authentication type Inner authentication type 802 1X username and password Certificates N...

Страница 11: ...ped with the printer The MAC address appears in the following format 00 04 12 34 56 78 Note Print a network setup page if you cannot locate the printer MAC address It will appear in the UAA field on the networksetuppage RefertotheUser sGuideontheSoftwareandDocumentationCDformoreinformationonprinting a network setup page Preparing to connect wirelessly 11 ...

Страница 12: ...ing properly The computer you are using is connected to the same wireless network where you want to set up the printer 1 Connect the power cable and then turn the printer on Make sure the printer and computer are fully on and ready Do not connect the USB cable until instructed to do so on the screen 2 Insert the Software and Documentation CD 3 Click Install Connecting to a wireless network using W...

Страница 13: ...igured the software will instruct you to disconnect the temporary USB cable so you can print wirelessly b If your printer has faxing capabilities then connect the telephone cable 8 Follow the on screen instructions to complete the software installation 9 To allow other computers on the wireless network to use the wireless printer follow steps 2 through 6 and step 8 for each computer Connecting to ...

Страница 14: ...ble 3 Connect the power cable and turn the power on Enter the printer information 1 Access the AirPort options In Mac OS X version 10 5 a From the Finder desktop click Apple menu System Preferences b Click Network c Click AirPort In Mac OS X version 10 4 and earlier a From the Finder desktop click Go Applications b From the Applications folder double click Internet Connect c From the toolbar click...

Страница 15: ... c Click AirPort In Mac OS X version 10 4 and earlier a From the Finder desktop click Go Applications b From the Applications folder double click Internet Connect c From the toolbar click AirPort 7 From the Network popup menu select your wireless network Configure your computer to use the printer wirelessly To print to a network printer each Macintosh user must install a custom PostScript Printer ...

Страница 16: ...st choose Add 5 Select the printer from the list 6 Click Add b For AppleTalk printing In Mac OS X version 10 5 1 From the Finder desktop click Apple menu System Preferences 2 Click Print Fax 3 Click 4 Click AppleTalk 5 Select the printer from the list 6 Click Add In Mac OS X version 10 4 1 From the Finder desktop click Go Applications 2 Double click the Utilities folder 3 Locate and double click P...

Страница 17: ...the printershouldbe within100feet 30meters ofthewirelessaccesspoint wirelessrouter The printer is located away from obstacles that could block the wireless signal Remove any large metal objects between the access point and the printer Make sure the printer and wireless access point are not separated bypoles walls or supportcolumnscontaining metal or concrete The printer is located away from other ...

Страница 18: ...MOVE YOUR ACCESS POINT TO MINIMIZE INTERFERENCE There may be temporary interference from other devices such as microwave ovens or other appliances cordless phones baby monitors and security system cameras Make sure your access point is not positioned too closely to these devices CHECK WHETHER THE PRINTER IS ON THE SAME WIRELESS NETWORK AS THE COMPUTER Printanetworksetuppage Refertothedocumentation...

Страница 19: ...ce Using Macintosh with an AirPort base station In Mac OS X version 10 5 1 From the menu bar click Apple menu System Preferences 2 Click Network 3 Click AirPort The SSID of the network the computer is connected to is displayed in the Network Name pop up menu 4 Write down the SSID In Mac OS X version 10 4 and earlier 1 From the menu bar click Go Applications 2 From the Applications folder double cl...

Страница 20: ...access point is using Wireless Equivalent Privacy WEP security the WEP key should be Exactly 10 or 26 hexadecimal characters Hexadecimal characters are A F a f and 0 9 or Exactly 5 or 13 ASCII characters ASCII characters are letters numbers and symbols found on a keyboard ASCII characters in a WEP key are case sensitive If your wireless access point is using Wi Fi Protected Access WPA security the...

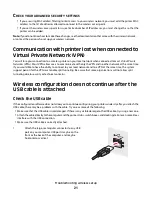
Страница 21: ...o have the ability to connect to your local network and to a VPN at the same time the system support person for the VPN must enable split tunneling Be aware that some organizations will not allow split tunneling due to security or technical concerns Wireless configuration does not continue after the USB cable is attached Check the USB cable If the configuration software does not allow you to conti...

Страница 22: ...d key A valid WPA pre shared key must be From 8 to 63 ASCII characters ASCII characters in a WPA pre shared key are case sensitive or Exactly 64 hexadecimal characters Hexadecimal characters are A F a f and 0 9 Note ASCII keys are case sensitive Be sure to include any capital letters Network does not appear in the Wireless Networks list There are several reasons why the target network might not ap...

Страница 23: ...e the printer and or the computer closer to the access point Add another access point if wireless coverage is necessary in a new area THE WIRELESS NETWORK IS NOT FUNCTIONING Confirm that the network equipment is functioning properly Attempt to connect to other resources on the network Try pinging or logging on to the access point Note If you are unable to communicate with devices on the wireless n...

Страница 24: ... Adding another access point can help resolve this issue Configuretheprinterforthenetwork manuallyenteringallnetworkinformation Theprintermayworkproperly after it is configured for the network Try turning off a few wireless devices to reduce network traffic Wireless Setup Utility unable to communicate with printer These are possible solutions Try one or more of the following The printer is not pow...

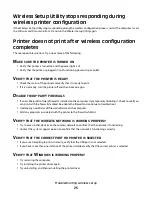
Страница 25: ...tware firewallis installed on the computer try temporarily disabling it Check to see if you can print with the firewall disabled Re enable the firewall and continue to troubleshoot Update any non Microsoft firewall software on the computer Add any programs associated with the printer to the firewall whitelist VERIFY THAT THE WIRELESS NETWORK IS WORKING PROPERLY Try to access other devices on the w...

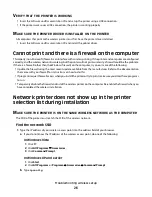
Страница 26: ...pdate available from the manufacturer Refer to the documentation that came with your firewall for instructions on how to do this Ifprogramsrequestfirewallaccesswhenyouinstalltheprinterortrytoprint make sureyou allowthose programs to run Temporarily disable the firewall and install the wireless printer on the computer Re enable the firewall when you have completed the wireless installation Network ...

Страница 27: ...ta click In Windows XP and earlier click Start 2 Click All Programs or Programs and then select the printer program folder from the list 3 Click Wireless Setup Utility Note If the Wireless Setup Utility is not installed on the computer insert the Software and Documentation CD and follow the wireless installation path 4 Follow the instructions on the computer screen including typing in the SSID of ...

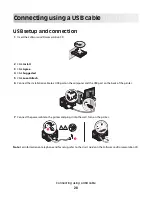
Страница 28: ...ck Local Attach 6 Connect the installation cable to a USB port on the computer and the USB port on the back of the printer 7 Connect the power cable to the printer and plug it into the wall Turn on the printer Note For information on telephone and fax setup refer to the User s Guide on the Software and Documentation CD Connecting using a USB cable 28 ...

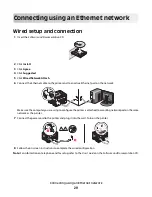
Страница 29: ...rt on the network Make sure the computeryou are using to configure the printer isattached to a working network portonthe same network as the printer 7 Connect the power cord to the printer and plug it into the wall Turn on the printer 8 Follow the on screen instructions to complete the wired configuration Note For information on telephone and fax setup refer to the User s Guide on the Software and...

Страница 30: ...ily during some methods of installation internal wireless print server A device that lets computers and printers communicate with each other over a network without cables IP Internet Protocol address The network address of a computer or printer Each device on the network has its own network address The address may be assigned manually by you static IP address automatically by the DHCP server DHCP ...

Страница 31: ...twork adapter and is usually the MAC address To find the UAA print a network setup page and look for the UAA listing USB cable A lightweight flexible cable that lets the printer communicate with the computer at much higher speeds than parallel or serial cables USB port A small rectangular port on the back of the computer that connects the peripheral devices using a USB cable WEP Wired Equivalent P...

Страница 32: ...up printer 5 T troubleshooting wireless network 17 troubleshooting wireless network printer does not show up in printer selection list during installation Windows 26 printer cannot connect to wireless network 18 U unable to communicate 24 USB 24 printer configuration 28 V Virtual Private Network 21 VPN lose connection to printer 21 W WEP key 22 Windows wireless network installation 12 wired setup ...

Отзывы: