


4
.
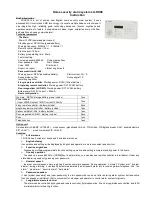
Link up front cover and tighten the screws(see fig.3)
Sensor emitter LX-AL8
—
Jumper setting (like right figure)
·
Sense once to emit: after sensing once, the
sensor emit signal
·
Sense twice to emit: after sensing twice, the
sensor emit signal ,
This setting enhance its
preventing false-alarm and preventing-pet
function
.
Note: the emit interval time is at least
15sec.that means: sense to make it emit, after
at least 15sec sense it again, it will emit again.
—
Test
·
press the arm key of remote controller or the main, set the main to arm.
·
set the jumper on needed position;
·
switch on 9V battery, after 60s the sensor enter stable working state;
·
according to the studying wireless method select study arm zone(2.arm zone) to study LX-AL8;
·
move along the tangent of the lens, the sense LED light and then it emit signal to the main, the emission LED light. the siren give
alarm and the main dial.
—
Attention
·
Low-battery LED: When battery energy is below 7V, the low-battery LED will flash once a second and remind you replace battery.
·
Avoid installing the unit on metal base;
·
Avoid installing the unit where sun shine or temperature change obviously, for example: air conditioning, heater etc.
Door magnetism LX-DM1
·
Install magnetism and emitter on upright position of door lock, the distance between them
is 3mm~5mm and triangle on emitter aim at triangle on magnetism(like right figure);
·
install DC12V battery into emitter and then close the battery lid;
·
according to the studying wireless method select study arm zone(2.arm zone) to study
LX-DM1;
·
press the arm key of remote controller or the main, set the main to arm.
·
Open door, the emitter is triggered and its LED light, then emit signal to the main, the siren
alarm and the main dial
;
·
tamper design: Under the condition that the triangle on emitter aim at triangle on magnetism,
when the battery lid is removed, it will emit signal to the main.
·
Attention:
1
.
Avoid installing the unit on metal base;
2
.
The magnetism should be on the left of the emitter (like following figure)
Warnning:
1. No slide all numerals of the DIP switch to ON position simultaneously
when coding!
2. you should not use numeral
“
1
”
on DIP switch when coding.
In co rre c t p o sitio n
C o rre ct p o s itio n
D o o r
D o o r f r a m e
D o o r lo c k
Fig. 1
Fig. 2
Fig. 3
out-line hole
78
160
AUTO
DIP switch
Sense LED
PIR
Jumper
A
U
T
O
/
1
A
U
T
O
/
1
1
Emit LED
Sense
once to
emit
Sense
twice to
emit
Low-battery LED


