background image

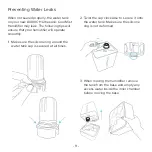
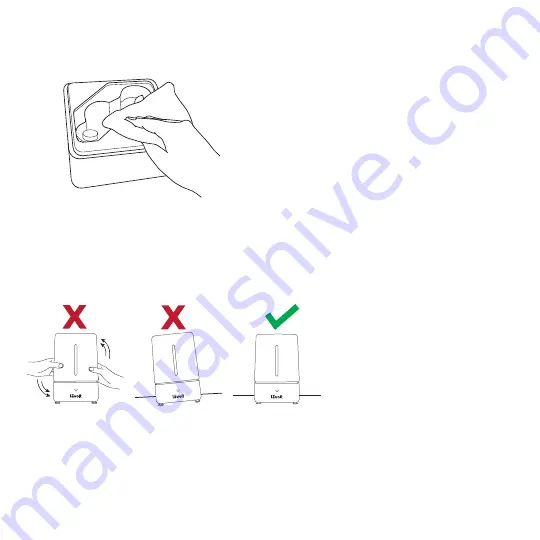
4. Wipe off any excess on water on the 

base before replacing the tank. 

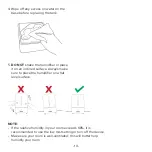
5. DO NOT shake the humidifier or place 

it on an inclined surface. Always make 

sure to place the humidifier on a flat, 

level surface.

NOTE: 

•  If the relative humidity in your room exceeds 68%, it is 

recommended to use the low mist setting or turn off the device. 

•  Make sure your room is well-ventilated; this will better help 

humidify your room.

- 10 -

Содержание LV400CH

Страница 1: ...Questions or Concerns Please contact us Mon Fri 9 00AM 5 00PM PST at 888 726 8520 or email support levoit com Model No LV400CH Ultrasonic Cool Mist Humidifier...

Страница 2: ...edicated to providing you with quality products so that you can see a better you Should you have any questions or concerns about using your new product feel free to reach out to our helpful customer s...

Страница 3: ...ormation Customer Support 4 5 6 7 11 13 15 16 Specifications Voltage Rated Power Effective Range Water Tank Capacity Max Moisture Capacity AC 120V 60Hz 25W 10m 107 ft 1 05 gallons 4 L 200 mL h Package...

Страница 4: ...nit while it is connected to a power source or while it is on Remove the water tank from the base before moving the humidifier DO NOT place the humidifier near sources of heat such as stove tops ovens...

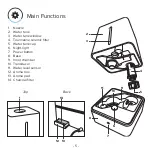
Страница 5: ...ow 4 Tourmaline ceramic filter 5 Water tank cap 6 Night light 7 Power button 8 Base 9 Inner chamber 10 Transducer 11 Water level sensor 12 Aroma box 13 Aroma pad 14 Charcoal filter Main Functions 9 1...

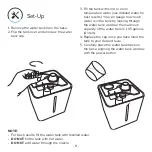
Страница 6: ...he tank by looking through the water tank window the maximum capacity of the water tank is 1 05 gallons 4 liters 4 Replace the cap once you have filled the tank to your desired level 5 Carefully place...

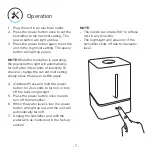
Страница 7: ...ity To check or change the current mist setting simply press the power button again 4 Optional Press and hold the power button for 2 seconds to turn on or turn off the built in night light 5 Press the...

Страница 8: ...home 1 Unplug the humidifier from its power source 2 Remove the aroma box from the back of the base 3 Add 2 3 drops of essential oil on the aroma pad 4 Replace the aroma box Fill the water tank with...

Страница 9: ...t your humidifier will operate smoothly 1 Make sure the silicone ring around the water tank cap is secured at all times 2 Twist the cap clockwise to secure it onto the water tank Make sure the silicon...

Страница 10: ...place it on an inclined surface Always make sure to place the humidifier on a flat level surface NOTE If the relative humidity in your room exceeds 68 it is recommended to use the low mist setting or...

Страница 11: ...t the vinegar from both parts of the humidifier and thoroughly rinse with warm water 7 Dry all parts with a dry clean cloth Make sure all parts of the humidifier are completely dry before reassembling...

Страница 12: ...the water tank 3 Slowly flip the water tank over to remove the nozzle 4 Scrub the nozzle with a soft bristled brush and warm water Rinse and dry thoroughly 5 Replace the nozzle onto the water tank Cle...

Страница 13: ...nit is new Remove the water cap and place the water tank in a cool dry place for 12 hours Dirty water or water has been in tank for a long time Rinse and clean water tank and fill with clean water Hum...

Страница 14: ...content Use distilled water with the humidifier Tourmaline ceramic filter can no longer filter water properly Replace ceramic filter Power button lights up red Water level low Add at least two cups of...

Страница 15: ...forth with each product This warranty is non transferrable Levoit is not responsible in any way for any damages losses or inconveniences caused by equipment failure or by user negligence abuse or use...

Страница 16: ...OF THE LIMITED WARRANTY Additional 1 Year Warranty You can extend your one year warranty by an additional year Log onto www levoit com warranty and enter your order number i e Amazon or Houzz to regi...

Страница 17: ......

Страница 18: ...www levoit com...

Отзывы: