background image

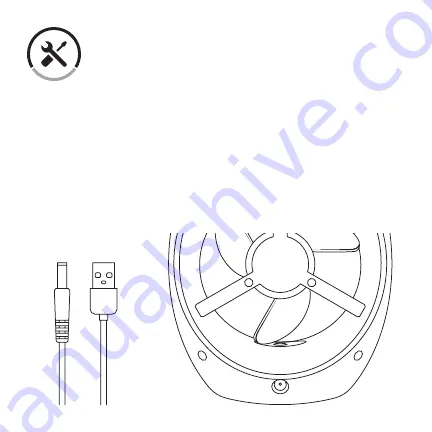
1.  Completely uncoil the USB power cord and connect the power cable 

to the fan’s power input, located on the backside of the fan.

2. Plug the USB connector into the AC power adapter to plug into a 120 

Volt, grounded AC electrical outlet or plug the USB connector into a 
standard powered USB outlet.

NOTE:

 Ensure that the plug fits tightly into the electrical outlet. A loose 

fit can cause overheating and damage to the plug.

Set-Up

7

Содержание LV130UF-I

Страница 1: ...Questions or Concerns Please contact us Mon Fri 9 00AM 6 00PM PST at 888 726 8520 or email support levoit com Model LV130UF I Desktop USB Fan Nightlight...

Страница 2: ...n either be powered by a standard AC outlet or USB outlet so you can plug it into your laptop and enjoy a nice breeze wherever you go A built in LED lamp featuring adjustable dimmer levels makes this...

Страница 3: ...uce the risk of personal injury and electric shock keep the fan out of reach of children pets and disabled people DO NOT pull on the power cord to disconnect the fan from an electrical outlet pull dir...

Страница 4: ...ed plug If using an extension cord with this fan ensure that the extension is compatible with the fan plug DO NOT operate the fan if it has a damaged power cord or plug exposed wires or if it has been...

Страница 5: ...5 commercial applications When the fan is not in use store it in a cool dry area away from direct sunlight humidity or high temperature areas...

Страница 6: ...1 Dimmer control switch 2 Nightlight 3 Fan housing 4 Intake vent 5 Exhaust vent 6 Fan blades 7 Power Speed Select 8 USB inlet 9 Fan base 1 2 3 5 4 6 8 9 7 Main Functions 6...

Страница 7: ...ide of the fan 2 Plug the USB connector into the AC power adapter to plug into a 120 Volt grounded AC electrical outlet or plug the USB connector into a standard powered USB outlet NOTE Ensure that th...

Страница 8: ...Turn fan on Low speed illuminates green x 2 High speed illuminates green x 3 Turn fan off No light Press once to turn the fan on to its lowest speed setting If you d like to increase its airflow pres...

Страница 9: ...t rotate the dimmer control switch clockwise until it clicks on To increase its brightness gradually rotate the dimmer control switch clockwise to desired level To decrease the brightness gradually ro...

Страница 10: ...chemicals as fire electrical shock personal injury and property damage can occur CAUTION Do not use gasoline benzene or thinner to clean your fan as these chemicals can cause surface damage 1 Use a v...

Страница 11: ...ight Green LED LED Nightlight Control Adjustable dimmer switch Max Power 3W Operation Voltage DC 5V Adapter Input Voltage AC 100 240V 50 60Hz Material ABS body EVA blades Dimensions 160 x 127 x 208mm...

Страница 12: ...free to contact our helpful Customer Support Team We re here for you Levoit Corporation 1202 N Miller Street Suite A Anaheim CA 92806 Toll Free 888 726 8520 Email support levoit com Support Hours Mon...

Страница 13: ...flaws If eligible this warranty extends only to personal use and does not extend to any product that has been used for commercial use rental use or any other use in which the product is not intended f...

Страница 14: ...state Should your product prove defective within the specified warranty period simply return the defective part or unit in its original packaging with the following An original copy of invoice Order c...

Страница 15: ..._______________ Order Number ____________________ To register your warranty or to make a claim please contact our helpful customer support team at 888 726 8520 or email support levoit com Please have...

Страница 16: ...www levoit com...

Отзывы: