background image

LCD Digital Microscope DM 5

 – Operating instructions – Page 7

TI

P!


Set the required menu language,  
if required. (see “Menu – General  
settings”, section “Language”,  
page 12). 

TI

P!


If the image cannot be focused sharply, 
check whether the protective cap is 
still on the microscope lens. Remove 
the cap. 

Using the USB lamps

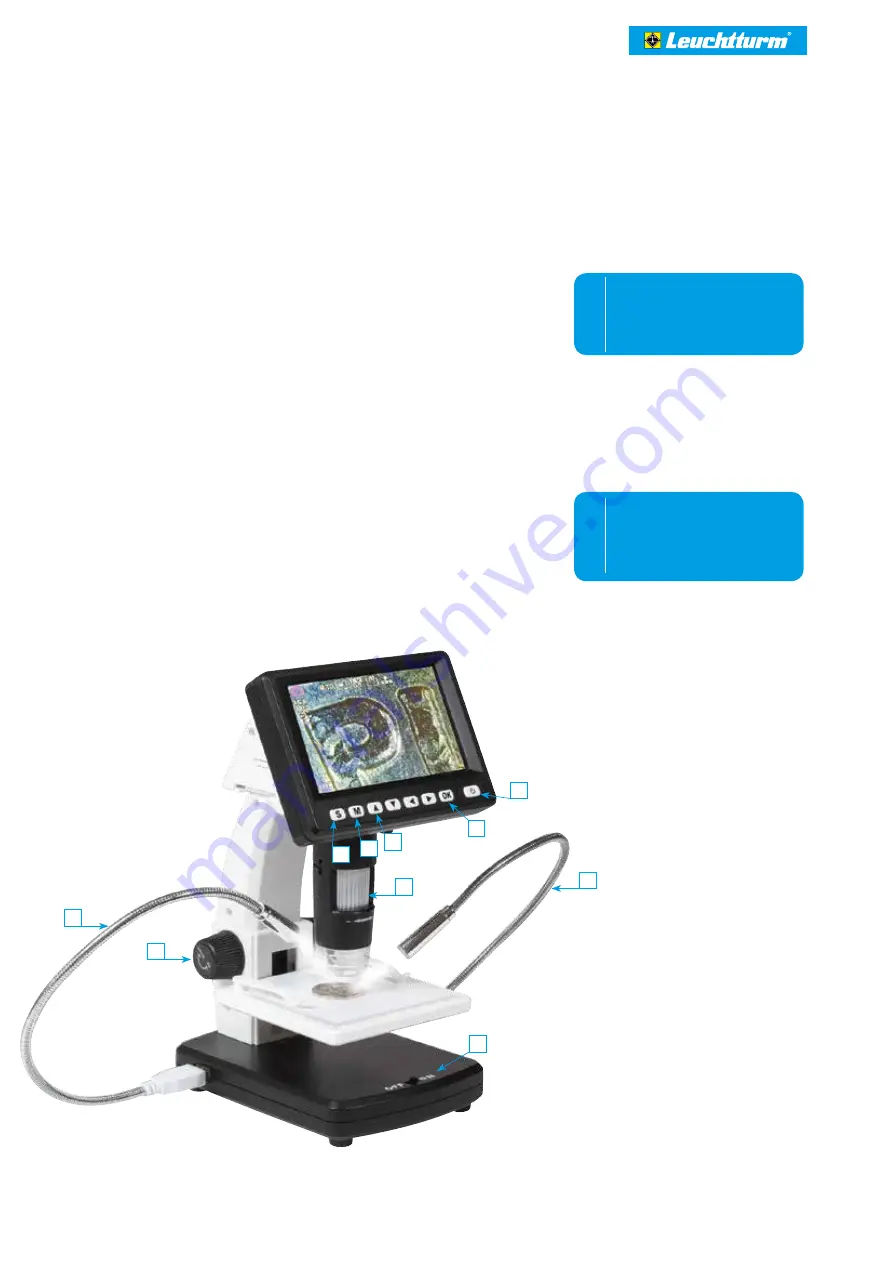
To use both separate USB lamps, connect the lamps to the supplied USB connections. Use the on/o


switch to switch the lamps on and o

.

Switching the device on/o

To switch the device on and o

, briefly press the on/o

 button on the display.

Capturing images/videos

1.

   Switch the device on.

2.

   Select the required capture mode (photo or video) by pressing the selection button (S) several times.

3.

   If necessary, carry out menu settings (see “Overview of menus”, page 9 onwards).

4.

  Place the object on the specimen stage.

5.

   Move the specimen stage down by using the adjusting wheel for height adjustment (Up – Down) 

in order to position the object. Then move the specimen stage upwards close to the microscope 
aperture.

6.

   Magnification and image section are obtained by setting the magnification with the focus adjusting 

wheel (Minus – Plus) on the front of the microscope and with the stage height. Once the object on 
the stage has been moved up to the lower edge of the microscope, a second focus for maximum 
magnification can be set with the adjusting wheel just before the right limit (+).

7.

   Fix the specimen stage in place with the locking screw (Loose – Tight).

8.

   Select the appropriate LED brightness. If necessary, switch the USB lamps on.

9.

   Use the zoom buttons (

  and 

 ) to digitally zoom the display in and out (zoom factor: 1x to 5x).

10.

  Press the capture button (OK). Video recording is stopped by pressing the recording button again.

Operation

10

1

2

3

6

7

7

5

8

9

Содержание DM 5

Страница 1: ...Operating instructions LCD Digital Microscope DM 5 ...

Страница 2: ...erviewof button functions 6 Commissioning 6 Overview of display symbols 7 Operation 9 Overviewof menus 9 Menu photosettings 1 1 Menu video settings 12 Menu general settings 13 Technical specifications 14 Troubleshooting DISTRIBUTOR Renniks Unit 3 37 39 Green Street Banksmeadow NSW 2019 02 9695 7055 info renniks com https renniks com ...

Страница 3: ...irect sunlight This could damage the light sensitivity of the device It cannot be entirely excluded that certain paints plastics or furniture care products could damage the material of the housing To avoid unwanted marks on furniture keep the device away from sensitive surfaces Use Do not touch the lens or the LCD display to avoid scratches and fingerprints Do not look directly into the LED lamps ...

Страница 4: ...nstellen der Höhe zwischen Objekt und Linse D Zum Verriegeln des Objekttisches Eine ausführliche Bedienungsanleitung finden Sie zum Download auf der Produktseite des Mikroskops auf unserer Webseite www leuchtturm de lcd digitalmikroskop dm 5 html No 361 358 Unpack Items 1x microscope 1x micro SD card 1x power adapter 1x cleaning cloth 1x USB cable 1x quick start guide 2x USB lamps Insert Micro SD ...

Страница 5: ...usting wheel for adjusting the height between object and lens 10 AV output 11 Connection for separate USB lamp 12 On off switch for separate USB lamps 13 Slot for micro SD card 14 Battery status display 15 Connection for separate USB lamp 16 Battery compartment for separate USB lamps 1 Switches between the modes Photo Video Play 2 Menu 3 Up Zoom 4 Down Zoom 5 Left Exposure value EV 6 Right Exposure...

Страница 6: ... Insert micro SD card Switch the digital microscope off The card slot has a spring mechanism Insert the microSD card in the slot and push it down carefully until it engages To remove press down on the SD card again PLEASE NOTE The battery charging status is shown at the bottom left of the display The LED lighting and the image quality are additional indicators When the battery is low the brightness...

Страница 7: ...4 Place the object on the specimen stage 5 Move the specimen stage down by using the adjusting wheel for height adjustment Up Down in order to position the object Then move the specimen stage upwards close to the microscope aperture 6 Magnification and image section are obtained by setting the magnification with the focus adjusting wheel Minus Plus on the front of the microscope and with the stage...

Страница 8: ...nch plug yellow of the cable to the video input usually yellow of the television 4 Switch the television on and select if not automatically recognised the corresponding input channel on the television Also note the instructions for the television Transferring photos videos to the computer A card reader device not included in delivery for micro SD cards is required to transfer existing photos and v...

Страница 9: ... No play once NOTE Use the arrow button to pause and play the slide show Use the menu button M to end the slide show NOTE A security prompt appears before final deletion Confirm this with OK if the file s really should be deleted Or select No with the button and confirm with OK to not delete the file s Once an individual file has been deleted the display automatically shows the next file A securit...

Страница 10: ...photos in sequence Image stabiliser The device comes with an image stabiliser that significantly reduces jiggling in images Select On or Off to switch the stabiliser on or off Exposure value Select the exposure value Select a value between 2 0 and 2 0 NOTE The exposure value can also be set outside the menu using the and buttons see Overview of button functions page 5 White balance Select settings f...

Страница 11: ...utton M in Video mode to enter the video settings menu The following values can be set here Movie size resolution exposure measurements white balance display effects and date stamp White balance Select settings for white balance based on the prevailing light conditions Select from Auto automatic balance Daylight Cloudy Neon light or Incandescent lamp Movie size Select the video size resolution Sele...

Страница 12: ... mode To access this menu press the menu button M and then the arrow button The following settings can be made here Sounds Automatic preview Mains frequency Energy saving mode Date and Time Language TV output Format SD card and Reset all Energy saving mode If the energy saving mode is switched on the device switches of automatically after the set time if not used This increases the life of the bat...

Страница 13: ...the settings Format SD card The SD card must be formatted before the first use All data on the card will be deleted during the formatting process A security prompt appears before final deletion Confirm this with OK if the file s really should be deleted Or select No with the button and confirm with OK to not delete the file s Technical specifications Image sensor HD sensor 720 P CMOS sensor Displa...

Страница 14: ...put of the television The device is connected to atelevision But noimage is displayed on the screen o Ensure that the mains cable is correctly connected to the microscope and the mains adapter o Ensure that the socket is working correctly o The battery is fully charged The batteryand charge display are notlit up eventhough thepowersupply unit is connected The battery is not charging o Ensure that ...

Отзывы: