


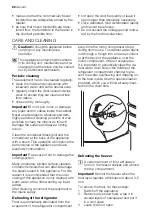


4. When defrosting is completed, dry the
interior thoroughly and refit the plug.
5. Switch on the appliance.
6. Set the temperature regulator to obtain
the maximum coldness and run the ap-
pliance for two or three hours using this
setting.
7. Reload the previously removed food in-
to the compartment.
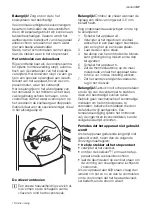
Important!
Never use sharp metal tools to
scrape off frost from the evaporator as you
could damage it. Do not use a mechanical
device or any artificial means to speed up
the thawing process other than those
recommended by the manufacturer. A
temperature rise of the frozen food packs,
during defrosting, may shorten their safe
storage life.
Periods of non-operation
When the appliance is not in use for long
periods, take the following precautions:
•
disconnect the appliance from elec-
tricity supply
• remove all food
• defrost
10)
and clean the appliance and all
accessories
• leave the door/doors ajar to prevent un-
pleasant smells.
If the cabinet will be kept on, ask some-
body to check it once in a while to prevent
the food inside from spoiling in case of a
power failure.
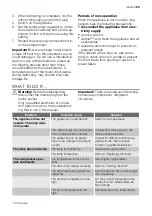
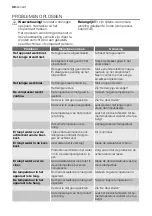
WHAT TO DO IF…
Warning!
Before troubleshooting,
disconnect the mains plug from the
mains socket.
Only a qualified electrician or compe-
tent person must do the troubleshoot-
ing that is not in this manual.
Important!
There are some sounds during
normal use (compressor, refrigerant
circulation).
Problem
Possible cause
Solution
The appliance does not
operate. The lamp does
not operate.
The appliance is switched off.
Switch on the appliance.
The mains plug is not connected
to the mains socket correctly.
Connect the mains plug to the
mains socket correctly.
The appliance has no power.
There is no voltage in the mains
socket.
Connect a different electrical ap-
pliance to the mains socket.
Contact a qualified electrician.
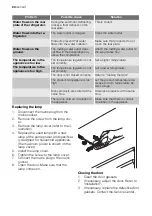
The lamp does not work.
The lamp is in stand-by.
Close and open the door.
The lamp is defective.
Refer to "Replacing the lamp".
The compressor oper-
ates continually.
The temperature is not set cor-
rectly.
Set a higher temperature.
The door is not closed correctly.
Refer to "Closing the door".
The door has been opened too
frequently.
Do not keep the door open longer
than necessary.
The product temperature is too
high.
Let the product temperature de-
crease to room temperature be-
fore storage.
The room temperature is too
high.
Decrease the room temperature.
10) If foreseen.
leonard
23


