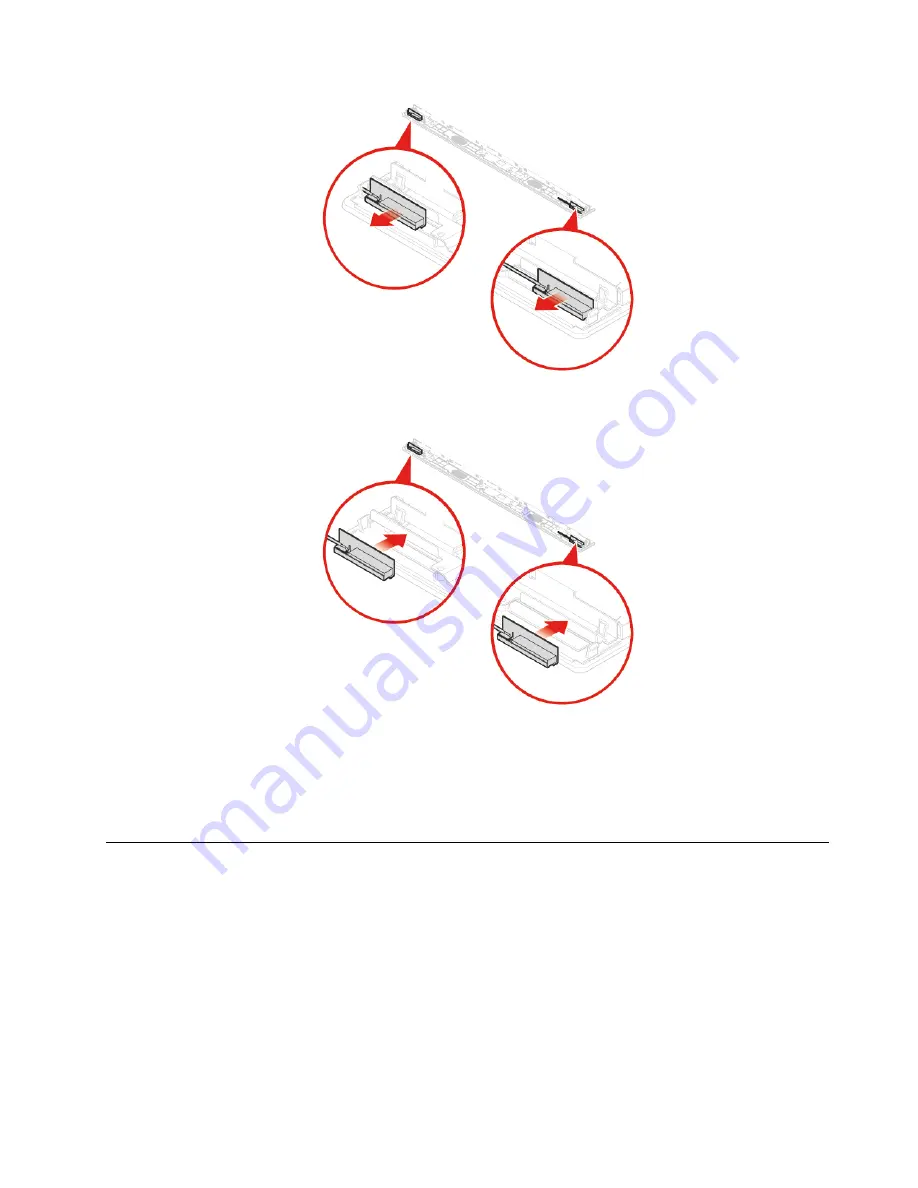
Figure 98. Removing the Wi-Fi antennas
Figure 99. Installing the Wi-Fi antennas
14. Route the new Wi-Fi antenna cables, and then connect the cables to the Wi-Fi card.
15. Reinstall the removed parts. To complete the replacement, see “Completing the parts replacement” on
Replacing the LCD panel
Attention:
Do not open your computer or attempt any repairs before reading the
Important Product
Information Guide
.
1. Remove the computer stand. See “Replacing the computer stand” on page 16.
2. Remove the computer cover. See “Removing the computer cover” on page 18.
3. Remove the storage drive. See “Replacing the storage drive” on page 19.
4. Remove the optical drive. See “Replacing the optical drive” on page 21.
5. Remove the optical drive cable. See “Replacing the optical drive and storage drive cables” on page 24.
6. Remove the side I/O bezel. See “Replacing the side I/O bezel” on page 24.
7. Remove the system board shield. See “Replacing the system board shield” on page 25.
.
57
Содержание ThinkCentre M920z
Страница 1: ...M920z User Guide and Hardware Maintenance Manual Energy Star Machine Types 10S6 10S7 10Y5 and 10Y6 ...
Страница 4: ...ii M920z User Guide and Hardware Maintenance Manual ...
Страница 14: ...10 M920z User Guide and Hardware Maintenance Manual ...
Страница 16: ...12 M920z User Guide and Hardware Maintenance Manual ...
Страница 39: ...Figure 51 Opening the retainer Figure 52 Removing the microprocessor Chapter 4 Replacing hardware 35 ...
Страница 40: ...Figure 53 Installing the microprocessor 36 M920z User Guide and Hardware Maintenance Manual ...
Страница 64: ...60 M920z User Guide and Hardware Maintenance Manual ...
Страница 66: ...62 M920z User Guide and Hardware Maintenance Manual ...
Страница 68: ...64 M920z User Guide and Hardware Maintenance Manual ...
Страница 69: ......
Страница 70: ......


