45
Lenovo ideapad 100S-11IBY
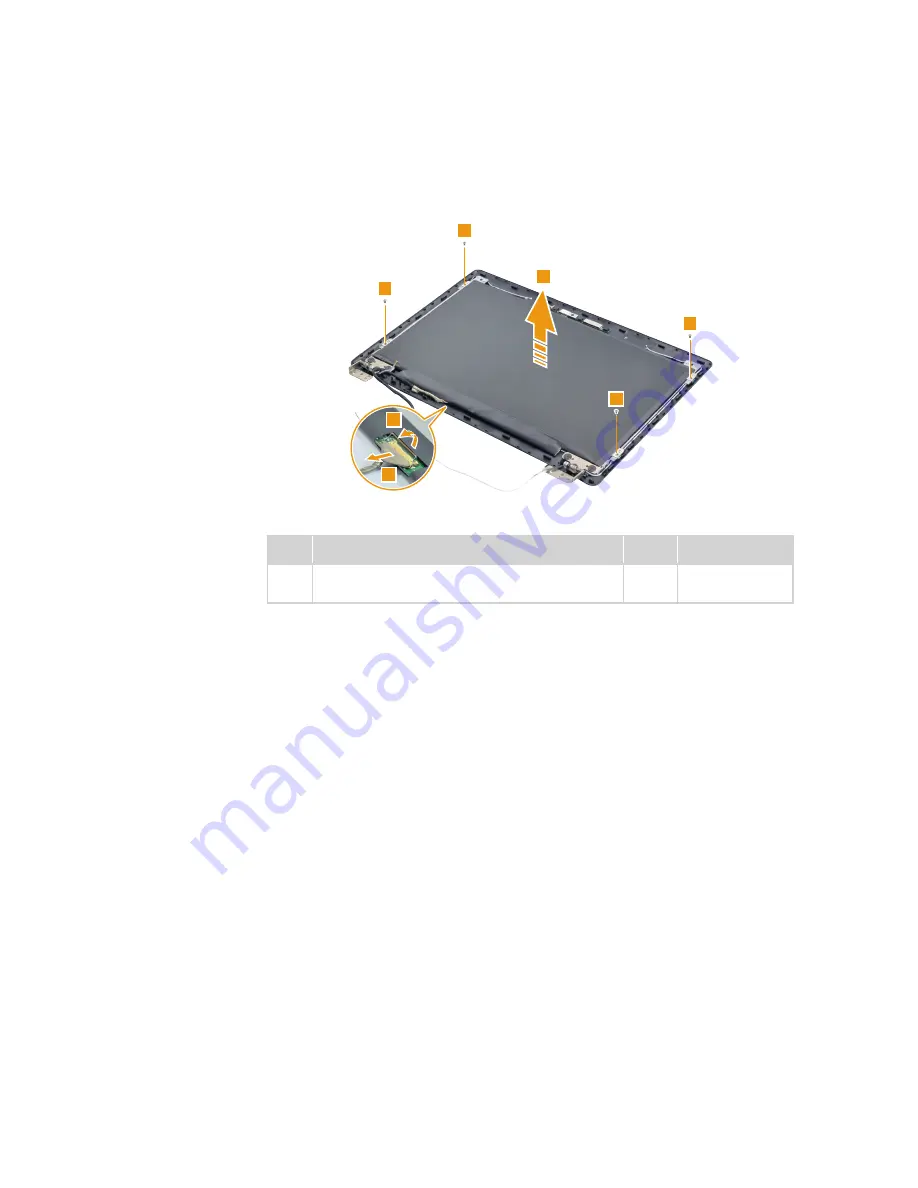
Figure 8. Removal steps of LCD unit (continued)
Remove the screws
5
. Lift the LCD panel slightly
6
. Detach the connector in
the directions shown by arrows
7
and
8
. Then remove the LCD panel.
5
5
5
5
6
7
8
Step Screw (quantity)
Color Torque
5
M2 x 3 mm, Phillips-head, nylok-coated (4)
LCD Class
White 1.0 kgf/cm
When installing:
Make sure that the metal connector is attached firmly.


