


To install the M.2 drive, complete the following steps:
Note:
When the fourth SATA drive is installed, the M.2 drive is not supported.
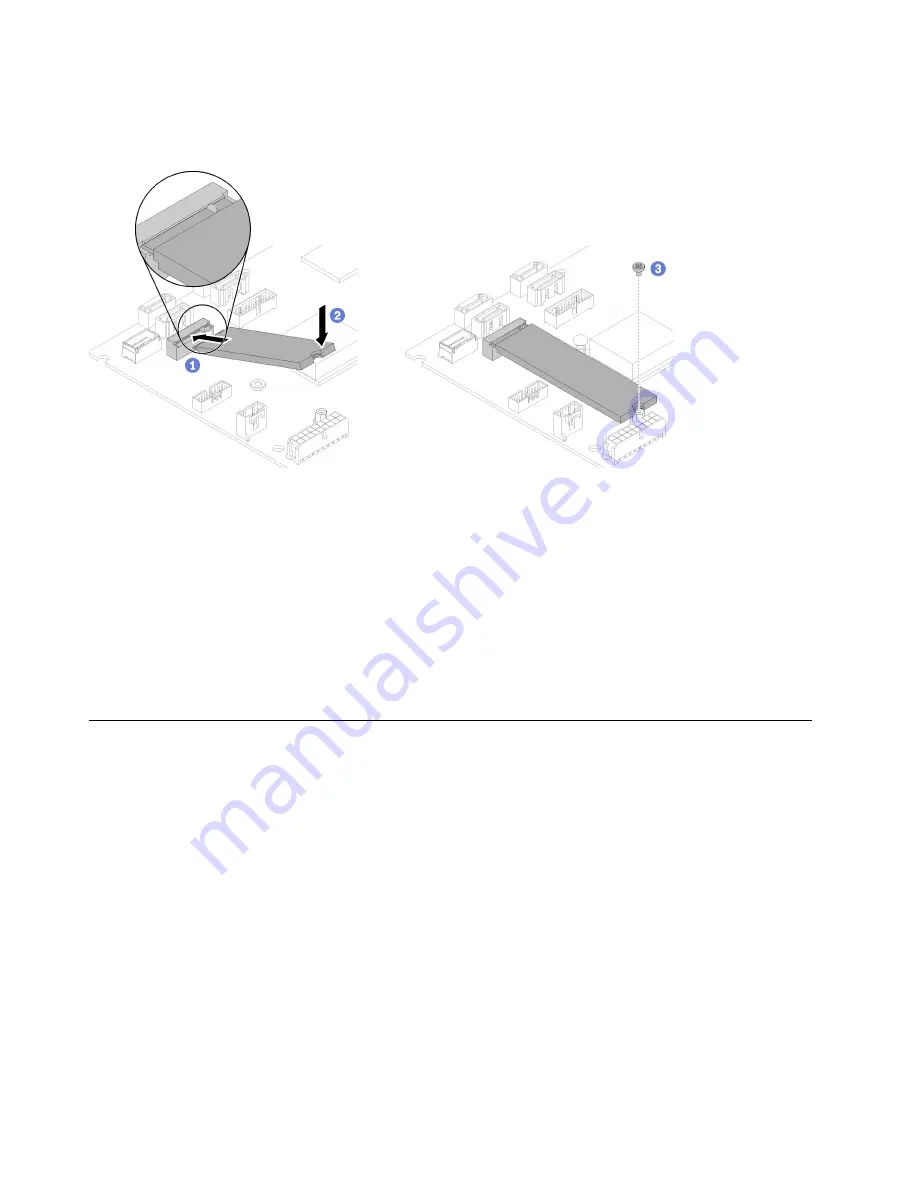
Figure 53. M.2 drive installation
Step 1. Insert the M.2 drive at an angle to the connector as shown.
Step 2. Lower down the other side of the M.2 drive to system board.
Step 3. Fasten the screw to secure the M.2 drive.
After you install the M.2 drive, complete the following steps:
1. Install the top cover onto the server (see
“Install the top cover” on page 87
).
2. Install the server into the rack if necessary.
3. Reconnect power cords and all external cables.
PCIe riser assembly replacement
Use this procedure to remove or install the PCIe riser assembly.
Remove the PCIe riser assembly
Use this information to remove the PCIe riser assembly.
Before you remove the PCIe riser assembly, complete the following steps:
1. Read
“Installation Guidelines” on page 31
to ensure that you work safely.
2. Turn off the server. Disconnect the power cords and all external cables (see
).
3. If server is installed in a rack, remove the server from the rack.
4. Remove the top cover (see
“Remove the top cover” on page 86
).
To remove the PCIe riser assembly, complete the following steps:
Step 1. Grasp the PCIe riser assembly by its edges and carefully lift it out of the server.
62
ThinkSystem SR150 Maintenance Manual
Содержание 7Y54
Страница 1: ...ThinkSystem SR150 Maintenance Manual Machine Type 7Y54 ...
Страница 8: ...vi ThinkSystem SR150 Maintenance Manual ...
Страница 25: ...Chapter 2 Server components 17 ...
Страница 38: ...30 ThinkSystem SR150 Maintenance Manual ...
Страница 102: ...94 ThinkSystem SR150 Maintenance Manual ...
Страница 128: ...120 ThinkSystem SR150 Maintenance Manual ...
Страница 132: ...124 ThinkSystem SR150 Maintenance Manual ...
Страница 137: ......
Страница 138: ...Part Number SP47A31793 Printed in Chinese Mainland 1P P N SP47A31793 1PSP47A31793 ...


