
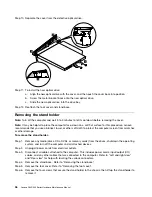


Step 6.
Remove the optical drive. Refer to “Replacing the optical drive”.
Step 7.
Remove the stand holder. Refer to “Removing the stand holder”.
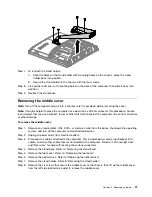
Step 8.
Remove the middle cover. Refer to “Removing the middle cover”.
Step 9.
Remove the EMI cover. Refer to “Removing the EMI cover”.
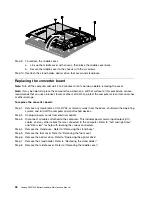
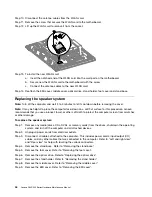
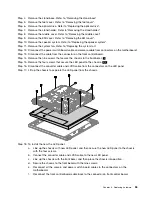
Step 10. Remove the heat-sink. Refer to “Replacing the heat sink”.
Step 11. Lift the small handle and open the retainer.
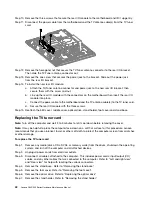
Step 12. Lift the microprocessor straight up and out of the socket.
3
Attention:
Do not touch the gold contacts on the bottom of the microprocessor. When handling the
microprocessor, touch only the sides.
Note:
Do not drop anything onto the microprocessor socket while it is exposed. The socket pins must
be kept as clean as possible.
Chapter 8
.
Replacing hardware
49
Содержание 10102/4773
Страница 2: ......
Страница 3: ...Lenovo C340 440 Series Hardware Maintenance Manual Machine Types 10102 4773 C340 10104 6595 C440 ...
Страница 6: ...iv Lenovo C340 440 SeriesHardware Maintenance Manual ...
Страница 8: ...2 Lenovo C340 440 SeriesHardware Maintenance Manual ...
Страница 16: ...10 Lenovo C340 440 SeriesHardware Maintenance Manual ...
Страница 18: ...12 Lenovo C340 440 SeriesHardware Maintenance Manual ...
Страница 24: ...18 Lenovo C340 440 SeriesHardware Maintenance Manual ...
Страница 32: ...26 Lenovo C340 440 SeriesHardware Maintenance Manual ...


