1. Press the TIMER / EQ button to select the following EQ settings :
the following EQ settings :
EQ settings :
- FLAT -> ROCK -> JAZZ -> CLASSIC -> POP -> FLAT.
will be shown on the display.
1. Insert USB / SD / MMC into the USB / SD / MMC input slots of the system.
2. Press the “FUNCTION” button to select USB / SD / MMC mode.
3. The unit will start to read the media and playback will start automatically.
note: The USB connector does not support connection with a USB extension cable and
it is not designed for communication with a computer directly.
The manufacturer is not responsible for the playability of a
USB / SD / MMC disk or MP3 player
due to recording conditions, capacity, interface compatibility, etc.
Due to different formats, some
USB / SD / MMC disks or MP3 players may take longer time to be read.
U�B / ��� / MM� O�E�ATION
FUNCTION
��E�ET EQ
TIMER / EQ
Mute on / off is changed cyclically by pushing the MUTE button.
The “mute” mark is on during mute.
Mute will be cancelled when you carry out the following operations.
a.
Press the MUTE button again.
b. The Volume is adjusted by the VOL +/- button.
MUTE ON/OFF
MUTE
FO� NO�MAL �OM�A�T ��I�� �LAYBA�K
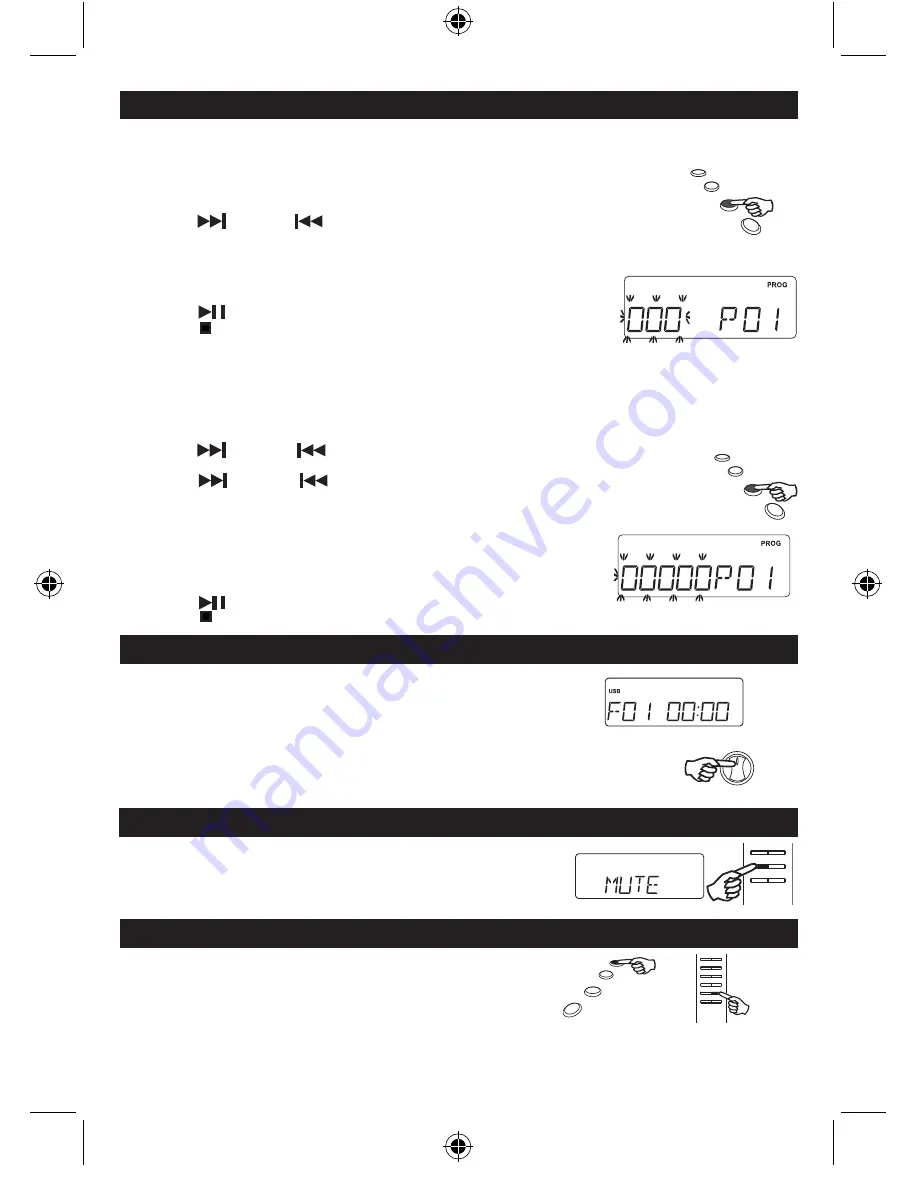
Programmed playback enables tracks on a disc to be played in a desired order. Up to 20 tracks can be programmed.
1. Program mode works in STOP mode only.
2. Hold the “ PROGRAM / MEMORY / CLK - ADJ. ” button for 2 seconds to enter program mode.
The “PROG” icon will be turned on. “000 P01” will be shown with “000” flashing. “000”
represents the track number and “P01” represents the program location number.
3. Press the F - SKIP or B - SKIP button to select the required track number.
4. Press the “PROGRAM / MEMORY / CLK -ADJ.” button to confirm the track number. The display will
show the next program number “000 P02”. The track number will be flashing again, enter the desired track number.
5. Repeat steps 3 and 4 until all the desired tracks has been programmed or all the program memories have been used.
It will loop back to P01 after all the program memories have
been used. The same track number can be programmed more than once.
6. Press the PLAY / PAUSE button to start playback.
7. Press the STOP button to clear all the programmed tracks.
GB 5
FO� M�3/WMA/U�B/��� �LAYBA�K
Programmed playback enables tracks on a disc to be played in a desired order. Up to 20 tracks can be programmed.
1. Program mode works in STOP mode only.
2. Hold the PROGRAM / MEMORY / CLK - ADJ. button for 2 seconds to enter program mode. The “PROG” icon will
be turned on. “00 000 P01” will be shown with “00” flashing. “000” represents the track number and
“P:01” represents the program location number.
3. Press the F - SKIP or B - SKIP button to select the desired folder.
4. Press the PROGRAM / MEMORY / CLK - ADJ. button to enter selected folder number.
5. Press the F - SKIP or B - SKIP button to select the required track number.
6. Press the PROGRAM / MEMORY / CLK - ADJ . button to confirm the track number.
The display will show the next program number “000 P02”. The track number will be
flashing again, enter the desired track number.
7. Repeat steps 3 and 4 until all the desired tracks have been programmed or all the
program memories have been used. It will loop back to P01 after all the program
memories have been used. The same track number can be programmed more
than once.
8. Press the PLAY / PAUSE button to start playback.
9. Press the STOP button to clear all the programmed tracks.
MP3/WMA/USB display
��OG�AMME�� ��� / U�B / ��� / MM� O�E�ATION
CD display
PROGRAM /
MEMORY /
CLK-ADJ.
PROGRAM /
MEMORY /
CLK-ADJ.
SCDI-01 LENCO ENGLISH IM NO RCA 7 7
15/6/2011 14:48:21


