LENCO KCR-9 Скачать руководство пользователя страница 2


2    

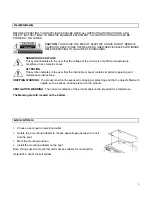
WARNINGS 


BEFORE OPERATING YOUR APPLIANCE PLEASE READ ALL OPERATING INSTRUCTIONS, AND 
SAFETY INSTRUCTIONS TO RECEIVE MAXIMUM ENJOYMENT. ALL INSTRUCTIONS SHOULD BE 
PROPERLY FOLLOWED.  

CAUTION: TO REDUCE THE RISK OF ELECTRIC SHOCK DO NOT REMOVE 
COVER (OR BACK) SINCE THERE ARE NO USER-SERVICABLE PARTS INSIDE. 
REFER SERVICING TO QUALIFIED TECHNICIANS.   

DANGEROUS VOLTAGE 
This symbol indicates to the user that the voltage of the circuits is of sufficient magnitude to 
constitute a risk of electric shock.  

ATTENTION 
This symbol indicates to the user that the instruction manual contains important operating and 
maintenance instructions.  

DRIPPING WARNING : The product shall not be exposed to dripping or splashing and that no objects filled with 

liquids, such as vases, shall be placed on the product.  

VENTILATION WARNING : The normal ventilation of the product shall not be impeded for intended use.  

The Marking plate IS located on the bottom      

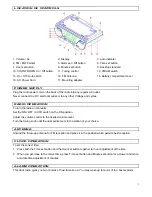
MOUNTING 


1. 

Choose a spot near an electrical outlet.  

2. 

Rotate the 4 mounting adapter to choose apposite gap between the unit 

and the spot.  

3. 

Mark the mounting position. 

4. 

Install the mounting adapter on the spot. 

Note: Fixings used to mount this unit must be suitable for construction 

material if in doubt consult builder.     

Содержание KCR-9

Страница 1: ...1 KCR 9 Instruction Manual ...

Страница 2: ...icates to the user that the instruction manual contains important operating and maintenance instructions DRIPPING WARNING The product shall not be exposed to dripping or splashing and that no objects filled with liquids such as vases shall be placed on the product VENTILATION WARNING The normal ventilation of the product shall not be impeded for intended use The Marking plate IS located on the bot...

Страница 3: ...N To turn the radio on manually Set the ON OFF AUTO switch on the ON position Adjust the volume control to the desired volume level Turn the tuning knob until the dual pointer sets to the station of your choice ANTENNA Unwind the throw up antenna for FM reception and place it in the position which permits best reception CLOCK OPERATION To set the correct time 1 Press both the Time set button and t...

Страница 4: ...ou can set the count down timer for up to 1 hour and 59 minutes 1 Set the ON OFF AUTO switch to either ON or OFF position 2 Slide the COUNT DOWN On Off button to ON position 3 Adjust the desired time with hour and minute s you wish An alarm sounds at the timer start counting down towards zero POWER FAILURE You can insert a 9 volt battery in the clock radio Should there be a power failure the clock...

Страница 5: ...This document was created with Win2PDF available at http www daneprairie com The unregistered version of Win2PDF is for evaluation or non commercial use only ...

Отзывы: