Chapter 3: Initial Installation and Configuration
21
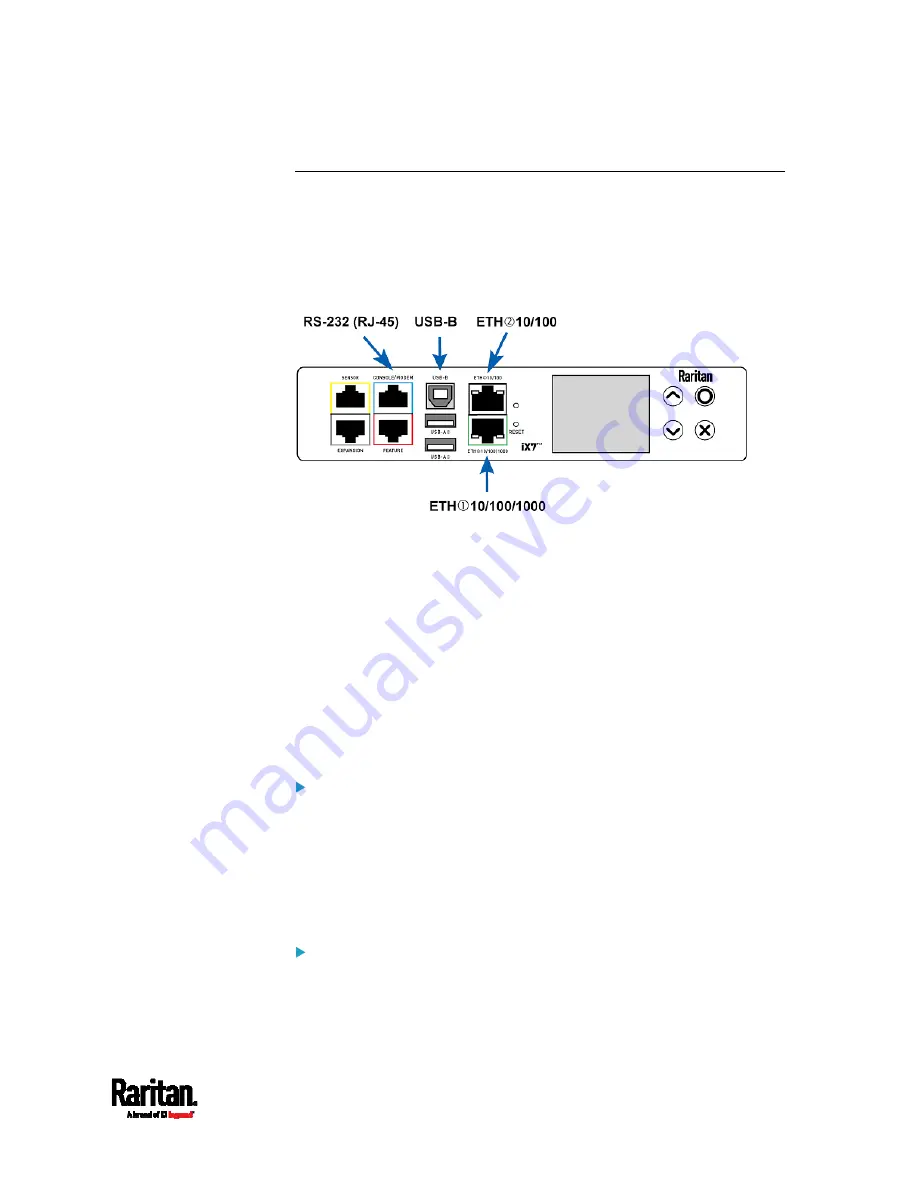
Connecting the SRC to a Computer
The SRC can be connected to a computer for configuration via one of the
following ports.
Ethernet ports
USB-B port
RS-232 serial port (RJ-45)
To use the command line interface (CLI) for configuration, establish an
RS-232 or USB connection.
To use a web browser for configuration, make a network connection to
the computer. The SRC is automatically configured with the following
link-local addressing in any network without DHCP available:
https://169.254.x.x (where x is a number)
https://pdu.local
See
APIPA and Link-Local Addressing
(on page 6).
Establish one of the following connections to a computer. Ethernet port
of SRC must be enabled for the described connection to work properly,
which has been enabled per default.
Direct network connection:
1.
Connect one end of a standard network patch cable to either
Ethernet port of the SRC.
2.
Connect the other end to a computer's Ethernet port.
3.
On the connected computer, launch a web browser to access the
SRC, using either link-local addressing:
pdu.local or 169.254.x.x. See
Login
(on page 95).
USB connection:
1.
A USB-to-serial driver is required in Windows
®
. Install this driver
before connecting the USB cable. See
Installing the USB-to-Serial
Driver (Optional)
(on page 656).
Содержание Raritan SRC-0100
Страница 42: ...Chapter 3 Initial Installation and Configuration 30 Number Device role Master device Slave 1 Slave 2 Slave 3...
Страница 113: ...Chapter 6 Using the Web Interface 101 4 To return to the main menu and the Dashboard page click on the top left corner...
Страница 114: ...Chapter 6 Using the Web Interface 102...
Страница 128: ...Chapter 6 Using the Web Interface 116 Go to an individual sensor s or actuator s data setup page by clicking its name...
Страница 290: ...Chapter 6 Using the Web Interface 278 If wanted you can customize the subject and content of this email in this action...
Страница 291: ...Chapter 6 Using the Web Interface 279...
Страница 301: ...Chapter 6 Using the Web Interface 289 6 Click Create to finish the creation...
Страница 311: ...Chapter 6 Using the Web Interface 299...
Страница 312: ...Chapter 6 Using the Web Interface 300 Continued...
Страница 625: ...Appendix H RADIUS Configuration Illustration 613 Note If your SRC uses PAP then select PAP...
Страница 626: ...Appendix H RADIUS Configuration Illustration 614 10 Select Standard to the left of the dialog and then click Add...
Страница 627: ...Appendix H RADIUS Configuration Illustration 615 11 Select Filter Id from the list of attributes and click Add...
Страница 630: ...Appendix H RADIUS Configuration Illustration 618 14 The new attribute is added Click OK...
Страница 631: ...Appendix H RADIUS Configuration Illustration 619 15 Click Next to continue...
Страница 661: ...Appendix I Additional SRC Information 649...


