


Chapter 7: Using the Web Interface
366
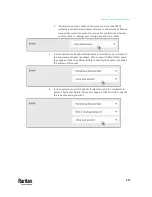
4.
To verify if the authentication configuration is set correctly, click Test
Connection to check whether the PX3TS can connect to the new server
successfully.
Tip: You can also test the connection on the Authentication page after
finishing adding servers. See
Managing External Authentication Settings
(on page 366).
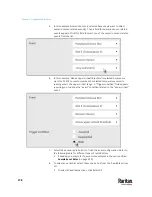
5.
Click Add Server. The new Radius server is listed on the Authentication
page.
6.
To add more servers, repeat the same steps.
7.
In the Authentication Type field, select Radius.
Otherwise, the Radius
authentication does not work.
8.
Click Save. Radius authentication is now in place.
Managing External Authentication Settings
Choose Device Settings > Security > Authentication to open the Authentication
page, where you can:
•
Enable both the external and local authentication
•
Edit or delete a server
•
Resort the access order of servers
•
Test the connection to a server
•
Disable external authentication without removing servers
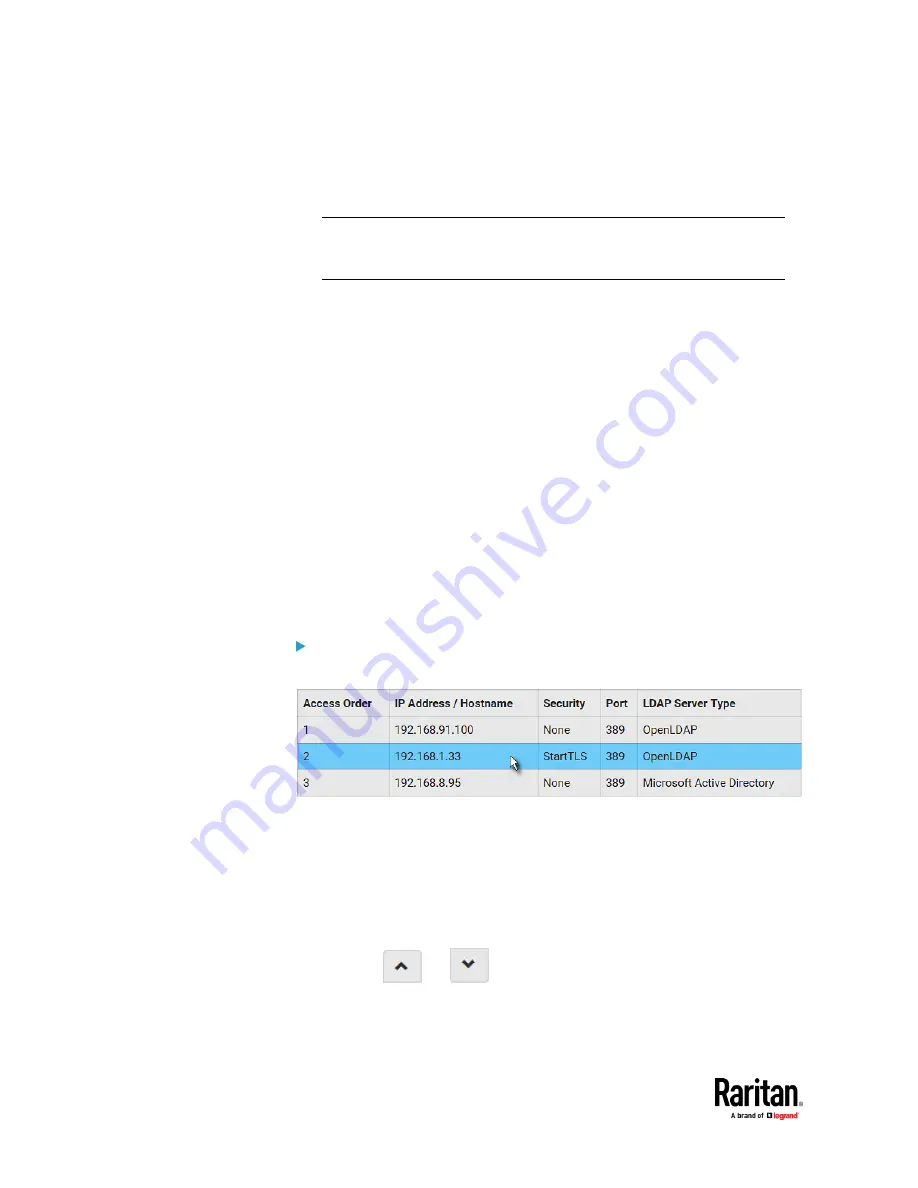
To test, edit or delete a server, or resort the server list:
1.
Select a server in the list.
2.
Perform the desired action.
▪
Click Edit to edit its settings, and click Modify Server to save changes.
For information on each field, see
Adding LDAP/LDAPS Servers
(on
page 362) or
Adding Radius Servers
(on page 365).
▪
Click Delete to delete the server, and then confirm the operation.
▪
Click Test Connection to verify the connection to the selected server.
User credentials may be required.
▪
Click
or
to change the server order, which determines
the access priority, and click Save Order to save the new sequence.
Содержание Raritan PX3TS
Страница 4: ......
Страница 6: ......
Страница 20: ......
Страница 52: ...Chapter 3 Initial Installation and Configuration 32 Number Device role Master device Slave 1 Slave 2 Slave 3...
Страница 80: ...Chapter 4 Connecting External Equipment Optional 60...
Страница 109: ...Chapter 5 PDU Linking 89...
Страница 117: ...Chapter 5 PDU Linking 97...
Страница 440: ...Chapter 7 Using the Web Interface 420 If wanted you can customize the subject and content of this email in this action...
Страница 441: ...Chapter 7 Using the Web Interface 421...
Страница 464: ...Chapter 7 Using the Web Interface 444...
Страница 465: ...Chapter 7 Using the Web Interface 445 Continued...
Страница 746: ...Appendix A Specifications 726...
Страница 823: ...Appendix I RADIUS Configuration Illustration 803 Note If your PX3TS uses PAP then select PAP...
Страница 824: ...Appendix I RADIUS Configuration Illustration 804 10 Select Standard to the left of the dialog and then click Add...
Страница 825: ...Appendix I RADIUS Configuration Illustration 805 11 Select Filter Id from the list of attributes and click Add...
Страница 828: ...Appendix I RADIUS Configuration Illustration 808 14 The new attribute is added Click OK...
Страница 829: ...Appendix I RADIUS Configuration Illustration 809 15 Click Next to continue...
Страница 860: ...Appendix J Additional PX3TS Information 840...
Страница 890: ...Appendix K Integration 870 3 Click OK...
Страница 900: ......


