


Chapter 7: Using the Web Interface
344
▪
Public key authentication only:
Enables the public key-based login only.
▪
Password and public key authentication:
Enables both the password-
and public key-based login. This is the default.
5.
Click Save.
If the public key authentication is selected, you must enter a valid SSH public
key for each user profile to log in over the SSH connection. See
Creating Users
(on page 297).
Changing Telnet Settings
You can enable or disable the Telnet access to the command line interface, or
change the TCP port.
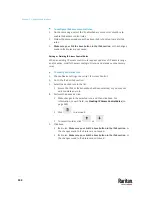
To change Telnet settings:
1.
Choose Device Settings > Network Services > Telnet.
2.
To enable the Telnet access, select the checkbox.
3.
To use a different port, type a new port number.
4.
Click Save.
Changing Modbus Settings
The PX3TS supports both the Modbus/TCP and Modbus Gateway features.
Enable either or both Modbus features according to your needs.
Modbus/TCP Access:
You can enable or disable the Modbus/TCP access to PX3TS, set it to the
read-only mode, or change the TCP port.
1.
Choose Device Settings > Network Services > Modbus.
2.
To enable the Modbus/TCP access, select the "Enable Modbus/TCP access"
checkbox.
3.
To use a different port, type a new port number.
4.
To enable the Modbus read-only mode, select the checkbox of the "Enable
read-only mode" field. To enable the read-write mode, deselect it.
Содержание Raritan PX3TS
Страница 4: ......
Страница 6: ......
Страница 20: ......
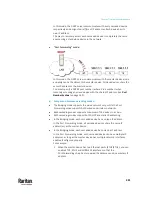
Страница 52: ...Chapter 3 Initial Installation and Configuration 32 Number Device role Master device Slave 1 Slave 2 Slave 3...
Страница 80: ...Chapter 4 Connecting External Equipment Optional 60...
Страница 109: ...Chapter 5 PDU Linking 89...
Страница 117: ...Chapter 5 PDU Linking 97...
Страница 440: ...Chapter 7 Using the Web Interface 420 If wanted you can customize the subject and content of this email in this action...
Страница 441: ...Chapter 7 Using the Web Interface 421...
Страница 464: ...Chapter 7 Using the Web Interface 444...
Страница 465: ...Chapter 7 Using the Web Interface 445 Continued...
Страница 746: ...Appendix A Specifications 726...
Страница 823: ...Appendix I RADIUS Configuration Illustration 803 Note If your PX3TS uses PAP then select PAP...
Страница 824: ...Appendix I RADIUS Configuration Illustration 804 10 Select Standard to the left of the dialog and then click Add...
Страница 825: ...Appendix I RADIUS Configuration Illustration 805 11 Select Filter Id from the list of attributes and click Add...
Страница 828: ...Appendix I RADIUS Configuration Illustration 808 14 The new attribute is added Click OK...
Страница 829: ...Appendix I RADIUS Configuration Illustration 809 15 Click Next to continue...
Страница 860: ...Appendix J Additional PX3TS Information 840...
Страница 890: ...Appendix K Integration 870 3 Click OK...
Страница 900: ......


