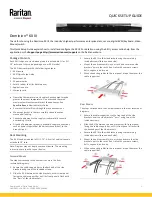


Dominion KX III Quick Setup Guide
2
QSG-DKX3-v3.6.9-0L-E
255-62-0003-00-RoHS
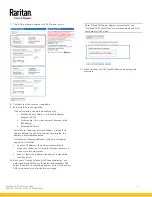
Step 1: Configuring Network Firewall Settings
TCP Port 5000
Enable remote access to KX III by allowing network and firewall
communication on TCP Port 5000. Alternatively, configure KX III to
use a different TCP port, and allow that port network and firewall
communication.
TCP Port 443
Allow access to TCP Port 443 (Standard HTTPS) so you can access
KX III via a web browser.
TCP Port 80
Allow access to TCP Port 80 (Standard HTTP) to enable automatic
redirection of HTTP requests to HTTPS.
QS Rule
Step 2: Configuring KVM Target Servers
Mouse Settings
Absolute Mouse Synchronization is recommended to minimize
mouse settings on target servers.
In this mode, absolute coordinates are used to keep the client and
target cursors in synch, even when the target mouse is set to a
different acceleration or speed.
This mode is supported on servers with USB ports and is the default
mode for virtual media CIMs.
•
Absolute Mouse Synchronization requires the use of a virtual
media CIM - D2CIM-VUSB, D2CIM-DVUSB, D2CIM-DVUSB-DVI,
D2CIM-DVUSB-HDMI, D2CIM-DVUSB-DP, D2CIM-VUSB-USBC
Target Server Video Resolutions
See
Supported Target Server Video Resolutions
in
Online Help
.
QS Rule
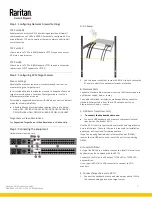
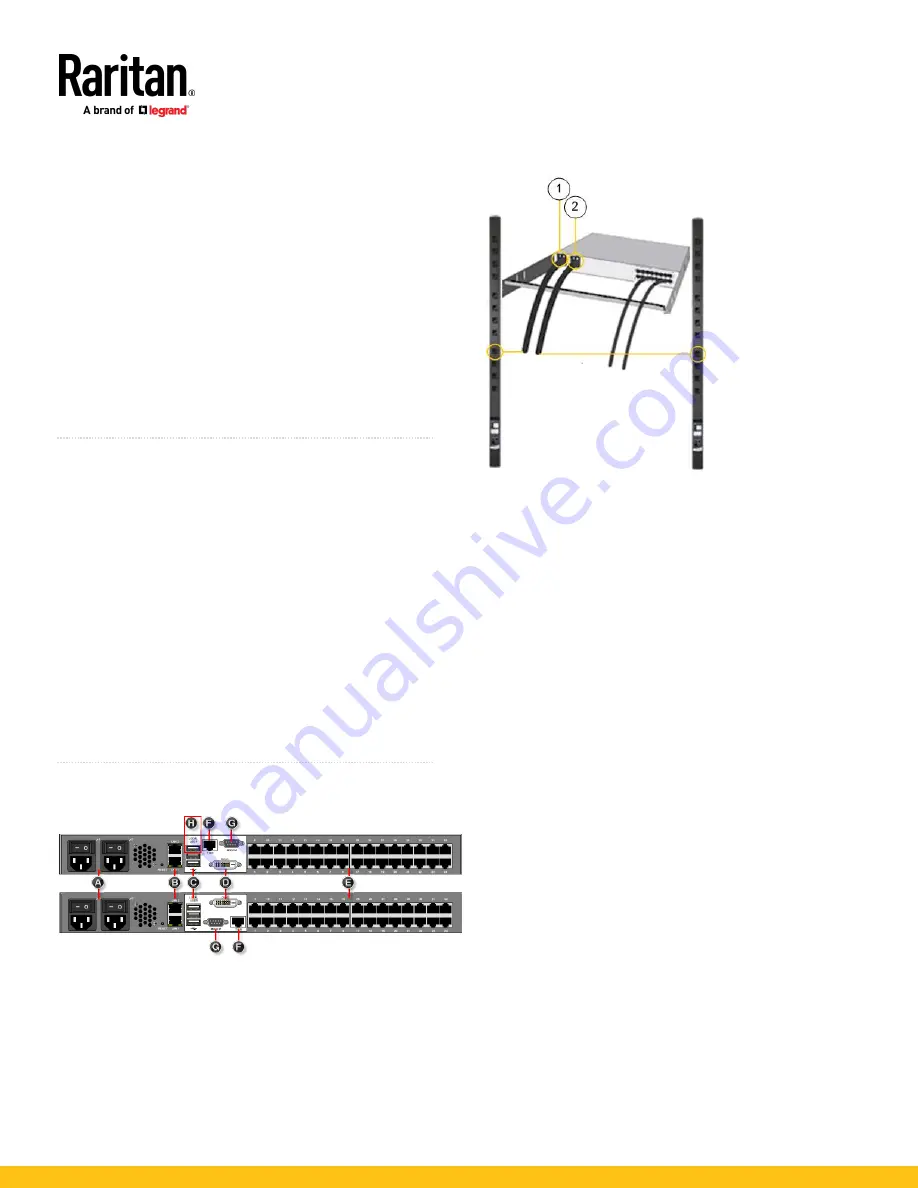
Step 3: Connecting the Equipment
Hardware version may vary.
A: AC Power
1.
Use the power cords that came with KX III. Use both cords with
AC power outlets for dual-power failover protection.
B: Network Ports
Connect a standard Ethernet cable from the LAN1 network port to
an Ethernet switch, hub, or router.
To enable the failover or isolation mode capabilities, connect a
standard Ethernet cable from the LAN2 network port to an
Ethernet switch, hub, or router.
C: USB Ports (Local User Port)
To connect the keyboard and mouse:
•
Connect a USB keyboard and mouse to the respective Local
User port on the back of KX III.
Use the KX III Local User port for administrative and target device
access at the rack. The Local User port is required for installation
and setup, but is optional for subsequent use.
If you're also using Dominion Serial Access Modules (DSAM),
reserve the top USB port on the rear of the unit for connecting
DSAM.
D: Local DVI-D Port
A single link DVI cable is used to connect to a local DVI monitor or
keyboard tray (not included with the KX III).
Connect to the DVI port on Raritan's T1700-LED or T1900-LED
keyboard tray.
Use a required DVI-D to VGA converter to connect to VGA
monitors.
E. Connect Target Servers to KX III
1.
Connect the keyboard, mouse and video plugs on the CIM to
the corresponding ports on the target server.